2007 NISSAN FRONTIER window
[x] Cancel search: windowPage 85 of 336

2 Instruments and controls
Instrument panel...................................2-3
Meters and gauges................................2-5
Speedometer and odometer.....................2-5
Trip computer (if so equipped)...................2-7
Tachometer....................................2-8
Engine coolant temperature gauge...............2-8
Fuel gauge....................................2-9
Engine oil pressure gauge (if so equipped)........2-9
Voltmeter (if so equipped)......................2-10
Compass and outside temperature display
(if so equipped)..................................2-10
Outside temperature display....................2-11
Compass display..............................2-11
Warning/indicator lights and audible reminders......2-14
Checking bulbs...............................2-15
Warning lights................................2-15
Indicator lights................................2-19
Audible reminders.............................2-23
Security systems (if so equipped)..................2-23
Vehicle security system (if so equipped)..........2-23
NISSAN vehicle immobilizer system
(if so equipped)...............................2-25
Windshield wiper and washer switch...............2-26Switch operation..............................2-26
Rear window and outside mirror defroster switch
(if so equipped)..................................2-27
Headlight and turn signal switch....................2-27
Headlight control switch........................2-27
Daytime running light system (Canada only)......2-29
Instrument brightness control...................2-30
Turn signal switch.............................2-30
Fog light switch (if so equipped)................2-31
Hazard warning flasher switch.....................2-31
Horn............................................2-32
Cargo lamp switch...............................2-32
Heated seat (if so equipped).......................2-33
Vehicle dynamic control (VDC) off switch
(if so equipped)..................................2-33
Hill descent control switch (if so equipped)..........2-34
Electronic locking rear differential (E-Lock) system
switch (if so equipped)............................2-35
Clutch interlock (clutch start) switch
(if so equipped)..................................2-36
Power outlet.....................................2-36
Storage.........................................2-37
Storage trays.................................2-37
ZREVIEW COPYÐ2007 Truck/Frontier(d22)
Owners ManualÐUSA_English(nna)
12/21/06Ðcathy
X
Page 86 of 336

Under-seat storage bins........................2-39
Console box..................................2-40
Glove box....................................2-41
Sunglasses holder (if so equipped)..............2-41
Map pockets..................................2-42
Seat pockets (if so equipped)...................2-43
Cup holders..................................2-43
Roof rack (if so equipped)......................2-45
Windows........................................2-46
Power windows (if so equipped)................2-46
Manual windows..............................2-49
Rear sliding window (if so equipped)............2-49
Sunroof (if so equipped)...........................2-49
Automatic sunroof.............................2-49Interior lights.....................................2-51
Personal lights (if so equipped)....................2-52
Map lights (if so equipped)........................2-52
HomeLinkTuniversal transceiver (if so equipped).....2-52
Programming HomeLinkT.......................2-53
Programming HomeLinkTfor Canadian
customers....................................2-54
Operating the HomeLinkTuniversal
transceiver....................................2-54
Programming trouble-diagnosis.................2-55
Clearing the programmed information............2-55
Reprogramming a single HomeLinkTbutton......2-55
If your vehicle is stolen.........................2-55
ZREVIEW COPYÐ2007 Truck/Frontier(d22)
Owners ManualÐUSA_English(nna)
12/21/06Ðcathy
X
Page 102 of 336
tire pressure gauge to adjust tire pressure to the
recommended pressure.
For additional information, see “Tire Pressure
Monitoring System (TPMS)” in the “Starting and
driving” section and in the “In case of emergency”
section.
TPMS malfunction:
If the TPMS is not functioning properly, the low
tire pressure warning light will flash for approxi-
mately 1 minute when the ignition switch is
turned ON. The light will remain on after the 1
minute. Have the system checked by a NISSAN
dealer.
For additional information, see “Tire Pressure
Monitoring System (TPMS)” in the “Starting and
driving” section.
WARNING
cIf the light does not illuminate with the
ignition switch turned ON, have the ve-
hicle checked by a NISSAN dealer as
soon as possible.cIf the light illuminates while driving,
avoid sudden steering maneuvers or
abrupt braking, reduce vehicle speed,
pull off the road to a safe location and
stop the vehicle as soon as possible.
Serious vehicle damage could occur
and may lead to an accident and could
result in serious personal injury. Check
the tire pressure for all four tires. Adjust
the tire pressure to the recommended
COLD tire pressure shown on the Tire
and Loading Information label to turn
the low tire pressure warning light OFF.
If the light stays on after adjusting the
tire pressure and driving over 16 mph,
have the system checked by a NISSAN
dealer. If you have a flat tire, replace it
with a spare tire as soon as possible.
cWhen a spare tire is mounted or a wheel
is replaced, tire pressure will not be
indicated, the TPMS will not function
and the low tire pressure warning light
will flash for approximately 1 minute.
The light will remain on after 1 minute.
Contact your NISSAN dealer as soon as
possible for tire replacement and/or
system resetting.cReplacing tires with those not originally
specified by NISSAN could affect the
proper operation of the TPMS.
CAUTION
cThe TPMS is not a substitute for the
regular tire pressure check. Be sure to
check the tire pressure regularly.
cIf the vehicle is being driven at speeds
of less than 16 MPH (25 km/h) , the
TPMS may not operate correctly.
cBe sure to install the specified size of
tires to the 4 wheels correctly.
Low windshield washer fluid
warning light
This light comes on when the windshield washer
fluid is at a low level. Add windshield washer fluid
as necessary. See “Window washer fluid” in the
“Maintenance and do-it-yourself” section of this
manual.
Seat belt warning light and
chime
The light and chime remind you to fasten your
seat belts. The light illuminates whenever the
ignition key is turned to the ON or START position
and remains illuminated until the driver’s seat belt
2-18Instruments and controls
ZREVIEW COPYÐ2007 Truck/Frontier(d22)
Owners ManualÐUSA_English(nna)
12/13/06Ðcathy
X
Page 108 of 336

The system helps deter vehicle theft but cannot
prevent it, nor can it prevent the theft of interior or
exterior vehicle components in all situations. Al-
ways secure your vehicle even if parking for a
brief period. Never leave your keys in the ignition,
and always lock the vehicle when unattended. Be
aware of your surroundings, and park in secure,
well-lit areas whenever possible.
Many devices offering additional protection, such
as component locks, identification markers, and
tracking systems, are available at auto supply
stores and specialty shops. Your NISSAN dealer
may also offer such equipment. Check with your
insurance company to see if you may be eligible
for discounts for various theft protection features.
How to arm the vehicle security
system
1. Close all windows.(The system can be
armed even if the windows are open.)
2. Remove the key from the ignition switch.
3. Close all doors. Lock all doors. The doors
can be locked with the key, power door lock
switch (if the door is opened, locked and
then closed) , or with the keyfob.
Keyfob operation:
cPush the
button on the keyfob.
All doors lock. The hazard lights flashtwice and the horn beeps once to indicate
all doors are locked.
cWhen the
button is pushed with
all doors locked, the hazard lights flash
twice and the horn beeps once as a re-
minder that the doors are already locked.
The horn may or may not beep. Refer to
“Silencing the horn beep feature” in the
“Pre-driving checks and adjustments” sec-
tion later in this manual.
4. Confirm that the
indicator light comes
on. Thelight stays on for about 30
seconds. The vehicle security system is now
pre-armed. After about 30 seconds the ve-
hicle security system automatically shifts
into the armed phase. The
light begins
to flash once every 3 seconds. If, during the
30-second pre-arm time period, the driver’s
door is unlocked by the key or the keyfob, or
the ignition key is turned to ACC or ON, the
system will not arm.
cIf the key is turned slowly when locking
the driver’s door, the system may not
arm. Furthermore, if the key is turned
beyond the vertical position toward the
unlock position to remove the key, the
system may be disarmed when the key
is removed. If the indicator light fails to
glow for 30 seconds, unlock the door
once and lock it again.cEven when the driver and/or passen-
gers are in the vehicle, the system will
arm with all doors closed and locked
with the ignition key in the OFF posi-
tion.
Vehicle security system activation
The vehicle security system will give the following
alarm:
cThe headlights blink and the horn sounds
intermittently.
cThe alarm automatically turns off after ap-
proximately 50 seconds. However, the alarm
reactivates if the vehicle is tampered with
again. The alarm can be shut off by unlocking
the driver’s door with the key, or by pressing
the
button on the keyfob.
The alarm is activated by:
copening a door without using the key or
keyfob (even if the door is unlocked by using
the inside lock knob or the power door lock
switch) .
How to stop an activated alarm
The alarm stops only by unlocking the driver’s
door with the key, or by pressing thebut-
ton on the keyfob.
2-24Instruments and controls
ZREVIEW COPYÐ2007 Truck/Frontier(d22)
Owners ManualÐUSA_English(nna)
12/13/06Ðcathy
X
Page 110 of 336
SWITCH OPERATION
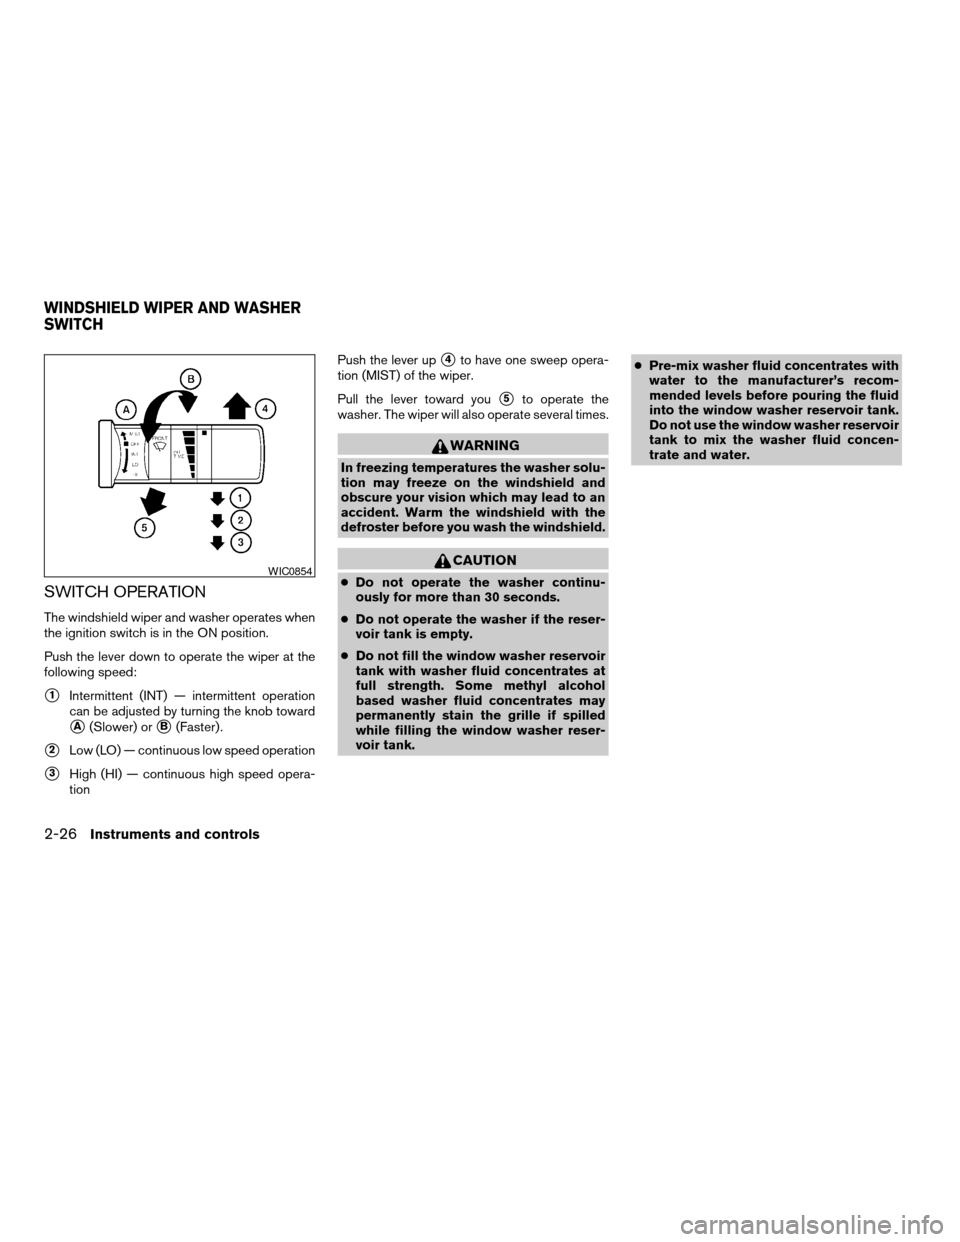
The windshield wiper and washer operates when
the ignition switch is in the ON position.
Push the lever down to operate the wiper at the
following speed:
s1Intermittent (INT) — intermittent operation
can be adjusted by turning the knob toward
sA(Slower) orsB(Faster) .
s2Low (LO) — continuous low speed operation
s3High (HI) — continuous high speed opera-
tionPush the lever up
s4to have one sweep opera-
tion (MIST) of the wiper.
Pull the lever toward you
s5to operate the
washer. The wiper will also operate several times.
WARNING
In freezing temperatures the washer solu-
tion may freeze on the windshield and
obscure your vision which may lead to an
accident. Warm the windshield with the
defroster before you wash the windshield.
CAUTION
cDo not operate the washer continu-
ously for more than 30 seconds.
cDo not operate the washer if the reser-
voir tank is empty.
cDo not fill the window washer reservoir
tank with washer fluid concentrates at
full strength. Some methyl alcohol
based washer fluid concentrates may
permanently stain the grille if spilled
while filling the window washer reser-
voir tank.cPre-mix washer fluid concentrates with
water to the manufacturer’s recom-
mended levels before pouring the fluid
into the window washer reservoir tank.
Do not use the window washer reservoir
tank to mix the washer fluid concen-
trate and water.WIC0854
WINDSHIELD WIPER AND WASHER
SWITCH
2-26Instruments and controls
ZREVIEW COPYÐ2007 Truck/Frontier(d22)
Owners ManualÐUSA_English(nna)
12/13/06Ðcathy
X
Page 111 of 336
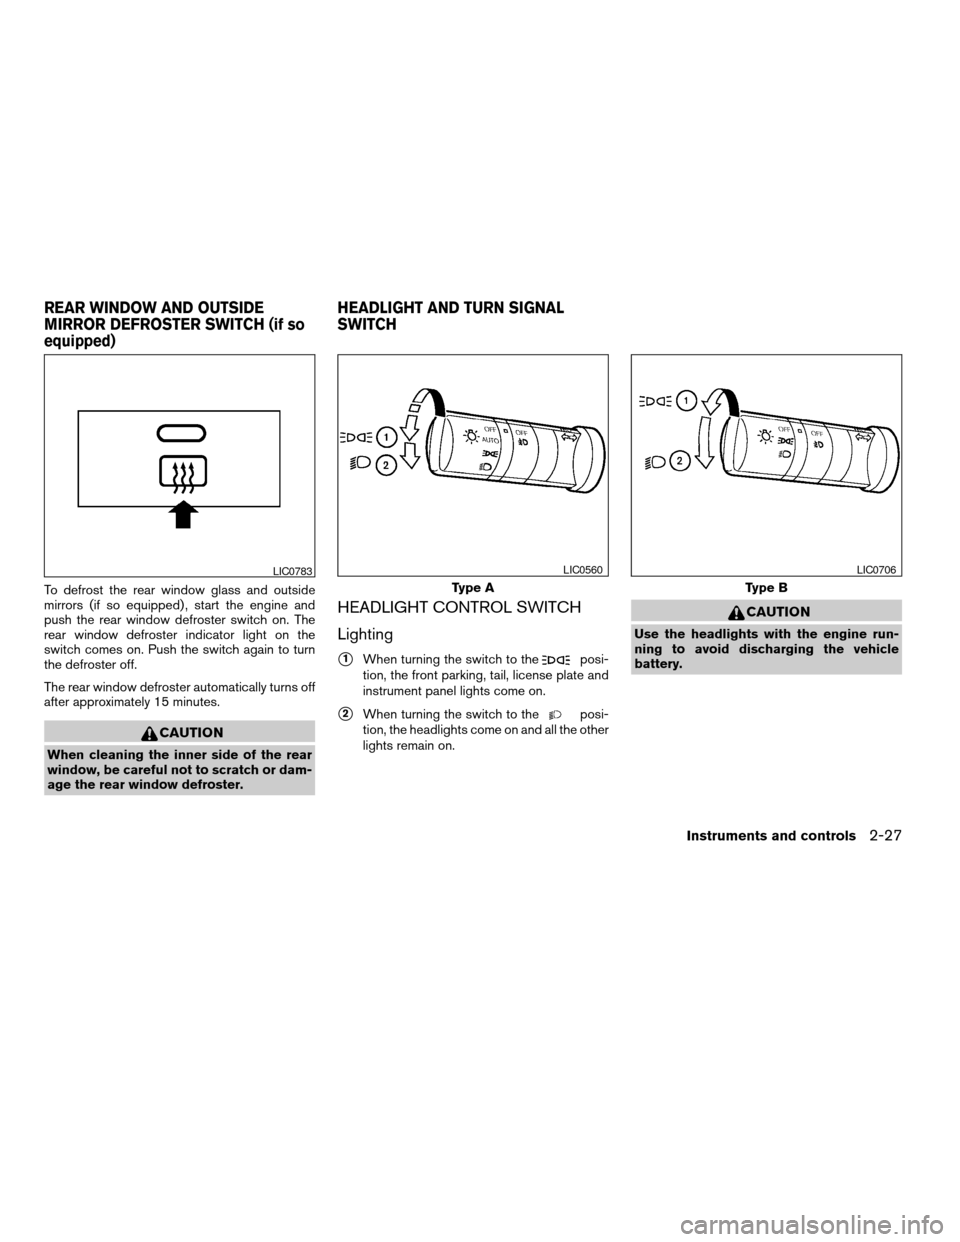
To defrost the rear window glass and outside
mirrors (if so equipped) , start the engine and
push the rear window defroster switch on. The
rear window defroster indicator light on the
switch comes on. Push the switch again to turn
the defroster off.
The rear window defroster automatically turns off
after approximately 15 minutes.
CAUTION
When cleaning the inner side of the rear
window, be careful not to scratch or dam-
age the rear window defroster.
HEADLIGHT CONTROL SWITCH
Lighting
s1When turning the switch to theposi-
tion, the front parking, tail, license plate and
instrument panel lights come on.
s2When turning the switch to theposi-
tion, the headlights come on and all the other
lights remain on.
CAUTION
Use the headlights with the engine run-
ning to avoid discharging the vehicle
battery.
LIC0783
Type A
LIC0560
Type B
LIC0706
REAR WINDOW AND OUTSIDE
MIRROR DEFROSTER SWITCH (if so
equipped)HEADLIGHT AND TURN SIGNAL
SWITCH
Instruments and controls2-27
ZREVIEW COPYÐ2007 Truck/Frontier(d22)
Owners ManualÐUSA_English(nna)
12/13/06Ðcathy
X
Page 121 of 336
CAUTION
cThe outlet and plug may be hot during
or immediately after use.
cOnly certain power outlets are designed
for use with a cigarette lighter unit. Do
not use any other power outlet for an
accessory lighter. See your NISSAN
dealer for additional information.
cDo not use with accessories that ex-
ceed a 12 volt, 120W (10A) power draw.
Do not use double adapters or more
than one electrical accessory.cUse power outlets with the engine run-
ning to avoid discharging the vehicle
battery.
cAvoid using power outlets when the air
conditioner, headlights or rear window
defroster is on.
cBefore inserting or disconnecting a
plug, be sure the electrical accessory
being used is turned OFF.
cPush the plug in as far as it will go. If
good contact is not made, the plug may
overheat or the internal temperature
fuse may open.
cWhen not in use, be sure to close the
cap. Do not allow water to contact the
outlet.
STORAGE TRAYS
WARNING
Do not place sharp objects in the trays to
help prevent injury in an accident or sud-
den stop.
Center console
LIC0761
Top center tray
LIC0764
STORAGE
Instruments and controls2-37
ZREVIEW COPYÐ2007 Truck/Frontier(d22)
Owners ManualÐUSA_English(nna)
12/13/06Ðcathy
X
Page 130 of 336
The front crossbar can be adjusted or removed.
Use the Torxdriver provided in the tool kit to
loosen both crossbar adjusting screws.
To adjust:
1. Loosen the adjusting screws with the
Torxdriver
s1by turning counterclockwise
sA.
2. When the clamp is loosened, move the
crossbar so the cargo can be positioned on
the crossbar
sB.
3. Tighten the crossbar adjusting screws with
the Torxdriver by turning clockwise.
4. Secure the cargo with rope.
5. Always check the tightness of the crossbar
adjusting screws.
To remove:
1. Loosen the adjusting screws with the
Torxdriver
s1by turning counterclockwise
sA.
2. Rotate the clamps
sC.
3. Remove the crossbar.
4. Reverse to install.
5. Always check the tightness of the crossbar
adjusting screws.If you hear wind noise coming from the roof rack
while driving, adjust the roof rack crossbar to the
neutral position, rearward ofDon the side rails.
WARNING
Properly secure all cargo with ropes or
straps to help prevent it from sliding or
shifting. In a sudden stop or collision, un-
secured cargo could cause personal
injury.
CAUTION
Use care when placing or removing items
from the roof rack. If you cannot comfort-
ably lift the items onto the roof rack from
the ground, use a ladder or stool.
POWER WINDOWS (if so equipped)
WARNING
cMake sure that all passengers have
their hands, etc. inside the vehicle while
it is in motion and before closing the
windows. Use the window lock switch
to prevent unexpected use of the power
windows.
cDo not leave children unattended inside
the vehicle. They could unknowingly ac-
tivate switches or controls and become
trapped in a window. Unattended chil-
dren could become involved in serious
accidents.
The power windows operate when the ignition
switch is in the ON position, or for about 45
seconds after the ignition switch is turned to the
OFF position. If the driver’s or passenger’s door
is opened during this period of about 45 sec-
onds, power to the windows is canceled.
WINDOWS
2-46Instruments and controls
ZREVIEW COPYÐ2007 Truck/Frontier(d22)
Owners ManualÐUSA_English(nna)
12/13/06Ðcathy
X