2007 NISSAN FRONTIER steering wheel
[x] Cancel search: steering wheelPage 102 of 336
tire pressure gauge to adjust tire pressure to the
recommended pressure.
For additional information, see “Tire Pressure
Monitoring System (TPMS)” in the “Starting and
driving” section and in the “In case of emergency”
section.
TPMS malfunction:
If the TPMS is not functioning properly, the low
tire pressure warning light will flash for approxi-
mately 1 minute when the ignition switch is
turned ON. The light will remain on after the 1
minute. Have the system checked by a NISSAN
dealer.
For additional information, see “Tire Pressure
Monitoring System (TPMS)” in the “Starting and
driving” section.
WARNING
cIf the light does not illuminate with the
ignition switch turned ON, have the ve-
hicle checked by a NISSAN dealer as
soon as possible.cIf the light illuminates while driving,
avoid sudden steering maneuvers or
abrupt braking, reduce vehicle speed,
pull off the road to a safe location and
stop the vehicle as soon as possible.
Serious vehicle damage could occur
and may lead to an accident and could
result in serious personal injury. Check
the tire pressure for all four tires. Adjust
the tire pressure to the recommended
COLD tire pressure shown on the Tire
and Loading Information label to turn
the low tire pressure warning light OFF.
If the light stays on after adjusting the
tire pressure and driving over 16 mph,
have the system checked by a NISSAN
dealer. If you have a flat tire, replace it
with a spare tire as soon as possible.
cWhen a spare tire is mounted or a wheel
is replaced, tire pressure will not be
indicated, the TPMS will not function
and the low tire pressure warning light
will flash for approximately 1 minute.
The light will remain on after 1 minute.
Contact your NISSAN dealer as soon as
possible for tire replacement and/or
system resetting.cReplacing tires with those not originally
specified by NISSAN could affect the
proper operation of the TPMS.
CAUTION
cThe TPMS is not a substitute for the
regular tire pressure check. Be sure to
check the tire pressure regularly.
cIf the vehicle is being driven at speeds
of less than 16 MPH (25 km/h) , the
TPMS may not operate correctly.
cBe sure to install the specified size of
tires to the 4 wheels correctly.
Low windshield washer fluid
warning light
This light comes on when the windshield washer
fluid is at a low level. Add windshield washer fluid
as necessary. See “Window washer fluid” in the
“Maintenance and do-it-yourself” section of this
manual.
Seat belt warning light and
chime
The light and chime remind you to fasten your
seat belts. The light illuminates whenever the
ignition key is turned to the ON or START position
and remains illuminated until the driver’s seat belt
2-18Instruments and controls
ZREVIEW COPYÐ2007 Truck/Frontier(d22)
Owners ManualÐUSA_English(nna)
12/13/06Ðcathy
X
Page 116 of 336
cTurn signals do not work when the haz-
ard warning flasher lights are on.
The flashers will operate with the ignition switch
in any position.
Some state laws may prohibit the use of
the hazard warning flasher switch while
driving.
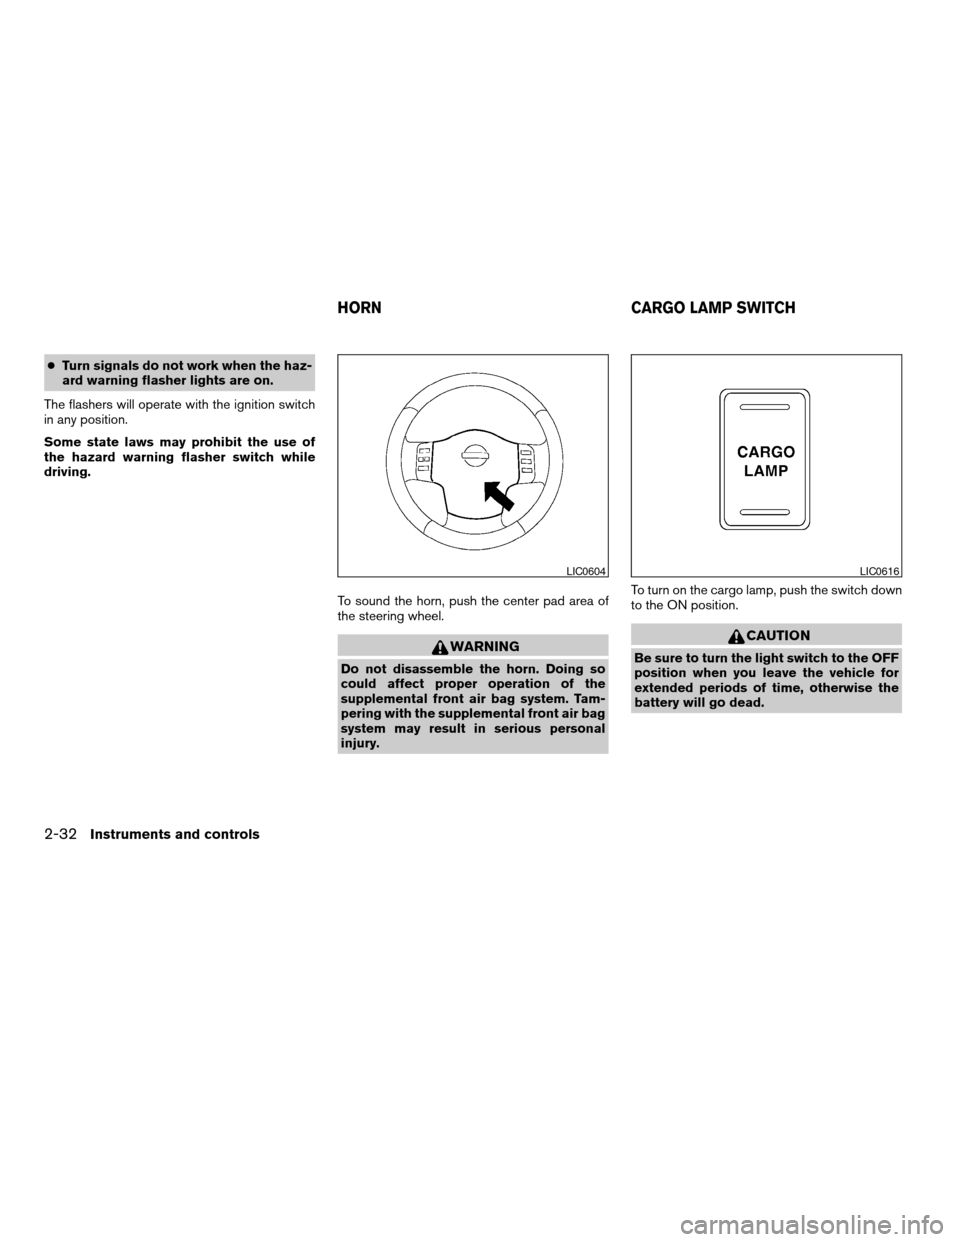
To sound the horn, push the center pad area of
the steering wheel.
WARNING
Do not disassemble the horn. Doing so
could affect proper operation of the
supplemental front air bag system. Tam-
pering with the supplemental front air bag
system may result in serious personal
injury.To turn on the cargo lamp, push the switch down
to the ON position.
CAUTION
Be sure to turn the light switch to the OFF
position when you leave the vehicle for
extended periods of time, otherwise the
battery will go dead.
LIC0604LIC0616
HORN CARGO LAMP SWITCH
2-32Instruments and controls
ZREVIEW COPYÐ2007 Truck/Frontier(d22)
Owners ManualÐUSA_English(nna)
12/13/06Ðcathy
X
Page 141 of 336

3 Pre-driving checks and adjustments
Keys .............................................3-2
NISSAN vehicle immobilizer system keys
(if so equipped)................................3-2
Doors............................................3-3
Locking with key................................3-3
Locking with inside lock knob....................3-4
Locking with power door lock switch
(if so equipped)................................3-4
Rear doors (King Cab models)...................3-5
Child safety rear door lock
(Crew Cab models only)........................3-6
Remote keyless entry system (if so equipped).........3-6
How to use remote keyless entry system..........3-7
Hood............................................3-9Fuel-filler door...................................3-10
Fuel-filler cap.................................3-10
Steering wheel...................................3-11
Tilt operation (if so equipped)...................3-11
Sun visors.......................................3-12
Vanity mirrors.................................3-12
Mirrors..........................................3-13
Rearview mirror (if so equipped).................3-13
Automatic anti-glare rearview mirror
(if so equipped)...............................3-13
Outside mirrors...............................3-13
Truck box........................................3-15
Tailgate.......................................3-15
Tie down hooks (if so equipped)................3-17
ZREVIEW COPYÐ2007 Truck/Frontier(d22)
Owners ManualÐUSA_English(nna)
12/13/06Ðcathy
X
Page 151 of 336
cDo not fill a portable fuel container in
the vehicle or trailer. Static electricity
can cause an explosion of flammable
liquid, vapor or gas in any vehicle or
trailer. To reduce the risk of serious
injury or death when filling portable fuel
containers:
– Always place the container on the
ground when filling.
– Do not use electronic devices when
filling.
– Keep the pump nozzle in contact
with the container while you are fill-
ing it.
– Use only approved portable fuel con-
tainers for flammable liquid.CAUTION
cIf fuel is spilled on the vehicle body,
flush it away with water to avoid paint
damage.
cTighten until the fuel-filler cap clicks.
Failure to tighten the fuel-filler cap
properly may cause the
mal-
function indicator light (MIL) to illumi-
nate. If the
light illuminates be-
cause the fuel-filler cap is loose or
missing, tighten or install the cap and
continue to drive the vehicle.
The
light should turn off after a
few driving trips. If the
light
does not turn off after a few driving
trips, have the vehicle inspected by a
NISSAN dealer.
cFor additional information, see the
“Malfunction indicator light (MIL)” in
the “Instruments and Controls” section
earlier in this manual.TILT OPERATION (if so equipped)
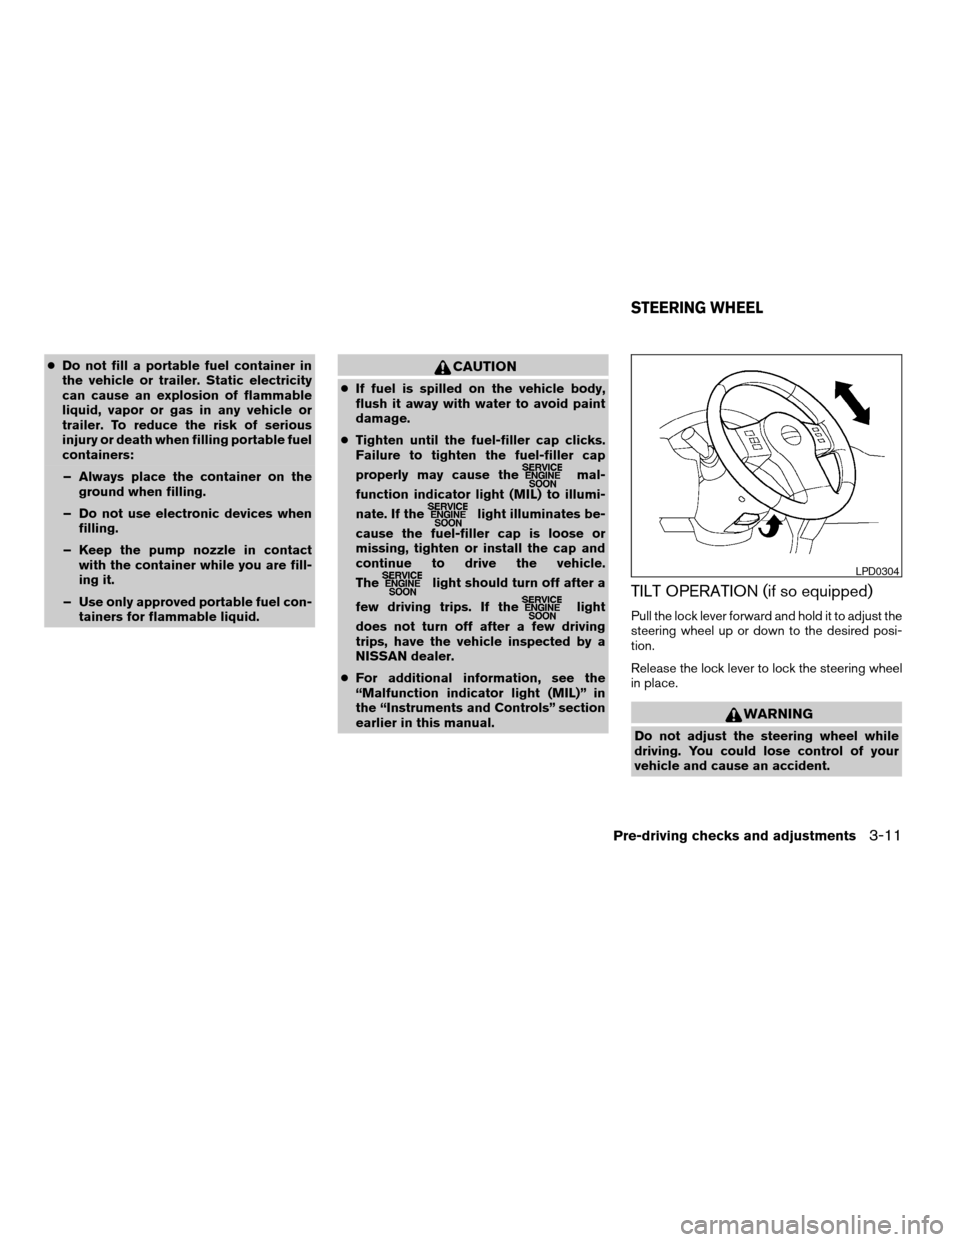
Pull the lock lever forward and hold it to adjust the
steering wheel up or down to the desired posi-
tion.
Release the lock lever to lock the steering wheel
in place.
WARNING
Do not adjust the steering wheel while
driving. You could lose control of your
vehicle and cause an accident.
LPD0304
STEERING WHEEL
Pre-driving checks and adjustments3-11
ZREVIEW COPYÐ2007 Truck/Frontier(d22)
Owners ManualÐUSA_English(nna)
12/13/06Ðcathy
X
Page 159 of 336

4 Heater, air conditioner and audio
systems
Ventilators........................................4-2
Heater and air conditioner (manual)..................4-2
Controls.......................................4-3
Heater operation...............................4-4
Air conditioner operation (if so equipped).........4-5
Air flow charts..................................4-6
Servicing air conditioner............................4-9
Audio system....................................4-10
Radio........................................4-10
FM radio reception............................4-10
AM radio reception............................4-10Satellite radio reception (if so equipped).........4-10
Audio operation precautions....................4-11
FM/AM radio with compact disc (CD) player
(if so equipped)...............................4-16
FM/AM/SAT radio with compact disc (CD)
changer......................................4-20
CD care and cleaning..........................4-25
Steering wheel switch for audio control
(if so equipped)...............................4-26
Antenna......................................4-26
Car phone or CB radio............................4-27
ZREVIEW COPYÐ2007 Truck/Frontier(d22)
Owners ManualÐUSA_English(nna)
12/13/06Ðcathy
X
Page 184 of 336
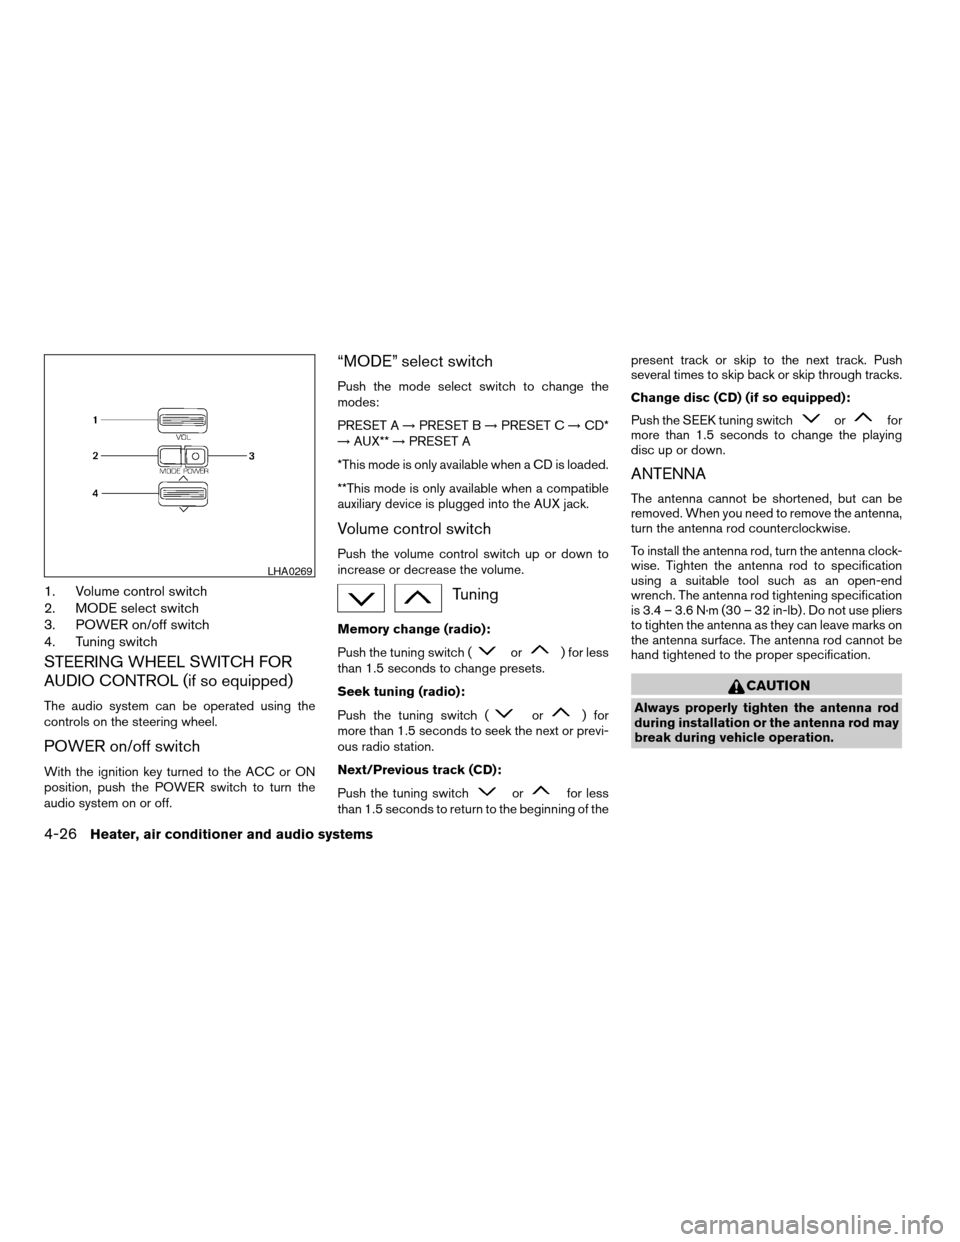
1. Volume control switch
2. MODE select switch
3. POWER on/off switch
4. Tuning switch
STEERING WHEEL SWITCH FOR
AUDIO CONTROL (if so equipped)
The audio system can be operated using the
controls on the steering wheel.
POWER on/off switch
With the ignition key turned to the ACC or ON
position, push the POWER switch to turn the
audio system on or off.
“MODE” select switch
Push the mode select switch to change the
modes:
PRESET A!PRESET B!PRESET C!CD*
!AUX**!PRESET A
*This mode is only available when a CD is loaded.
**This mode is only available when a compatible
auxiliary device is plugged into the AUX jack.
Volume control switch
Push the volume control switch up or down to
increase or decrease the volume.
Tuning
Memory change (radio):
Push the tuning switch (
or) for less
than 1.5 seconds to change presets.
Seek tuning (radio):
Push the tuning switch (
or) for
more than 1.5 seconds to seek the next or previ-
ous radio station.
Next/Previous track (CD):
Push the tuning switch
orfor less
than 1.5 seconds to return to the beginning of thepresent track or skip to the next track. Push
several times to skip back or skip through tracks.
Change disc (CD) (if so equipped):
Push the SEEK tuning switch
orfor
more than 1.5 seconds to change the playing
disc up or down.
ANTENNA
The antenna cannot be shortened, but can be
removed. When you need to remove the antenna,
turn the antenna rod counterclockwise.
To install the antenna rod, turn the antenna clock-
wise. Tighten the antenna rod to specification
using a suitable tool such as an open-end
wrench. The antenna rod tightening specification
is 3.4 – 3.6 N·m (30 – 32 in-lb) . Do not use pliers
to tighten the antenna as they can leave marks on
the antenna surface. The antenna rod cannot be
hand tightened to the proper specification.
CAUTION
Always properly tighten the antenna rod
during installation or the antenna rod may
break during vehicle operation.
LHA0269
4-26Heater, air conditioner and audio systems
ZREVIEW COPYÐ2007 Truck/Frontier(d22)
Owners ManualÐUSA_English(nna)
12/13/06Ðcathy
X
Page 186 of 336

5 Starting and driving
Precautions when starting and driving................5-2
Exhaust gas (carbon monoxide)..................5-2
Three-way catalyst..............................5-2
Tire Pressure Monitoring System (TPMS)..........5-3
On-pavement and off-road driving
precautions....................................5-5
Avoiding collision and rollover....................5-5
Drinking alcohol/drugs and driving................5-6
Driving safety precautions.......................5-6
Ignition switch.....................................5-8
Automatic transmission..........................5-8
Manual transmission............................5-9
Key positions.................................5-10
Nissan vehicle immobilizer system...............5-10
Before starting the engine.........................5-10
Starting the engine...............................5-11
Driving the vehicle................................5-12
Automatic transmission.........................5-12
Manual transmission (if so equipped)............5-16
Parking brake....................................5-18
Cruise control (if so equipped).....................5-19
Precautions on cruise control...................5-19
Cruise control operations.......................5-19Break-in schedule................................5-20
Increasing fuel economy...........................5-21
Using four wheel drive (4WD).............5-21
Transfer case shifting procedures...............5-22
Electronic locking rear differential (E-Lock) system
(if so equipped)..................................5-27
Parking/parking on hills............................5-29
Power steering...................................5-30
Brake system....................................5-30
Brake precautions.............................5-30
Anti-lock Braking System (ABS).................5-31
Active brake limited slip (ABLS) system
(if so equipped)..................................5-32
Vehicle dynamic control (VDC) system
(if so equipped)..................................5-32
Hill descent control system (if so equipped).........5-34
Hill start assist (HSA) system (if so equipped).......5-34
Cold weather driving..............................5-35
Freeing a frozen door lock......................5-35
Anti-freeze....................................5-35
Battery.......................................5-35
Draining of coolant water.......................5-35
Tire equipment................................5-35
ZREVIEW COPYÐ2007 Truck/Frontier(d22)
Owners ManualÐUSA_English(nna)
12/21/06Ðcathy
X
Page 190 of 336
km/h) . Also, this system may not detect a
sudden drop in tire pressure (for example a
flat tire while driving) .
cThe low tire pressure warning light does not
automatically turn off when the tire pressure
is adjusted. After the tire is inflated to the
recommended pressure, the vehicle must be
driven at speeds above 16 MPH (25 km/h)
to activate the TPMS and turn off the low tire
pressure warning light. Use a tire pressure
gauge to check the tire pressure.
cTire pressure rises and falls depending on
the heat caused by the vehicle’s operation
and the outside temperature. Low outside
temperature can lower the temperature of
the air inside the tire which can cause a
lower tire inflation pressure. This may cause
the low tire pressure warning light to illumi-
nate. If the warning light illuminates in low
ambient temperature, check the tire pres-
sure for all four tires.
cYou can also check the pressure of all tires
(except the spare tire) on the display screen.
The order of the tire pressure figures dis-
played on the screen does not correspond
with the actual order of the tire position. See
“Tire pressure information” in the “Display
screen, heater, air conditioner and audio
systems” section.For additional information, see “Low tire pressure
warning light” in the “Instruments and controls”
section, “Tire Pressure Monitoring System
(TPMS)” in the “In case of emergency” section.
WARNING
cIf the low tire pressure warning light
illuminates while driving, avoid sudden
steering maneuvers or abrupt braking,
reduce vehicle speed, pull off the road
to a safe location and stop the vehicle
as soon as possible. Serious vehicle
damage could occur and may lead to an
accident and could result in serious
personal injury. Check the tire pressure
for all four tires. Adjust the tire pressure
to the recommended COLD tire pres-
sure shown on the Tire and Loading
Information label to turn the low tire
pressure warning light OFF. If you have
a flat tire, replace it with a spare tire as
soon as possible. (See “Flat tire” in the
“In case of emergency” section for
changing a flat tire.)cWhen a spare tire is mounted or a wheel
is replaced, tire pressure will not be
indicated, the TPMS will not function
and the low tire pressure warning light
will flash for approximately 1 minute.
The light will remain on after 1 minute.
Contact your NISSAN dealer as soon as
possible for tire replacement and/or
system resetting.
cReplacing tires with those not originally
specified by NISSAN could affect the
proper operation of the TPMS.
cDo not inject any tire liquid or aerosol
tire sealant into the tires, as this may
cause a malfunction of the tire pressure
sensors.
CAUTION
Do not place metalized film or any metal
parts (antenna, etc.) on the windows. This
may cause poor reception of the signals
from the tire pressure sensors, and the
TPMS will not function properly.
Some devices and transmitters may temporarily
interfere with the operation of the TPMS and
cause the low tire pressure warning light to illu-
minate.
5-4Starting and driving
ZREVIEW COPYÐ2007 Truck/Frontier(d22)
Owners ManualÐUSA_English(nna)
12/13/06Ðcathy
X