2007 NISSAN ARMADA wheel size
[x] Cancel search: wheel sizePage 301 of 344

1. Wear indicator
2. Location mark
Tire wear and damage
WARNING
cTires should be periodically in-
spected for wear, cracking, bulg-
ing or objects caught in the tread.
If excessive wear, cracks, bulging
or deep cuts are found, the tire(s)
should be replaced.cThe original tires have built-in
tread wear indicators. When the
wear indicators are visible, the
tire(s) should be replaced.
cTires degrade with age and use.
Have tires, including the spare,
over 6 years old checked by a
qualified technician because
some tire damage may not be ob-
vious. Replace the tires as neces-
sary to prevent tire failure and
possible personal injury.
cImproper service of the spare tire
may result in serious personal in-
jury. If it is necessary to repair the
spare tire, contact a NISSAN
dealer.
cFor additional information re-
garding tires, refer to “Important
Tire Safety Information” (US) or
“Tire Safety Information”
(Canada) in the Warranty Infor-
mation Booklet.
Replacing wheels and tires
When replacing a tire, use the same size, tread
design, speed rating and load carrying capacityas originally equipped. Recommended types and
sizes are shown in “Wheels and tires” in the
“Technical and consumer information” section of
this manual.
WARNING
cThe use of tires other than those recom-
mended or the mixed use of tires of
different brands, construction (bias,
bias-belted or radial) , or tread patterns
can adversely affect the ride, braking,
handling, ground clearance, body-to-
tire clearance, tire chain clearance,
speedometer calibration, headlight aim
and bumper height. Some of these ef-
fects may lead to accidents and could
result in serious personal injury.
c
If the wheels are changed for any reason,
always replace with wheels which have
the same off-set dimension. Wheels of a
different off-set could cause premature
tire wear, degrade vehicle handling char-
acteristics and/or interference with the
brake discs/drums. Such interference
can lead to decreased braking efficiency
and/or early brake pad/shoe wear. Refer
to “Wheels and tires” in the “Technical
and consumer information” section of
this manual for wheel off-set dimensions.
WDI0259
Maintenance and do-it-yourself8-39
ZREVIEW COPYÐ2007 Armada(wzw)
Owners ManualÐUSA_English(nna)
07/08/06Ðtbrooks
X
Page 302 of 344
cWhen a spare tire is mounted or a wheel
is replaced, tire pressure will not be
indicated, the TPMS will not function
and the low tire pressure warning light
will flash. Contact your NISSAN dealer
as soon as possible for tire replacement
and/or system resetting.
cReplacing tires with those not originally
specified by NISSAN could affect the
proper operation of the TPMS.
cDo not install a deformed wheel or tire
even if it has been repaired. Such
wheels or tires could have structural
damage and could fail without warning.
cThe use of retread tires is not
recommended.
cFor additional information regarding
tires, refer to “Important Tire Safety In-
formation” (US) or “Tire Safety Informa-
tion” (Canada) in the Warranty Informa-
tion Booklet.Four-wheel drive models
CAUTION
Always use tires of the same type, size,
brand, construction (bias, bias-belted or
radial) , and tread pattern on all four
wheels. Failure to do so may result in a
circumference difference between tires
on the front and rear axles which will
cause excessive tire wear and may dam-
age the transmission, transfer case and
differential gears.
If excessive tire wear is found, it is recommended
that all four tires be replaced with tires of the
same size, brand, construction and tread pattern.
The tire pressure and wheel alignment should
also be checked and corrected as necessary.
Contact a NISSAN dealer.
Wheel balance
Unbalanced wheels may affect vehicle handling
and tire life. Even with regular use, wheels can get
out of balance. Therefore, they should be bal-
anced as required.
Wheel balance service should be per-
formed with the wheels off the vehicle.
Spin balancing the wheels on the vehicle
could lead to mechanical damage.cFor additional information regarding
tires, refer to “Important Tire Safety
Information” (US) or “Tire Safety Infor-
mation” (Canada) in the Warranty In-
formation Booklet .
Care of wheels
cWash the wheels when washing the vehicle
to maintain their appearance.
cClean the inner side of the wheels when the
wheel is changed or the underside of the
vehicle is washed.
cDo not use abrasive cleaners when washing
the wheels.
cInspect wheel rims regularly for dents or
corrosion. Such damage may cause loss of
pressure or poor seal at the tire bead.
cNISSAN recommends waxing the road
wheels to protect against road salt in areas
where it is used during winter.
8-40Maintenance and do-it-yourself
ZREVIEW COPYÐ2007 Armada(wzw)
Owners ManualÐUSA_English(nna)
07/08/06Ðtbrooks
X
Page 311 of 344
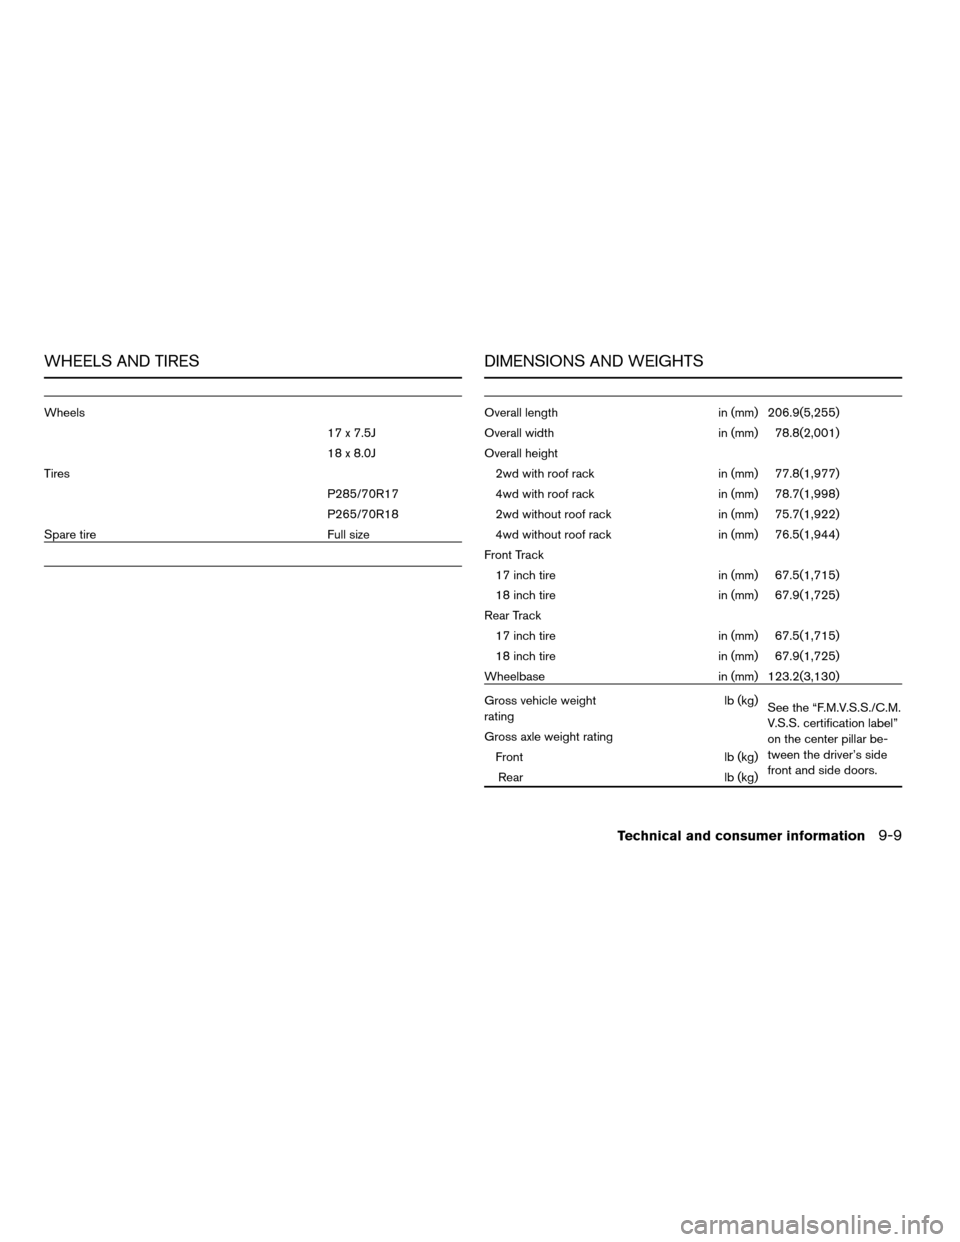
WHEELS AND TIRES
Wheels
17 x 7.5J
18 x 8.0J
Tires
P285/70R17
P265/70R18
Spare tire Full size
DIMENSIONS AND WEIGHTS
Overall length in (mm) 206.9(5,255)
Overall width in (mm) 78.8(2,001)
Overall height
2wd with roof rack in (mm) 77.8(1,977)
4wd with roof rack in (mm) 78.7(1,998)
2wd without roof rack in (mm) 75.7(1,922)
4wd without roof rack in (mm) 76.5(1,944)
Front Track
17 inch tire in (mm) 67.5(1,715)
18 inch tire in (mm) 67.9(1,725)
Rear Track
17 inch tire in (mm) 67.5(1,715)
18 inch tire in (mm) 67.9(1,725)
Wheelbase in (mm) 123.2(3,130)
Gross vehicle weight
ratinglb (kg)
See the “F.M.V.S.S./C.M.
V.S.S. certification label”
on the center pillar be-
tween the driver’s side
front and side doors. Gross axle weight rating
Front lb (kg)
Rear lb (kg)
Technical and consumer information9-9
ZREVIEW COPYÐ2007 Armada(wzw)
Owners ManualÐUSA_English(nna)
07/08/06Ðtbrooks
X
Page 323 of 344
WARNING
Trailer hitch components have specific
weight ratings. Your vehicle may be ca-
pable of towing a trailer heavier than the
weight rating of the hitch components.
Never exceed the weight rating of the
hitch components. Doing so can cause
serious personal injury or property
damage.
Hitch ball
Choose a hitch ball of the proper size and weight
rating for your trailer:
cThe required hitch ball size is stamped on
most trailer couplers. Most hitch balls also
have the size printed on the top of the ball.
cChoose the proper class hitch ball based on
the trailer weight.
cThe diameter of the threaded shank of the
hitch ball must be matched to the ball mount
hole diameter. The hitch ball shank should
be no more than 1/16” smaller than the hole
in the ball mount.
cThe threaded shank of the hitch ball must be
long enough to be properly secured to the
ball mount. There should be at least 2
threads showing beyond the lock washer
and nut.
Ball mount
The hitch ball is attached to the ball mount and
the ball mount is inserted into the hitch receiver.
Choose a proper class ball mount based on the
trailer weight. Additionally, the ball mount should
be chosen to keep the trailer tongue level with the
ground.
Weight carrying hitches
A weight carrying or9dead weight9ball mount is
one that is designed to carry the whole amount of
tongue weight and gross weight directly on the
ball mount and on the receiver.
Weight distribution hitch
This type of hitch is also called a “load-leveling” or
“equalizing” hitch. A set of bars attach to the ball
mount and to the trailer to distribute the tongue
weight (hitch weight) of your trailer. Many ve-
hicles can’t carry the full tongue weight of a given
trailer, and need some of the tongue weight
transferred through the frame and pushing down
on the front wheels. This gives stability to the tow
vehicle.
Another reason to have a weight distributing ball
mount is to comply with the rating on your re-
ceiver. Most receivers have a weight carrying
rating of 5,000 lbs. gross weight, 500 lbs. tongue
weight and a weight distribution rating of 10,000lbs. gross weight, 1,000 lbs. tongue weight. This
means that without using a weight distributing
ballmount, the receiver is only designed to carry
5,000 lbs.
When hooking up a trailer using a weight distrib-
uting hitch, always refer to the hitch manufactur-
er’s instructions.
1. Park unloaded vehicle on a level surface.
With the ignition on and the doors closed,
allow the vehicle to stand for several minutes
so that it can level.
2. Measure the height of a reference point on
the front and rear bumpers at the center of
the vehicle.
3. Attach the trailer to the vehicle and adjust
the hitch equalizers so that the front bumper
height is within0-.5inches (0 – 13 mm) of
the reference height measured in step 2. The
rear bumper should be no higher than the
reference height measured in step 2.
Technical and consumer information9-21
ZREVIEW COPYÐ2007 Armada(wzw)
Owners ManualÐUSA_English(nna)
07/08/06Ðtbrooks
X
Page 340 of 344
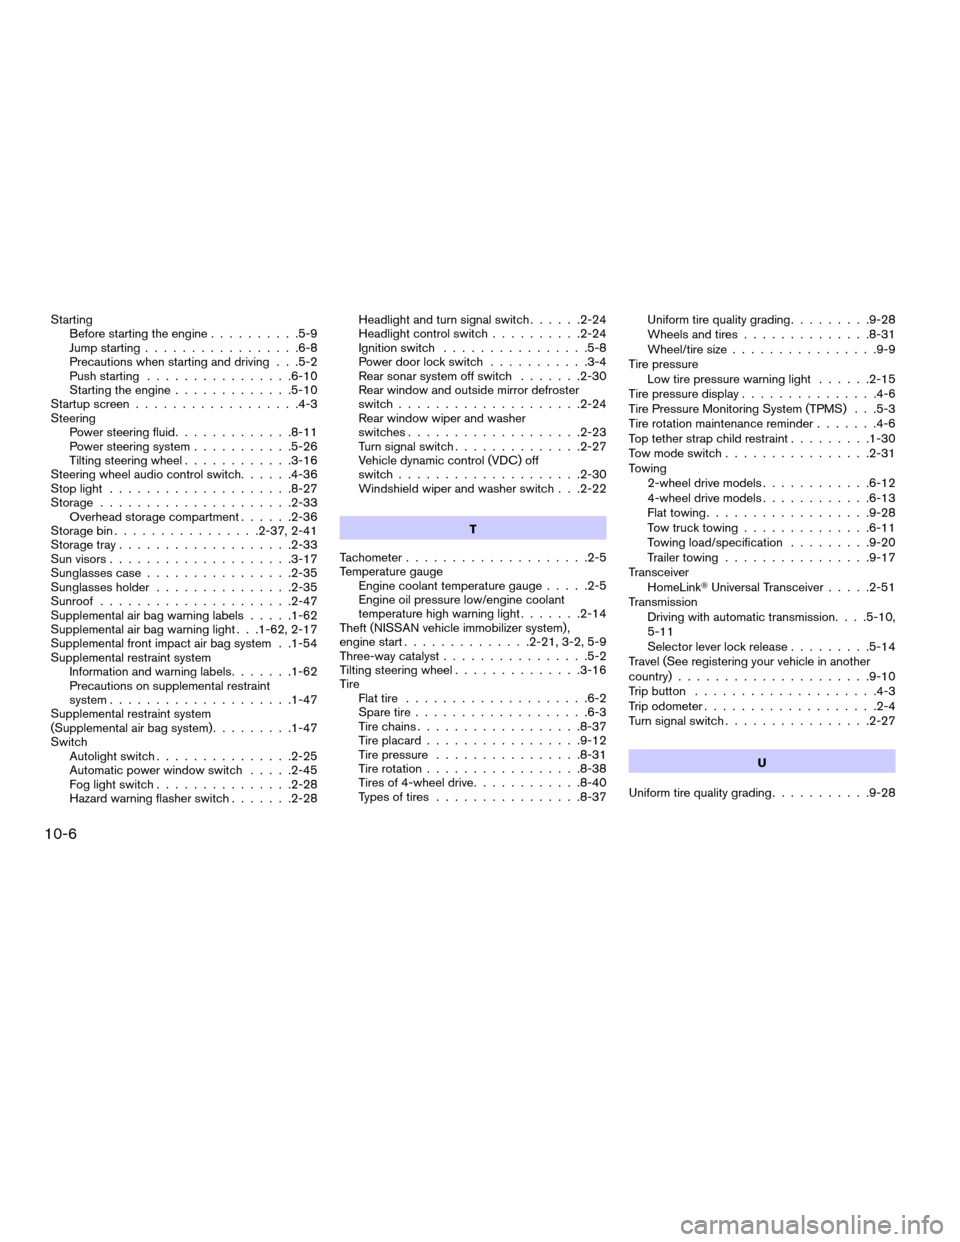
Starting
Before starting the engine..........5-9
Jump starting.................6-8
Precautions when starting and driving . . .5-2
Push starting................6-10
Starting the engine.............5-10
Startup screen..................4-3
Steering
Power steering fluid.............8-11
Power steering system...........5-26
Tilting steering wheel............3-16
Steering wheel audio control switch......4-36
Stop light....................8-27
Storage.....................2-33
Overhead storage compartment......2-36
Storage bin................2-37, 2-41
Storage tray...................2-33
Sun visors....................3-17
Sunglasses case................2-35
Sunglasses holder...............2-35
Sunroof.....................2-47
Supplemental air bag warning labels.....1-62
Supplemental air bag warning light . . .1-62, 2-17
Supplemental front impact air bag system . .1-54
Supplemental restraint system
Information and warning labels.......1-62
Precautions on supplemental restraint
system....................1-47
Supplemental restraint system
(Supplemental air bag system).........1-47
Switch
Autolight switch...............2-25
Automatic power window switch.....2-45
Fog light switch...............2-28
Hazard warning flasher switch.......2-28Headlight and turn signal switch......2-24
Headlight control switch..........2-24
Ignition switch................5-8
Power door lock switch...........3-4
Rear sonar system off switch.......2-30
Rear window and outside mirror defroster
switch....................2-24
Rear window wiper and washer
switches...................2-23
Turn signal switch..............2-27
Vehicle dynamic control (VDC) off
switch....................2-30
Windshield wiper and washer switch . . .2-22
T
Tachometer....................2-5
Temperature gauge
Engine coolant temperature gauge.....2-5
Engine oil pressure low/engine coolant
temperature high warning light.......2-14
Theft (NISSAN vehicle immobilizer system) ,
engine start..............2-21, 3-2, 5-9
Three-way catalyst................5-2
Tilting steering wheel..............3-16
Tire
Flat tire....................6-2
Spare tire...................6-3
Tire chains..................8-37
Tire placard.................9-12
Tire pressure................8-31
Tire rotation.................8-38
Tires of 4-wheel drive............8-40
Types of tires................8-37Uniform tire quality grading.........9-28
Wheels and tires..............8-31
Wheel/tire size................9-9
Tire pressure
Low tire pressure warning light......2-15
Tire pressure display...............4-6
Tire Pressure Monitoring System (TPMS) . . .5-3
Tire rotation maintenance reminder.......4-6
Top tether strap child restraint.........1-30
Tow mode switch................2-31
Towing
2-wheel drive models............6-12
4-wheel drive models............6-13
Flat towing..................9-28
Tow truck towing..............6-11
Towing load/specification.........9-20
Trailer towing................9-17
Transceiver
HomeLinkTUniversal Transceiver.....2-51
Transmission
Driving with automatic transmission. . . .5-10,
5-11
Selector lever lock release.........5-14
Travel (See registering your vehicle in another
country).....................9-10
Trip button....................4-3
Trip odometer...................2-4
Turn signal switch................2-27
U
Uniform tire quality grading...........9-28
10-6
ZREVIEW COPYÐ2007 Armada(wzw)
Owners ManualÐUSA_English(nna)
07/08/06Ðtbrooks
X
Page 341 of 344
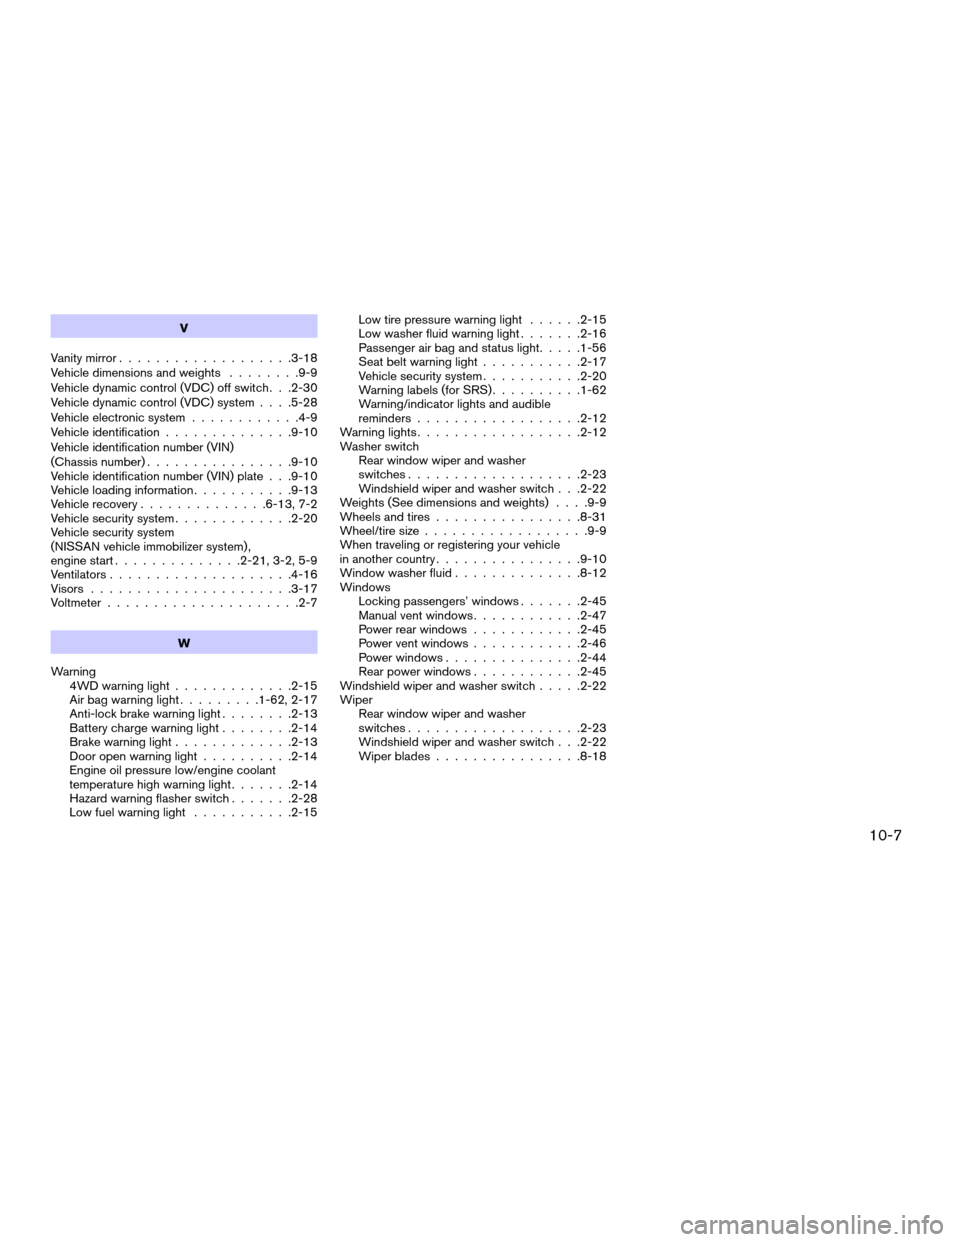
V
Vanity mirror...................3-18
Vehicle dimensions and weights........9-9
Vehicle dynamic control (VDC) off switch. . .2-30
Vehicle dynamic control (VDC) system. . . .5-28
Vehicle electronic system............4-9
Vehicle identification..............9-10
Vehicle identification number (VIN)
(Chassis number)................9-10
Vehicle identification number (VIN) plate . . .9-10
Vehicle loading information...........9-13
Vehicle recovery..............6-13, 7-2
Vehicle security system.............2-20
Vehicle security system
(NISSAN vehicle immobilizer system) ,
engine start..............2-21, 3-2, 5-9
Ventilators....................4-16
Visors......................3-17
Voltmeter.....................2-7
W
Warning
4WD warning light.............2-15
Air bag warning light.........1-62, 2-17
Anti-lock brake warning light........2-13
Battery charge warning light........2-14
Brake warning light.............2-13
Door open warning light..........2-14
Engine oil pressure low/engine coolant
temperature high warning light.......2-14
Hazard warning flasher switch.......2-28
Low fuel warning light...........2-15Low tire pressure warning light......2-15
Low washer fluid warning light.......2-16
Passenger air bag and status light.....1-56
Seat belt warning light...........2-17
Vehicle security system...........2-20
Warning labels (for SRS)..........1-62
Warning/indicator lights and audible
reminders..................2-12
Warning lights..................2-12
Washer switch
Rear window wiper and washer
switches...................2-23
Windshield wiper and washer switch . . .2-22
Weights (See dimensions and weights). . . .9-9
Wheels and tires................8-31
Wheel/tire size..................9-9
When traveling or registering your vehicle
in another country................9-10
Window washer fluid..............8-12
Windows
Locking passengers’ windows.......2-45
Manual vent windows............2-47
Power rear windows............2-45
Power vent windows............2-46
Power windows...............2-44
Rear power windows............2-45
Windshield wiper and washer switch.....2-22
Wiper
Rear window wiper and washer
switches...................2-23
Windshield wiper and washer switch . . .2-22
Wiper blades................8-18
10-7
ZREVIEW COPYÐ2007 Armada(wzw)
Owners ManualÐUSA_English(nna)
07/08/06Ðtbrooks
X