2007 NISSAN ARMADA oil temperature
[x] Cancel search: oil temperaturePage 234 of 344
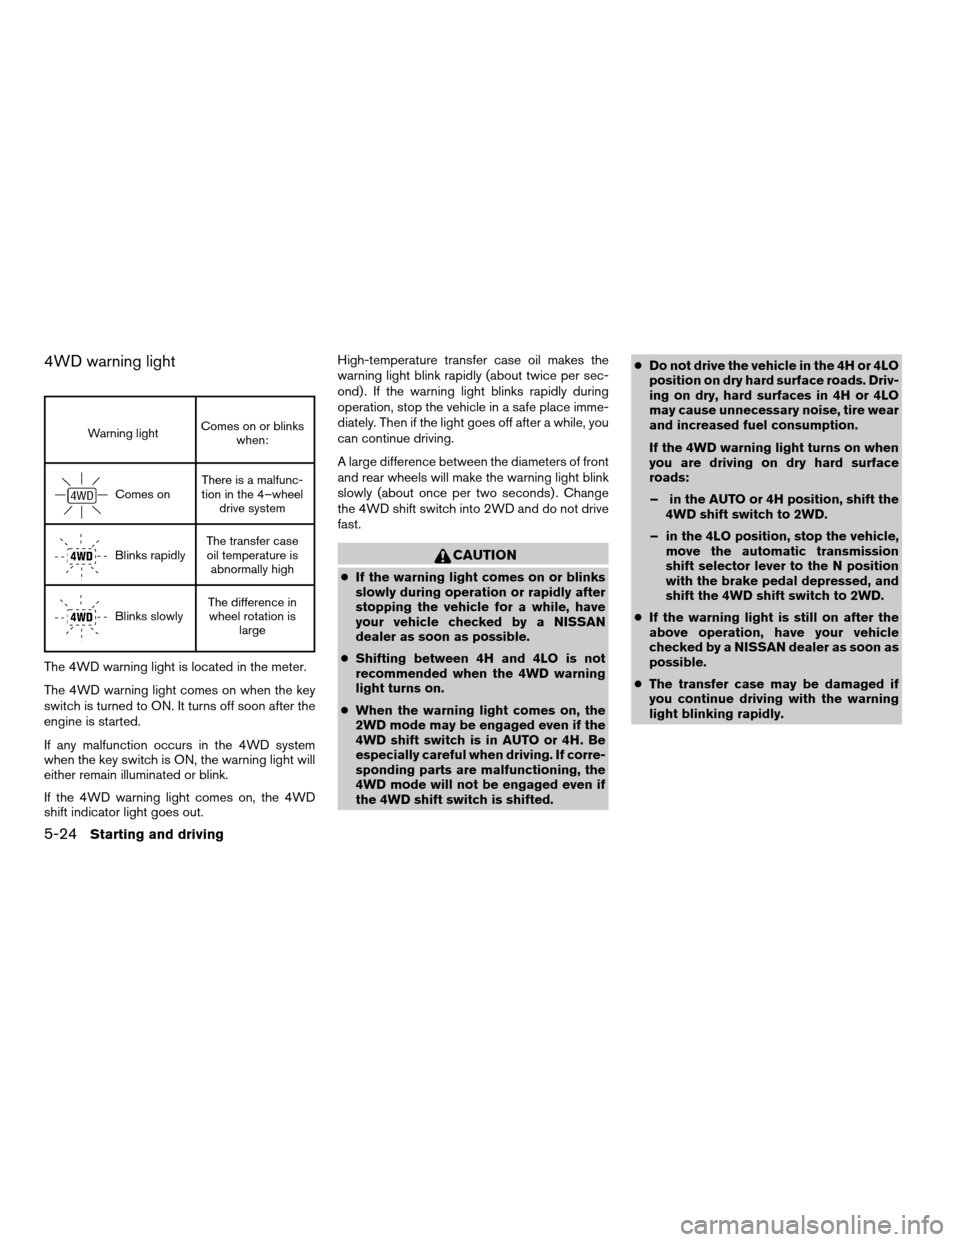
4WD warning light
Warning lightComes on or blinks
when:
Comes onThere is a malfunc-
tion in the 4–wheel
drive system
Blinks rapidlyThe transfer case
oil temperature is
abnormally high
Blinks slowlyThe difference in
wheel rotation is
large
The 4WD warning light is located in the meter.
The 4WD warning light comes on when the key
switch is turned to ON. It turns off soon after the
engine is started.
If any malfunction occurs in the 4WD system
when the key switch is ON, the warning light will
either remain illuminated or blink.
If the 4WD warning light comes on, the 4WD
shift indicator light goes out.High-temperature transfer case oil makes the
warning light blink rapidly (about twice per sec-
ond) . If the warning light blinks rapidly during
operation, stop the vehicle in a safe place imme-
diately. Then if the light goes off after a while, you
can continue driving.
A large difference between the diameters of front
and rear wheels will make the warning light blink
slowly (about once per two seconds) . Change
the 4WD shift switch into 2WD and do not drive
fast.
CAUTION
cIf the warning light comes on or blinks
slowly during operation or rapidly after
stopping the vehicle for a while, have
your vehicle checked by a NISSAN
dealer as soon as possible.
cShifting between 4H and 4LO is not
recommended when the 4WD warning
light turns on.
cWhen the warning light comes on, the
2WD mode may be engaged even if the
4WD shift switch is in AUTO or 4H. Be
especially careful when driving. If corre-
sponding parts are malfunctioning, the
4WD mode will not be engaged even if
the 4WD shift switch is shifted.cDo not drive the vehicle in the 4H or 4LO
position on dry hard surface roads. Driv-
ing on dry, hard surfaces in 4H or 4LO
may cause unnecessary noise, tire wear
and increased fuel consumption.
If the 4WD warning light turns on when
you are driving on dry hard surface
roads:
– in the AUTO or 4H position, shift the
4WD shift switch to 2WD.
– in the 4LO position, stop the vehicle,
move the automatic transmission
shift selector lever to the N position
with the brake pedal depressed, and
shift the 4WD shift switch to 2WD.
cIf the warning light is still on after the
above operation, have your vehicle
checked by a NISSAN dealer as soon as
possible.
cThe transfer case may be damaged if
you continue driving with the warning
light blinking rapidly.
5-24Starting and driving
ZREVIEW COPYÐ2007 Armada(wzw)
Owners ManualÐUSA_English(nna)
07/08/06Ðtbrooks
X
Page 252 of 344
cMake sure the jumper cables do not
touch moving parts in the engine com-
partment and that the cable clamps do
not contact any other metal.
5. Start the engine of the booster vehicle and
let it run for a few minutes.
6. Keep the engine speed of the booster ve-
hicle at about 2,000 rpm, and start the en-
gine of the vehicle being jump started.
CAUTION
Do not keep the starter motor engaged for
more than 10 seconds. If the engine does
not start right away, turn the key off and
wait 3 to 4 seconds before trying again.
7. After starting the engine, carefully discon-
nect the negative cable and then the positive
cable.
8. Replace the vent caps (if so equipped) . Be
sure to dispose of the cloth used to cover
the vent holes as it may be contaminated
with corrosive acid.
CAUTION
Automatic transmission models cannot
be push-started or tow-started. Attempt-
ing to do so may cause transmission
damage.
WARNING
cDo not continue to drive if your vehicle
overheats. Doing so could cause engine
damage or a vehicle fire.
cTo avoid the danger of being scalded,
never remove the radiator or coolant
reservoir cap while the engine is still
hot. When the radiator or coolant reser-
voir cap is removed, pressurized hot
water will spurt out, possibly causing
serious injury.
cDo not open the hood if steam is com-
ing out.
If your vehicle is overheating (indicated by an
extremely high temperature gauge reading and
the illumination of the engine oil pressure/engine
coolant temperature high indicator light) , or if you
feel a lack of engine power, detect abnormal
noise, etc. take the following steps.
1. Move the vehicle safely off the road, apply
the parking brake and move the shift lever to
P (Park) .
Do not stop the engine.
2. Turn off the air conditioner. Open all the
windows, move the heater or air conditioner
temperature control to maximum hot and fan
control to high speed.
PUSH STARTING IF YOUR VEHICLE OVERHEATS
6-10In case of emergency
ZREVIEW COPYÐ2007 Armada(wzw)
Owners ManualÐUSA_English(nna)
07/08/06Ðtbrooks
X
Page 259 of 344
REMOVING SPOTS
Remove tar and oil spots, industrial dust, insects,
and tree sap as quickly as possible from the
surface of the paint to avoid lasting damage or
staining. Special cleaning products are available
at a NISSAN dealer or any automotive accessory
store.
UNDERBODY
In areas where road salt is used in winter, it is
necessary to clean the underbody regularly in
order to prevent dirt and salt from building up and
causing the acceleration of corrosion on the un-
derbody and suspension. Before the winter pe-
riod and again in the spring, the underseal must
be checked and, if necessary, retreated.
GLASS
Use glass cleaner to remove smoke and dust film
from the glass surfaces. It is normal for glass to
become coated with a film after the vehicle is
parked in the hot sun. Glass cleaner and a soft
cloth will easily remove this film.
CAUTION
When cleaning the inside of the windows,
do not use sharp-edged tools, abrasive
cleaners or chlorine-based disinfectant
cleaners. They could damage the electri-
cal conductors, radio antenna elements or
rear window defroster elements.
ALUMINUM ALLOY WHEELS
Wash the wheels regularly with a sponge damp-
ened in a mild soap solution, especially during
winter months in areas where road salt is used. If
not removed, road salt can discolor the wheels.
CAUTION
Follow the directions below to avoid
staining or discoloring the wheels:
cDo not use a cleaner that uses strong
acid or alkali contents to clean the
wheels.
cDo not apply wheel cleaners to the
wheels when they are hot. The wheel
temperature should be the same as am-
bient temperature.
cRinse the wheel to completely remove
the cleaner within 15 minutes after the
cleaner is applied.
CHROME PARTS
Clean all chrome parts regularly with a non-
abrasive chrome polish to maintain the finish.
TIRE DRESSINGS
NISSAN does not recommend the use of tire
dressings. Tire manufacturers apply a coating to
the tires to help reduce discoloration of the rub-
ber. If a tire dressing is applied to the tires, it may
react with the coating and form a compound. This
compound may come off the tire while driving and
stain the vehicle paint.
If you choose to use a tire dressing, take the
following precautions:
cUse a water-based tire dressing. The coat-
ing on the tire dissolves more easily with an
oil-based tire dressing.
cApply a light coat of tire dressing to help
prevent it from entering the tire
tread/grooves (where it would be difficult to
remove) .
cWipe off excess tire dressing using a dry
towel. Make sure the tire dressing is com-
pletely removed from the tire tread/grooves.
cAllow the tire dressing to dry as recom-
mended by tire dressing manufacturer.
Appearance and care7-3
ZREVIEW COPYÐ2007 Armada(wzw)
Owners ManualÐUSA_English(nna)
07/08/06Ðtbrooks
X
Page 266 of 344

Windshield defrosterCheck that the air
comes out of the defroster outlets properly and in
sufficient quantity when operating the heater or
air conditioner.
Under the hood and vehicle
The maintenance items listed here should be
checked periodically (for example, each time you
check the engine oil or refuel) .
Battery*Check the fluid level in each cell. It
should be between the MAX and MIN lines. Ve-
hicles operated in high temperatures or under
severe conditions require frequent checks of the
battery fluid level.
Brake fluid levels*Make sure that the brake
fluid level is between the MIN and MAX lines on
the reservoir.
Engine coolant level*Check the coolant level
when the engine is cold.
Engine drive belts*Make sure the drive belts
are not frayed, worn, cracked or oily.
Engine oil level*Check the level after parking
the vehicle on a level surface with the engine off.
Wait more than 10 minutes for the oil to drain
back into the oil pan.
Exhaust systemMake sure there are no loose
supports, cracks or holes. If the sound of the
exhaust seems unusual or there is a smell ofexhaust fumes, immediately have the exhaust
system inspected by a NISSAN dealer. See the
carbon monoxide warning in the “Starting and
driving” section of this manual.
Fluid leaksCheck under the vehicle for fuel, oil,
water or other fluid leaks after the vehicle has
been parked for a while. Water dripping from the
air conditioner after use is normal. If you should
notice any leaks or if gasoline fumes are evident,
check for the cause and have it corrected imme-
diately.
Power steering fluid level* and linesCheck
the level when the fluid is cold, with the engine
off. Check the lines for proper attachment, leaks,
cracks, etc.
Radiator and hosesCheck the front of the
radiator and clean off any dirt, insects, leaves,
etc., that may have accumulated. Make sure the
hoses have no cracks, deformation, rot or loose
connections.
UnderbodyThe underbody is frequently ex-
posed to corrosive substances such as those
used on icy roads or to control dust. It is very
important to remove these substances from the
underbody, otherwise rust may form on the floor
pan, frame, fuel lines and exhaust system. At the
end of winter, the underbody should be thor-
oughly flushed with plain water, in those areaswhere mud and dirt may have accumulated. See
the “Appearance and care” section of this
manual.
Windshield washer fluid*Check that there is
adequate fluid in the reservoir.
8-4Maintenance and do-it-yourself
ZREVIEW COPYÐ2007 Armada(wzw)
Owners ManualÐUSA_English(nna)
07/08/06Ðtbrooks
X
Page 270 of 344
If the cooling system frequently requires
coolant, have it checked by a NISSAN
dealer.
CHANGING ENGINE COOLANT
A NISSAN dealer can change the engine coolant.
The service procedure can be found in the
NISSAN Service Manual.
Improper servicing can result in reduced
heater performance and engine overheat-
ing.
WARNING
cTo avoid the danger of being scalded,
never change the coolant when the en-
gine is hot.
cNever remove the radiator or engine
coolant reservoir cap when the engine
is hot. Serious burns could be caused
by high pressure fluid escaping from
the radiator.
cAvoid direct skin contact with used
coolant. If skin contact is made, wash
thoroughly with soap or hand cleaner
as soon as possible.
cKeep coolant out of the reach of chil-
dren and pets.Engine coolant must be disposed of properly.
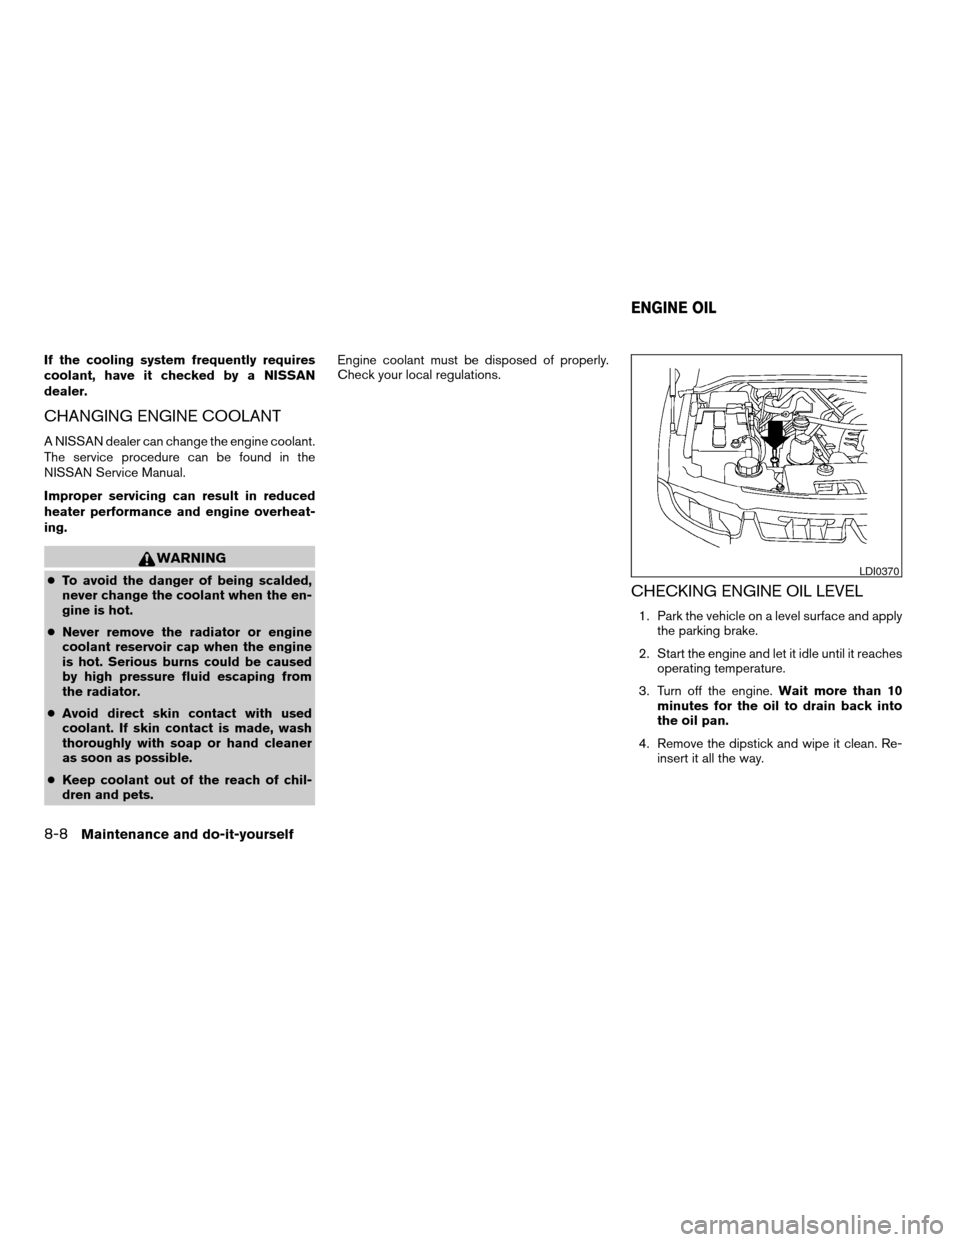
Check your local regulations.CHECKING ENGINE OIL LEVEL
1. Park the vehicle on a level surface and apply
the parking brake.
2. Start the engine and let it idle until it reaches
operating temperature.
3. Turn off the engine.Wait more than 10
minutes for the oil to drain back into
the oil pan.
4. Remove the dipstick and wipe it clean. Re-
insert it all the way.
LDI0370
ENGINE OIL
8-8Maintenance and do-it-yourself
ZREVIEW COPYÐ2007 Armada(wzw)
Owners ManualÐUSA_English(nna)
07/08/06Ðtbrooks
X
Page 271 of 344
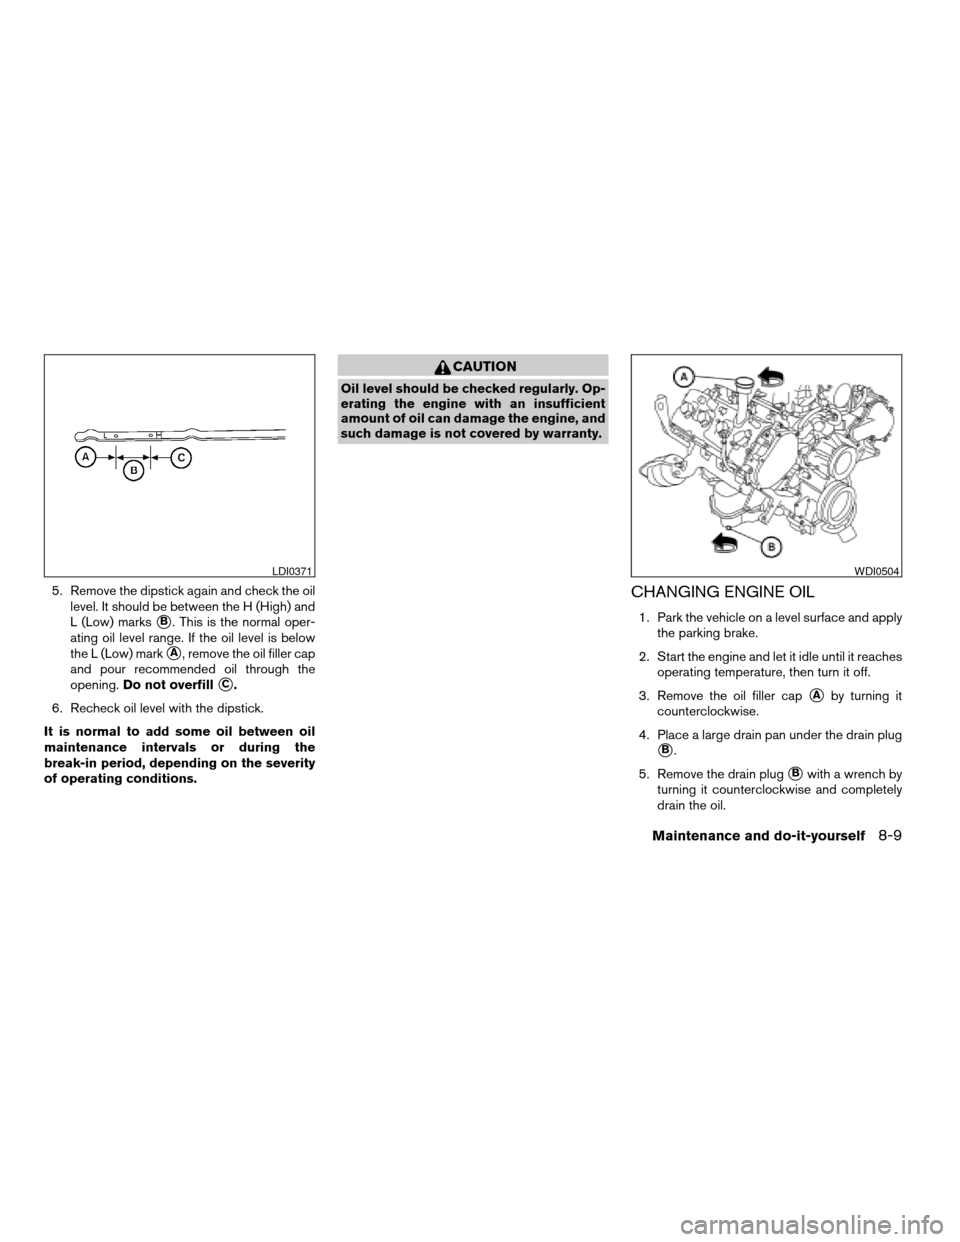
5. Remove the dipstick again and check the oil
level. It should be between the H (High) and
L (Low) marks
sB. This is the normal oper-
ating oil level range. If the oil level is below
the L (Low) mark
sA, remove the oil filler cap
and pour recommended oil through the
opening.Do not overfill
sC.
6. Recheck oil level with the dipstick.
It is normal to add some oil between oil
maintenance intervals or during the
break-in period, depending on the severity
of operating conditions.
CAUTION
Oil level should be checked regularly. Op-
erating the engine with an insufficient
amount of oil can damage the engine, and
such damage is not covered by warranty.
CHANGING ENGINE OIL
1. Park the vehicle on a level surface and apply
the parking brake.
2. Start the engine and let it idle until it reaches
operating temperature, then turn it off.
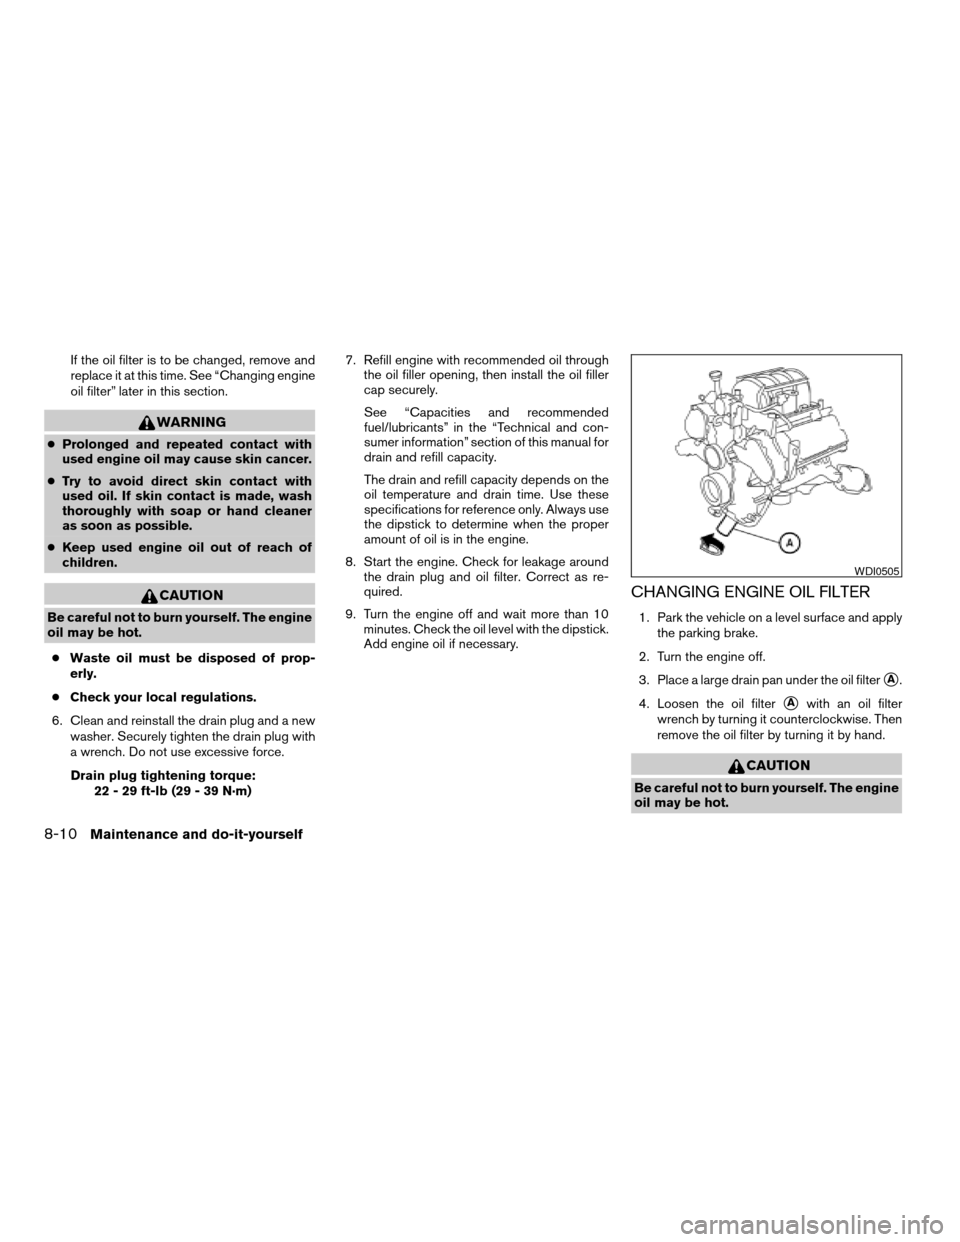
3. Remove the oil filler cap
sAby turning it
counterclockwise.
4. Place a large drain pan under the drain plug
sB.
5. Remove the drain plug
sBwith a wrench by
turning it counterclockwise and completely
drain the oil.
LDI0371WDI0504
Maintenance and do-it-yourself8-9
ZREVIEW COPYÐ2007 Armada(wzw)
Owners ManualÐUSA_English(nna)
07/08/06Ðtbrooks
X
Page 272 of 344
If the oil filter is to be changed, remove and
replace it at this time. See “Changing engine
oil filter” later in this section.
WARNING
cProlonged and repeated contact with
used engine oil may cause skin cancer.
cTry to avoid direct skin contact with
used oil. If skin contact is made, wash
thoroughly with soap or hand cleaner
as soon as possible.
cKeep used engine oil out of reach of
children.
CAUTION
Be careful not to burn yourself. The engine
oil may be hot.
cWaste oil must be disposed of prop-
erly.
cCheck your local regulations.
6. Clean and reinstall the drain plug and a new
washer. Securely tighten the drain plug with
a wrench. Do not use excessive force.
Drain plug tightening torque:
22 - 29 ft-lb (29 - 39 N·m)7. Refill engine with recommended oil through
the oil filler opening, then install the oil filler
cap securely.
See “Capacities and recommended
fuel/lubricants” in the “Technical and con-
sumer information” section of this manual for
drain and refill capacity.
The drain and refill capacity depends on the
oil temperature and drain time. Use these
specifications for reference only. Always use
the dipstick to determine when the proper
amount of oil is in the engine.
8. Start the engine. Check for leakage around
the drain plug and oil filter. Correct as re-
quired.
9. Turn the engine off and wait more than 10
minutes. Check the oil level with the dipstick.
Add engine oil if necessary.
CHANGING ENGINE OIL FILTER
1. Park the vehicle on a level surface and apply
the parking brake.
2. Turn the engine off.
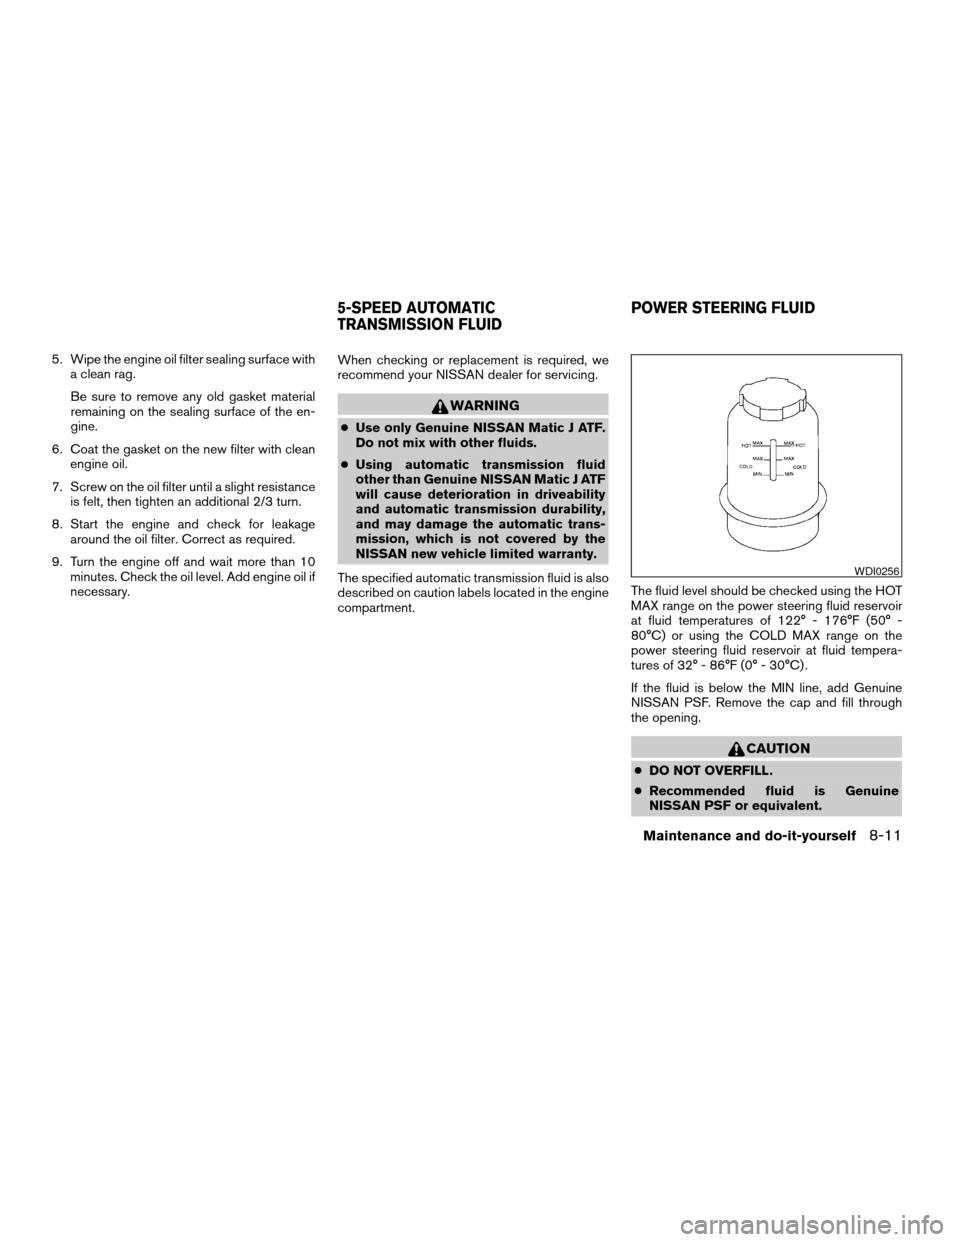
3. Place a large drain pan under the oil filter
sA.
4. Loosen the oil filter
sAwith an oil filter
wrench by turning it counterclockwise. Then
remove the oil filter by turning it by hand.
CAUTION
Be careful not to burn yourself. The engine
oil may be hot.
WDI0505
8-10Maintenance and do-it-yourself
ZREVIEW COPYÐ2007 Armada(wzw)
Owners ManualÐUSA_English(nna)
07/08/06Ðtbrooks
X
Page 273 of 344
5. Wipe the engine oil filter sealing surface with
a clean rag.
Be sure to remove any old gasket material
remaining on the sealing surface of the en-
gine.
6. Coat the gasket on the new filter with clean
engine oil.
7. Screw on the oil filter until a slight resistance
is felt, then tighten an additional 2/3 turn.
8. Start the engine and check for leakage
around the oil filter. Correct as required.
9. Turn the engine off and wait more than 10
minutes. Check the oil level. Add engine oil if
necessary.When checking or replacement is required, we
recommend your NISSAN dealer for servicing.
WARNING
cUse only Genuine NISSAN Matic J ATF.
Do not mix with other fluids.
cUsing automatic transmission fluid
other than Genuine NISSAN Matic J ATF
will cause deterioration in driveability
and automatic transmission durability,
and may damage the automatic trans-
mission, which is not covered by the
NISSAN new vehicle limited warranty.
The specified automatic transmission fluid is also
described on caution labels located in the engine
compartment.The fluid level should be checked using the HOT
MAX range on the power steering fluid reservoir
at fluid temperatures of 122° - 176°F (50° -
80°C) or using the COLD MAX range on the
power steering fluid reservoir at fluid tempera-
tures of 32° - 86°F (0° - 30°C) .
If the fluid is below the MIN line, add Genuine
NISSAN PSF. Remove the cap and fill through
the opening.
CAUTION
cDO NOT OVERFILL.
cRecommended fluid is Genuine
NISSAN PSF or equivalent.
WDI0256
5-SPEED AUTOMATIC
TRANSMISSION FLUIDPOWER STEERING FLUID
Maintenance and do-it-yourself8-11
ZREVIEW COPYÐ2007 Armada(wzw)
Owners ManualÐUSA_English(nna)
07/08/06Ðtbrooks
X