2007 NISSAN ALTIMA audio
[x] Cancel search: audioPage 5 of 344

Table of
ContentsIllustrated table of contents
Safety—Seats, seat belts and supplemental restraint system
Instruments and controls
Pre-driving checks and adjustments
Monitor, climate, audio, phone and voice recognition systems
Starting and driving
In case of emergency
Appearance and care
Maintenance and do-it-yourself
Technical and consumer information
Index
0
1
2
3
4
5
6
7
8
9
10
Page 12 of 344

1. Driver, center and passenger ventila-
tors (P. 4-9)
2. Headlight/fog light (if so equipped)/turn
signal switch (P. 2-26)
3. Steering wheel switch for audio control
(if so equipped) (P. 4-43)4. Meters and gauges (P. 2-3)
5. Driver supplemental air bag/horn
(P. 1-35, 2-32)
6. Cruise control main/set switch
(if so equipped) (P. 5-17)7. Windshield wiper/washer switch
(P. 2-25)
8. Push Button Ignition (P. 0-0)
9. Hazard warning flasher switch (P. 2-31)
10. Front passenger air bag status light
(P. 1-44)
11. Front passenger supplemental air bag
(P. 1-35)
12. Glove box (P. 2-38)
13. Navigation system* (if so equipped)
(P. 4-2)
14. Heater and air conditioner
(manual or automatic) (if so equipped)
(P. 4-10, P. 4-18)
15. Shift selector lever (P. 5-10)
16. Audio system controls (if so equipped)
(P. 4-20)
17. Tilt/telescopic steering wheel controls
(P. 3-21)
18. Vehicle Information display controls
(P. 2-15)
19. Intelligent Key port (P. 3-6)
20. Trunk opener (P. 3-17)
*: Refer to the separate Navigation System Own-
er’s Manual.
See the page number indicated in paren-
theses for operating details.
LIC1055
INSTRUMENT PANEL
0-6Illustrated table of contents
ZREVIEW COPYÐ2007 Altima(alt)
Owners ManualÐUSA_English(nna)
10/26/06Ðdebbie
X
Page 70 of 344

1. Driver, center and passenger ventila-
tors (P. 4-9)
2. Headlight/fog light (if so equipped)/turn
signal switch (P. 2-26)
3. Steering wheel switch for audio control
(if so equipped) (P. 4-43)4. Meters and gauges (P. 2-3)
5. Driver supplemental air bag/horn
(P. 1-35, 2-32)
6. Cruise control main/set switch
(if so equipped) (P. 5-17)7. Windshield wiper/washer switch
(P. 2-25)
8. Push Button Ignition (P. 0-0)
9. Hazard warning flasher switch (P. 2-31)
10. Front passenger air bag status light
(P. 1-44)
11. Front passenger supplemental air bag
(P. 1-35)
12. Glove box (P. 2-38)
13. Navigation system* (if so equipped)
(P. 4-2)
14. Heater and air conditioner
(manual or automatic) (if so equipped)
(P. 4-10, P. 4-18)
15. Shift selector lever (P. 5-10)
16. Audio system controls (if so equipped)
(P. 4-20)
17. Tilt/telescopic steering wheel controls
(P. 3-21)
18. Vehicle Information display controls
(P. 2-15)
19. Intelligent Key port (P. 3-6)
20. Trunk opener (P. 3-17)
*: Refer to the separate Navigation System Own-
er’s Manual.
See the page number indicated in paren-
theses for operating details.
LIC1055
INSTRUMENT PANEL
2-2Instruments and controls
ZREVIEW COPYÐ2007 Altima(alt)
Owners ManualÐUSA_English(nna)
10/26/06Ðdebbie
X
Page 72 of 344

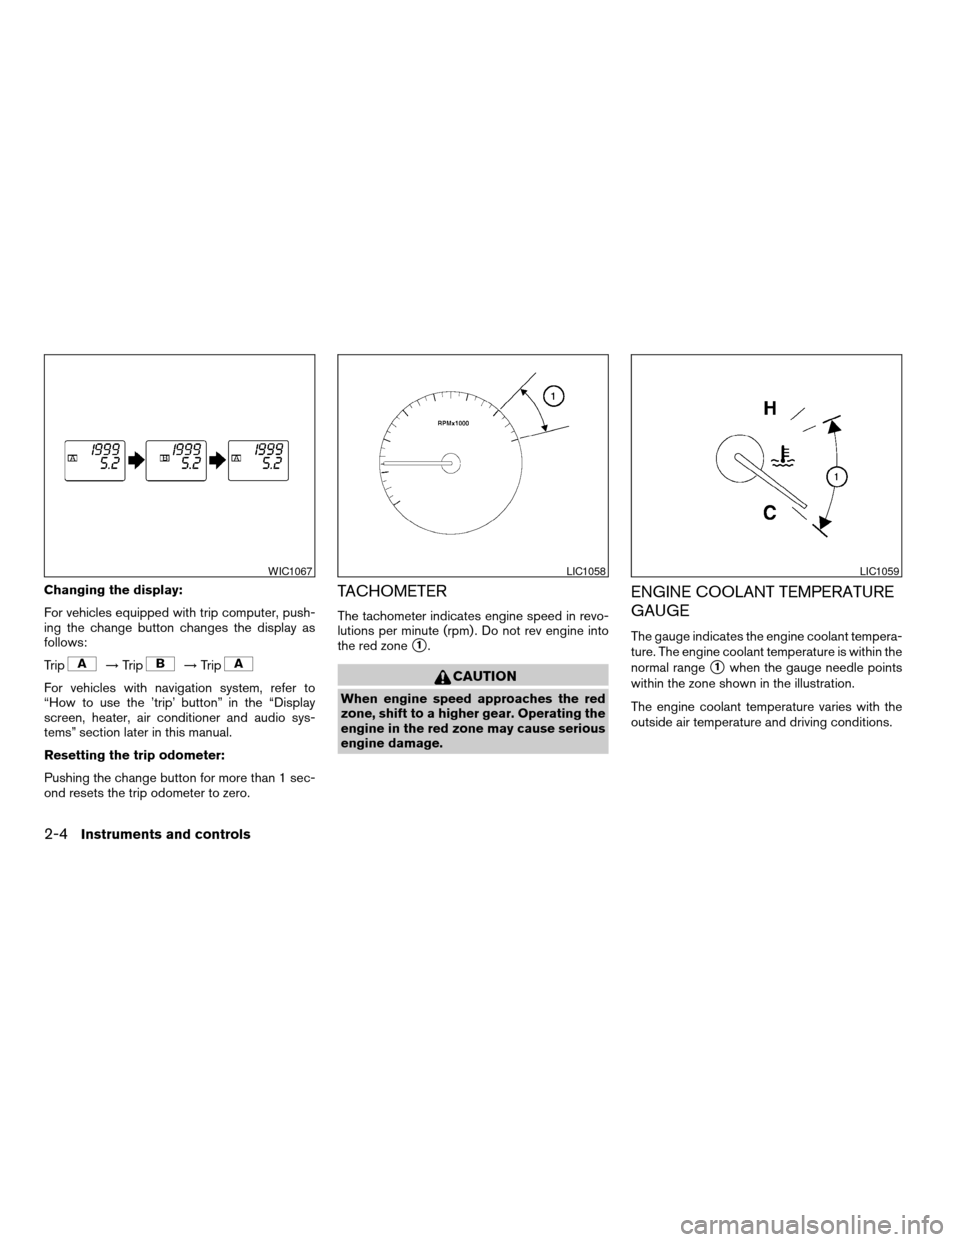
Changing the display:
For vehicles equipped with trip computer, push-
ing the change button changes the display as
follows:
Trip
!Trip!Trip
For vehicles with navigation system, refer to
“How to use the ’trip’ button” in the “Display
screen, heater, air conditioner and audio sys-
tems” section later in this manual.
Resetting the trip odometer:
Pushing the change button for more than 1 sec-
ond resets the trip odometer to zero.
TACHOMETER
The tachometer indicates engine speed in revo-
lutions per minute (rpm) . Do not rev engine into
the red zone
s1.
CAUTION
When engine speed approaches the red
zone, shift to a higher gear. Operating the
engine in the red zone may cause serious
engine damage.
ENGINE COOLANT TEMPERATURE
GAUGE
The gauge indicates the engine coolant tempera-
ture. The engine coolant temperature is within the
normal range
s1when the gauge needle points
within the zone shown in the illustration.
The engine coolant temperature varies with the
outside air temperature and driving conditions.
WIC1067LIC1058LIC1059
2-4Instruments and controls
ZREVIEW COPYÐ2007 Altima(alt)
Owners ManualÐUSA_English(nna)
10/26/06Ðdebbie
X
Page 91 of 344

Your vehicle may have two types of security sys-
tems:
cVehicle security system
cNISSAN Vehicle Immobilizer System
VEHICLE SECURITY SYSTEM (if so
equipped)
The vehicle security system provides visual and
audible alarm signals if someone opens the doors
or trunk lid when the system is armed. It is not,
however, a motion detection type system that
activates when a vehicle is moved or when a
vibration occurs.The system helps deter vehicle theft but cannot
prevent it, nor can it prevent the theft of interior or
exterior vehicle components in all situations. Al-
ways secure your vehicle even if parking for a
brief period. Never leave your keys in the ignition,
and always lock the vehicle when unattended. Be
aware of your surroundings, and park in secure,
well-lit areas whenever possible.
Many devices offering additional protection, such
as component locks, identification markers, and
tracking systems, are available at auto supply
stores and specialty shops. Your NISSAN dealer
may also offer such equipment. Check with your
insurance company to see if you may be eligible
for discounts for various theft protection features.
How to arm the vehicle security
system
1. Close all windows.(The system can be
armed even if the windows are open.)
2. Remove the intelligent key from the vehicle.
3. Close all doors, hood and trunk. Lock all
doors. The doors can be locked with the
intelligent key, door handle request switch,
power door lock switch or mechanical key.
For vehicles with navigation system, see
9Vehicle electronic systems9in the9Display
screen, heater, air conditioner and audiosystems9section later in this manual. For
vehicles without navigation system, see9Si-
lencing the horn beep feature9in the9Pre-
driving checks and adjustments9section
later in this manual.
4. Confirm that the security indicator light
comes on. The security light stays on for
about 30 seconds. The vehicle security sys-
tem is now pre-armed. After about 30 sec-
onds the vehicle security system automati-
cally shifts into the armed phase. The
security light begins to flash once every 3
seconds. If, during the 30-second pre-arm
time period, the driver’s door is unlocked by
the key or the keyfob, or the ignition switch is
pushed to ACC or ON, the system will not
arm.
cEven when the driver and/or passen-
gers are in the vehicle, the system will
activate with all the doors, hood and
trunk lid locked with the ignition
switch in the LOCK position. When
pushing the ignition switch to the ACC
or ON position, the system will be re-
leased.
LIC0301
SECURITY SYSTEMS
Instruments and controls2-23
ZREVIEW COPYÐ2007 Altima(alt)
Owners ManualÐUSA_English(nna)
10/26/06Ðdebbie
X
Page 94 of 344

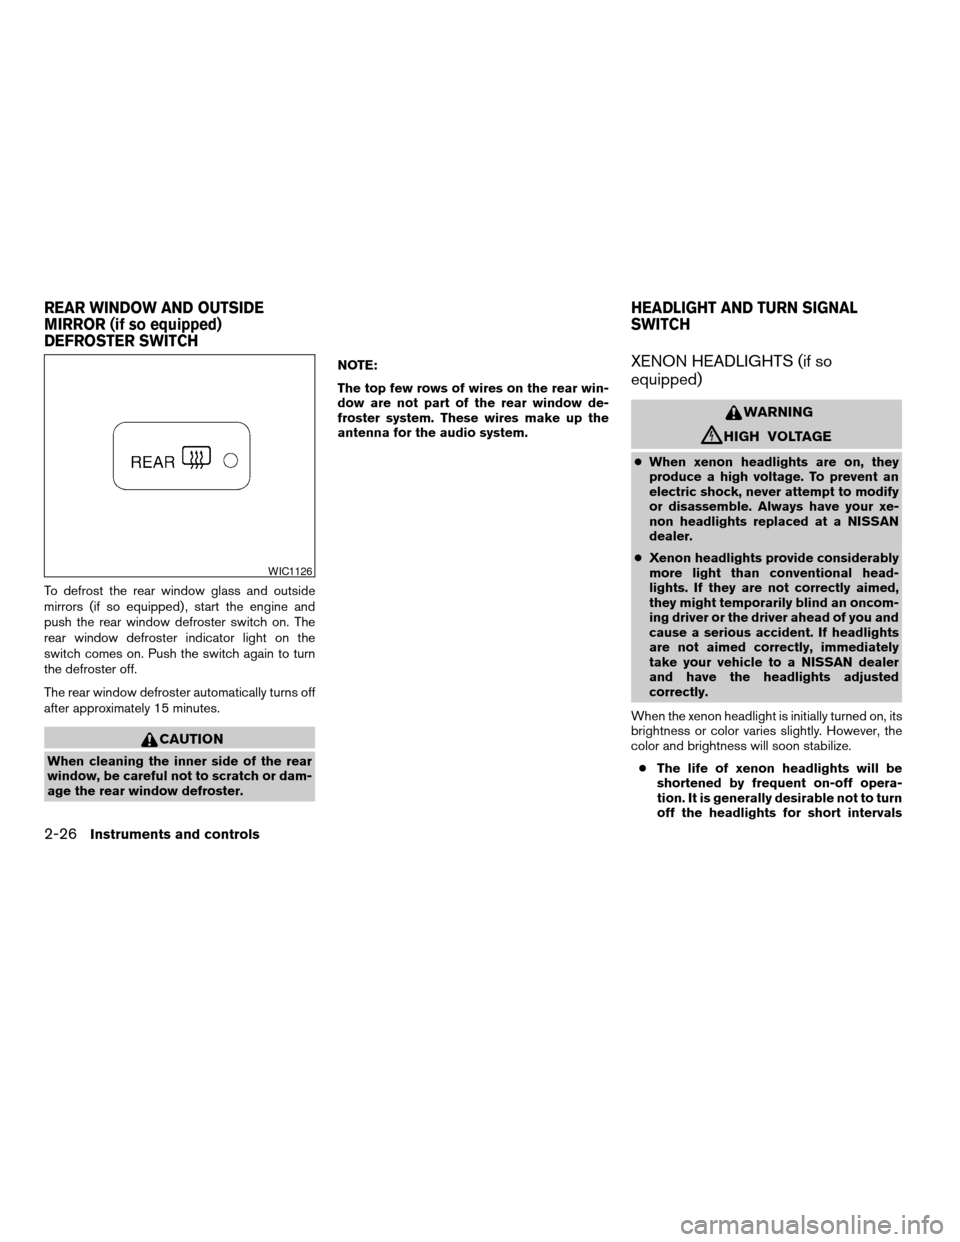
To defrost the rear window glass and outside
mirrors (if so equipped) , start the engine and
push the rear window defroster switch on. The
rear window defroster indicator light on the
switch comes on. Push the switch again to turn
the defroster off.
The rear window defroster automatically turns off
after approximately 15 minutes.
CAUTION
When cleaning the inner side of the rear
window, be careful not to scratch or dam-
age the rear window defroster.NOTE:
The top few rows of wires on the rear win-
dow are not part of the rear window de-
froster system. These wires make up the
antenna for the audio system.
XENON HEADLIGHTS (if so
equipped)
WARNING
cHIGH VOLTAGE
cWhen xenon headlights are on, they
produce a high voltage. To prevent an
electric shock, never attempt to modify
or disassemble. Always have your xe-
non headlights replaced at a NISSAN
dealer.
cXenon headlights provide considerably
more light than conventional head-
lights. If they are not correctly aimed,
they might temporarily blind an oncom-
ing driver or the driver ahead of you and
cause a serious accident. If headlights
are not aimed correctly, immediately
take your vehicle to a NISSAN dealer
and have the headlights adjusted
correctly.
When the xenon headlight is initially turned on, its
brightness or color varies slightly. However, the
color and brightness will soon stabilize.
cThe life of xenon headlights will be
shortened by frequent on-off opera-
tion. It is generally desirable not to turn
off the headlights for short intervals
WIC1126
REAR WINDOW AND OUTSIDE
MIRROR (if so equipped)
DEFROSTER SWITCHHEADLIGHT AND TURN SIGNAL
SWITCH
2-26Instruments and controls
ZREVIEW COPYÐ2007 Altima(alt)
Owners ManualÐUSA_English(nna)
10/26/06Ðdebbie
X
Page 96 of 344

Autolight system (if so equipped)
The autolight system allows the headlights to be
set so they turn on and off automatically. The
autolight system can:
cTurn on the headlights, front parking, tail,
license plate and instrument panel lights au-
tomatically when it is dark.
cTurn off all the lights when it is light.
cKeep all the lights on for 45 seconds after
you turn the key to OFF and all doors are
closed.NOTE:
Autolight activation sensitivity and the
time delay for autolight shutoff is adjust-
able for vehicles with navigation system.
See “Vehicle electronic systems” in the
“Display screen, heater, air conditioner and
audio systems” section later in this manual.
To turn on the autolight system:
1. Turn the headlight switch to the AUTO posi-
tion
s1.
2. Turn the ignition key to ON.
3. The autolight system automatically turns the
headlights on and off.
Initially, if the ignition switch is turned OFF and a
door is opened and left open, the headlights
remain ON for 5 minutes. If another door is
opened during the 5 minutes, then the 5 minute
timer is reset.
To turn the autolight system off, turn the switch to
the OFF,
,orposition.
Type C
LIC1063LIC1086
2-28Instruments and controls
ZREVIEW COPYÐ2007 Altima(alt)
Owners ManualÐUSA_English(nna)
10/26/06Ðdebbie
X
Page 120 of 344

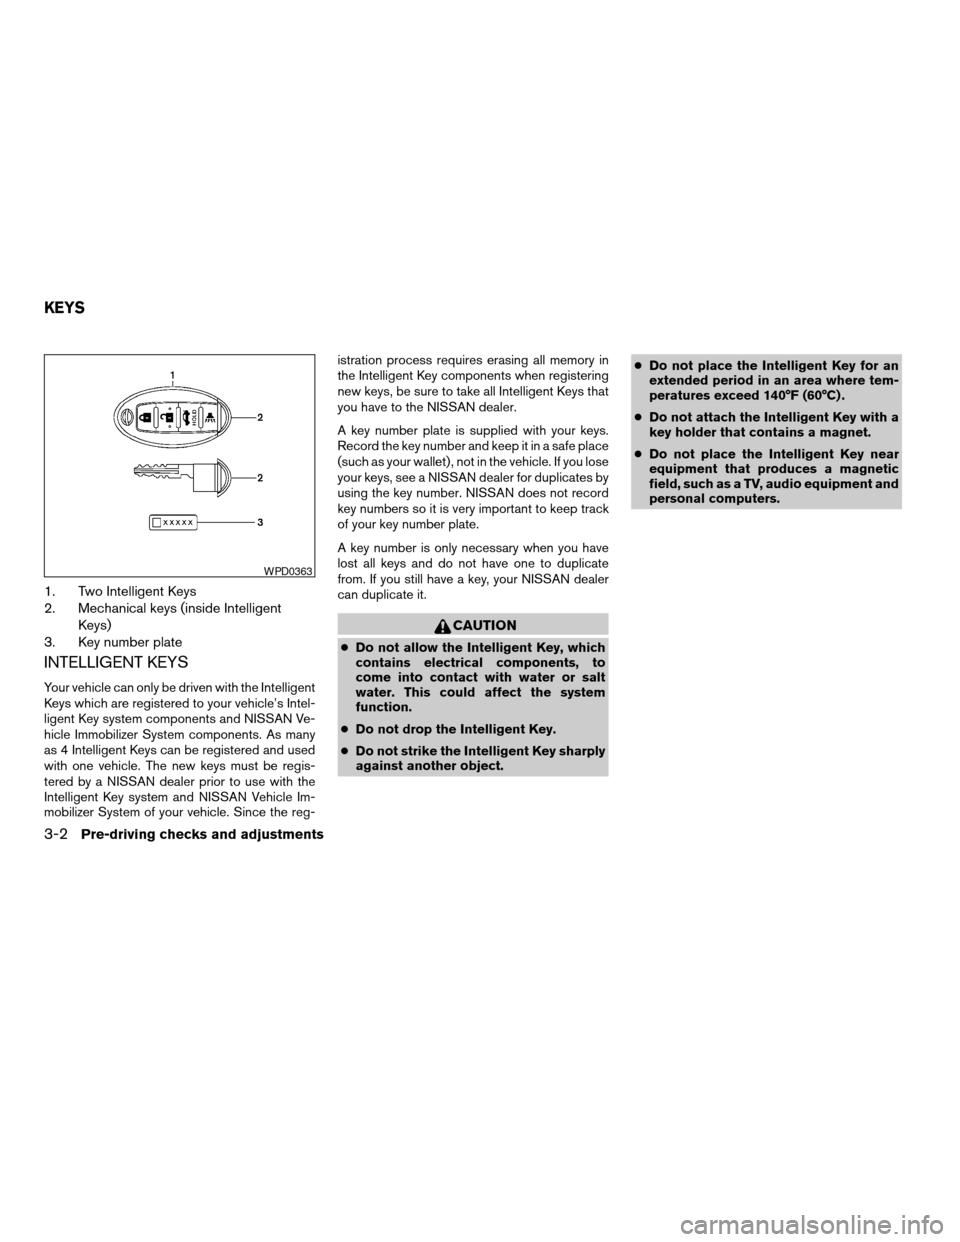
1. Two Intelligent Keys
2. Mechanical keys (inside Intelligent
Keys)
3. Key number plate
INTELLIGENT KEYS
Your vehicle can only be driven with the Intelligent
Keys which are registered to your vehicle’s Intel-
ligent Key system components and NISSAN Ve-
hicle Immobilizer System components. As many
as 4 Intelligent Keys can be registered and used
with one vehicle. The new keys must be regis-
tered by a NISSAN dealer prior to use with the
Intelligent Key system and NISSAN Vehicle Im-
mobilizer System of your vehicle. Since the reg-istration process requires erasing all memory in
the Intelligent Key components when registering
new keys, be sure to take all Intelligent Keys that
you have to the NISSAN dealer.
A key number plate is supplied with your keys.
Record the key number and keep it in a safe place
(such as your wallet) , not in the vehicle. If you lose
your keys, see a NISSAN dealer for duplicates by
using the key number. NISSAN does not record
key numbers so it is very important to keep track
of your key number plate.
A key number is only necessary when you have
lost all keys and do not have one to duplicate
from. If you still have a key, your NISSAN dealer
can duplicate it.
CAUTION
cDo not allow the Intelligent Key, which
contains electrical components, to
come into contact with water or salt
water. This could affect the system
function.
cDo not drop the Intelligent Key.
cDo not strike the Intelligent Key sharply
against another object.cDo not place the Intelligent Key for an
extended period in an area where tem-
peratures exceed 140°F (60°C) .
cDo not attach the Intelligent Key with a
key holder that contains a magnet.
cDo not place the Intelligent Key near
equipment that produces a magnetic
field, such as a TV, audio equipment and
personal computers.
WPD0363
KEYS
3-2Pre-driving checks and adjustments
ZREVIEW COPYÐ2007 Altima(alt)
Owners ManualÐUSA_English(nna)
10/26/06Ðdebbie
X