2007 NISSAN ALTIMA air condition
[x] Cancel search: air conditionPage 70 of 344

1. Driver, center and passenger ventila-
tors (P. 4-9)
2. Headlight/fog light (if so equipped)/turn
signal switch (P. 2-26)
3. Steering wheel switch for audio control
(if so equipped) (P. 4-43)4. Meters and gauges (P. 2-3)
5. Driver supplemental air bag/horn
(P. 1-35, 2-32)
6. Cruise control main/set switch
(if so equipped) (P. 5-17)7. Windshield wiper/washer switch
(P. 2-25)
8. Push Button Ignition (P. 0-0)
9. Hazard warning flasher switch (P. 2-31)
10. Front passenger air bag status light
(P. 1-44)
11. Front passenger supplemental air bag
(P. 1-35)
12. Glove box (P. 2-38)
13. Navigation system* (if so equipped)
(P. 4-2)
14. Heater and air conditioner
(manual or automatic) (if so equipped)
(P. 4-10, P. 4-18)
15. Shift selector lever (P. 5-10)
16. Audio system controls (if so equipped)
(P. 4-20)
17. Tilt/telescopic steering wheel controls
(P. 3-21)
18. Vehicle Information display controls
(P. 2-15)
19. Intelligent Key port (P. 3-6)
20. Trunk opener (P. 3-17)
*: Refer to the separate Navigation System Own-
er’s Manual.
See the page number indicated in paren-
theses for operating details.
LIC1055
INSTRUMENT PANEL
2-2Instruments and controls
ZREVIEW COPYÐ2007 Altima(alt)
Owners ManualÐUSA_English(nna)
10/26/06Ðdebbie
X
Page 72 of 344

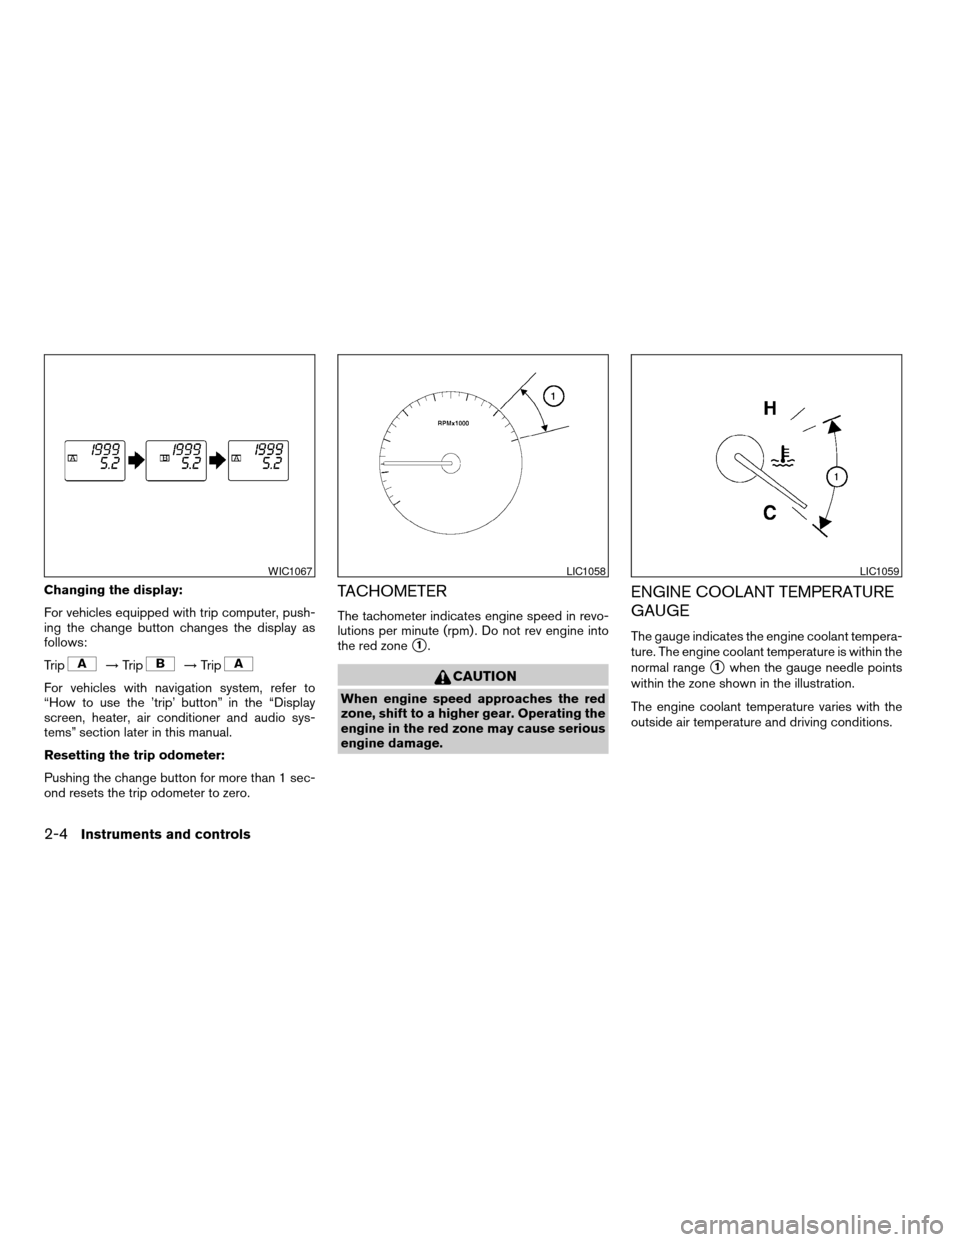
Changing the display:
For vehicles equipped with trip computer, push-
ing the change button changes the display as
follows:
Trip
!Trip!Trip
For vehicles with navigation system, refer to
“How to use the ’trip’ button” in the “Display
screen, heater, air conditioner and audio sys-
tems” section later in this manual.
Resetting the trip odometer:
Pushing the change button for more than 1 sec-
ond resets the trip odometer to zero.
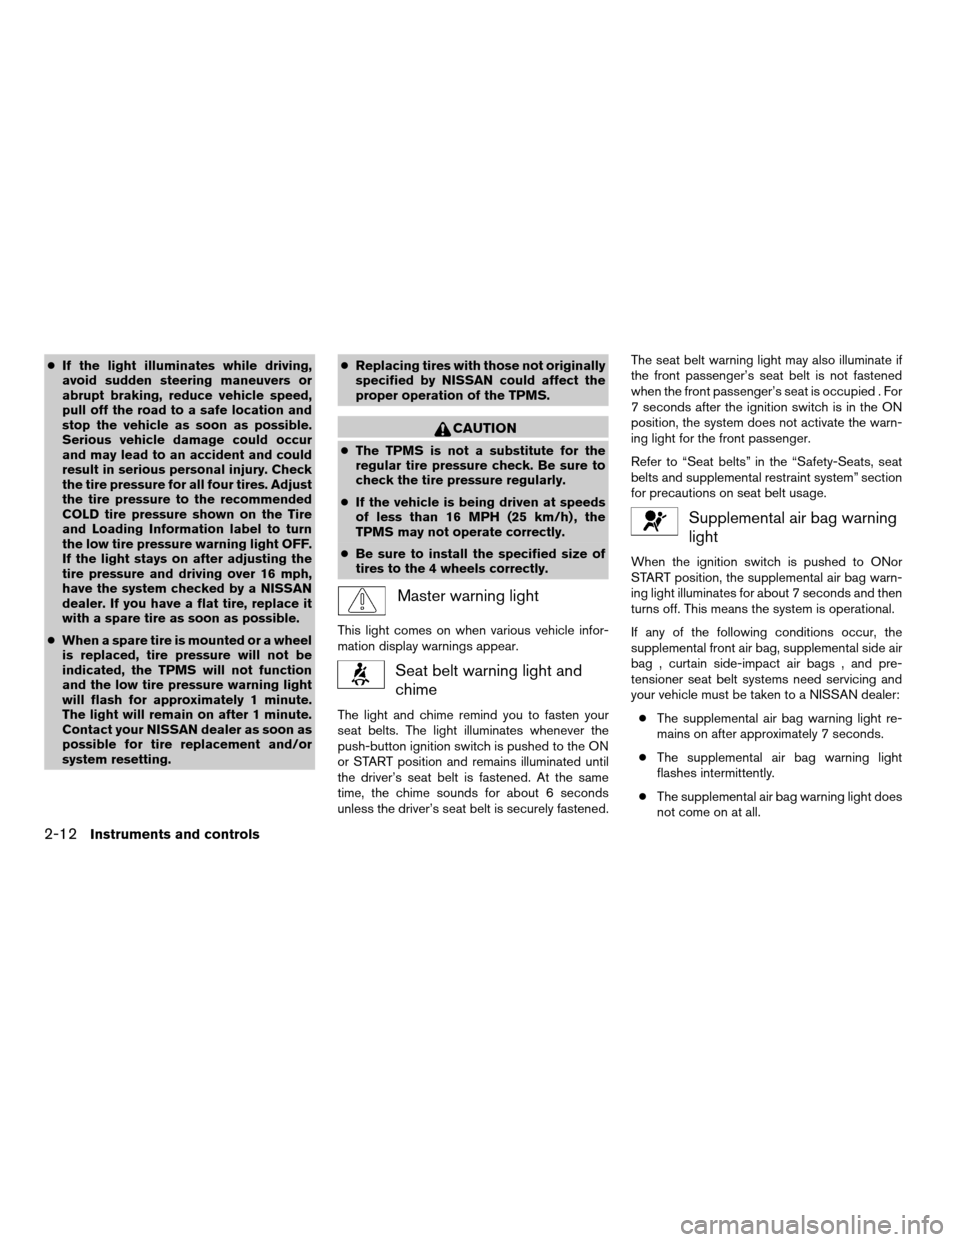
TACHOMETER
The tachometer indicates engine speed in revo-
lutions per minute (rpm) . Do not rev engine into
the red zone
s1.
CAUTION
When engine speed approaches the red
zone, shift to a higher gear. Operating the
engine in the red zone may cause serious
engine damage.
ENGINE COOLANT TEMPERATURE
GAUGE
The gauge indicates the engine coolant tempera-
ture. The engine coolant temperature is within the
normal range
s1when the gauge needle points
within the zone shown in the illustration.
The engine coolant temperature varies with the
outside air temperature and driving conditions.
WIC1067LIC1058LIC1059
2-4Instruments and controls
ZREVIEW COPYÐ2007 Altima(alt)
Owners ManualÐUSA_English(nna)
10/26/06Ðdebbie
X
Page 80 of 344

cIf the light illuminates while driving,
avoid sudden steering maneuvers or
abrupt braking, reduce vehicle speed,
pull off the road to a safe location and
stop the vehicle as soon as possible.
Serious vehicle damage could occur
and may lead to an accident and could
result in serious personal injury. Check
the tire pressure for all four tires. Adjust
the tire pressure to the recommended
COLD tire pressure shown on the Tire
and Loading Information label to turn
the low tire pressure warning light OFF.
If the light stays on after adjusting the
tire pressure and driving over 16 mph,
have the system checked by a NISSAN
dealer. If you have a flat tire, replace it
with a spare tire as soon as possible.
cWhen a spare tire is mounted or a wheel
is replaced, tire pressure will not be
indicated, the TPMS will not function
and the low tire pressure warning light
will flash for approximately 1 minute.
The light will remain on after 1 minute.
Contact your NISSAN dealer as soon as
possible for tire replacement and/or
system resetting.cReplacing tires with those not originally
specified by NISSAN could affect the
proper operation of the TPMS.
CAUTION
cThe TPMS is not a substitute for the
regular tire pressure check. Be sure to
check the tire pressure regularly.
cIf the vehicle is being driven at speeds
of less than 16 MPH (25 km/h) , the
TPMS may not operate correctly.
cBe sure to install the specified size of
tires to the 4 wheels correctly.
Master warning light
This light comes on when various vehicle infor-
mation display warnings appear.
Seat belt warning light and
chime
The light and chime remind you to fasten your
seat belts. The light illuminates whenever the
push-button ignition switch is pushed to the ON
or START position and remains illuminated until
the driver’s seat belt is fastened. At the same
time, the chime sounds for about 6 seconds
unless the driver’s seat belt is securely fastened.The seat belt warning light may also illuminate if
the front passenger’s seat belt is not fastened
when the front passenger’s seat is occupied . For
7 seconds after the ignition switch is in the ON
position, the system does not activate the warn-
ing light for the front passenger.
Refer to “Seat belts” in the “Safety-Seats, seat
belts and supplemental restraint system” section
for precautions on seat belt usage.
Supplemental air bag warning
light
When the ignition switch is pushed to ONor
START position, the supplemental air bag warn-
ing light illuminates for about 7 seconds and then
turns off. This means the system is operational.
If any of the following conditions occur, the
supplemental front air bag, supplemental side air
bag , curtain side-impact air bags , and pre-
tensioner seat belt systems need servicing and
your vehicle must be taken to a NISSAN dealer:
cThe supplemental air bag warning light re-
mains on after approximately 7 seconds.
cThe supplemental air bag warning light
flashes intermittently.
cThe supplemental air bag warning light does
not come on at all.
2-12Instruments and controls
ZREVIEW COPYÐ2007 Altima(alt)
Owners ManualÐUSA_English(nna)
10/26/06Ðdebbie
X
Page 82 of 344

cMalfunction indicator light blinking — An en-
gine misfire has been detected which may
damage the emission control system. To re-
duce or avoid emission control system dam-
age:
– do not drive at speeds above 45 MPH
(72 km/h) .
– avoid hard acceleration or deceleration.
– avoid steep uphill grades.
– if possible, reduce the amount of cargo
being hauled or towed.
The malfunction indicator light may stop blinking
and come on steady. Have the vehicle inspected
by a NISSAN dealer. You do not need to have
your vehicle towed to the dealer.
CAUTION
Continued vehicle operation without hav-
ing the emission control system checked
and repaired as necessary could lead to
poor driveability, reduced fuel economy,
and possible damage to the emission con-
trol system.
Slip indicator light (if so
equipped)
This indicator light will blink when the traction
control system is limiting wheel spin. Slippery
road conditions may exist if the slip indicator
blinks on. If this happens, adjust your driving
accordingly.
The slip indicator light also comes on when you
turn the ignition key to the ON position. The light
will turn off after about 2 seconds if the system is
operational. If the light does not come on or does
not go off, have the traction control system
checked by a NISSAN dealer.
Traction control system off
indicator light (if so equipped)
This indicator light comes on when the traction
control off switch is pushed to OFF. This indi-
cates the traction control system is not operating.
Push the traction control off switch again or re-
start the engine and the system will operate nor-
mally. See “Traction control system (TCS)” in the
“Starting and driving” section of this manual.
The traction control light also comes on when you
turn the ignition key to the ON position. The light
will turn off after about 2 seconds if the traction
control system (TCS) is operational. If the light
stays on or comes on along with the SLIP indica-tor light while you are driving, have the traction
control system checked by a NISSAN dealer.
While the traction control system is operating,
you might feel slight vibration or hear the system
working when starting the vehicle or accelerat-
ing, but this is normal.
Turn signal/hazard indicator
lights
The appropriate light flashes when the turn signal
switch is activated.
Both lights flash when the hazard switch is turned
on.
Vehicle dynamic control off
indicator light (if so equipped)
This indicator light comes on when the vehicle
dynamic control off switch is pushed to OFF. This
indicates the vehicle dynamic control system is
not operating.
Push the vehicle dynamic control off switch again
or restart the engine and the system will operate
normally. See “Vehicle dynamic control (VDC)
system” in the “Starting and driving” section of
this manual.
The vehicle dynamic control light also comes on
when you push the push-button ignition switch to
the ON position. The light will turn off after about
2-14Instruments and controls
ZREVIEW COPYÐ2007 Altima(alt)
Owners ManualÐUSA_English(nna)
10/26/06Ðdebbie
X
Page 91 of 344

Your vehicle may have two types of security sys-
tems:
cVehicle security system
cNISSAN Vehicle Immobilizer System
VEHICLE SECURITY SYSTEM (if so
equipped)
The vehicle security system provides visual and
audible alarm signals if someone opens the doors
or trunk lid when the system is armed. It is not,
however, a motion detection type system that
activates when a vehicle is moved or when a
vibration occurs.The system helps deter vehicle theft but cannot
prevent it, nor can it prevent the theft of interior or
exterior vehicle components in all situations. Al-
ways secure your vehicle even if parking for a
brief period. Never leave your keys in the ignition,
and always lock the vehicle when unattended. Be
aware of your surroundings, and park in secure,
well-lit areas whenever possible.
Many devices offering additional protection, such
as component locks, identification markers, and
tracking systems, are available at auto supply
stores and specialty shops. Your NISSAN dealer
may also offer such equipment. Check with your
insurance company to see if you may be eligible
for discounts for various theft protection features.
How to arm the vehicle security
system
1. Close all windows.(The system can be
armed even if the windows are open.)
2. Remove the intelligent key from the vehicle.
3. Close all doors, hood and trunk. Lock all
doors. The doors can be locked with the
intelligent key, door handle request switch,
power door lock switch or mechanical key.
For vehicles with navigation system, see
9Vehicle electronic systems9in the9Display
screen, heater, air conditioner and audiosystems9section later in this manual. For
vehicles without navigation system, see9Si-
lencing the horn beep feature9in the9Pre-
driving checks and adjustments9section
later in this manual.
4. Confirm that the security indicator light
comes on. The security light stays on for
about 30 seconds. The vehicle security sys-
tem is now pre-armed. After about 30 sec-
onds the vehicle security system automati-
cally shifts into the armed phase. The
security light begins to flash once every 3
seconds. If, during the 30-second pre-arm
time period, the driver’s door is unlocked by
the key or the keyfob, or the ignition switch is
pushed to ACC or ON, the system will not
arm.
cEven when the driver and/or passen-
gers are in the vehicle, the system will
activate with all the doors, hood and
trunk lid locked with the ignition
switch in the LOCK position. When
pushing the ignition switch to the ACC
or ON position, the system will be re-
leased.
LIC0301
SECURITY SYSTEMS
Instruments and controls2-23
ZREVIEW COPYÐ2007 Altima(alt)
Owners ManualÐUSA_English(nna)
10/26/06Ðdebbie
X
Page 96 of 344

Autolight system (if so equipped)
The autolight system allows the headlights to be
set so they turn on and off automatically. The
autolight system can:
cTurn on the headlights, front parking, tail,
license plate and instrument panel lights au-
tomatically when it is dark.
cTurn off all the lights when it is light.
cKeep all the lights on for 45 seconds after
you turn the key to OFF and all doors are
closed.NOTE:
Autolight activation sensitivity and the
time delay for autolight shutoff is adjust-
able for vehicles with navigation system.
See “Vehicle electronic systems” in the
“Display screen, heater, air conditioner and
audio systems” section later in this manual.
To turn on the autolight system:
1. Turn the headlight switch to the AUTO posi-
tion
s1.
2. Turn the ignition key to ON.
3. The autolight system automatically turns the
headlights on and off.
Initially, if the ignition switch is turned OFF and a
door is opened and left open, the headlights
remain ON for 5 minutes. If another door is
opened during the 5 minutes, then the 5 minute
timer is reset.
To turn the autolight system off, turn the switch to
the OFF,
,orposition.
Type C
LIC1063LIC1086
2-28Instruments and controls
ZREVIEW COPYÐ2007 Altima(alt)
Owners ManualÐUSA_English(nna)
10/26/06Ðdebbie
X
Page 103 of 344

cAvoid using power outlets when the air
conditioner, headlights or rear window
defroster is on.
cBefore inserting or disconnecting a
plug, be sure the electrical accessory
being used is turned OFF.
cPush the plug in as far as it will go. If
good contact is not made, the plug may
overheat or the internal temperature
fuse may open.cWhen not in use, be sure to close the
cap. Do not allow water to contact the
outlet.
cDo not leave devices plugged in the
outlet for an extended period of time
because the constant supply of power
will drain the battery
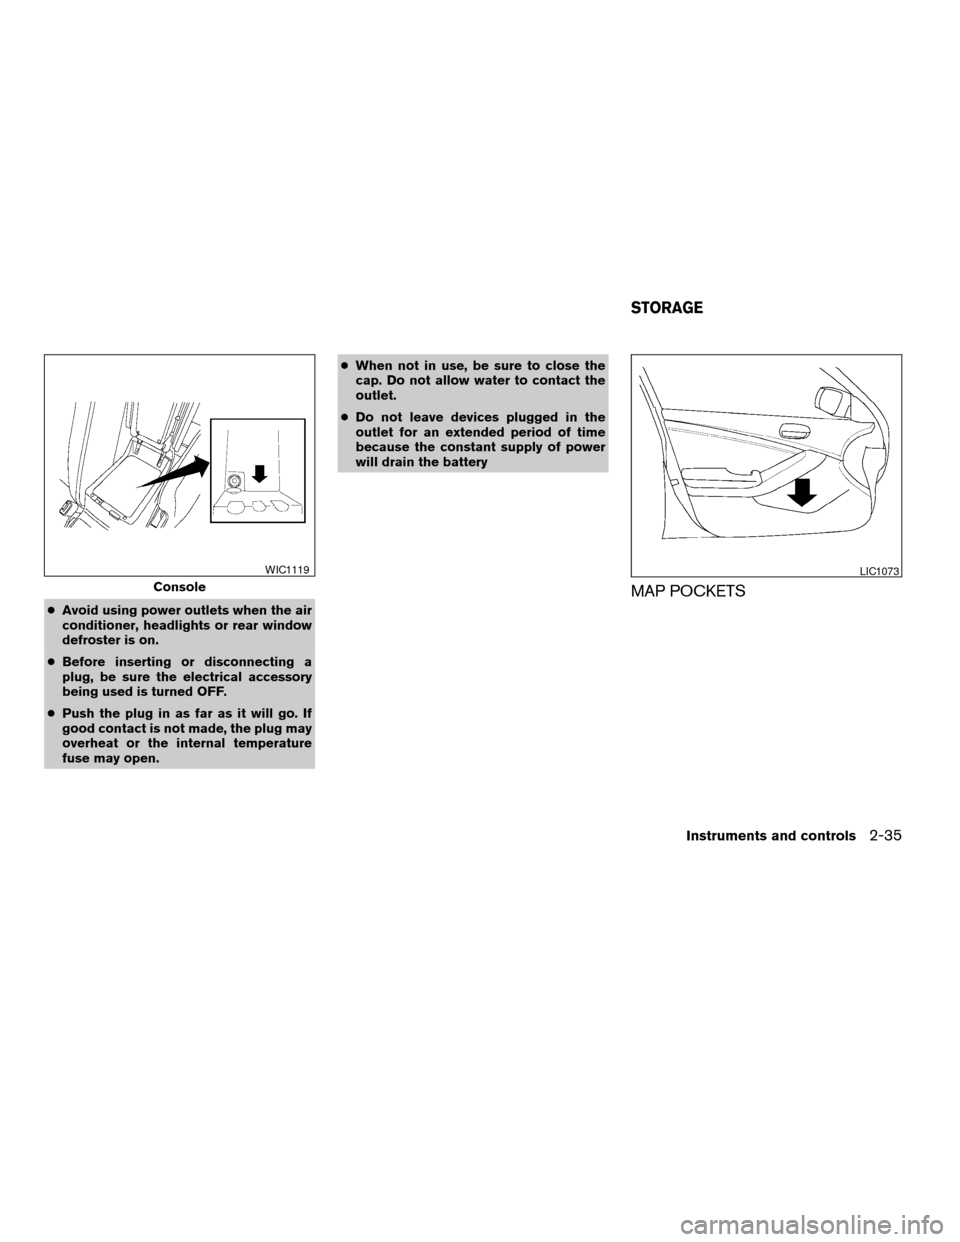
MAP POCKETSConsole
WIC1119LIC1073
STORAGE
Instruments and controls2-35
ZREVIEW COPYÐ2007 Altima(alt)
Owners ManualÐUSA_English(nna)
10/26/06Ðdebbie
X
Page 144 of 344

4 Monitor, climate, audio, phone and voice
recognition systems
Control panel buttons (if so equipped)...............4-2
Setting up the start-up screen...................4-3
How to use the SETUP button...................4-3
button...................................4-6
Rearview monitor (if so equipped)...................4-7
How to read the displayed lines..................4-7
Adjusting the screen............................4-8
Operating tips..................................4-8
Ventilators........................................4-9
Heater and air conditioner (manual).................4-10
Controls......................................4-11
Heater operation..............................4-12
Air conditioner operation (if so equipped)........4-13
Air flow charts.................................4-14
Heater and air conditioner (automatic)
(if so equipped)..................................4-18
Automatic operation...........................4-18
Manual operation..............................4-19
Operating tips.................................4-19
Servicing air conditioner...........................4-20
Audio system....................................4-20
Radio........................................4-20FM radio reception............................4-21
AM radio reception............................4-21
Satellite radio reception (if so equipped).........4-21
Audio operation precautions....................4-22
FM/AM radio with compact disc (CD) player
(if so equipped)...............................4-27
FM/AM/SAT radio with compact disc (CD)
changer (if so equipped).......................4-31
FM/AM/SAT radio with compact disc (CD)
changer (if so equipped).......................4-38
CD care and cleaning..........................4-42
Steering wheel switch for audio control
(if so equipped)...............................4-43
Antenna......................................4-44
Car phone or CB radio............................4-45
BluetoothTHands-Free Phone System
(if so equipped)..................................4-45
Using the system..............................4-47
Control buttons...............................4-49
Getting started................................4-49
List of voice commands........................4-51
Speaker adaptation (SA) mode..................4-56
ZREVIEW COPYÐ2007 Altima(alt)
Owners ManualÐUSA_English(nna)
10/26/06Ðdebbie
X