WATER PUMP
CO-23
C
D
E
F
G
H
I
J
K
L
MA
CO
Revision: 2006 November2007 350Z
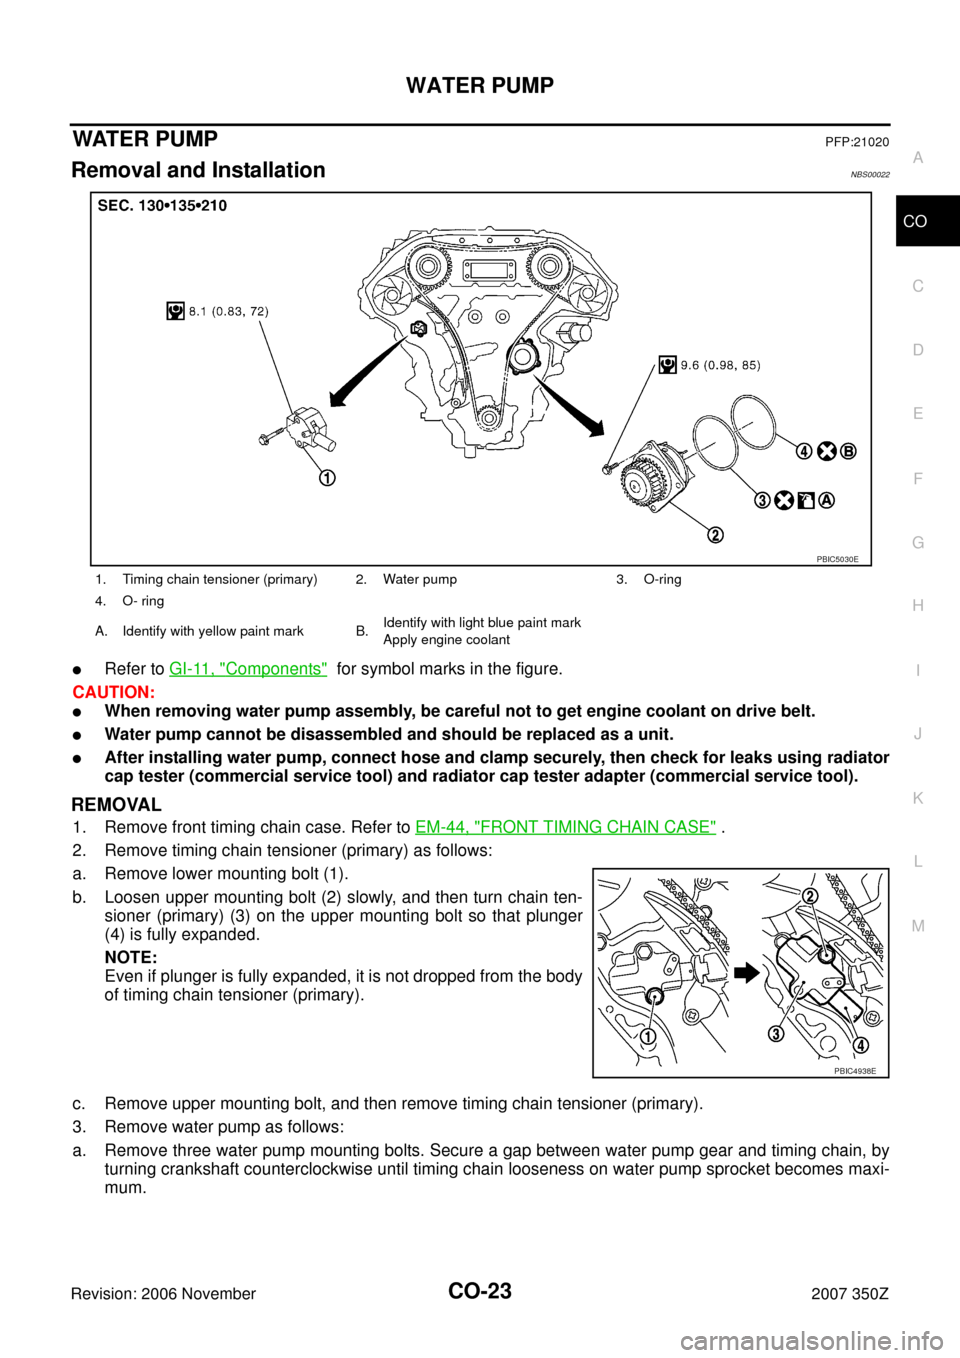
WAT E R P U MPPFP:21020
Removal and InstallationNBS00022
�Refer to GI-11, "Components" for symbol marks in the figure.
CAUTION:
�When removing water pump assembly, be careful not to get engine coolant on drive belt.
�Water pump cannot be disassembled and should be replaced as a unit.
�After installing water pump, connect hose and clamp securely, then check for leaks using radiator
cap tester (commercial service tool) and radiator cap tester adapter (commercial service tool).
REMOVAL
1. Remove front timing chain case. Refer to EM-44, "FRONT TIMING CHAIN CASE" .
2. Remove timing chain tensioner (primary) as follows:
a. Remove lower mounting bolt (1).
b. Loosen upper mounting bolt (2) slowly, and then turn chain ten-
sioner (primary) (3) on the upper mounting bolt so that plunger
(4) is fully expanded.
NOTE:
Even if plunger is fully expanded, it is not dropped from the body
of timing chain tensioner (primary).
c. Remove upper mounting bolt, and then remove timing chain tensioner (primary).
3. Remove water pump as follows:
a. Remove three water pump mounting bolts. Secure a gap between water pump gear and timing chain, by
turning crankshaft counterclockwise until timing chain looseness on water pump sprocket becomes maxi-
mum.
1. Timing chain tensioner (primary) 2. Water pump 3. O-ring
4. O- ring
A. Identify with yellow paint mark B.Identify with light blue paint mark
Apply engine coolant
PBIC5030E
PBIC4938E
CO-26
WATER INLET AND THERMOSTAT ASSEMBLY
Revision: 2006 November2007 350Z
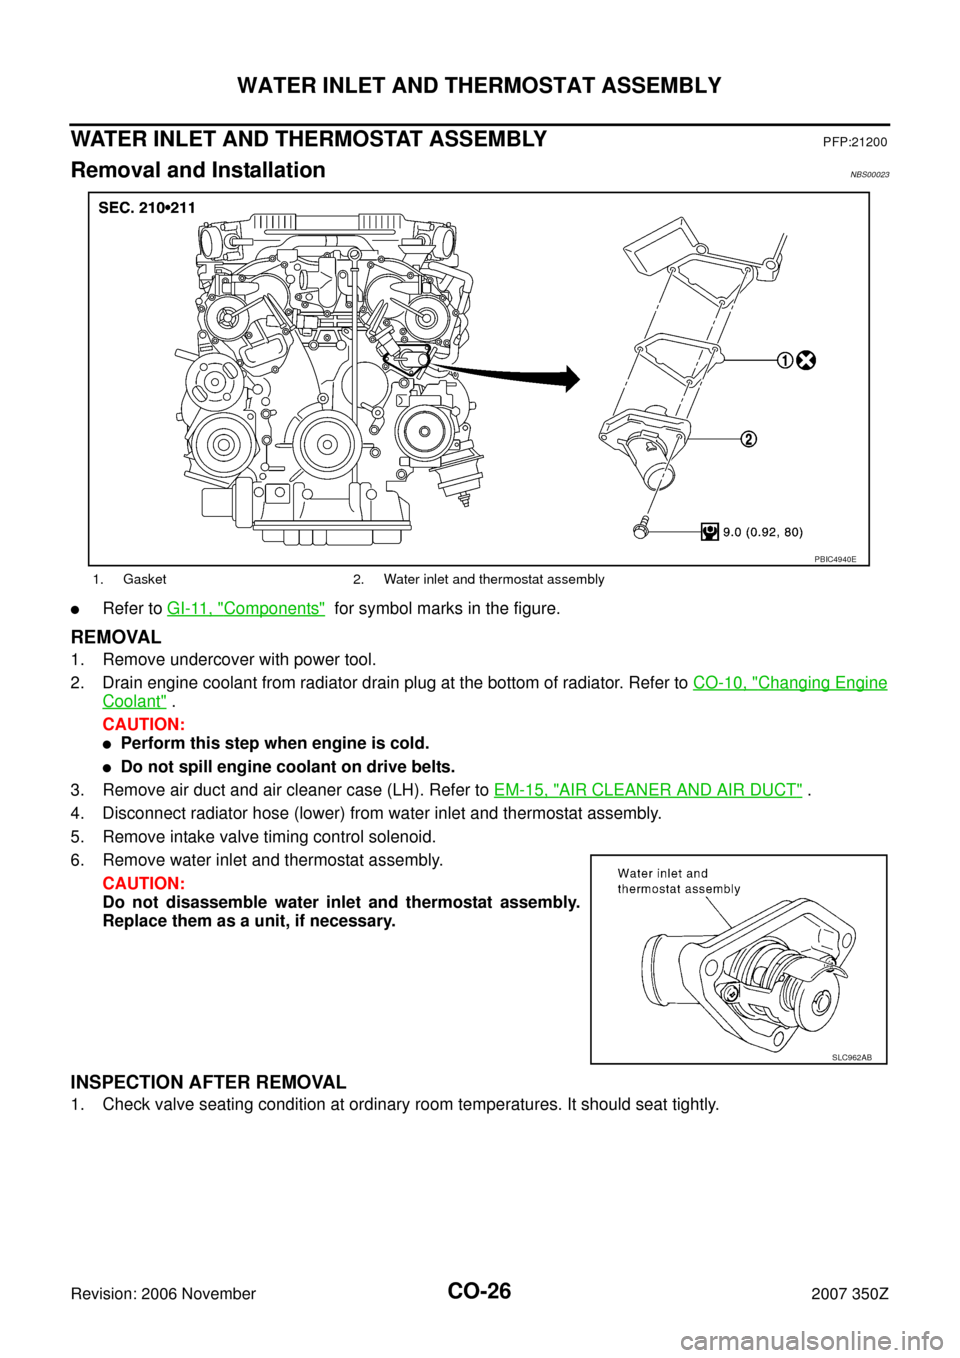
WATER INLET AND THERMOSTAT ASSEMBLYPFP:21200
Removal and InstallationNBS00023
�Refer to GI-11, "Components" for symbol marks in the figure.
REMOVAL
1. Remove undercover with power tool.
2. Drain engine coolant from radiator drain plug at the bottom of radiator. Refer to CO-10, "
Changing Engine
Coolant" .
CAUTION:
�Perform this step when engine is cold.
�Do not spill engine coolant on drive belts.
3. Remove air duct and air cleaner case (LH). Refer to EM-15, "
AIR CLEANER AND AIR DUCT" .
4. Disconnect radiator hose (lower) from water inlet and thermostat assembly.
5. Remove intake valve timing control solenoid.
6. Remove water inlet and thermostat assembly.
CAUTION:
Do not disassemble water inlet and thermostat assembly.
Replace them as a unit, if necessary.
INSPECTION AFTER REMOVAL
1. Check valve seating condition at ordinary room temperatures. It should seat tightly.
1. Gasket 2. Water inlet and thermostat assembly
PBIC4940E
SLC962AB