Page 281 of 473
280 OperationEngine compartmentCoolantThe engine coolant is a mixture of water
and anticorrosion/antifreeze. To check
the coolant level, the vehicle must be
parked on level ground and the engine
must be cool.
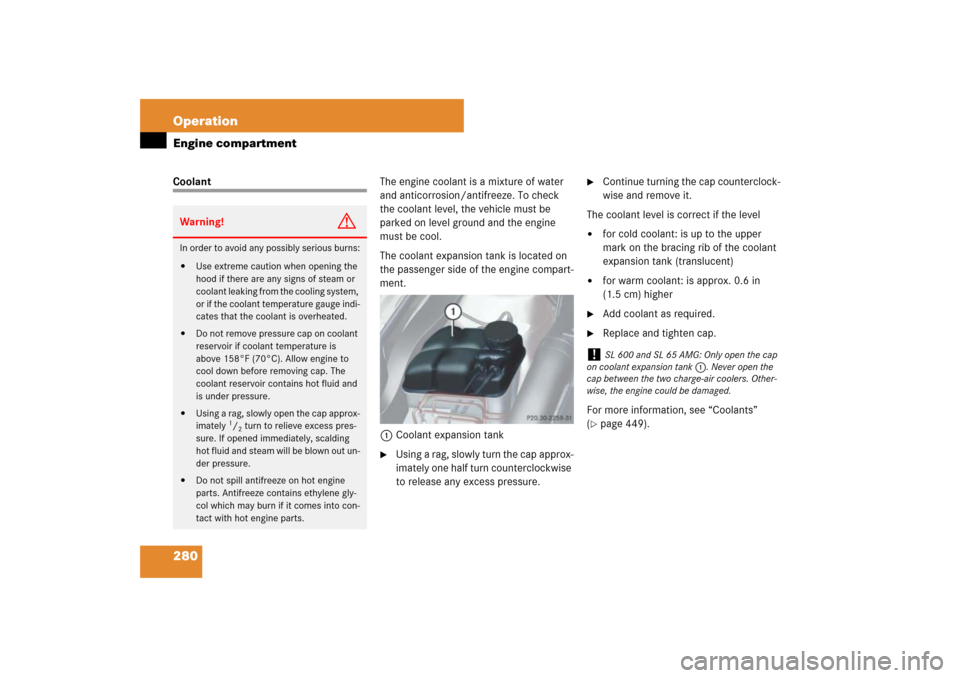
The coolant expansion tank is located on
the passenger side of the engine compart-
ment.
1Coolant expansion tank
�
Using a rag, slowly turn the cap approx-
imately one half turn counterclockwise
to release any excess pressure.
�
Continue turning the cap counterclock-
wise and remove it.
The coolant level is correct if the level
�
for cold coolant: is up to the upper
mark on the bracing rib of the coolant
expansion tank (translucent)
�
for warm coolant: is approx. 0.6 in
(1.5 cm) higher
�
Add coolant as required.
�
Replace and tighten cap.
For more information, see “Coolants”
(
�page 449).
Warning!
G
In order to avoid any possibly serious burns:�
Use extreme caution when opening the
hood if there are any signs of steam or
coolant leaking from the cooling system,
or if the coolant temperature gauge indi-
cates that the coolant is overheated.
�
Do not remove pressure cap on coolant
reservoir if coolant temperature is
above 158°F (70°C). Allow engine to
cool down before removing cap. The
coolant reservoir contains hot fluid and
is under pressure.
�
Using a rag, slowly open the cap approx-
imately
1/2 turn to relieve excess pres-
sure. If opened immediately, scalding
hot fluid and steam will be blown out un-
der pressure.
�
Do not spill antifreeze on hot engine
parts. Antifreeze contains ethylene gly-
col which may burn if it comes into con-
tact with hot engine parts.
!
SL 600 and SL 65 AMG: Only open the cap
on coolant expansion tank1. Never open the
cap between the two charge-air coolers. Other-
wise, the engine could be damaged.
Page 327 of 473
326 OperationVehicle care�
Restart the engine after cleaning
sensor cover1.
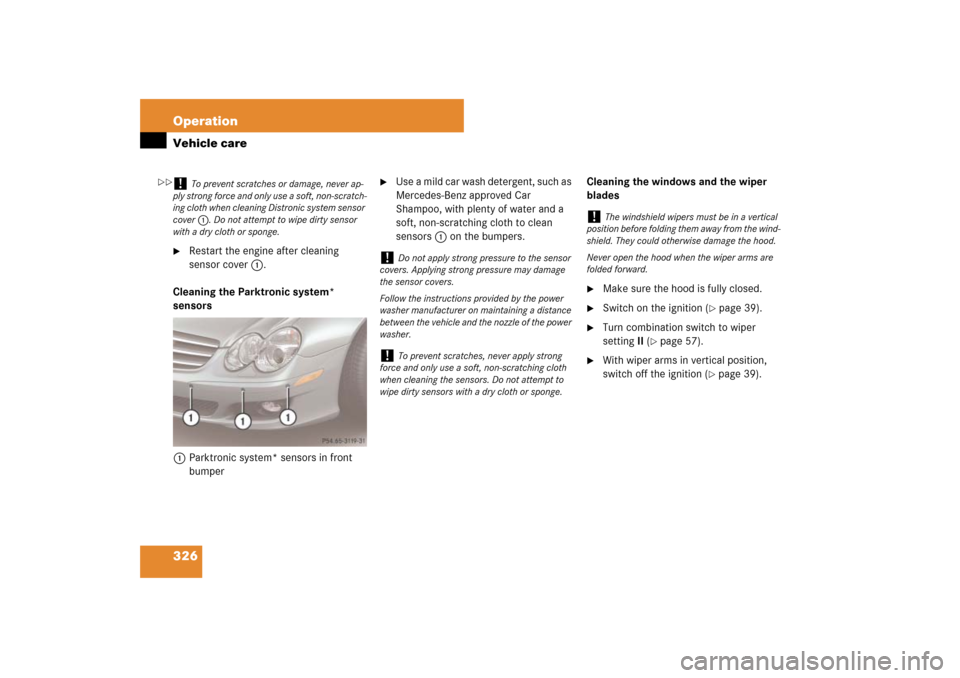
Cleaning the Parktronic system*
sensors
1Parktronic system* sensors in front
bumper
�
Use a mild car wash detergent, such as
Mercedes-Benz approved Car
Shampoo, with plenty of water and a
soft, non-scratching cloth to clean
sensors1 on the bumpers.Cleaning the windows and the wiper
blades
�
Make sure the hood is fully closed.
�
Switch on the ignition (
�page 39).
�
Turn combination switch to wiper
settingII (
�page 57).
�
With wiper arms in vertical position,
switch off the ignition (
�page 39).
!
To prevent scratches or damage, never ap-
ply strong force and only use a soft, non-scratch-
ing cloth when cleaning Distronic system sensor
cover1. Do not attempt to wipe dirty sensor
with a dry cloth or sponge.
!
Do not apply strong pressure to the sensor
covers. Applying strong pressure may damage
the sensor covers.
Follow the instructions provided by the power
washer manufacturer on maintaining a distance
between the vehicle and the nozzle of the power
washer.
!
To prevent scratches, never apply strong
force and only use a soft, non-scratching cloth
when cleaning the sensors. Do not attempt to
wipe dirty sensors with a dry cloth or sponge.
!
The windshield wipers must be in a vertical
position before folding them away from the wind-
shield. They could otherwise damage the hood.
Never open the hood when the wiper arms are
folded forward.
��
Page 339 of 473
338 Practical hintsWhat to do if …
During severe operating conditions, e.g.
stop-and-go traffic, the coolant tempera-
ture may rise close to 248°F (120°C).
Warning!
G
Driving when your engine is overheated can
cause some fluids which may have leaked
into the engine compartment to catch fire.
You could be seriously burned.
Steam from an overheated engine can cause
serious burns and can occur just by opening
the engine hood. Stay away from the engine
if you see or hear steam coming from it.
Turn off the engine, get out of the vehicle
and do not stand near the vehicle until the
engine has cooled down.
!
The engine should not be operated with the
coolant temperature above 248°F (120°C). Do-
ing so may cause serious engine damage which
is not covered by the Mercedes-Benz Limited
Warranty.
Page 373 of 473
372 Practical hintsWhat to do if …
During severe operating conditions, e.g.
stop-and-go traffic, the coolant tempera-
ture may rise close to 248°F (120°C).
Left display
Right display
Possible cause/consequence
Possible solution�
Observe the coolant temperature gauge in the
instrument cluster (
�page 27).
If the temperature rises again:
�
Contact an authorized Mercedes-Benz
Center immediately.
Warning!
G
Driving when your engine is overheated can
cause some fluids which may have leaked
into the engine compartment to catch fire.
You could be seriously burned.
Steam from an overheated engine can cause
serious burns and can occur just by opening
the engine hood. Stay away from the engine
if you see or hear steam coming from it.
Turn off the engine, get out of the vehicle
and do not stand near the vehicle until the
engine has cooled down.
!
The engine should not be operated with the
coolant temperature above 248°F (120°C). Do-
ing so may cause serious engine damage which
is not covered by the Mercedes-Benz Limited
Warranty.
Page 378 of 473
377 Practical hints
What to do if …
Left display
Right display
Possible cause/consequence
Possible solution
A
Fuel cap
open
A loss of pressure has been detect-
ed in the fuel system. The fuel cap
may not be closed properly or the
fuel system may be leaky.
�
Check the fuel cap (
�page 271).
If it is not closed properly:
�
Close the fuel cap.
If it is closed properly:
�
Have the fuel system checked by an autho-
rized Mercedes-Benz Center.
K
being lowered
The retractable hardtop is not com-
pletely opened or closed. The roof
hydraulics will start to lose pres-
sure.
�
Make sure the retractable hardtop is com-
pletely opened or closed (
�page 199).
locked
in driving mode
You have attempted to open the re-
tractable hardtop while driving.
�
Stop the vehicle in a safe location and try to
open the hardtop again.
O
You are driving with the hood open.
Risk of accident!�
Stop the vehicle in a safe location or as soon
as it is safe to do so.
�
Close the hood (
�page 275).
Page 400 of 473
399 Practical hints
Replacing bulbs
Notes on bulb replacement�
Only use 12-volt bulbs of the same type
and with the specified watt rating.
�
Switch the lights off before changing a
bulb to prevent short circuits.
�
Always use a clean lint-free cloth when
handling bulbs.
�
Your hands should be dry and free of oil
and grease.
�
If the newly installed bulb does not
come on, visit an authorized
Mercedes-Benz Center.Have the LEDs and bulbs for the following
lamps replaced by an authorized
Mercedes-Benz Center:
�
the additional turn signals in the exteri-
or rear view mirrors
�
the high mounted brake lamp
�
the brake lamps
�
the parking lamps and the side marker
lamps in the tail lamp unit
�
the rear fog lamps
�
the low beam (Xenon or Bi-Xenon*)
lamps
�
the front fog lamps
�
the front side marker lamps
Replacing bulbs for front lamps
Before you start to replace a bulb for a
front lamp, do the following first:�
Turn the exterior lamp switch to posi-
tion M (
�page 128).
�
Open the hood (
�page 274).
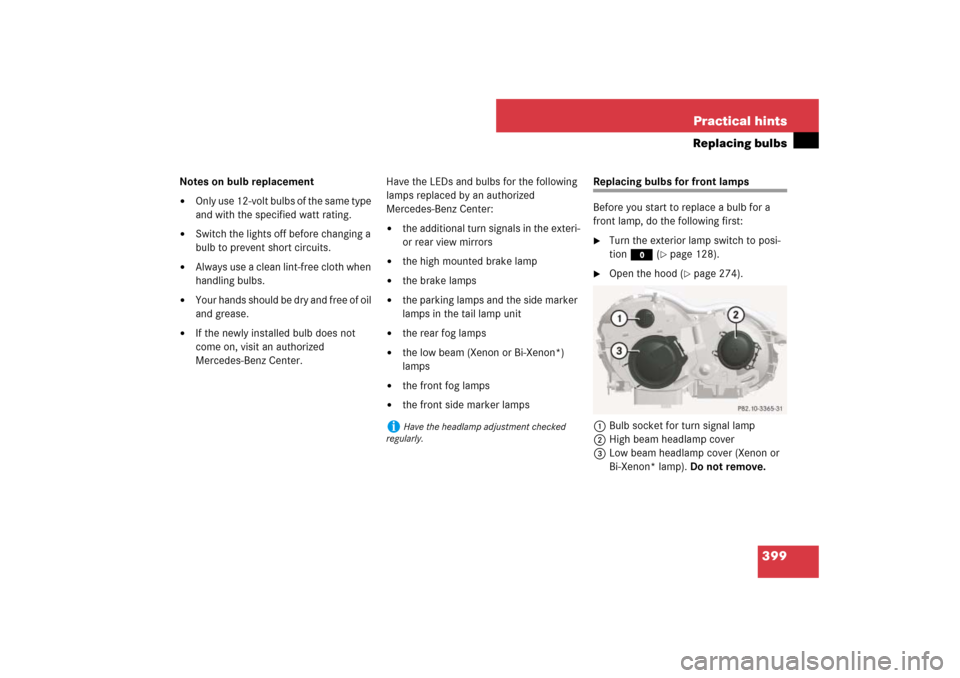
1Bulb socket for turn signal lamp
2High beam headlamp cover
3Low beam headlamp cover (Xenon or
Bi-Xenon* lamp). Do not remove.
i
Have the headlamp adjustment checked
regularly.
Page 404 of 473
403 Practical hints
Replacing wiper blades
�Replacing wiper blades
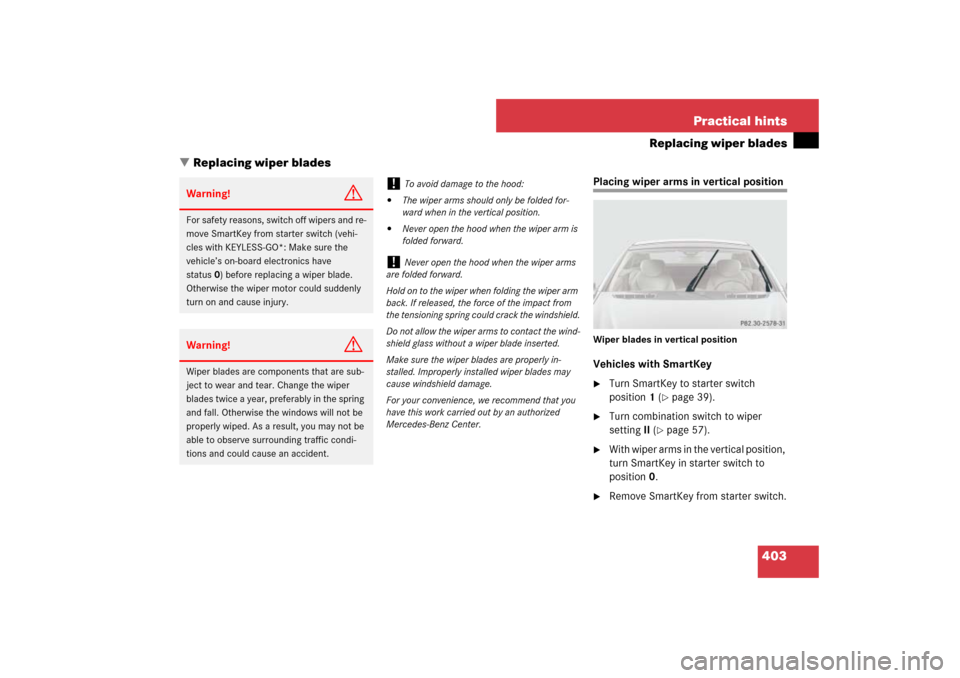
Placing wiper arms in vertical positionWiper blades in vertical positionVehicles with SmartKey�
Turn SmartKey to starter switch
position1 (
�page 39).
�
Turn combination switch to wiper
settingII (
�page 57).
�
With wiper arms in the vertical position,
turn SmartKey in starter switch to
position0.
�
Remove SmartKey from starter switch.
Warning!
G
For safety reasons, switch off wipers and re-
move SmartKey from starter switch (vehi-
cles with KEYLESS-GO*: Make sure the
vehicle’s on-board electronics have
status0) before replacing a wiper blade.
Otherwise the wiper motor could suddenly
turn on and cause injury. Warning!
G
Wiper blades are components that are sub-
ject to wear and tear. Change the wiper
blades twice a year, preferably in the spring
and fall. Otherwise the windows will not be
properly wiped. As a result, you may not be
able to observe surrounding traffic condi-
tions and could cause an accident.
!
To avoid damage to the hood:
�
The wiper arms should only be folded for-
ward when in the vertical position.
�
Never open the hood when the wiper arm is
folded forward.
!
Never open the hood when the wiper arms
are folded forward.
Hold on to the wiper when folding the wiper arm
back. If released, the force of the impact from
the tensioning spring could crack the windshield.
Do not allow the wiper arms to contact the wind-
shield glass without a wiper blade inserted.
Make sure the wiper blades are properly in-
stalled. Improperly installed wiper blades may
cause windshield damage.
For your convenience, we recommend that you
have this work carried out by an authorized
Mercedes-Benz Center.
Page 418 of 473
417 Practical hints
Batteries
�
Open the hood (
�page 274).
�
Use the 10 mm open-end wrench from
the vehicle tool kit to disconnect the
negative lead from negative
terminal2 of the starter battery
(�page 414).
�
Remove the covers from the positive
terminals 1 and 4 (
�page 414).
�
Disconnect the positive lead from pos-
itive terminal 4 of the consumer bat-
tery (
�page 414).
�
Disconnect the positive lead from pos-
itive terminal 1 of the starter battery
(�page 414).
Removing the batteries
Removing the consumer battery�
Remove the screws securing the bat-
tery in the trunk.
�
Remove the battery support and
bracket.
�
Pull out the battery ventilation hose
from the battery.
Depending on battery arrangement in
your vehicle model, the ventilation tube
is located either on the left or right side
of the battery.
�
Take out the battery.
Removing the starter battery
�
Remove the screws securing the start-
er battery in the engine compartment.
�
Pull battery ventilation 3
(�page 414) out of the battery.
�
Lift the retaining bracket.
�
Remove the battery.
Charging and reinstalling batteriesWarning!
G
Never charge a battery while still installed in
the vehicle unless the accessory battery
charge unit approved by Mercedes-Benz is
being used. Gases may escape during charg-
ing and cause explosions that may result in
paint damage, corrosion or personal injury.
An accessory battery charge unit specially
adapted for Mercedes-Benz vehicles and
tested and approved by Mercedes-Benz is
available, permitting the charging of the bat-
tery in its installed position. Contact an au-
thorized Mercedes-Benz Center for
information and availability. Charge battery
in accordance with the separate instruc-
tions for the accessory battery charger.