Page 132 of 473

131 Controls in detail
Lighting
Fog lampsFront fog lamps
�
Switch on the low beam headlamps
(�page 55).
�
Pull out the exterior lamp switch to first
stop.
The front fog lamps are switched on.
The green indicator lamp ‡ in the
exterior lamp switch comes on
(�page 128).
�
Push in the exterior lamp switch.
The front fog lamps are switched off.
The green indicator lamp ‡ in the
exterior lamp switch goes out.Rear fog lamp (driver’s side only)
�
Switch on the front fog lamps
(�page 131).
�
Pull out the exterior lamp switch to sec-
ond stop.
The rear fog lamp is switched on.
The yellow indicator lamp † in the
lamp switch comes on (
�page 128).
�
Push in the exterior lamp switch to first
stop.
The rear fog lamp is switched off.
The yellow indicator lamp † in the
exterior lamp switch goes out.
The front fog lamps remain lit.
Warning!
G
In low ambient lighting or foggy conditions,
only switch from position U to B with
the vehicle at a standstill in a safe location.
Switching from U to B will briefly
switch off the headlamps. Doing so while
driving in low ambient lighting conditions
may result in an accident.i
Fog lamps will operate with the parking
lamps and/or the low beam headlamps on. Fog
lamps should only be used in conjunction with
low beam headlamps. Consult your State or
Province Motor Vehicle Regulations regarding
permissible lamp operation.
i
The fog lamps cannot be switched on with
the exterior lamp switch in position U. To
switch on the fog lamps, turn the exterior lamp
switch to position B first.
Page 134 of 473

133 Controls in detail
Lighting
Combination switch
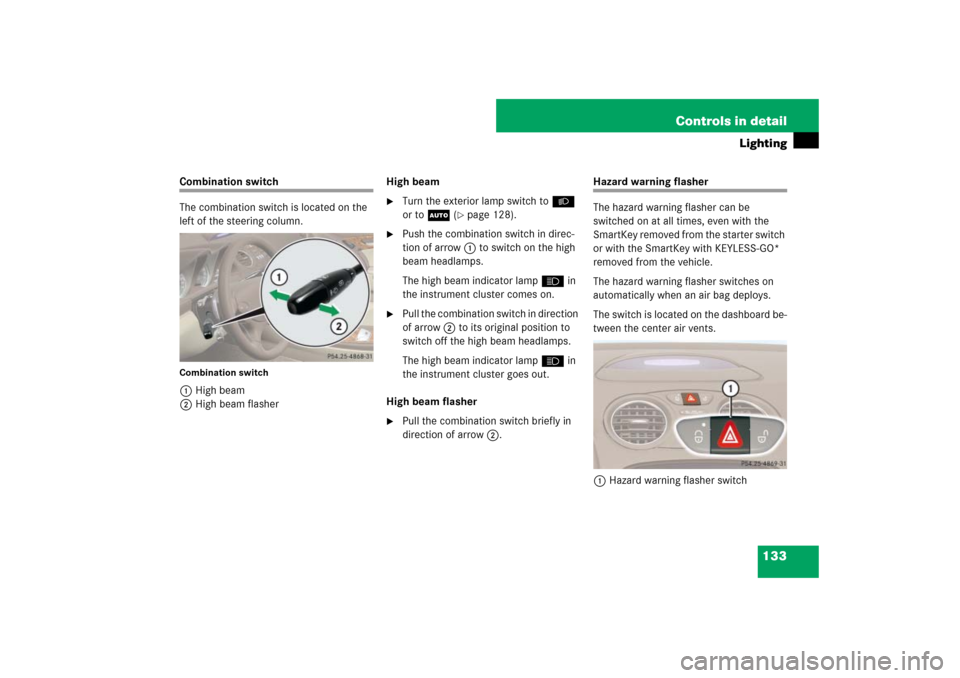
The combination switch is located on the
left of the steering column.Combination switch1High beam
2High beam flasherHigh beam
�
Turn the exterior lamp switch toB
or toU (
�page 128).
�
Push the combination switch in direc-
tion of arrow1 to switch on the high
beam headlamps.
The high beam indicator lamp A in
the instrument cluster comes on.
�
Pull the combination switch in direction
of arrow 2 to its original position to
switch off the high beam headlamps.
The high beam indicator lamp A in
the instrument cluster goes out.
High beam flasher
�
Pull the combination switch briefly in
direction of arrow2.
Hazard warning flasher
The hazard warning flasher can be
switched on at all times, even with the
SmartKey removed from the starter switch
or with the SmartKey with KEYLESS-GO*
removed from the vehicle.
The hazard warning flasher switches on
automatically when an air bag deploys.
The switch is located on the dashboard be-
tween the center air vents.
1Hazard warning flasher switch
Page 154 of 473

153 Controls in detail
Control system
Should the vehicle’s system record any
conditions while driving, the number of
messages will reappear in the multifunc-
tion display�
when the SmartKey in the starter
switch is turned to position0 or re-
moved from the starter switch
or
�
when you turn off the engine by press-
ing the KEYLESS-GO* start/stop but-
ton on the gear selector lever once and
open the driver’s door (this puts the
starter switch in position 0, same as
with the SmartKey removed from the
starter switch)
Settings menu
In the
Settings
menu there are two func-
tions:
�
The function
Reset
, with which you can
reset most settings to those set at the
factory.
�
A collection of submenus with which
you can make individual settings for
your vehicle.
The following settings and submenus are
available:Resetting all settings
You can reset the functions of most of the
submenus to the factory settings.
For safety, the
Light circuit Headlamp
mode
submenu in the
Lighting
menu can
be reset with the vehicle at standstill only.
�
Press button è or ÿ repeatedly
until the
Settings...
menu appears in
the multifunction display.
i
The vehicle status message memory will be
cleared when you then turn the SmartKey in the
starter switch to position 1 or 2, or when you
press the KEYLESS-GO* start/stop button once
or twice without depressing the brake pedal. You
will then only see high priority messages in the
multifunction display (
�page 347).
Function
Page
Resetting all settings
153
Submenus in the Settings menu
154
Instrument cluster submenu
156
Time submenu
157
Lighting submenu
159
Vehicle submenu
162
Convenience submenu
162
��
Page 160 of 473

159 Controls in detail
Control system
Lighting submenu
Access the
Lighting
submenu via the
Settings
menu. Use the
Lighting
sub-
menu to change the lamp and lighting set-
tings on your vehicle. The following
functions are available:Setting daytime running lamp mode
(USA only)
�
Move the selection marker with button
æ or ç to the
Lighting
sub-
menu.
�
Press button j or k repeatedly
until the message
Light circuit
Headlamp mode
appears in the multi-
function display.
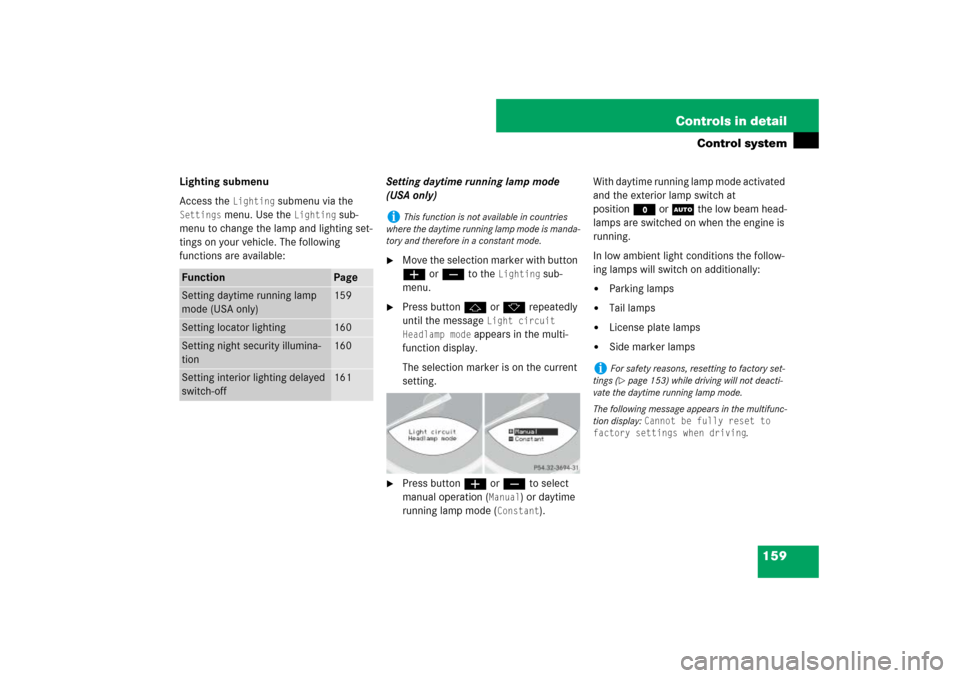
The selection marker is on the current
setting.
�
Press button æ or ç to select
manual operation (
Manual
) or daytime
running lamp mode (
Constant
).With daytime running lamp mode activated
and the exterior lamp switch at
positionM or U the low beam head-
lamps are switched on when the engine is
running.
In low ambient light conditions the follow-
ing lamps will switch on additionally:
�
Parking lamps
�
Tail lamps
�
License plate lamps
�
Side marker lamps
Function
Page
Setting daytime running lamp
mode (USA only)
159
Setting locator lighting
160
Setting night security illumina-
tion
160
Setting interior lighting delayed
switch-off
161
i
This function is not available in countries
where the daytime running lamp mode is manda-
tory and therefore in a constant mode.
i
For safety reasons, resetting to factory set-
tings (�page 153) while driving will not deacti-
vate the daytime running lamp mode.
The following message appears in the multifunc-
tion display:
Cannot be fully reset to
factory settings when driving
.
Page 162 of 473

161 Controls in detail
Control system
If after turning off the engine you do not
open a door or do not close an opened
door, the lamps will switch off automatical-
ly after 60 seconds.�
Move the selection marker with button
æ or ç to the
Lighting
sub-
menu.
�
Press button j or k repeatedly
until the message
Headlamps delayed
switch-off
appears in the multifunc-
tion display.
The selection marker is on the current
setting.
�
Press button æ or ç to switch
the delayed switch-off feature
On or
Off
.
�
Turn the exterior lamp switch to posi-
tion U before turning off the engine.
The delayed switch-off feature is acti-
vated.
You can temporarily deactivate the de-
layed switch-off feature:
�
Before exiting the vehicle turn the
SmartKey in the starter switch to
position0.
�
Then turn it to position2 and back
to0.
The delayed switch-off feature is deac-
tivated. It will reactivate as soon as you
reinsert the SmartKey in the starter
switch.Setting interior lighting delayed
switch-off
Use this function to set whether you would
like the interior lighting to remain on for
10 seconds during darkness after you have
removed the SmartKey from the starter
switch.
�
Move the selection marker with button
æ or ç to the
Lighting
sub-
menu.
�
Press button j or k repeatedly
until the message
Int. lighting
delayed switch-off appears in the
multifunction display.
The selection marker is on the current
setting.
Page 181 of 473

180 Controls in detailGood visibilityFor information on windshield wiper opera-
tion, see “Windshield wipers” (
�page 57).
Headlamp cleaning system
The button is located on the left side of the
dashboard.
1Headlamp washer button�
Switch on the ignition (
�page 39).
�
Press button1.
The headlamps are cleaned with a
high-pressure water jet.
For information on filling up the washer flu-
id reservoir, see “Windshield washer sys-
tem and headlamp cleaning system”
(
�page 282).
Rear view mirrors
For information on setting the rear view
mirrors, see “Mirrors” (
�page 47).
Auto-dimming rear view mirrors
The reflection brightness of the exterior
rear view mirror on the driver’s side and
the interior rear view mirror will respond
automatically to glare when
�
the ignition is switched on
and
�
incoming light from headlamps falls on
the sensor in the interior rear view mir-
ror.
The interior rear view mirror will not react if
�
reverse gear is engaged
�
the interior lighting is switched on
i
The headlamps will automatically be
cleaned when you have
�
switched on the headlamps
and
�
operated the windshield wipers with wind-
shield washer fluid fifteen times
When you switch off the ignition, the counter re-
sets.
Page 273 of 473

272 OperationAt the gas station�
Insert fuel cap 2 into fuel filler neck
and turn fuel cap clockwise until it au-
dibly engages.
�
Close fuel filler flap 1.
You should hear the latch close shut.
Check regularly and before a long trip
For information on quantities and require-
ments of operating agents, see “Fuels,
coolants, lubricants, etc.” (
�page 444).
�
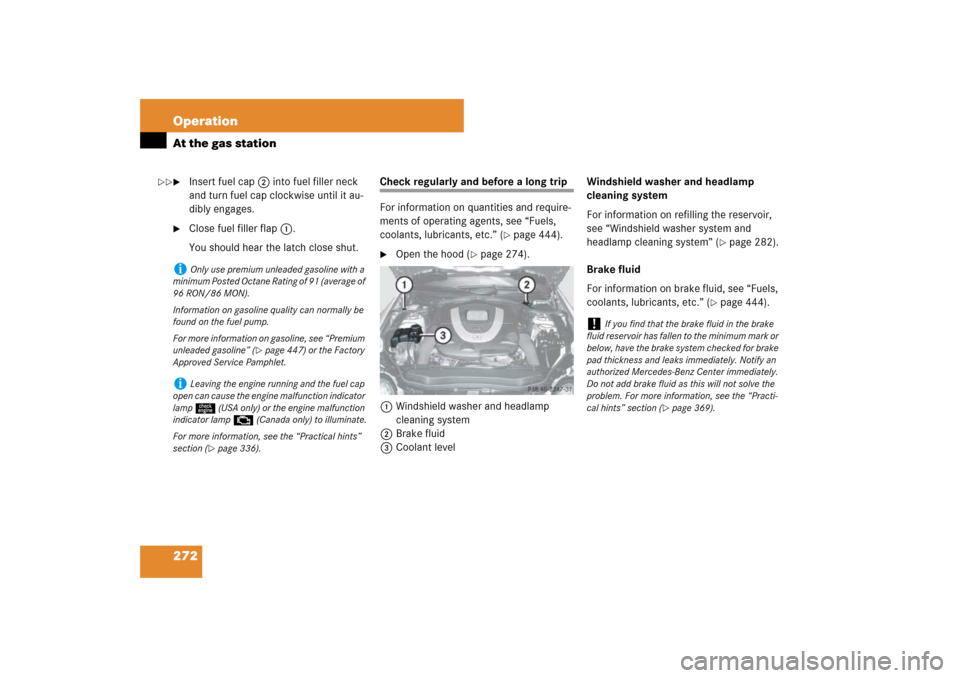
Open the hood (
�page 274).
1Windshield washer and headlamp
cleaning system
2Brake fluid
3Coolant levelWindshield washer and headlamp
cleaning system
For information on refilling the reservoir,
see “Windshield washer system and
headlamp cleaning system” (
�page 282).
Brake fluid
For information on brake fluid, see “Fuels,
coolants, lubricants, etc.” (
�page 444).
i
Only use premium unleaded gasoline with a
minimum Posted Octane Rating of 91 (average of
96 RON/86 MON).
Information on gasoline quality can normally be
found on the fuel pump.
For more information on gasoline, see “Premium
unleaded gasoline” (
�page 447) or the Factory
Approved Service Pamphlet.
i
Leaving the engine running and the fuel cap
open can cause the engine malfunction indicator
lamp ú (USA only) or the engine malfunction
indicator lamp ± (Canada only) to illuminate.
For more information, see the “Practical hints”
section (
�page 336).
!
If you find that the brake fluid in the brake
fluid reservoir has fallen to the minimum mark or
below, have the brake system checked for brake
pad thickness and leaks immediately. Notify an
authorized Mercedes-Benz Center immediately.
Do not add brake fluid as this will not solve the
problem. For more information, see the “Practi-
cal hints” section (
�page 369).
��
Page 274 of 473
273 Operation
At the gas station
Coolant level
For information on checking the coolant
level, see “Coolant” (
�page 280).
Engine oil level
For more information on checking the en-
gine oil level, see “Engine oil”
(
�page 275).
Vehicle lighting
Check function and cleanliness. For more
information, see “Replacing bulbs”
(�page 397).
Exterior lamp switch, see “Switching on
headlamps” (
�page 55).
Tire inflation pressure
For information on checking the tire infla-
tion pressure, see “Checking tire inflation
pressure” (
�page 292).