Page 349 of 473

348 Practical hintsWhat to do if …
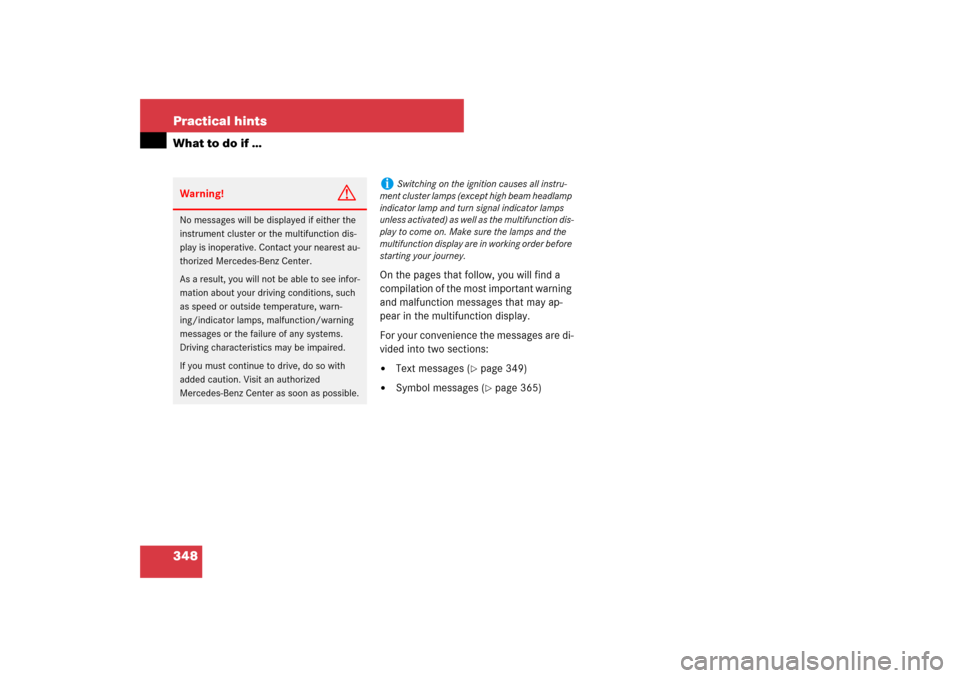
On the pages that follow, you will find a
compilation of the most important warning
and malfunction messages that may ap-
pear in the multifunction display.
For your convenience the messages are di-
vided into two sections:�
Text messages (
�page 349)
�
Symbol messages (
�page 365)
Warning!
G
No messages will be displayed if either the
instrument cluster or the multifunction dis-
play is inoperative. Contact your nearest au-
thorized Mercedes-Benz Center.
As a result, you will not be able to see infor-
mation about your driving conditions, such
as speed or outside temperature, warn-
ing/indicator lamps, malfunction/warning
messages or the failure of any systems.
Driving characteristics may be impaired.
If you must continue to drive, do so with
added caution. Visit an authorized
Mercedes-Benz Center as soon as possible.
i
Switching on the ignition causes all instru-
ment cluster lamps (except high beam headlamp
indicator lamp and turn signal indicator lamps
unless activated) as well as the multifunction dis-
play to come on. Make sure the lamps and the
multifunction display are in working order before
starting your journey.
Page 382 of 473

381 Practical hints
What to do if …
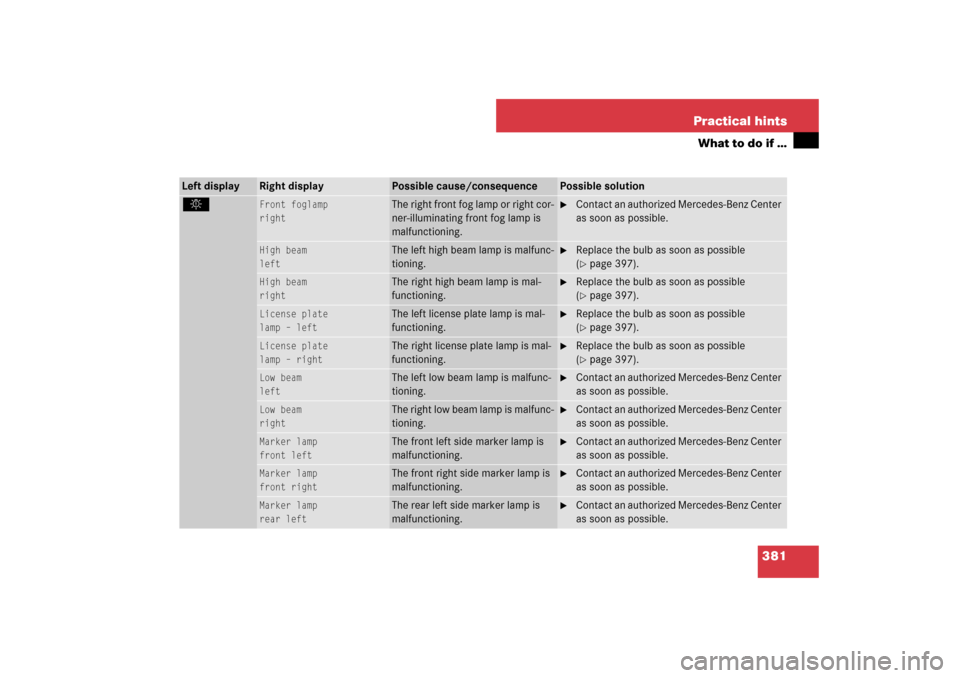
Left display
Right display
Possible cause/consequence
Possible solution
.
Front foglamp
right
The right front fog lamp or right cor-
ner-illuminating front fog lamp is
malfunctioning.
�
Contact an authorized Mercedes-Benz Center
as soon as possible.
High beam
left
The left high beam lamp is malfunc-
tioning.
�
Replace the bulb as soon as possible
(�page 397).
High beam
right
The right high beam lamp is mal-
functioning.
�
Replace the bulb as soon as possible
(�page 397).
License plate
lamp – left
The left license plate lamp is mal-
functioning.
�
Replace the bulb as soon as possible
(�page 397).
License plate
lamp – right
The right license plate lamp is mal-
functioning.
�
Replace the bulb as soon as possible
(�page 397).
Low beam
left
The left low beam lamp is malfunc-
tioning.
�
Contact an authorized Mercedes-Benz Center
as soon as possible.
Low beam
right
The right low beam lamp is malfunc-
tioning.
�
Contact an authorized Mercedes-Benz Center
as soon as possible.
Marker lamp
front left
The front left side marker lamp is
malfunctioning.
�
Contact an authorized Mercedes-Benz Center
as soon as possible.
Marker lamp
front right
The front right side marker lamp is
malfunctioning.
�
Contact an authorized Mercedes-Benz Center
as soon as possible.
Marker lamp
rear left
The rear left side marker lamp is
malfunctioning.
�
Contact an authorized Mercedes-Benz Center
as soon as possible.
Page 399 of 473
398 Practical hintsReplacing bulbsFront lamps Rear lamps
Lamp
Type
1
Additional turn signal
LED
2
Turn signal lamp
1156 NA
3
Low beam
1
1Vehicles with Xenon or Bi-Xenon* headlamps:
Low beam and high beam use the same D2S-35W
lamp. Do not replace the Xenon and Bi-Xenon*
bulbs yourself. Contact an authorized
Mercedes-Benz Center.
D2S-35 W
4
Xenon headlamp:
High beam, high beam
flasher
H7 (55 W)
Bi-Xenon headlamp*:
High beam flasher
H7 (55 W)
Parking and standing
lamp
W 5 W
5
Front fog lamp, Cor-
ner-illuminating front
fog lamp
H11 (55 W)
6
Side marker lamp
W 5 W
Lamp
Type
7
Rear fog lamp
(driver’s side only)
P 21 W
8
High mounted brake
lamp
LED
9
Backup lamp
P 21 W
a
Tail, parking and
standing lamp, side
marker lamp
LED
b
Brake lamp
LED
c
License plate lamp
C 5 W
d
Turn signal lamp
PY 21 W
Page 400 of 473

399 Practical hints
Replacing bulbs
Notes on bulb replacement�
Only use 12-volt bulbs of the same type
and with the specified watt rating.
�
Switch the lights off before changing a
bulb to prevent short circuits.
�
Always use a clean lint-free cloth when
handling bulbs.
�
Your hands should be dry and free of oil
and grease.
�
If the newly installed bulb does not
come on, visit an authorized
Mercedes-Benz Center.Have the LEDs and bulbs for the following
lamps replaced by an authorized
Mercedes-Benz Center:
�
the additional turn signals in the exteri-
or rear view mirrors
�
the high mounted brake lamp
�
the brake lamps
�
the parking lamps and the side marker
lamps in the tail lamp unit
�
the rear fog lamps
�
the low beam (Xenon or Bi-Xenon*)
lamps
�
the front fog lamps
�
the front side marker lamps
Replacing bulbs for front lamps
Before you start to replace a bulb for a
front lamp, do the following first:�
Turn the exterior lamp switch to posi-
tion M (
�page 128).
�
Open the hood (
�page 274).
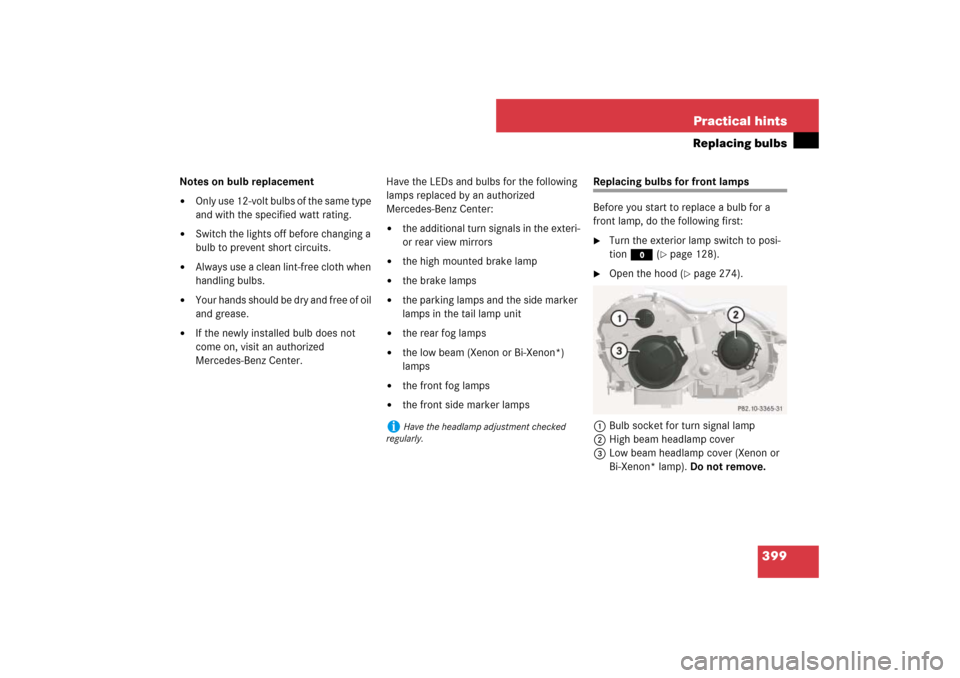
1Bulb socket for turn signal lamp
2High beam headlamp cover
3Low beam headlamp cover (Xenon or
Bi-Xenon* lamp). Do not remove.
i
Have the headlamp adjustment checked
regularly.
Page 401 of 473

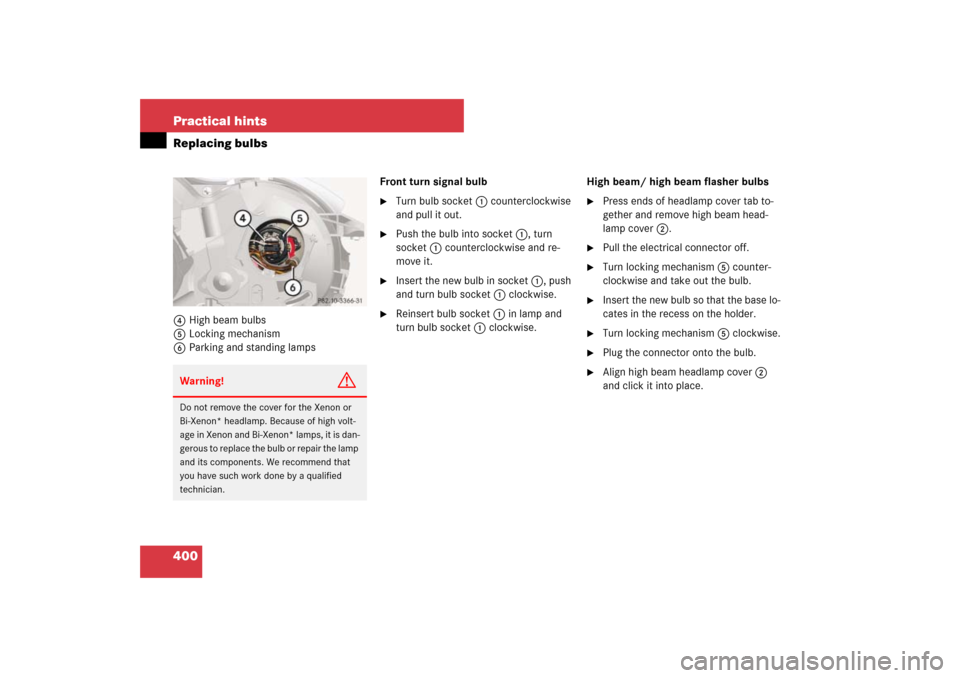
400 Practical hintsReplacing bulbs4High beam bulbs
5Locking mechanism
6Parking and standing lampsFront turn signal bulb
�
Turn bulb socket 1 counterclockwise
and pull it out.
�
Push the bulb into socket 1, turn
socket 1 counterclockwise and re-
move it.
�
Insert the new bulb in socket 1, push
and turn bulb socket 1 clockwise.
�
Reinsert bulb socket 1 in lamp and
turn bulb socket 1 clockwise.High beam/ high beam flasher bulbs
�
Press ends of headlamp cover tab to-
gether and remove high beam head-
lamp cover 2.
�
Pull the electrical connector off.
�
Turn locking mechanism 5 counter-
clockwise and take out the bulb.
�
Insert the new bulb so that the base lo-
cates in the recess on the holder.
�
Turn locking mechanism 5 clockwise.
�
Plug the connector onto the bulb.
�
Align high beam headlamp cover 2
and click it into place.
Warning!
G
Do not remove the cover for the Xenon or
Bi-Xenon* headlamp. Because of high volt-
age in Xenon and Bi-Xenon* lamps, it is dan-
gerous to replace the bulb or repair the lamp
and its components. We recommend that
you have such work done by a qualified
technician.
Page 402 of 473
401 Practical hints
Replacing bulbs
Parking and standing lamp bulbs�
Press ends of cover tab together and
remove high beam headlamp cover 2.
�
Pull out bulb socket 6 with the bulb.
�
Pull the bulb out of bulb socket 6.
�
Insert a new bulb in bulb socket 6.
�
Reinstall bulb socket 6.
�
Align high beam headlamp cover 2
and click it into place.Additional turn signal lamp bulbs
The additional turn signal lamps in the
exterior rear view mirrors have LEDs.
If a malfunction occurs or LEDs fail to func-
tion, the entire turn signal unit must be re-
placed. Have the turn signal unit replaced
by an authorized Mercedes-Benz Center.Front side marker lamp bulbs
Since replacing the side marker lamp bulbs
is a technically highly demanding process,
we recommend you have the side marker
lamp bulbs replaced by an authorized
Mercedes-Benz Center.
Page 456 of 473

455 Index
Center console
Lower part 32
Upper part 31
Central locking
Automatic 119, 162
Central locking/unlocking switch 31,
119
Locking/unlocking from inside 119
Certification label 430
Check engine see Lamps, indicator and
warning
Checking tire pressure electronically with
the Advanced Tire Pressure Monitoring
System (Advanced TPMS)*,
(Canada only) 298
Children in the vehicle
Air bags 83
Front passenger front air bag off indica-
tor lamp 76, 345
Infant and child restraint systems 83
Occupant Classification System
(OCS) 72
Cigarette lighter 239
Clock 25, 157
Cockpit 24
Cold tire inflation pressure 312COMAND system 31
Driving instructions 268
Combination switch
High beam 56, 133
Turn signals 56
Windshield wipers 57
Consumer battery 281
Control and operation of radio
transmitters 268
Control system 139, 142
Control system menus
AMG Menu 146
AUDIO 149
NAV 151
Settings 153
Standard display 145
TEL* 165
Trip computer 163
Vehicle status message memory 152
Control system submenus 143
Convenience 162
Instrument cluster 156
Lighting 159
Time 157
Vehicle 162
Convenience feature 201Coolant 449
Anticorrosion/antifreeze mixing ratio
and quantity 451
Checking coolant level 280
Coolant warning lamp 337
Messages in the multifunction
display 371, 373
Temperature 270
Temperature gauge 137
Corner-illuminating front fog lamps 132
Corner-illuminating front fog lamps*
Replacing bulbs 397
Courtesy lighting 135
Cruise control 209
Messages in the multifunction
display 352, 353
Cup holder 238
Curb weight 312
D
Daytime running lamp mode 130
Setting 159
Deep water see Standing water
Defogging, Windshield 191
Defrosting, Front 190
Defrosting, Rear 183
Page 460 of 473

459 Index
H
Hard plastic trim items, cleaning 328
Hardtop see Retractable hardtop
Hazard warning flasher 133
Head restraints 44
Headlamp switch-off delay see Delayed
switch-off, exterior lamps
Headlamps
Automatic mode 129
Cleaning lenses 325
Cleaning system 180
Manual mode 129
Messages in the multifunction
display 380
Replacing bulbs 397
Switch 55, 128
Headliner, cleaning 329
Head-thorax air bag 72
Heated steering wheel* 240
High beam flasher 56, 133
High beam headlamps 56, 128, 398
Indicator lamp 29
Messages in the multifunction
display 380
Replacing bulbs 397, 400
Switching on 133High mounted brake lamp 398
High-performance brake system
(AMG vehicles only) 262
Hood 274
Messages in display 377
Opening 274
Horn 25
HVAC see Automatic climate control
Hydroplaning 264
I
Identification labels 430
Identification number, Vehicle (VIN) 431
Ignition 40
Immobilizer 96
Indicator lamps see Lamps, indicator and
warning
Infant and child restraint systems 83
Infant and child restraint systems see
Children in the vehicle
Inflation pressure see
Tires, Inflation pressure
Inside door handle 111Instrument cluster 26, 136
Illumination brightness 136
Lamps 332
Language 156
Messages in the multifunction
display 26, 347
Multifunction display 139
Instrument lighting see Instrument cluster,
Illumination brightness
Instrument panel see Instrument cluster
Instruments and controls see Cockpit
Interior lighting 134
Delayed switch-off 161
Interior rear view mirror 48
Antiglare position 180
Auto-dimming 180
J
Jack 389
Jacking up the vehicle 406
Jump starting 419