207 Controls in detail
Retractable hardtop
�
Open tensioning clasps 5 by pulling
them downward.
�
Unhook retainer springs 6 from hold-
ers and flip retainer springs all the way
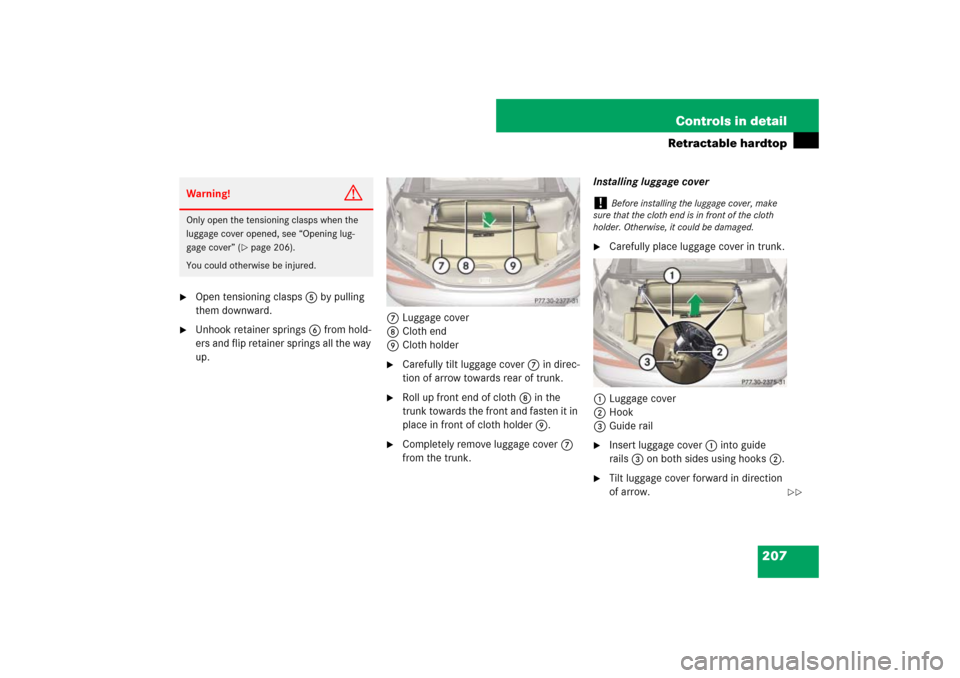
up.7Luggage cover
8Cloth end
9Cloth holder
�
Carefully tilt luggage cover 7 in direc-
tion of arrow towards rear of trunk.
�
Roll up front end of cloth 8 in the
trunk towards the front and fasten it in
place in front of cloth holder 9.
�
Completely remove luggage cover 7
from the trunk.Installing luggage cover
�
Carefully place luggage cover in trunk.
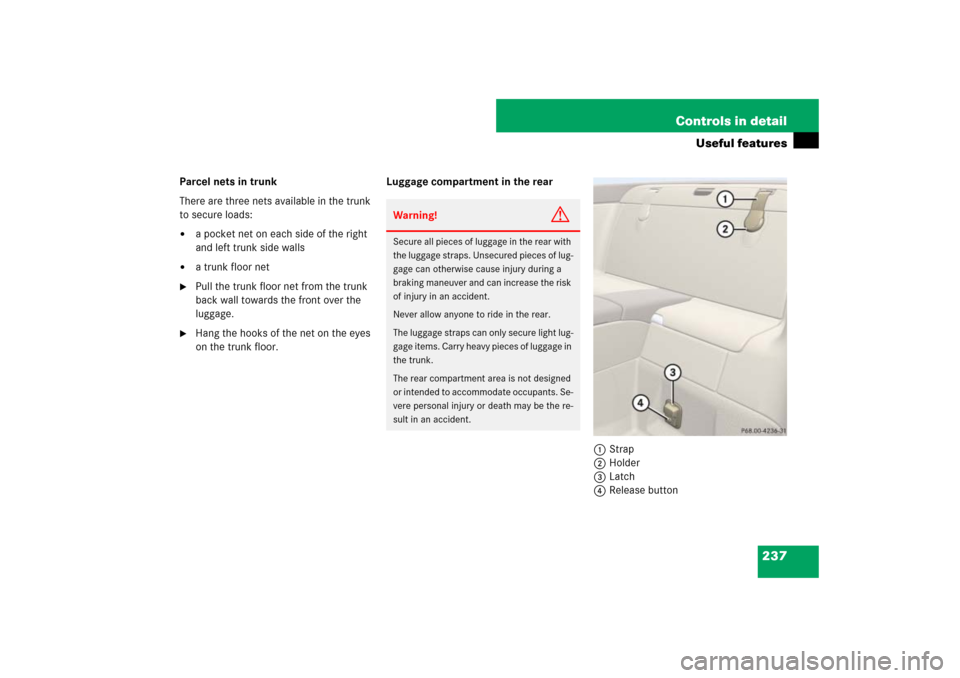
1Luggage cover
2Hook
3Guide rail
�
Insert luggage cover 1 into guide
rails3 on both sides using hooks 2.
�
Tilt luggage cover forward in direction
of arrow.
Warning!
G
Only open the tensioning clasps when the
luggage cover opened, see “Opening lug-
gage cover” (
�page 206).
You could otherwise be injured.
!
Before installing the luggage cover, make
sure that the cloth end is in front of the cloth
holder. Otherwise, it could be damaged.
��
237 Controls in detail
Useful features
Parcel nets in trunk
There are three nets available in the trunk
to secure loads:�
a pocket net on each side of the right
and left trunk side walls
�
a trunk floor net
�
Pull the trunk floor net from the trunk
back wall towards the front over the
luggage.
�
Hang the hooks of the net on the eyes
on the trunk floor.Luggage compartment in the rear
1Strap
2Holder
3Latch
4Release button
Warning!
G
Secure all pieces of luggage in the rear with
the luggage straps. Unsecured pieces of lug-
gage can otherwise cause injury during a
braking maneuver and can increase the risk
of injury in an accident.
Never allow anyone to ride in the rear.
The luggage straps can only secure light lug-
gage items. Carry heavy pieces of luggage in
the trunk.
The rear compartment area is not designed
or intended to accommodate occupants. Se-
vere personal injury or death may be the re-
sult in an accident.