Page 83 of 473

82 Safety and SecurityOccupant safetyThe roll bar raises automatically in an acci-
dent or in a critical driving situation. You
can also raise and lower the roll bar manu-
ally using the buttons provided.
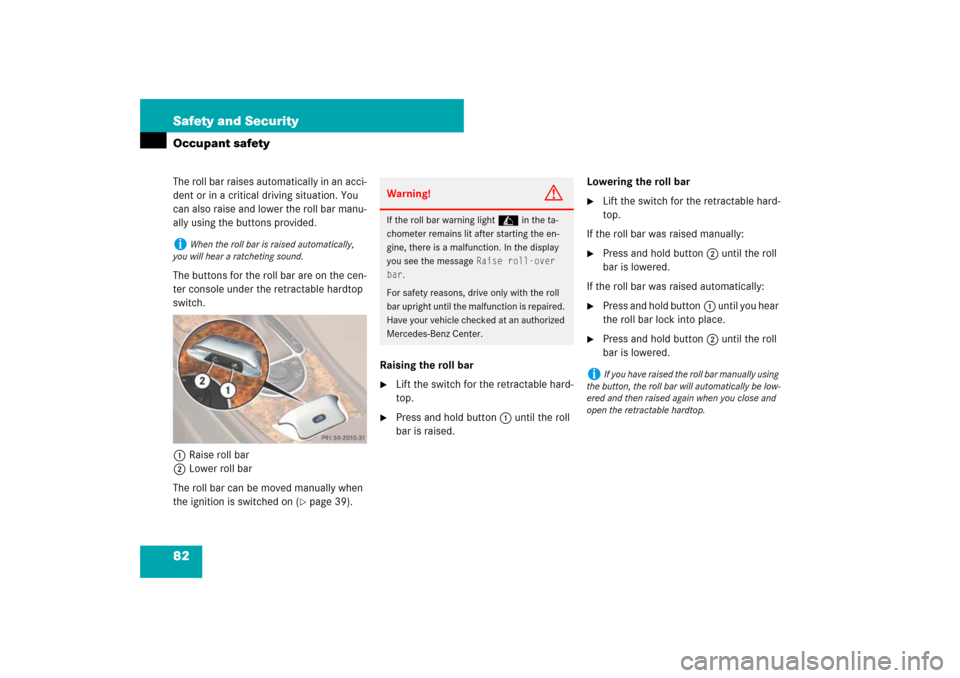
The buttons for the roll bar are on the cen-
ter console under the retractable hardtop
switch.
1Raise roll bar
2Lower roll bar
The roll bar can be moved manually when
the ignition is switched on (
�page 39).Raising the roll bar
�
Lift the switch for the retractable hard-
top.
�
Press and hold button1 until the roll
bar is raised.Lowering the roll bar
�
Lift the switch for the retractable hard-
top.
If the roll bar was raised manually:
�
Press and hold button2 until the roll
bar is lowered.
If the roll bar was raised automatically:
�
Press and hold button1 until you hear
the roll bar lock into place.
�
Press and hold button2 until the roll
bar is lowered.
i
When the roll bar is raised automatically,
you will hear a ratcheting sound.
Warning!
G
If the roll bar warning light in the ta-
chometer remains lit after starting the en-
gine, there is a malfunction. In the display
you see the message
Raise roll-over
bar
.
For safety reasons, drive only with the roll
bar upright until the malfunction is repaired.
Have your vehicle checked at an authorized
Mercedes-Benz Center.
i
If you have raised the roll bar manually using
the button, the roll bar will automatically be low-
ered and then raised again when you close and
open the retractable hardtop.
Page 93 of 473

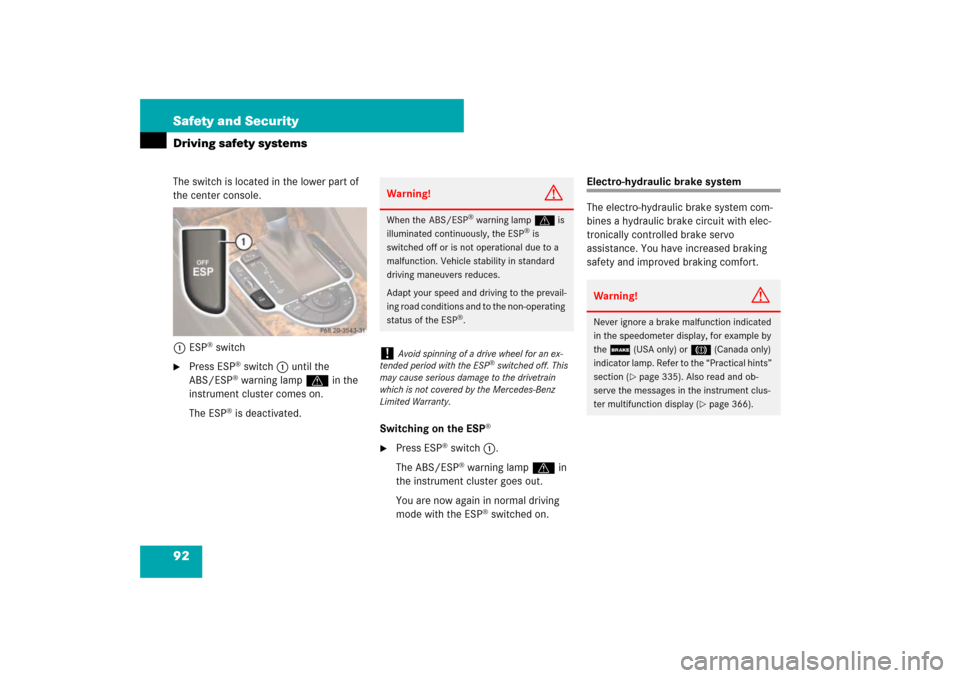
92 Safety and SecurityDriving safety systemsThe switch is located in the lower part of
the center console.
1ESP
® switch
�
Press ESP
® switch1 until the
ABS/ESP® warning lamp v in the
instrument cluster comes on.
The ESP
® is deactivated.
Switching on the ESP
®
�
Press ESP
® switch1.
The ABS/ESP® warning lamp v in
the instrument cluster goes out.
You are now again in normal driving
mode with the ESP
® switched on.
Electro-hydraulic brake system
The electro-hydraulic brake system com-
bines a hydraulic brake circuit with elec-
tronically controlled brake servo
assistance. You have increased braking
safety and improved braking comfort.
Warning!
G
When the ABS/ESP
® warning lampv is
illuminated continuously, the ESP
® is
switched off or is not operational due to a
malfunction. Vehicle stability in standard
driving maneuvers reduces.
Adapt your speed and driving to the prevail-
ing road conditions and to the non-operating
status of the ESP
®.
!
Avoid spinning of a drive wheel for an ex-
tended period with the ESP
® switched off. This
may cause serious damage to the drivetrain
which is not covered by the Mercedes-Benz
Limited Warranty.
Warning!
G
Never ignore a brake malfunction indicated
in the speedometer display, for example by
the;(USA only) or3(Canada only)
indicator lamp. Refer to the “Practical hints”
section (
�page 335). Also read and ob-
serve the messages in the instrument clus-
ter multifunction display (
�page 366).
Page 141 of 473
140 Controls in detailControl systemMultifunction steering wheel
The displays in the multifunction display
and the settings in the control system are
controlled by the buttons on the multifunc-
tion steering wheel.
Depending on the selected menu, pressing
the buttons on the multifunction steering
wheel will alter what appears in the multi-
function display.
The information available in the multifunc-
tion display is arranged in menus, each
containing a number of functions or sub-
menus.
1
Left multifunction display in the
speedometer
2
Right multifunction display in the
tachometerOperating the control system
3
Selecting the submenu or setting the
volume:
Press buttonçdown / to decreaseæup / to increase
4
Telephone*:
Press buttonsto take a calltto end a call
5
Menu systems:
Press buttonÿfor previous menuèfor next menu
6
Moving within a menu:
Press buttonjfor next displaykfor previous display
Page 143 of 473
142 Controls in detailControl systemMenusThis is what you will see when you scroll
through the menus.The table below provides an overview of
the individual menus.
Page 153 of 473

152 Controls in detailControl systemVehicle status message memory menu
Use the vehicle status message memory
menu to scan malfunction and warning
messages that may be stored in the sys-
tem. Such messages appear in the multi-
function display and are based on
conditions or system status the vehicle’s
system has recorded.
The vehicle status message memory menu
only appears, if messages have been
stored.
�
Press button è or ÿ repeatedly
until the vehicle status message mem-
ory menu appears in the multifunction
display.
If the vehicle status message memory
menu does not appear, no messages
have been stored.If conditions have occurred causing status
messages to be recorded, the number of
messages appears in the right multifunc-
tion display:
1Number of recorded status messages
�
Press button k or j.
The stored messages will now be dis-
played in the order in which they have
occurred. For malfunction and warning
messages, see “Vehicle status messag-
es in the multifunction display”
(�page 347).
Warning!
G
Malfunction and warning messages are only
indicated for certain systems and are inten-
tionally not very detailed. The malfunction
and warning messages are simply a remind-
er with respect to the operation of certain
systems and do not replace the owner’s
and/or driver’s responsibility to maintain
the vehicle’s operating safety by having all
required maintenance and safety checks
performed on the vehicle and by bringing
the vehicle to an authorized Mercedes-Benz
Center to address the malfunction and
warning messages (
�page 347).
i
After you have scrolled through all recorded
status messages, the first recorded message ap-
pears again.
Page 155 of 473

154 Controls in detailControl system�
Press the reset button in the instru-
ment cluster for approximately
3 seconds.
In the right multifunction display you
will see the request to press the reset
button again to confirm.
�
Press the reset button again.
The functions of all the submenus will
reset to factory settings.Submenus in the Settings menu
�
Press button è or ÿ repeatedly
until the
Settings...
menu appears in
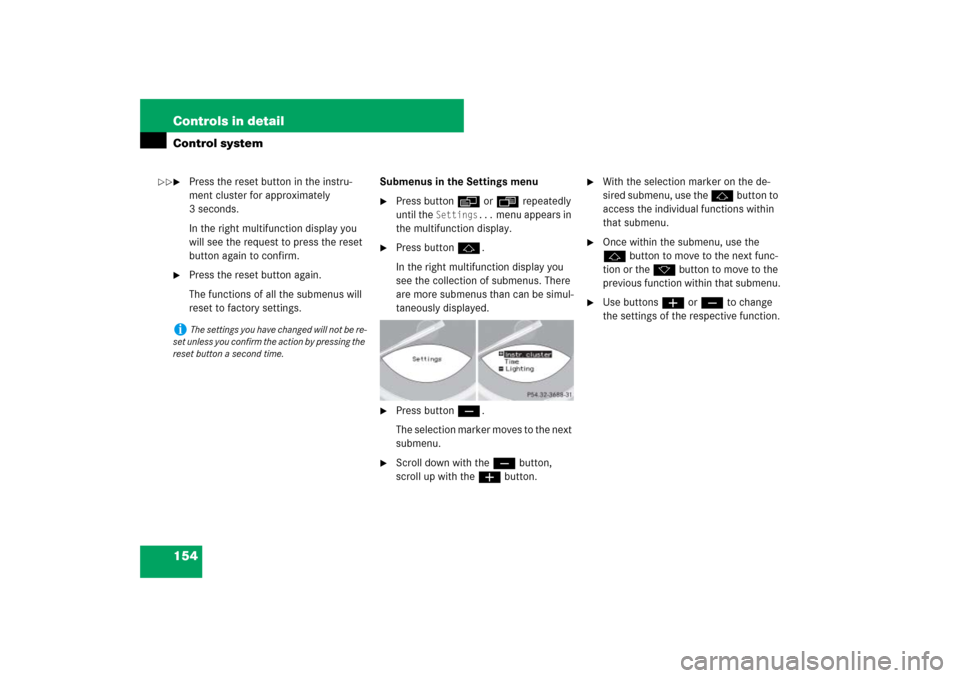
the multifunction display.
�
Press button j.
In the right multifunction display you
see the collection of submenus. There
are more submenus than can be simul-
taneously displayed.
�
Press button ç.
The selection marker moves to the next
submenu.
�
Scroll down with the ç button,
scroll up with the æ button.
�
With the selection marker on the de-
sired submenu, use the j button to
access the individual functions within
that submenu.
�
Once within the submenu, use the
j button to move to the next func-
tion or the k button to move to the
previous function within that submenu.
�
Use buttons æ or ç to change
the settings of the respective function.
i
The settings you have changed will not be re-
set unless you confirm the action by pressing the
reset button a second time.
��
Page 158 of 473

157 Controls in detail
Control system
�
Press æ or ç to select the
language to be used for the
multifunction display messages.
Available languages:�
German
�
English
�
French
�
Italian
�
Spanish
�
Dutch
�
Swedish
�
Danish
�
Turkish
�
PortugueseSelecting standard display
�
Move the selection marker with button
æ or ç to the
Inst. cluster
submenu.
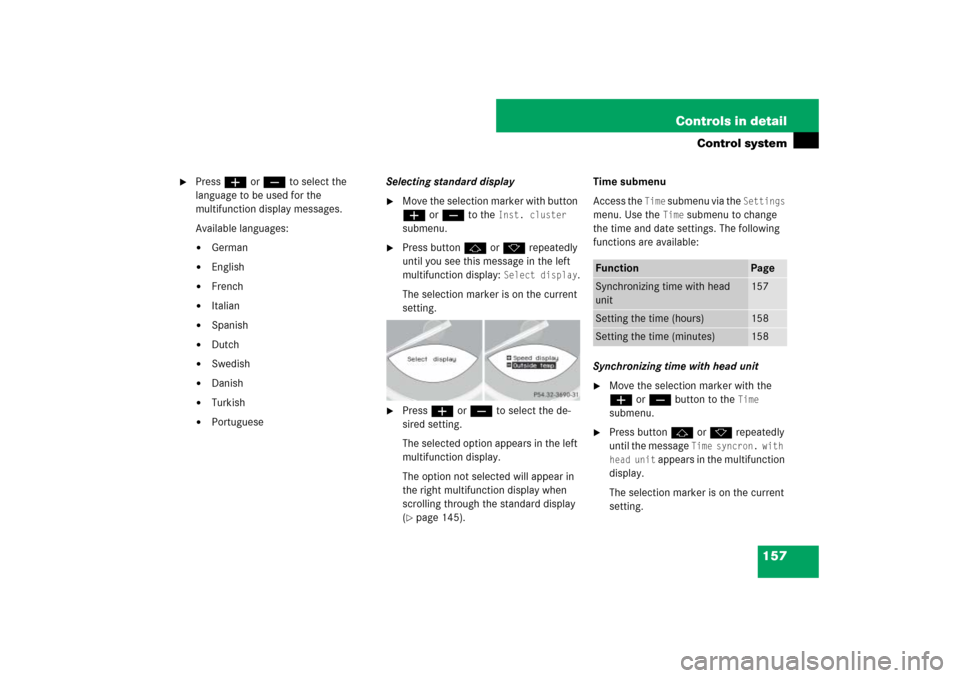
�
Press button j or k repeatedly
until you see this message in the left
multifunction display:
Select display
.
The selection marker is on the current
setting.
�
Press æ or ç to select the de-
sired setting.
The selected option appears in the left
multifunction display.
The option not selected will appear in
the right multifunction display when
scrolling through the standard display
(�page 145).Time submenu
Access the
Time
submenu via the
Settings
menu. Use the
Time
submenu to change
the time and date settings. The following
functions are available:
Synchronizing time with head unit
�
Move the selection marker with the
æ or ç button to the
Time
submenu.
�
Press button j or k repeatedly
until the message
Time syncron. with
head unit
appears in the multifunction
display.
The selection marker is on the current
setting.
Function
Page
Synchronizing time with head
unit
157
Setting the time (hours)
158
Setting the time (minutes)
158
Page 168 of 473

167 Controls in detail
Control system
�
Press button j or k.
The control system reads the phone
book which is stored in the telephone.
This may take several minutes. In the
right multifunction display you will see
the message
Please wait!
.
When the message
Please wait!
dis-
appears, the phone book has been
loaded.
�
Press button j or k repeatedly
until the desired name appears in the
right multifunction display.
The stored names are displayed in
ascending or descending alphabetical
order.
�
Press button s.
The system dials the selected phone
number.
�
If the connection is successful and this
feature is supported by your network
provider, the name of the party you are
calling (if stored in your phone book)
and the duration of the call will appear
in the display.
�
If no connection is made, the control
system stores the dialed number in the
redial memory. Redialing
The control system stores the most recent-
ly dialed phone numbers. This eliminates
the need to search through your entire
phone book.
�
Press button ÿ or è repeatedly
until you see the
TEL
menu in the left
multifunction display.
In the right multifunction display you
will see the standby message.
�
Press button s.
In the right multifunction display you
see the first number in the redial mem-
ory.
�
Press button j or k repeatedly
until the desired name appears in the
right multifunction display.
�
Press button s.
The control system dials the selected
phone number.
i
If you press and hold j or k for long-
er than one second, the system scrolls rapidly
through the list of names until you release the
button again.
Cancel the quick search mode by pressing t.