Page 110 of 473

109 Controls in detail
Locking and unlocking
Selective setting
If you frequently travel alone, you may wish
to reprogram the SmartKey with
KEYLESS-GO so that grasping an outside
door handle only unlocks the driver’s door,
interior lockable storage compartments
and the fuel filler flap.�
Press and hold buttons Œ and ‹
simultaneously for about 6 seconds
until battery check lamp5
(�page 106) flashes twice.
The SmartKey with KEYLESS-GO will
then function as follows:Unlocking the driver’s door and fuel fill-
er flap
�
Grasp the driver’s door handle.
All turn signals flash once. The locking
knob in the driver’s door moves up. The
anti-theft alarm system is disarmed.
Global unlocking
�
Grasp the door handle on the passen-
ger side.
All turn signals flash once. The locking
knobs in the doors move up. The
anti-theft alarm system is disarmed.
Global locking
�
Press lock button on an outside door
handle or the trunk lid.
With the trunk and all doors closed, all
turn signals flash three times. The lock-
ing knobs in the doors move down.
The anti-theft alarm system is armed.Restoring to factory setting
�
Press and hold buttons Œ and ‹
simultaneously for about 6 seconds
until battery check lamp5
(�page 106) flashes twice.
!
If you can no longer lock or unlock the vehi-
cle with the SmartKey with KEYLESS-GO, then
the batteries in the SmartKey are discharged,
the SmartKey with KEYLESS-GO is malfunction-
ing or the vehicle battery is drained.
�
Check the batteries in the SmartKey with
KEYLESS-GO (
�page 105) and replace
them if necessary (�page 395).
�
Use the mechanical key to unlock the driv-
er’s door (
�page 391) and the trunk
(
�page 117).
�
Have the vehicle batteries and their connec-
tions checked (
�page 414).
�
Use the mechanical key to lock or unlock the
doors (
�page 393).
If the SmartKey with KEYLESS-GO is malfunc-
tioning, contact an authorized Mercedes-Benz
Center.
Page 113 of 473

112 Controls in detailLocking and unlockingOpening the trunk from the outside
1Trunk lid handle
Vehicles without trunk opening/closing
system*�
Press button Š on the SmartKey or
SmartKey with KEYLESS-GO*.
or
�
Pull on handle1.
In vehicles without KEYLESS-GO*: The
vehicle must be unlocked.
�
Lift the trunk lid.Vehicles with trunk opening/closing
system*
�
Press and hold button Š on the
SmartKey or SmartKey with
KEYLESS-GO* until trunk unlocks and
begins to open.
or
�
Pull on handle1.
Vehicles without KEYLESS-GO*: The
vehicle must be unlocked.Opening the trunk from the inside
Vehicles without trunk opening/closing
system*
1Remote trunk opening switch
2Indicator lamp
�
Pull switch1 until the trunk begins to
open.
The trunk lid unlocks. Indicator
lamp2 comes on and remains lit until
the trunk is closed again.
�
Lift the trunk lid.
!
The trunk lid swings open upwards automat-
ically. Always make sure that there is sufficient
overhead clearance.
!
To stop the opening procedure, press
buttonŠ on the SmartKey or SmartKey with
KEYLESS-GO* or pull the trunk lid handle.
Page 127 of 473

126 Controls in detailMemory functionPrior to operating the vehicle, the driver
should check and adjust the seat height,
seat position fore and aft, and seat back-
rest angle if necessary, to ensure adequate
control, reach and comfort. The head re-
straint should also be adjusted for proper
height. See also the section on air bags
(�page 68) for proper seat positioning.
In addition, adjust the steering wheel to
ensure adequate control, reach, operation
and comfort. Both the interior and exterior
rear view mirrors should be adjusted for
adequate rear vision.
Fasten seat belts. Infants and small chil-
dren should be seated in a properly se-
cured restraint system that complies with
U.S. Federal Motor Vehicle Safety Stan-
dard 213 and Canadian Motor Vehicle
Safety Standard 213.With the memory switch you can store up
to three different settings.
The following settings are stored when us-
ing the buttons on the driver’s door:
�
Driver’s seat and backrest position
�
Steering wheel position
�
Driver’s side exterior rear view mirror
position
�
Passenger side exterior rear view mir-
ror position
The following settings are stored when us-
ing the buttons on the passenger door:
�
Passenger seat and backrest positionThe memory switch is located on the door
control panel.
M Memory button
1, 2, 3 Stored positions
�
Switch on the ignition (
�page 39).
or
�
Open the respective door.
Warning!
G
Do not activate the memory function on the
driver’s side while driving. Activating the
memory function while driving could cause
the driver to lose control of the vehicle.
Page 141 of 473
140 Controls in detailControl systemMultifunction steering wheel
The displays in the multifunction display
and the settings in the control system are
controlled by the buttons on the multifunc-
tion steering wheel.
Depending on the selected menu, pressing
the buttons on the multifunction steering
wheel will alter what appears in the multi-
function display.
The information available in the multifunc-
tion display is arranged in menus, each
containing a number of functions or sub-
menus.
1
Left multifunction display in the
speedometer
2
Right multifunction display in the
tachometerOperating the control system
3
Selecting the submenu or setting the
volume:
Press buttonçdown / to decreaseæup / to increase
4
Telephone*:
Press buttonsto take a calltto end a call
5
Menu systems:
Press buttonÿfor previous menuèfor next menu
6
Moving within a menu:
Press buttonjfor next displaykfor previous display
Page 147 of 473

146 Controls in detailControl systemAMG menu
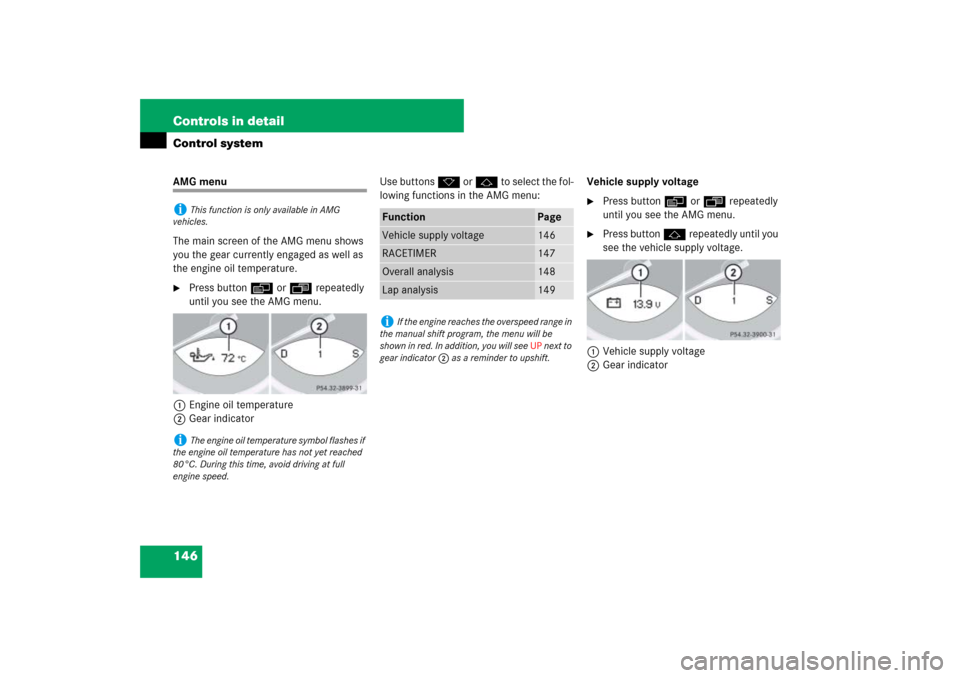
The main screen of the AMG menu shows
you the gear currently engaged as well as
the engine oil temperature.�
Press button è or ÿ repeatedly
until you see the AMG menu.
1Engine oil temperature
2Gear indicatorUse buttons k or j to select the fol-
lowing functions in the AMG menu:Vehicle supply voltage
�
Press button è or ÿ repeatedly
until you see the AMG menu.
�
Press button j repeatedly until you
see the vehicle supply voltage.
1Vehicle supply voltage
2Gear indicator
i
This function is only available in AMG
vehicles.
i
The engine oil temperature symbol flashes if
the engine oil temperature has not yet reached
80°C. During this time, avoid driving at full
engine speed.
Function
Page
Vehicle supply voltage
146
RACETIMER
147
Overall analysis
148
Lap analysis
149
i
If the engine reaches the overspeed range in
the manual shift program, the menu will be
shown in red. In addition, you will see UP next to
gear indicator 2 as a reminder to upshift.
Page 148 of 473

147 Controls in detail
Control system
RACETIMER
The RACETIMER allows you to time and
save driving stretches in hours, minutes
and seconds.�
Press button è or ÿ repeatedly
until you see the AMG menu.
�
Press button j repeatedly until you
see the RACETIMER.
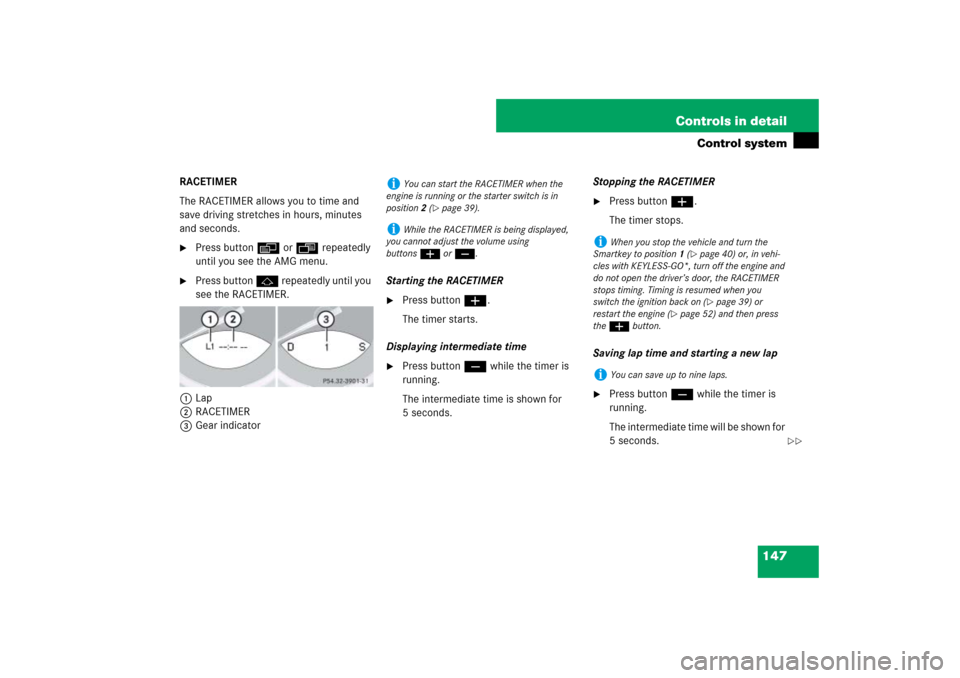
1Lap
2RACETIMER
3Gear indicatorStarting the RACETIMER
�
Press button æ.
The timer starts.
Displaying intermediate time
�
Press button ç while the timer is
running.
The intermediate time is shown for
5 seconds.Stopping the RACETIMER
�
Press button æ.
The timer stops.
Saving lap time and starting a new lap
�
Press button ç while the timer is
running.
The intermediate time will be shown for
5 seconds.
i
You can start the RACETIMER when the
engine is running or the starter switch is in
position2 (
�page 39).
i
While the RACETIMER is being displayed,
you cannot adjust the volume using
buttonsæ or ç.
i
When you stop the vehicle and turn the
Smartkey to position 1 (
�page 40) or, in vehi-
cles with KEYLESS-GO*, turn off the engine and
do not open the driver’s door, the RACETIMER
stops timing. Timing is resumed when you
switch the ignition back on (�page 39) or
restart the engine (
�page 52) and then press
the æbutton.
i
You can save up to nine laps.
��
Page 155 of 473

154 Controls in detailControl system�
Press the reset button in the instru-
ment cluster for approximately
3 seconds.
In the right multifunction display you
will see the request to press the reset
button again to confirm.
�
Press the reset button again.
The functions of all the submenus will
reset to factory settings.Submenus in the Settings menu
�
Press button è or ÿ repeatedly
until the
Settings...
menu appears in
the multifunction display.
�
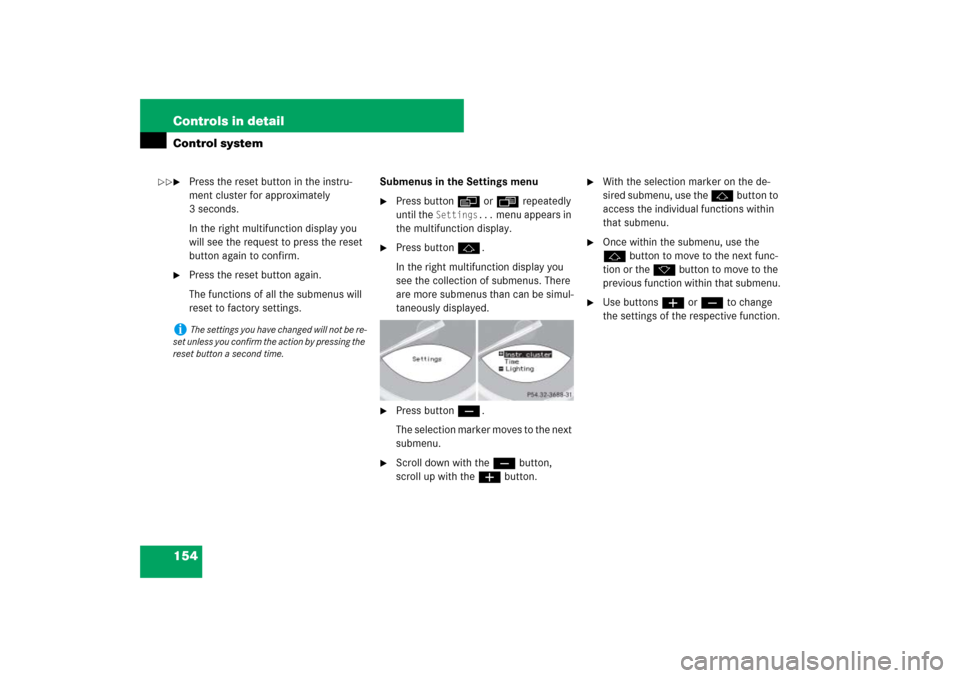
Press button j.
In the right multifunction display you
see the collection of submenus. There
are more submenus than can be simul-
taneously displayed.
�
Press button ç.
The selection marker moves to the next
submenu.
�
Scroll down with the ç button,
scroll up with the æ button.
�
With the selection marker on the de-
sired submenu, use the j button to
access the individual functions within
that submenu.
�
Once within the submenu, use the
j button to move to the next func-
tion or the k button to move to the
previous function within that submenu.
�
Use buttons æ or ç to change
the settings of the respective function.
i
The settings you have changed will not be re-
set unless you confirm the action by pressing the
reset button a second time.
��
Page 192 of 473

191 Controls in detail
Automatic climate control
Activating�
Press button P (
�page 185).
The indicator lamp on the button
comes on.
The air conditioning switches to the fol-
lowing functions automatically:
�
cooling on to dehumidify
�
maximum blower speed and
heating power
�
air flows onto the windshield
and the front side windows
�
the air recirculation mode is
switched off
Deactivating
�
Press button P (
�page 185).
The indicator lamp on the button goes
out. Defrosting is turned off.
The previous settings are in effect
again.Windshield fogged on the outside
�
Switch the windshield wipers on
(�page 57).
If the automatic air distribution and air vol-
ume are switched off:
�
Turn air distribution controls1 and 5
(�page 185) to position h ork.
or
�
Press control buttons 1, 5 and 9
(�page 185).
The control buttons are engaged. The
U symbol on the control buttons
come on. Air distribution and air vol-
ume are adjusted automatically.
Air recirculation mode
Switch to air recirculation mode to prevent
unpleasant odors from entering the vehicle
from the outside. This setting cuts off the
intake of outside air and recirculates the
air in the passenger compartment.
i
The cooling remains switched on.
i
Keep this setting selected only until the
windshield is clear again.
Warning!
G
Fogged windows impair visibility, endanger-
ing you and others. If the windows begin to
fog on the inside, switching off the air
recirculation mode immediately should clear
interior window fogging. If interior window
fogging persists, make sure the air
conditioning (
�page 193) is activated, or
press buttonP.