Page 599 of 705

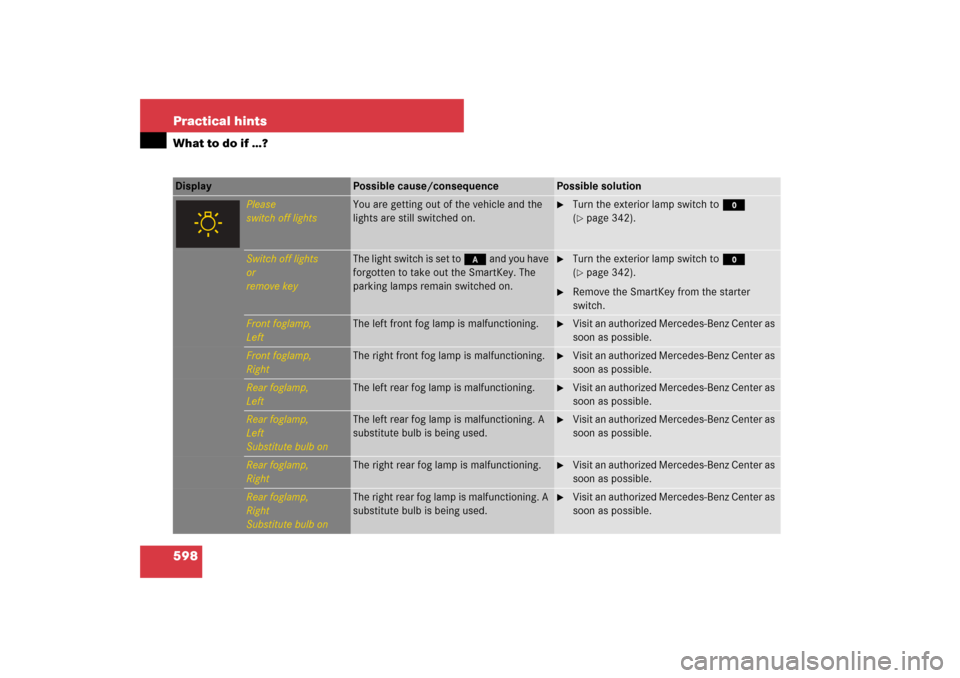
598 Practical hintsWhat to do if …?Display
Possible cause/consequence
Possible solution
Please
switch off lights
You are getting out of the vehicle and the
lights are still switched on.
�
Turn the exterior lamp switch to M
(�page 342).
Switch off lights
or
remove key
The light switch is set to * and you have
forgotten to take out the SmartKey. The
parking lamps remain switched on.
�
Turn the exterior lamp switch to M
(�page 342).
�
Remove the SmartKey from the starter
switch.
Front foglamp,
Left
The left front fog lamp is malfunctioning.
�
Visit an authorized Mercedes-Benz Center as
soon as possible.
Front foglamp,
Right
The right front fog lamp is malfunctioning.
�
Visit an authorized Mercedes-Benz Center as
soon as possible.
Rear foglamp,
Left
The left rear fog lamp is malfunctioning.
�
Visit an authorized Mercedes-Benz Center as
soon as possible.
Rear foglamp,
Left
Substitute bulb on
The left rear fog lamp is malfunctioning. A
substitute bulb is being used.
�
Visit an authorized Mercedes-Benz Center as
soon as possible.
Rear foglamp,
Right
The right rear fog lamp is malfunctioning.
�
Visit an authorized Mercedes-Benz Center as
soon as possible.
Rear foglamp,
Right
Substitute bulb on
The right rear fog lamp is malfunctioning. A
substitute bulb is being used.
�
Visit an authorized Mercedes-Benz Center as
soon as possible.
Page 611 of 705
610 Practical hintsWhat to do if …?Display
Possible cause/consequence
Possible solution
Shift to 'P'
You have attempted to turn off the engine
with the KEYLESS-GO* start/stop button
and opened the driver’s door with the auto-
matic transmission not shift to positionP.
�
Shift the automatic transmission toP
(�page 367).
or
�
Close the driver’s door.
You are driving with the trunk open.
�
Close the trunk (
�page 437).
Washer fluid,
please refill
The water level has dropped to approx.
1.1 US qts (1.0 l).
�
Add washer fluid (
�page 498).
Page 615 of 705
614 Practical hintsUnlocking/locking in an emergencyUnlocking the vehicle
If you are unable to unlock the vehicle with
the SmartKey or KEYLESS-GO*, open the
driver’s door and the trunk using the me-
chanical key. Removing the mechanical key
1Mechanical key locking tab
2Mechanical key
�
Move locking tab1 in the direction of
arrow.
�
Slide mechanical key2 out of the
housing.Unlocking the driver’s door
1Unlocking
2Mechanical key
�
Insert mechanical key2 into the driv-
er’s door lock until it stops.
�
Turn mechanical key2 counterclock-
wise to position1.
The driver’s door is unlocked.
�
Pull door handle quickly.
The locking knob moves up.
�
Turn back mechanical key2 and re-
move.
�
Pull door handle again.
i
Unlocking the driver’s door and/or the trunk
with the mechanical key will trigger the anti-theft
alarm system (
�page 75).
To cancel the alarm, insert the SmartKey or
SmartKey with KEYLESS-GO* in the starter
switch.
Page 616 of 705

615 Practical hints
Unlocking/locking in an emergency
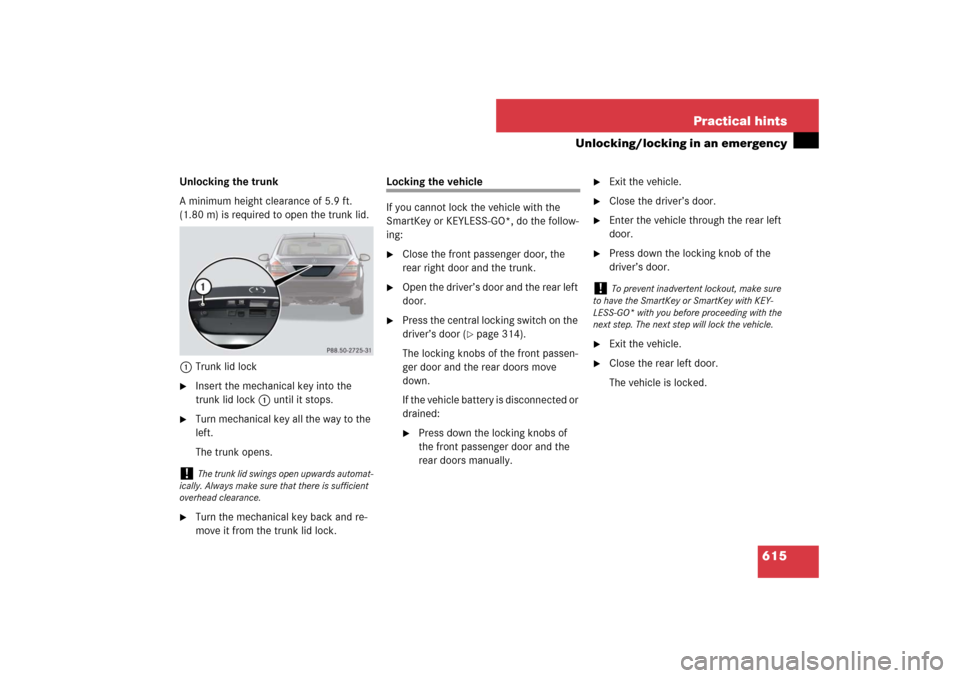
Unlocking the trunk
A minimum height clearance of 5.9 ft.
(1.80 m) is required to open the trunk lid.
1Trunk lid lock�
Insert the mechanical key into the
trunk lid lock1 until it stops.
�
Turn mechanical key all the way to the
left.
The trunk opens.
�
Turn the mechanical key back and re-
move it from the trunk lid lock.
Locking the vehicle
If you cannot lock the vehicle with the
SmartKey or KEYLESS-GO*, do the follow-
ing:�
Close the front passenger door, the
rear right door and the trunk.
�
Open the driver’s door and the rear left
door.
�
Press the central locking switch on the
driver’s door (
�page 314).
The locking knobs of the front passen-
ger door and the rear doors move
down.
If the vehicle battery is disconnected or
drained:
�
Press down the locking knobs of
the front passenger door and the
rear doors manually.
�
Exit the vehicle.
�
Close the driver’s door.
�
Enter the vehicle through the rear left
door.
�
Press down the locking knob of the
driver’s door.
�
Exit the vehicle.
�
Close the rear left door.
The vehicle is locked.
!
The trunk lid swings open upwards automat-
ically. Always make sure that there is sufficient
overhead clearance.
!
To prevent inadvertent lockout, make sure
to have the SmartKey or SmartKey with KEY-
LESS-GO* with you before proceeding with the
next step. The next step will lock the vehicle.
Page 620 of 705

619 Practical hints
Replacing SmartKey batteries
�Replacing SmartKey batteries
If the batteries in the SmartKey or the
SmartKey with KEYLESS-GO* are dis-
charged, the vehicle can no longer be
locked or unlocked. It is recommended to
have the batteries replaced at an autho-
rized Mercedes-Benz Center.Batteries contain materials that can harm
the environment if disposed of improperly.
Recycling of batteries is the preferred
method of disposal. Many states require
sellers of batteries to accept old batteries
for recycling.SmartKey/SmartKey with
KEYLESS-GO*
Replacement batteries: Lithium, type
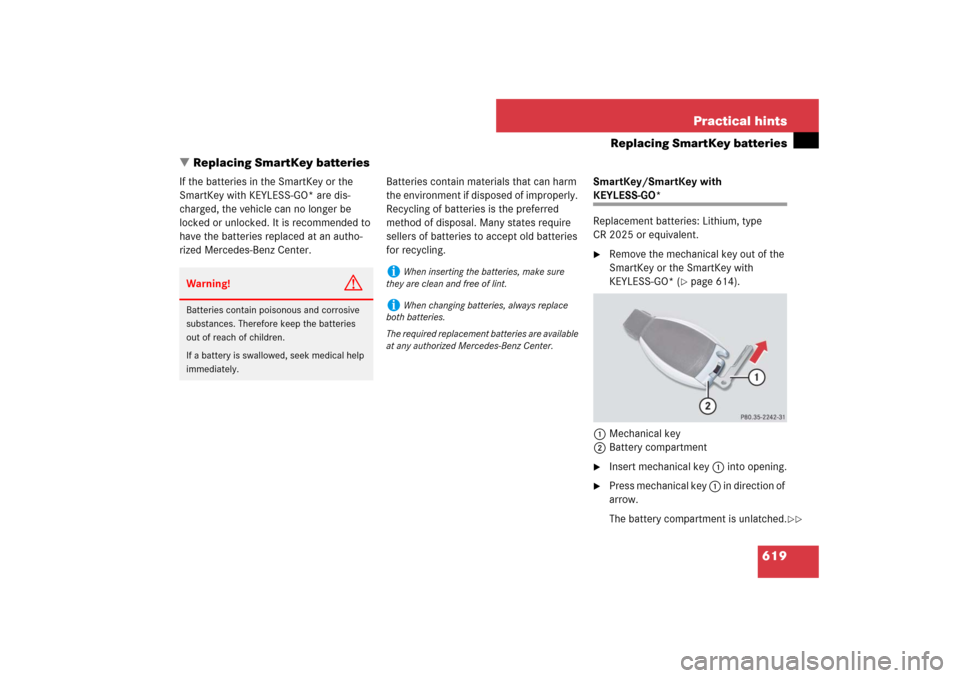
CR 2025 or equivalent.�
Remove the mechanical key out of the
SmartKey or the SmartKey with
KEYLESS-GO* (
�page 614).
1Mechanical key
2Battery compartment
�
Insert mechanical key 1 into opening.
�
Press mechanical key 1 in direction of
arrow.
The battery compartment is unlatched.
Warning!
G
Batteries contain poisonous and corrosive
substances. Therefore keep the batteries
out of reach of children.
If a battery is swallowed, seek medical help
immediately.
i
When inserting the batteries, make sure
they are clean and free of lint.
i
When changing batteries, always replace
both batteries.
The required replacement batteries are available
at any authorized Mercedes-Benz Center.
��
Page 621 of 705
620 Practical hintsReplacing SmartKey batteries�
Pull battery compartment 2 out of the
housing.
3Batteries
4Contact springs
�
Pull out batteries3.
�
Using a line-free cloth, insert new bat-
teries 3 under contact springs 4 with
the positive terminal (+) side facing up.
�
Return battery compartment 2
(�page 619) into housing until it locks
into place.
�
Slide the mechanical key back into the
SmartKey/SmartKey with
KEYLESS-GO*.
�
Check the operation of the SmartKey/
KEYLESS-GO*.
��
Page 628 of 705

627 Practical hints
Replacing wiper blades
�Replacing wiper blades
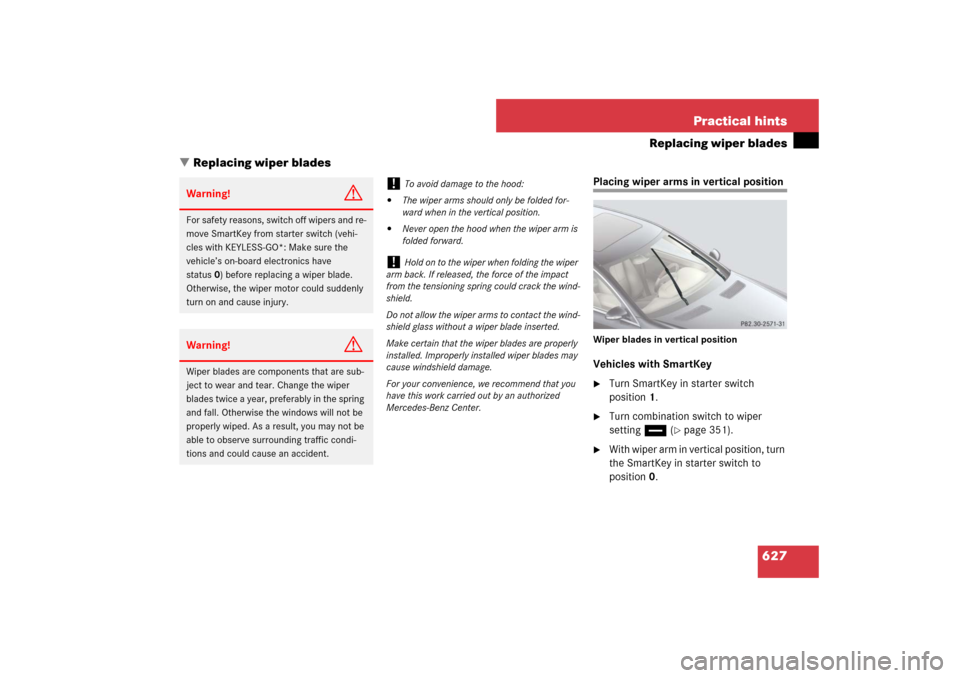
Placing wiper arms in vertical positionWiper blades in vertical positionVehicles with SmartKey�
Turn SmartKey in starter switch
position1.
�
Turn combination switch to wiper
settingu (
�page 351).
�
With wiper arm in vertical position, turn
the SmartKey in starter switch to
position0.
Warning!
G
For safety reasons, switch off wipers and re-
move SmartKey from starter switch (vehi-
cles with KEYLESS-GO*: Make sure the
vehicle’s on-board electronics have
status0) before replacing a wiper blade.
Otherwise, the wiper motor could suddenly
turn on and cause injury. Warning!
G
Wiper blades are components that are sub-
ject to wear and tear. Change the wiper
blades twice a year, preferably in the spring
and fall. Otherwise the windows will not be
properly wiped. As a result, you may not be
able to observe surrounding traffic condi-
tions and could cause an accident.
!
To avoid damage to the hood:
�
The wiper arms should only be folded for-
ward when in the vertical position.
�
Never open the hood when the wiper arm is
folded forward.
!
Hold on to the wiper when folding the wiper
arm back. If released, the force of the impact
from the tensioning spring could crack the wind-
shield.
Do not allow the wiper arms to contact the wind-
shield glass without a wiper blade inserted.
Make certain that the wiper blades are properly
installed. Improperly installed wiper blades may
cause windshield damage.
For your convenience, we recommend that you
have this work carried out by an authorized
Mercedes-Benz Center.
Page 629 of 705
628 Practical hintsReplacing wiper bladesVehicles with KEYLESS-GO*�
Turn off the engine (
�page 366).
�
Take foot off brake pedal.
�
Turn combination switch to wiper
settingu (
�page 351).
�
Press KEYLESS-GO start/stop button
(�page 317) repeatedly until wind-
shield wipers start.
�
Press KEYLESS-GO start/stop button
(�page 317) when the wiper arms are
in a vertical position.
Removing wiper blades�
Fold the wiper arm forward until it
snaps into place.
�
Turn the wiper blade at a right angle to
wiper arm (arrow 1).
�
Slide the wiper blade sideways out of
the retainer in the direction of
arrow2.
Installing wiper blades�
Slide the wiper blade onto wiper arm
until it locks in place.
�
Rotate the wiper blade into position
parallel to wiper arm.
�
Fold the wiper arm backward to rest on
the windshield. Make sure you hold
onto the wiper when folding the wiper
arm back.
!
To do so, only touch the wiper arm so as not
to damage the wiper blade inserts.