Page 457 of 705

456 Controls in detailUseful featuresRear window sunshade
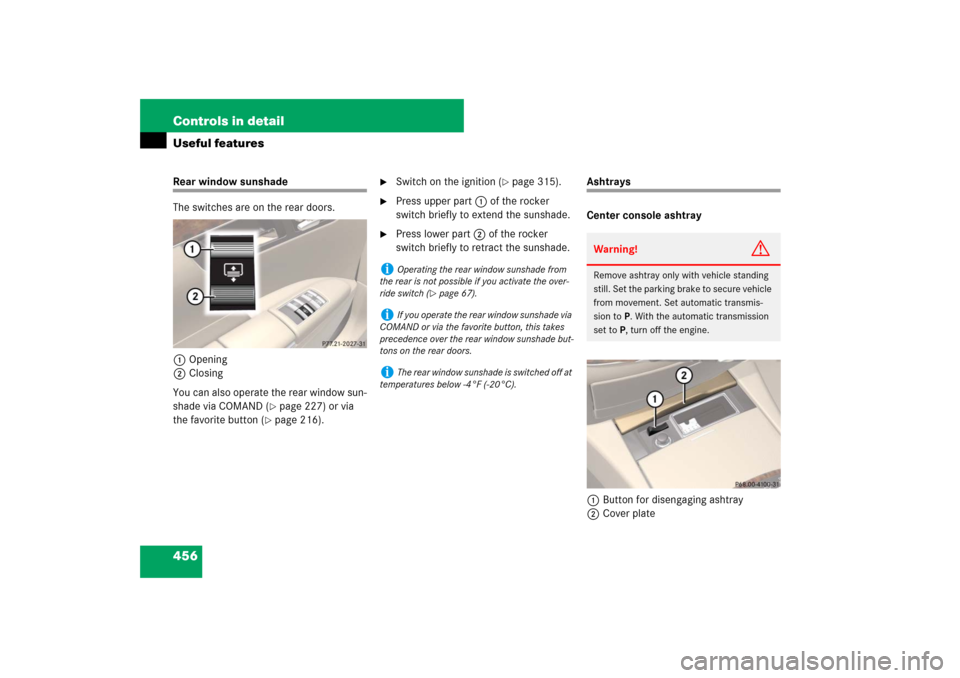
The switches are on the rear doors.
1Opening
2Closing
You can also operate the rear window sun-
shade via COMAND (
�page 227) or via
the favorite button (
�page 216).
�
Switch on the ignition (
�page 315).
�
Press upper part 1 of the rocker
switch briefly to extend the sunshade.
�
Press lower part 2 of the rocker
switch briefly to retract the sunshade.
Ashtrays
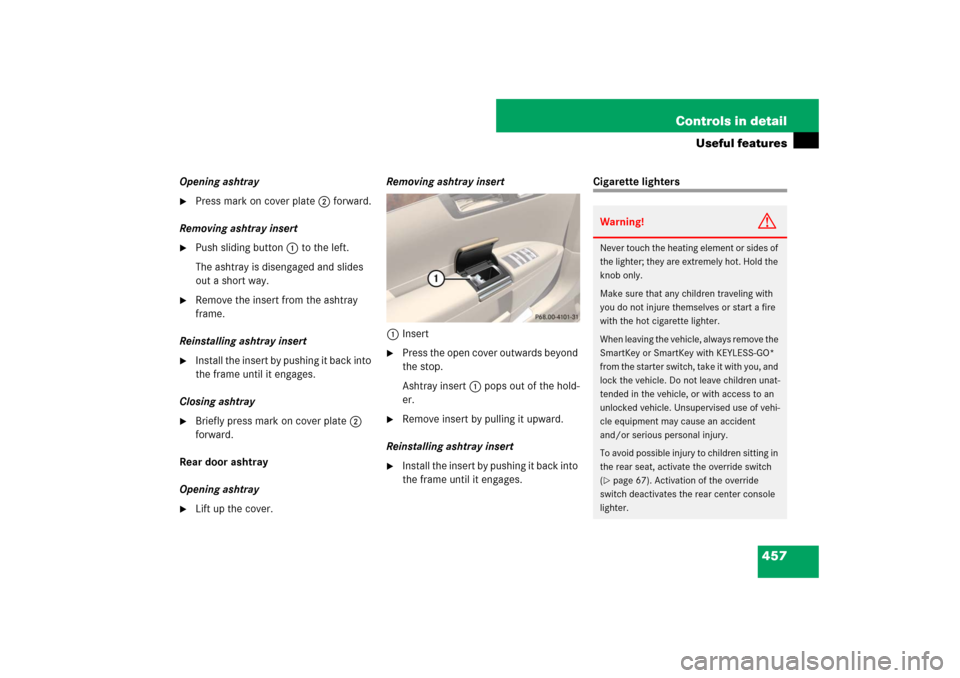
Center console ashtray
1Button for disengaging ashtray
2Cover plate
i
Operating the rear window sunshade from
the rear is not possible if you activate the over-
ride switch (
�page 67).
i
If you operate the rear window sunshade via
COMAND or via the favorite button, this takes
precedence over the rear window sunshade but-
tons on the rear doors.
i
The rear window sunshade is switched off at
temperatures below -4°F (-20°C).
Warning!
G
Remove ashtray only with vehicle standing
still. Set the parking brake to secure vehicle
from movement. Set automatic transmis-
sion toP. With the automatic transmission
set toP, turn off the engine.
Page 458 of 705

457 Controls in detail
Useful features
Opening ashtray�
Press mark on cover plate2 forward.
Removing ashtray insert
�
Push sliding button1 to the left.
The ashtray is disengaged and slides
out a short way.
�
Remove the insert from the ashtray
frame.
Reinstalling ashtray insert
�
Install the insert by pushing it back into
the frame until it engages.
Closing ashtray
�
Briefly press mark on cover plate2
forward.
Rear door ashtray
Opening ashtray
�
Lift up the cover.Removing ashtray insert
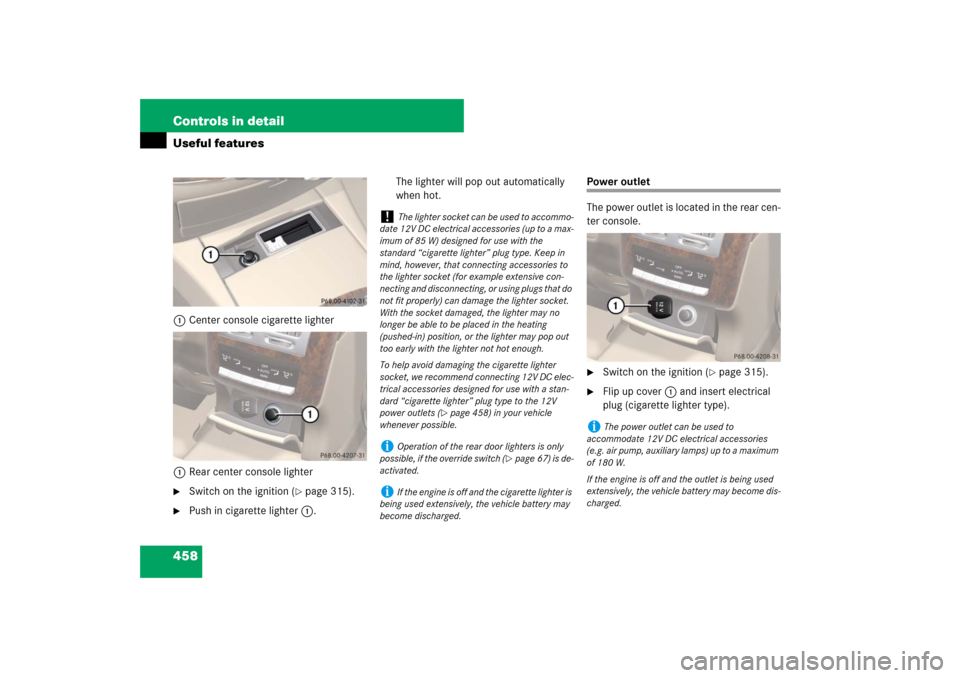
1Insert
�
Press the open cover outwards beyond
the stop.
Ashtray insert1 pops out of the hold-
er.
�
Remove insert by pulling it upward.
Reinstalling ashtray insert
�
Install the insert by pushing it back into
the frame until it engages.
Cigarette lightersWarning!
G
Never touch the heating element or sides of
the lighter; they are extremely hot. Hold the
knob only.
Make sure that any children traveling with
you do not injure themselves or start a fire
with the hot cigarette lighter.
When leaving the vehicle, always remove the
SmartKey or SmartKey with KEYLESS-GO*
from the starter switch, take it with you, and
lock the vehicle. Do not leave children unat-
tended in the vehicle, or with access to an
unlocked vehicle. Unsupervised use of vehi-
cle equipment may cause an accident
and/or serious personal injury.
To avoid possible injury to children sitting in
the rear seat, activate the override switch
(�page 67). Activation of the override
switch deactivates the rear center console
lighter.
Page 459 of 705

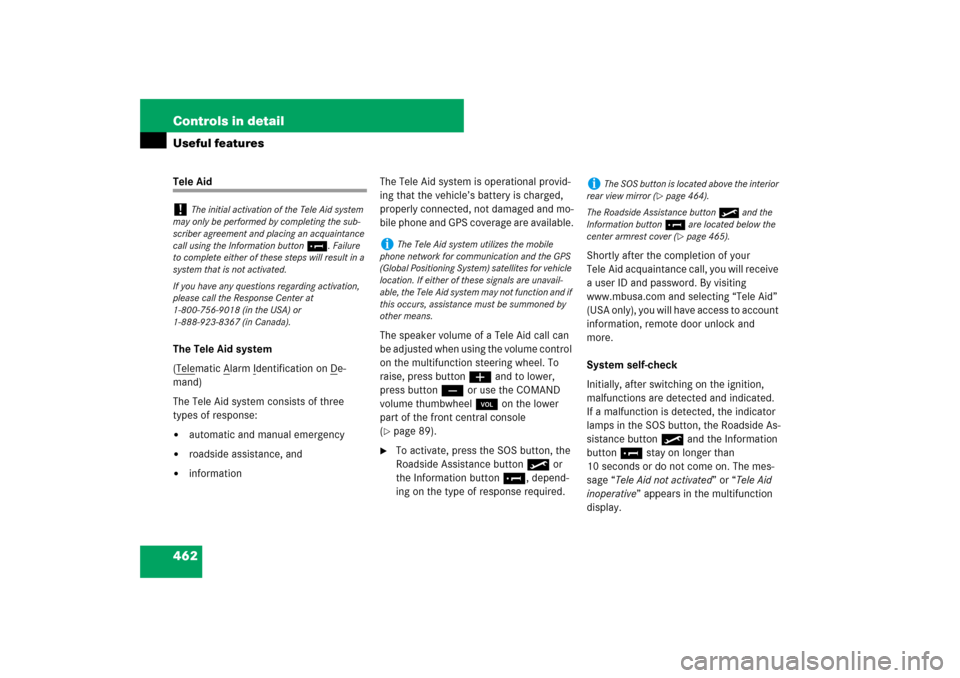
458 Controls in detailUseful features1Center console cigarette lighter
1Rear center console lighter�
Switch on the ignition (
�page 315).
�
Push in cigarette lighter1.The lighter will pop out automatically
when hot.
Power outlet
The power outlet is located in the rear cen-
ter console.�
Switch on the ignition (
�page 315).
�
Flip up cover1 and insert electrical
plug (cigarette lighter type).
!
The lighter socket can be used to accommo-
date 12V DC electrical accessories (up to a max-
imum of 85 W) designed for use with the
standard “cigarette lighter” plug type. Keep in
mind, however, that connecting accessories to
the lighter socket (for example extensive con-
necting and disconnecting, or using plugs that do
not fit properly) can damage the lighter socket.
With the socket damaged, the lighter may no
longer be able to be placed in the heating
(pushed-in) position, or the lighter may pop out
too early with the lighter not hot enough.
To help avoid damaging the cigarette lighter
socket, we recommend connecting 12V DC elec-
trical accessories designed for use with a stan-
dard “cigarette lighter” plug type to the 12V
power outlets (
�page 458) in your vehicle
whenever possible.
i
Operation of the rear door lighters is only
possible, if the override switch (
�page 67) is de-
activated.
i
If the engine is off and the cigarette lighter is
being used extensively, the vehicle battery may
become discharged.
i
The power outlet can be used to
accommodate 12V DC electrical accessories
(e.g. air pump, auxiliary lamps) up to a maximum
of 180 W.
If the engine is off and the outlet is being used
extensively, the vehicle battery may become dis-
charged.
Page 463 of 705

462 Controls in detailUseful featuresTele Aid
The Tele Aid system
(Tele
matic A
larm I
dentification on D
e-
mand)
The Tele Aid system consists of three
types of response:
�
automatic and manual emergency
�
roadside assistance, and
�
informationThe Tele Aid system is operational provid-
ing that the vehicle’s battery is charged,
properly connected, not damaged and mo-
bile phone and GPS coverage are available.
The speaker volume of a Tele Aid call can
be adjusted when using the volume control
on the multifunction steering wheel. To
raise, press buttonæ and to lower,
press buttonç or use the COMAND
volume thumbwheel , on the lower
part of the front central console
(
�page 89).
�
To activate, press the SOS button, the
Roadside Assistance button• or
the Information button¡, depend-
ing on the type of response required.Shortly after the completion of your
Tele Aid acquaintance call, you will receive
a user ID and password. By visiting
www.mbusa.com and selecting “Tele Aid”
(USA only), you will have access to account
information, remote door unlock and
more.
System self-check
Initially, after switching on the ignition,
malfunctions are detected and indicated.
If a malfunction is detected, the indicator
lamps in the SOS button, the Roadside As-
sistance button• and the Information
button¡ stay on longer than
10 seconds or do not come on. The mes-
sage “Tele Aid not activated” or “Tele Aid
inoperative” appears in the multifunction
display.
!
The initial activation of the Tele Aid system
may only be performed by completing the sub-
scriber agreement and placing an acquaintance
call using the Information button¡. Failure
to complete either of these steps will result in a
system that is not activated.
If you have any questions regarding activation,
please call the Response Center at
1-800-756-9018 (in the USA) or
1-888-923-8367 (in Canada).
i
The Tele Aid system utilizes the mobile
phone network for communication and the GPS
(Global Positioning System) satellites for vehicle
location. If either of these signals are unavail-
able, the Tele Aid system may not function and if
this occurs, assistance must be summoned by
other means.
i
The SOS button is located above the interior
rear view mirror (
�page 464).
The Roadside Assistance button• and the
Information button¡ are located below the
center armrest cover (�page 465).