Page 626 of 705

625 Practical hints
Replacing bulbs
High beam flasher lamp
In vehicles with Bi-Xenon headlamps, you
can only change the halogen bulb for the
high-beam flasher lamp.
1Bulb holder
2Wire position
3Grip
�
Turn cover2 (
�page 624) counter-
clockwise and remove it.
�
Turn bulb holder1 counterclockwise
until it disengages.
�
Take out bulb holder1.
�
Take bulb out of holder.
�
Insert new bulb into holder and press it
all the way down.
The tab of the bulb holder must be po-
sitioned on the upper left-hand side
and wire2 must point upward and to
the right for the left headlamp, down-
ward and to the left for the right head-
lamp.
�
Turn bulb holder clockwise until it en-
gages and grip3 is in a vertical posi-
tion.IR emitter*
1Bulb
2Wire position
�
Turn cover2 (
�page 624) counter-
clockwise and remove it.
�
Turn bulb holder1 counterclockwise
until it disengages.
�
Take out bulb holder1.
�
Press both catches on left and right
sides of bulb holder1 and take bulb
out of holder.
�
Insert new bulb into holder until it en-
gages.
��
Page 627 of 705

626 Practical hintsReplacing bulbs�
Insert bulb holder1 into guide in
headlamp. Wire2 must point down-
ward and to the right.
�
Turn bulb holder1 clockwise until it
engages and wire2 points downward
and to the left.
Corner-illuminating lamp
1Bulb holder
2Grip
3Wire position
�
Turn cover3 (
�page 624) counter-
clockwise and remove it.
�
Turn bulb holder1 counterclockwise
until it disengages.
�
Take out bulb holder1.
�
Take bulb out of holder.
�
Insert new bulb into holder and press it
all the way down.
�
Insert bulb holder1 into guide in
headlamp.
The tab of the bulb holder must be po-
sitioned on the upper left-hand side
and wire3 must point downward and
to the left for the left headlamp, up-
ward and to the right for the right head-
lamp.
�
Turn bulb holder1 clockwise until it
engages and grip2 is in a horizontal
position.Additional turn signal lamp bulbs
The additional turn signal lamps in the ex-
terior rear view mirrors have LEDs.
If a malfunction occurs or LEDs fail to func-
tion, the entire turn signal unit must be re-
placed. Have the turn signal unit replaced
by an authorized Mercedes-Benz Center.
Front side marker lamp bulbs
Since replacing the side marker lamp bulbs
is a technically highly demanding process,
we recommend you have the side marker
lamp bulbs replaced by an authorized
Mercedes-Benz Center.
��
Page 634 of 705

633 Practical hints
Flat tire
�
Unscrew the alignment bolt, install the
last wheel bolt and tighten slightly.Lowering the vehicle
�
Lower vehicle by turning crank coun-
terclockwise until vehicle is resting ful-
ly on its own weight.
�
Remove the jack.
1 - 5 Wheel bolts
�
Tighten the five wheel bolts evenly, fol-
lowing the diagonal sequence illustrat-
ed (1 to 5), until all bolts are tight.
Observe a tightening torque of
110 lb-ft (150 Nm).Before storing the jack, it should be fully
collapsed, with handle folded in (storage
position).
�
Store the jack and the other vehicle
tools in the designated storage space
underneath the trunk floor
(�page 611).
Warning!
G
Only use Genuine equipment
Mercedes-Benz wheel bolts. Other wheel
bolts may come loose.
Do not tighten the wheel bolts when the ve-
hicle is raised. Otherwise the vehicle could
fall off the jack.
Warning!
G
Have the tightening torque checked after
changing a wheel. The wheels could come
loose if they are not tightened to a torque of
110 lb-ft (150 Nm).i
Do not activate the tire inflation pressure
monitor (
�page 511) until the depressurized
tire has been removed from the trunk.
Page 645 of 705
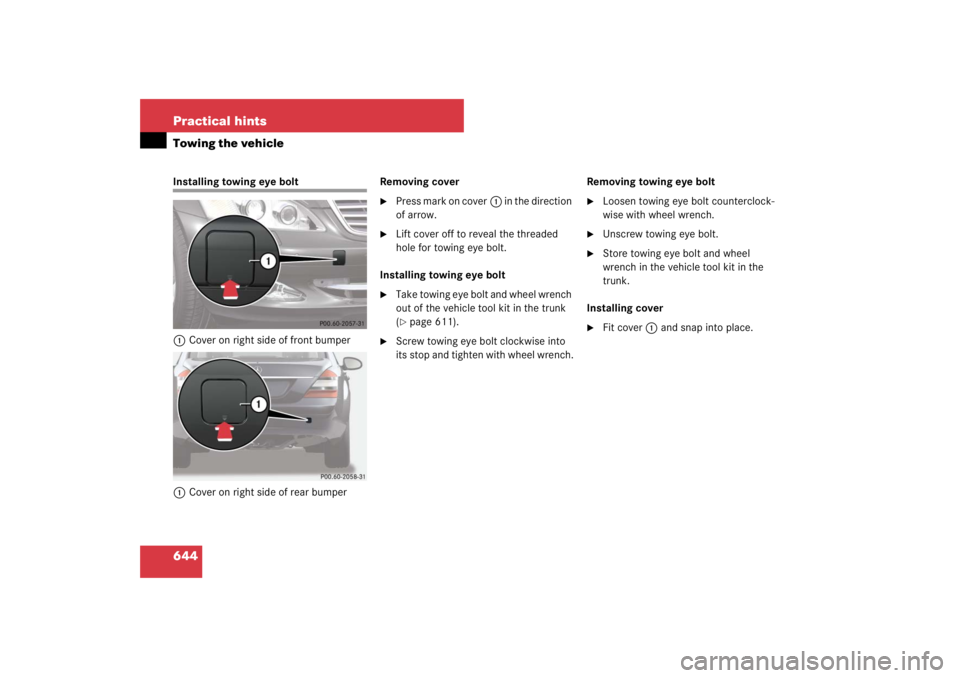
644 Practical hintsTowing the vehicleInstalling towing eye bolt
1Cover on right side of front bumper
1Cover on right side of rear bumperRemoving cover
�
Press mark on cover1 in the direction
of arrow.
�
Lift cover off to reveal the threaded
hole for towing eye bolt.
Installing towing eye bolt
�
Take towing eye bolt and wheel wrench
out of the vehicle tool kit in the trunk
(�page 611).
�
Screw towing eye bolt clockwise into
its stop and tighten with wheel wrench.Removing towing eye bolt
�
Loosen towing eye bolt counterclock-
wise with wheel wrench.
�
Unscrew towing eye bolt.
�
Store towing eye bolt and wheel
wrench in the vehicle tool kit in the
trunk.
Installing cover
�
Fit cover1 and snap into place.
Page:
< prev 1-8 9-16 17-24