Page 469 of 570

468 Practical hints
What to do if …
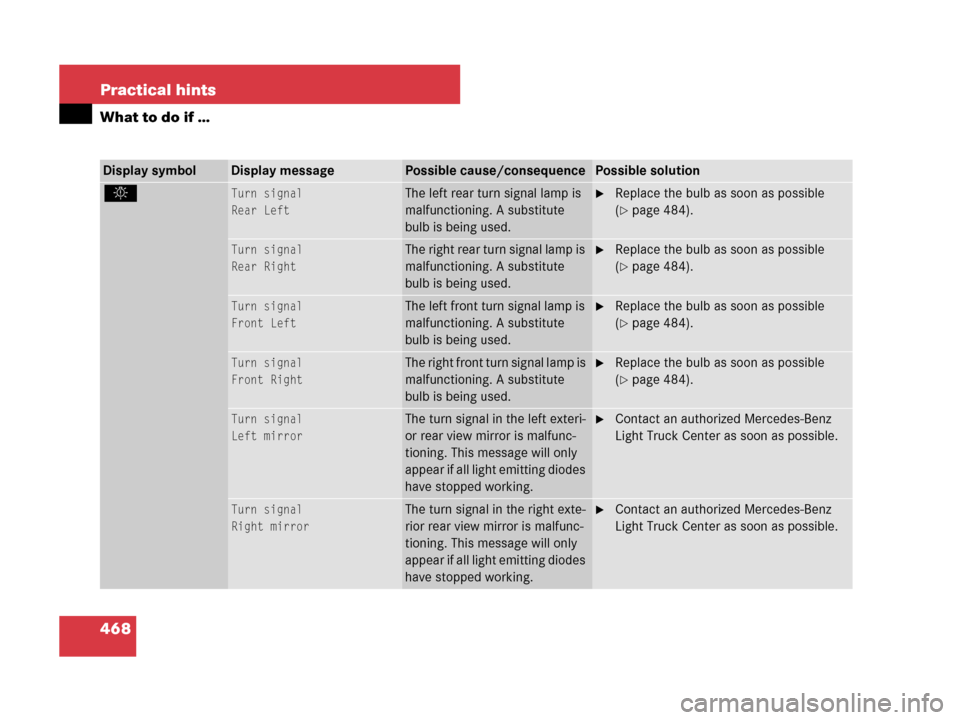
Display symbolDisplay messagePossible cause/consequencePossible solution
. Turn signal
Rear LeftThe left rear turn signal lamp is
malfunctioning. A substitute
bulb is being used.�Replace the bulb as soon as possible
(
�page 484).
Turn signal
Rear RightThe right rear turn signal lamp is
malfunctioning. A substitute
bulb is being used.�Replace the bulb as soon as possible
(
�page 484).
Turn signal
Front LeftThe left front turn signal lamp is
malfunctioning. A substitute
bulb is being used.�Replace the bulb as soon as possible
(
�page 484).
Turn signal
Front RightThe right front turn signal lamp is
malfunctioning. A substitute
bulb is being used.�Replace the bulb as soon as possible
(
�page 484).
Turn signal
Left mirrorThe turn signal in the left exteri-
or rear view mirror is malfunc-
tioning. This message will only
appear if all light emitting diodes
have stopped working.�Contact an authorized Mercedes-Benz
Light Truck Center as soon as possible.
Turn signal
Right mirrorThe turn signal in the right exte-
rior rear view mirror is malfunc-
tioning. This message will only
appear if all light emitting diodes
have stopped working.�Contact an authorized Mercedes-Benz
Light Truck Center as soon as possible.
Page 485 of 570
484 Practical hints
Replacing bulbs
Bulbs
Safe vehicle operation depends on proper
exterior lighting and signaling. It is there-
fore essential that all bulbs and lamp
assemblies are in good working order at
all times.
Correct headlamp adjustment is extremely
important. Have headlamps checked and
readjusted at regular intervals and when a
bulb has been replaced. See an authorized
Mercedes-Benz Light Truck Center for
headlamp adjustment.iIf the headlamps or front fog lamps are
fogged up on the inside as a result of high humid-
ity, driving the vehicle a distance with the lights
on should clear up the fogging.iSubstitute bulbs will be brought into use
when the following lamps malfunction:
�Turn signal lamps
�Brake lamps
�Parking lamps
�Tail lamps
Read and observe messages in the multifunction
display (
�page 463).
Page 486 of 570
485 Practical hints
Replacing bulbs
Front lamps Rear lamps
LampType
1Parking/standing lampW 5 W
2Turn signal lampPY 21 W
3Additional turn signal
lamp
LED
4Headlamps:
Low beam
H7 (55 W)
Bi-Xenon headlamps*:
Low beam1
1Vehicles with Bi-Xenon* headlamps: Do not
replace the Bi-Xenon bulbs yourself. Contact an
authorized Mercedes-Benz Light Truck Center.
D2S-35 W
5Headlamps:
High beam/high beam
flasher
H7 (55 W)
Bi-Xenon headlamps*:
High beam/high beam
flasher spot lamp
H7 (55 W)
6Side marker lampWY 5 W
7Corner-illuminating
front fog lamp*
H11 (55 W)
LampType
8High-mounted brake
lamp
LED
9Tail, brake, and side
marker lamp
P 21 W
aTurn signal lampPY 21 W
bBackup lampP 21 W
cRear fog lamp (driver’s
side only)
P 21 W
dLicense plate lampsC 5 W
Page 487 of 570

486 Practical hints
Replacing bulbs
Notes on bulb replacement
�Only use 12-volt bulbs of the same type
and with the specified watt rating.
�Switch the lights off before changing a
bulb to prevent short circuits.
�Always use a clean lint-free cloth when
handling bulbs.
�Your hands should be dry and free of oil
and grease.
�If the newly installed bulb does not
come on, contact an authorized
Mercedes-Benz Light Truck Center.Have the LEDs and bulbs for the following
lamps replaced by an authorized
Mercedes-Benz Light Truck Center:
�the additional turn signal lamps in the
exterior rear view mirrors
�the high mounted brake lamp
�the Bi-Xenon* low beam lamps
�the Bi-Xenon* high beam flasher spot-
light
�the front side marker lamps
Warning!G
Bulbs and bulb sockets can be very hot.
Allow the lamp to cool down before chang-
ing a bulb.
Keep bulbs out of reach of children.
Halogen lamps contain pressurized gas.
A bulb can explode if you:
�touch or move it when hot
�drop the bulb
�scratch the bulb
Wear eye and hand protection.
Because of high voltage in Xenon lamps, it is
dangerous to replace the bulb or repair the
lamp and its components. We recommend
that you have such work done by a qualified
technician.!Do not replace the bulbs yourself. You could
otherwise damage the LEDs or parts of the vehi-
cle. Only have the LEDs replaced by a qualified
specialist workshop having the necessary skills
and tools for carrying out the work required.
Page 488 of 570
487 Practical hints
Replacing bulbs
Replacing bulbs for front lamps
Before you start to replace a bulb for a
front lamp, do the following first:
�Turn the exterior lamp switch to
positionM (
�page 146).
�Open the hood (�page 364).
Halogen headlamps
1Low beam/high beam headlamp cover2Bulb socket for turn signal lamp
2Bulb socket for turn signal lamp
3Bulb socket for low beam headlamp
4Bulb socket for high beam headlampLow beam headlamp bulbs
�Turn cover 1 counterclockwise.
�Remove cover 1.
�Turn bulb socket 3 counterclockwise.
�Pull bulb socket 3 out of the head-
lamp housing.
�Pull the low beam bulb out of bulb
socket 3.
�Insert the new low beam bulb into bulb
socket 3.
�Insert bulb socket 3 into the head-
lamp housing.
�Turn bulb socket 3 clockwise until it
engages.
�Place cover 1 on the opening in the
headlamp housing.
�Turn cover 1 clockwise until it
engages.
Page 489 of 570
488 Practical hints
Replacing bulbs
High beam headlamp bulbs
�Turn cover 1 counterclockwise.
�Remove cover 1.
�Turn bulb socket 4 counterclockwise.
�Pull bulb socket 4 out of the head-
lamp housing.
�Pull the high beam bulb out of bulb
socket 4.
�Insert the new high beam bulb into bulb
socket 4.
�Insert bulb socket 4 into the head-
lamp housing.
�Turn bulb socket 4 clockwise until it
engages.
�Place cover 1 on the opening in the
headlamp housing.
�Turn cover 1 clockwise until it
engages.Front turn signal lamp bulbs
�Pull bulb socket 2 out of the head-
lamp housing.
�Pull the turn signal bulb out of bulb
socket 2.
�Insert the new turn signal bulb into bulb
socket 2.
�Insert bulb socket 2 into the head-
lamp housing.Bi-Xenon headlamps*
1Bulb socket for turn signal lamp
2Low beam/high beam headlamp cover
– Do not remove
1Bulb socket for turn signal lamp
Page 490 of 570

489 Practical hints
Replacing bulbs
Low beam and high beam flasher spot
bulbs
Front turn signal lamp bulbs
�Pull bulb socket 1 out of the head-
lamp housing.
�Pull the turn signal bulb out of bulb
socket 1.
�Insert the new turn signal bulb into bulb
socket 1.
�Insert bulb socket 1 into the head-
lamp housing.Parking and standing lamp bulbs
1Bulb socket for parking and standing
lamp
�Turn bulb socket 1 counterclockwise.
�Pull bulb socket 1 out of the housing.
�Pull the bulb out of bulb socket 1.
�Insert the new parking and standing
lamp bulb into bulb socket 1.
�Insert bulb socket 1 into the housing.
�Turn bulb socket 1 clockwise until it
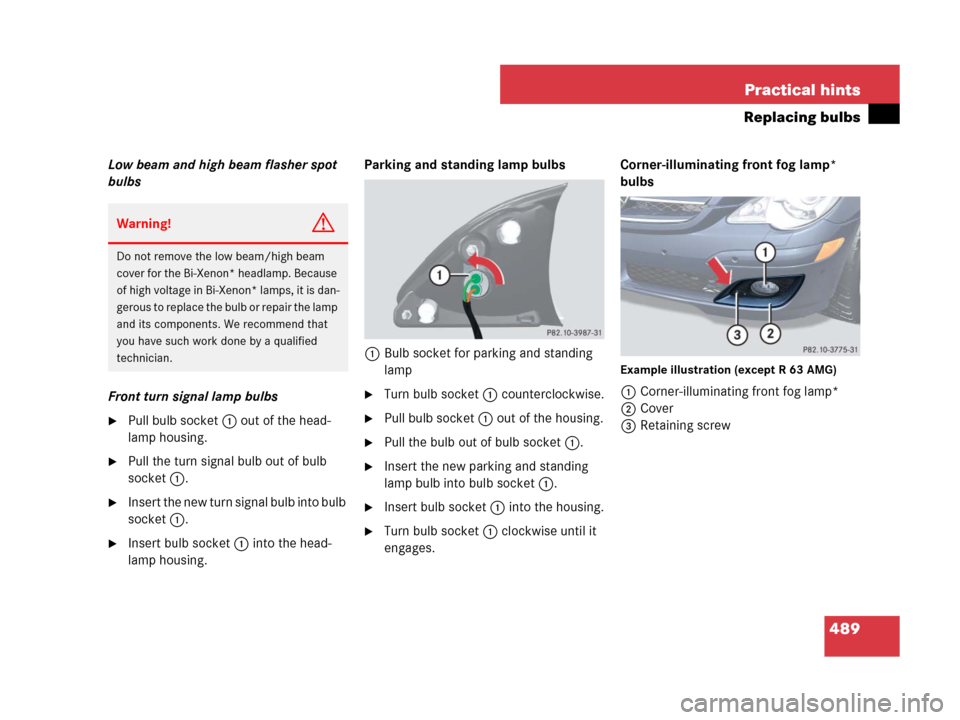
engages.Corner-illuminating front fog lamp*
bulbs
Example illustration (except R 63 AMG)
1Corner-illuminating front fog lamp*
2Cover
3Retaining screw
Warning!G
Do not remove the low beam/high beam
cover for the Bi-Xenon* headlamp. Because
of high voltage in Bi-Xenon* lamps, it is dan-
gerous to replace the bulb or repair the lamp
and its components. We recommend that
you have such work done by a qualified
technician.
Page 492 of 570

491 Practical hints
Replacing bulbs
�Turn bulb socket 5 counterclockwise.
�Pull bulb socket 5 out of the housing.
�Pull the bulb out of bulb socket 5.
�Insert the new corner-illuminating front
fog lamp bulb into bulb socket 5.
�Insert bulb socket 5 into the housing.
�Turn bulb socket 5 clockwise until it
engages.
�Insert corner-illuminating front fog
lamp 1 back into bumper.
�Fasten retaining screws4.
�Reinsert cover 2 and press it in until it
engages.
�Fasten retaining screw(s)3.Additional turn signal lamps bulbs
The additional turn signal lamps in the
exterior rear view mirrors have LEDs.
If a malfunction occurs or LEDs fail to
function, the entire turn signal unit must
be replaced. Have the turn signal unit re-
placed by an authorized Mercedes-Benz
Light Truck Center.
Front side marker lamp bulbs
Since replacing the side marker lamp bulbs
is a technically highly demanding process,
we recommend you have the side marker
lamp bulbs replaced by an authorized
Mercedes-Benz Light Truck Center.
Replacing bulbs for rear lamps
Before you start to replace a bulb for a rear
lamp, do the following first:
�Turn the combination switch to
positionM (
�page 146).
Tail lamp unit
�Open the tailgate (�page 123).
iTo access the tail lamp units, you have to
remove the cover in the corresponding side trim
panel of the cargo compartment.