Page 131 of 570

130 Controls in detail
Locking and unlocking
Automatic central locking
The doors and the tailgate lock automati-
cally when the ignition is switched on and
the wheels are turning at vehicle speeds of
approximately 9 mph (15 km/h) or more.
You can open a locked door from the in-
side. Open door only when conditions are
safe to do so.
For information on towing the vehicle, see
“Towing the vehicle” (
�page 517).
You can deactivate the automatic locking
mode using the control system
(
�page 189).
Locking and unlocking from the inside
You can lock or unlock the doors and the
tailgate from inside using the central lock-
ing or unlocking switch. This can be useful,
for example, if you want to lock the vehicle
before starting to drive.
The fuel filler flap cannot be locked or un-
locked with the central locking or unlock-
ing switch.
The switches are located in the front-door
control panels.1Central unlocking switch
2Central locking switch
Locking
�Press central locking switch2.
If all doors and the tailgate are closed,
the vehicle locks.
Unlocking
�Press central unlocking switch1.
The vehicle unlocks.
iThe doors unlock automatically after an
accident if the force of the impact exceeds a pre-
set threshold.
The vehicle automatically locks when the
ignition is switched on and the wheels are
turning at vehicle speeds of approximately
9 mph (15 km/h) or more. You could therefore
lock yourself out when the vehicle
�is pushed or towed
�is on a test stand
Warning!G
When leaving the vehicle, always remove the
SmartKey or SmartKey with KEYLESS-GO*
from the starter switch, take it with you, and
lock the vehicle. Do not leave children unat-
tended in the vehicle, or with access to an
unlocked vehicle. Unsupervised use of vehi-
cle equipment may cause an accident
and/or serious personal injury.
Page 154 of 570
153 Controls in detail
Lighting
Switching on hazard warning flasher
�Press hazard warning flasher
switch1.
All turn signals are flashing.
Switching off hazard warning flasher
�Press hazard warning flasher switch1
again.
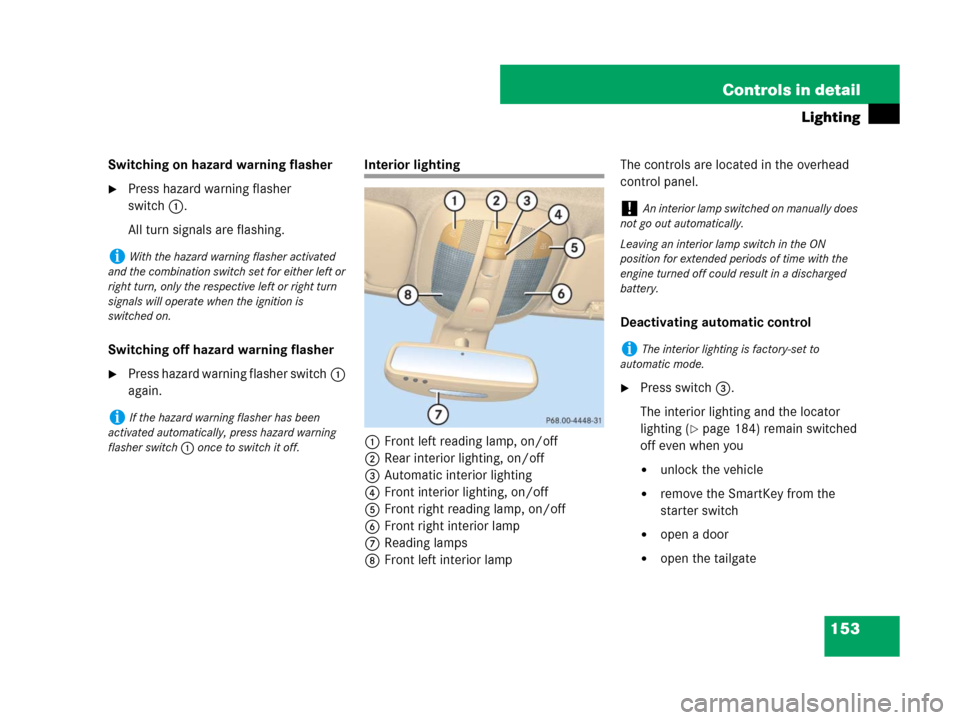
Interior lighting
1Front left reading lamp, on/off
2Rear interior lighting, on/off
3Automatic interior lighting
4Front interior lighting, on/off
5Front right reading lamp, on/off
6Front right interior lamp
7Reading lamps
8Front left interior lampThe controls are located in the overhead
control panel.
Deactivating automatic control
�Press switch3.
The interior lighting and the locator
lighting (
�page 184) remain switched
off even when you
�unlock the vehicle
�remove the SmartKey from the
starter switch
�open a door
�open the tailgate
iWith the hazard warning flasher activated
and the combination switch set for either left or
right turn, only the respective left or right turn
signals will operate when the ignition is
switched on.
iIf the hazard warning flasher has been
activated automatically, press hazard warning
flasher switch1 once to switch it off.
!An interior lamp switched on manually does
not go out automatically.
Leaving an interior lamp switch in the ON
position for extended periods of time with the
engine turned off could result in a discharged
battery.
iThe interior lighting is factory-set to
automatic mode.
Page 155 of 570
154 Controls in detail
Lighting
Activating automatic control
�Press switch3.
The interior lighting and the locator
lighting (
�page 184) come on when
you
�unlock the vehicle
�remove the SmartKey from the
starter switch
�open a door
�open the tailgate
The interior lighting switches off after
10 seconds see “Setting interior lighting
delayed shut-off” (
�page 186).Manual control
Switching front/rear interior lighting on
and off
�Press front/rear interior lighting
switch4 or 2 (
�page 153) to switch
on the desired interior light.
�Press front/rear interior lighting
switch4 or 2 again to switch off the
respective interior light.
Switching front reading lamps on and off
The front reading lamps are located in the
lower edge of the interior rear view mirror.
�Press front reading lamp
switch1or5 (
�page 153) to
switch on the desired front reading
lamp.
�Press front reading lamp
switch1or5 again to switch off the
respective front reading lamp.Switching second-row reading lamps on
and off
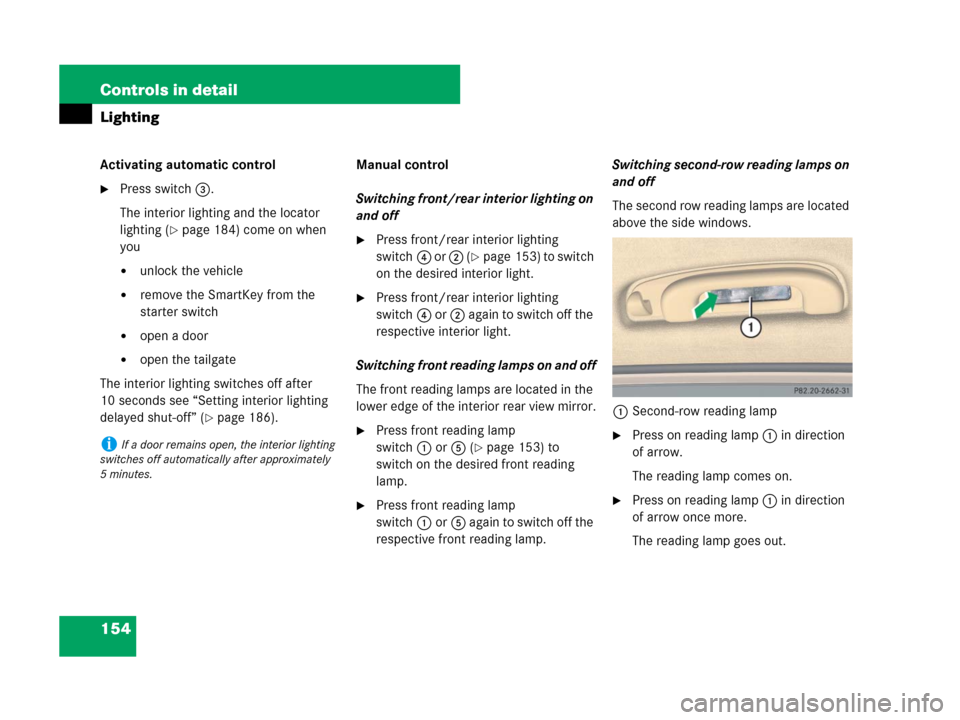
The second row reading lamps are located
above the side windows.
1Second-row reading lamp
�Press on reading lamp 1 in direction
of arrow.
The reading lamp comes on.
�Press on reading lamp 1 in direction
of arrow once more.
The reading lamp goes out.
iIf a door remains open, the interior lighting
switches off automatically after approximately
5minutes.
Page 156 of 570
155 Controls in detail
Lighting
Switching third-row reading lamps* on
and off
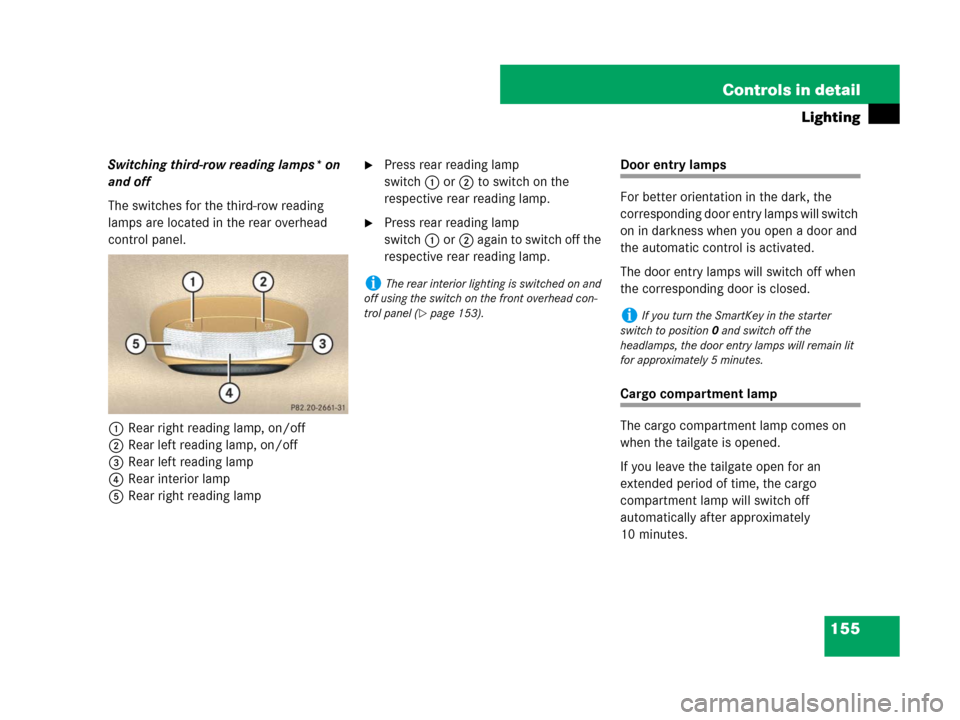
The switches for the third-row reading
lamps are located in the rear overhead
control panel.
1Rear right reading lamp, on/off
2Rear left reading lamp, on/off
3Rear left reading lamp
4Rear interior lamp
5Rear right reading lamp�Press rear reading lamp
switch1or2 to switch on the
respective rear reading lamp.
�Press rear reading lamp
switch1or2 again to switch off the
respective rear reading lamp.
Door entry lamps
For better orientation in the dark, the
corresponding door entry lamps will switch
on in darkness when you open a door and
the automatic control is activated.
The door entry lamps will switch off when
the corresponding door is closed.
Cargo compartment lamp
The cargo compartment lamp comes on
when the tailgate is opened.
If you leave the tailgate open for an
extended period of time, the cargo
compartment lamp will switch off
automatically after approximately
10 minutes.
iThe rear interior lighting is switched on and
off using the switch on the front overhead con-
trol panel (
�page 153).iIf you turn the SmartKey in the starter
switch to position0 and switch off the
headlamps, the door entry lamps will remain lit
for approximately 5 minutes.
Page 179 of 570
178 Controls in detail
Control system
The table below shows what settings can
be changed within the various menus.
Detailed instructions on making individual
settings can be found on the following
pages.
INSTRUMENT CLUSTERTIME/DATELIGHTINGVEHICLECOMFORT*
(�page 179)(�page 181)(�page 183)(�page 186)(�page 189)
Selecting speedometer display
modeSetting the time
(hour)Setting daytime running
lamp mode (USA only)Calling up the compassActivating
easy-entry/exit feature*
Selecting languageSetting the time
(minutes)Setting locator lightingCompass adjustmentSetting fold-in function
for exterior rear view
mirrors*
Selecting display (digital
speedometer or outside
temperature) for status indicatorSetting the date
(month)Setting night security
illuminationCompass calibration
Setting the date
(day)Setting interior lighting
delayed shut-offAudio search function
Setting the date
(year)Setting automatic
locking
Limiting opening height
of tailgate*
Page 187 of 570
186 Controls in detail
Control system
Setting interior lighting delayed shut-off
Use this function to set whether you would
like the interior lighting to remain on for
10 seconds during darkness after you have
removed the SmartKey from the starter
switch.
�Move the selection marker with
buttonæ orç to the
Lighting
submenu.
�Press buttonj ork repeatedly
until the message
Int. light.
delayed shut-off
appears in the
multifunction display.
The selection marker is on the current
setting.
�Press buttonæ orç to switch
the interior lighting delayed shut-off
feature
On or Off.Vehicle submenu
Access the
Vehicle submenu via the
Settings menu. Use the Vehicle submenu
to make general vehicle settings.
The following functions are available:Compass adjustment
This function is not available if your vehicle
is equipped with the COMAND system with
navigation module*.
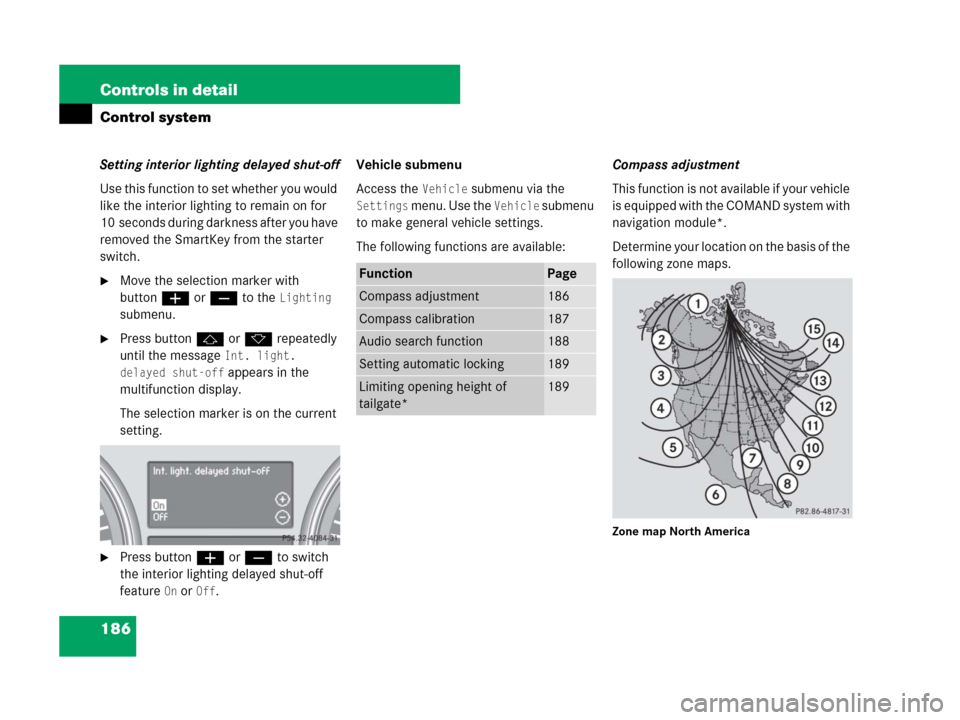
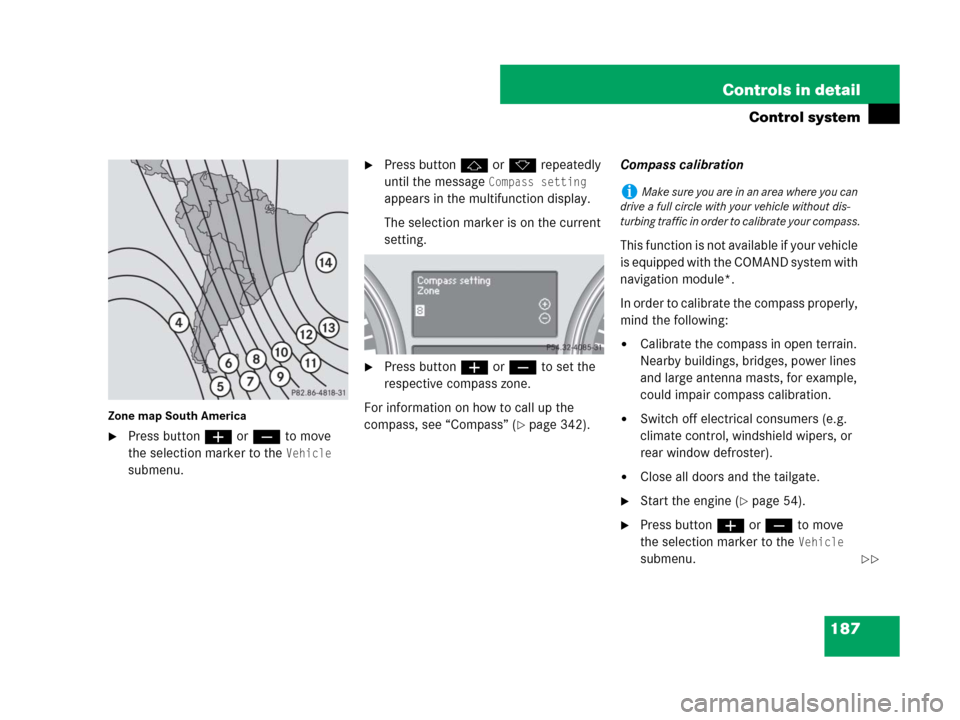
Determine your location on the basis of the
following zone maps.
Zone map North America
FunctionPage
Compass adjustment186
Compass calibration187
Audio search function188
Setting automatic locking189
Limiting opening height of
tailgate*189
Page 188 of 570
187 Controls in detail
Control system
Zone map South America
�Press buttonæ orç to move
the selection marker to the
Vehicle
submenu.
�Press buttonj ork repeatedly
until the message
Compass setting
appears in the multifunction display.
The selection marker is on the current
setting.
�Press buttonæ orç to set the
respective compass zone.
For information on how to call up the
compass, see “Compass” (
�page 342).Compass calibration
This function is not available if your vehicle
is equipped with the COMAND system with
navigation module*.
In order to calibrate the compass properly,
mind the following:
�Calibrate the compass in open terrain.
Nearby buildings, bridges, power lines
and large antenna masts, for example,
could impair compass calibration.
�Switch off electrical consumers (e.g.
climate control, windshield wipers, or
rear window defroster).
�Close all doors and the tailgate.
�Start the engine (�page 54).
�Press buttonæ orç to move
the selection marker to the
Vehicle
submenu.
iMake sure you are in an area where you can
drive a full circle with your vehicle without dis-
turbing traffic in order to calibrate your compass.
��
Page 190 of 570
189 Controls in detail
Control system
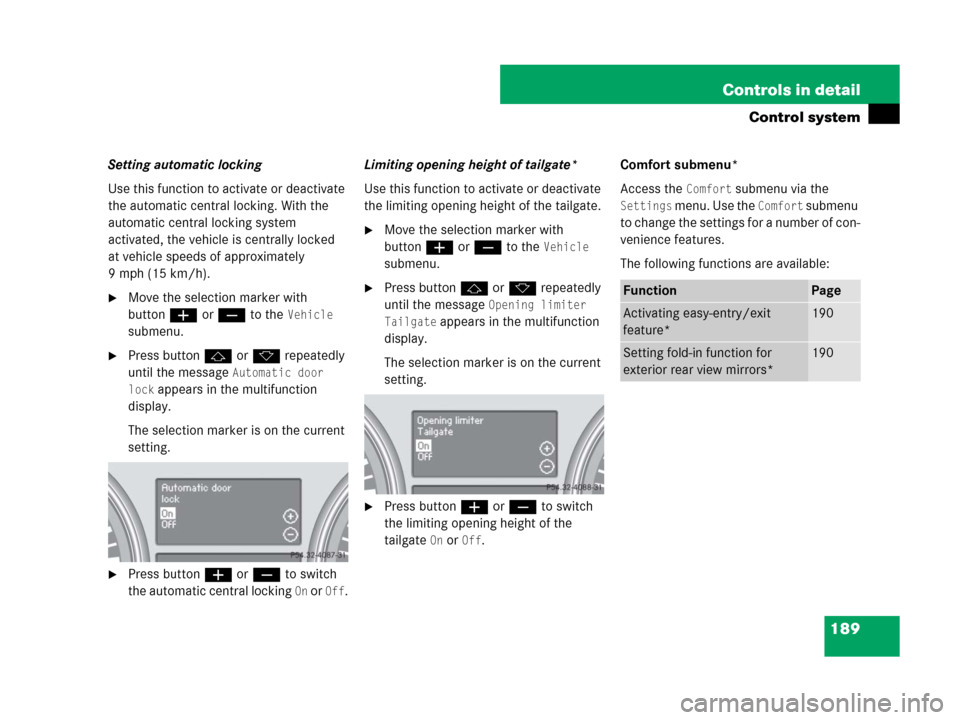
Setting automatic locking
Use this function to activate or deactivate
the automatic central locking. With the
automatic central locking system
activated, the vehicle is centrally locked
at vehicle speeds of approximately
9mph(15km/h).
�Move the selection marker with
buttonæ orç to the
Vehicle
submenu.
�Press buttonj ork repeatedly
until the message
Automatic door
lock
appears in the multifunction
display.
The selection marker is on the current
setting.
�Press buttonæ orç to switch
the automatic central locking
On or Off.Limiting opening height of tailgate*
Use this function to activate or deactivate
the limiting opening height of the tailgate.
�Move the selection marker with
buttonæ orç to the
Vehicle
submenu.
�Press buttonj ork repeatedly
until the message
Opening limiter
Tailgate
appears in the multifunction
display.
The selection marker is on the current
setting.
�Press buttonæ orç to switch
the limiting opening height of the
tailgate
On or Off.Comfort submenu*
Access the
Comfort submenu via the
Settings menu. Use the Comfort submenu
to change the settings for a number of con-
venience features.
The following functions are available:
FunctionPage
Activating easy-entry/exit
feature*190
Setting fold-in function for
exterior rear view mirrors*190