Page 10 of 242
8 Introduction
Symbols
� Symbols
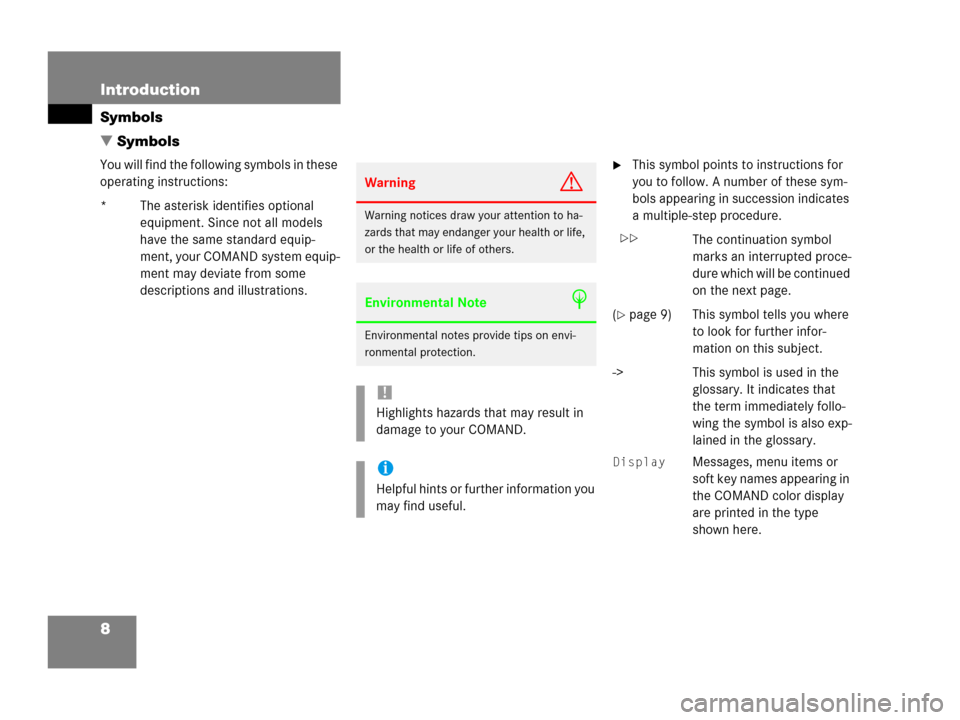
You will find the following symbols in these
operating instructions:
* The asterisk identifies optional
equipment. Since not all models
have the same standard equip-
ment, your COMAND system equip-
ment may deviate from some
descriptions and illustrations.�This symbol points to instructions for
you to follow. A number of these sym-
bols appearing in succession indicates
a multiple-step procedure.
The continuation symbol
marks an interrupted proce-
dure which will be continued
on the next page.
(
�page 9) This symbol tells you where
to look for further infor-
mation on this subject.
-> This symbol is used in the
glossary. It indicates that
the term immediately follo-
wing the symbol is also exp-
lained in the glossary.
Display Messages, menu items or
soft key names appearing in
the COMAND color display
are printed in the type
shown here.
WarningG
Warning notices draw your attention to ha-
zards that may endanger your health or life,
or the health or life of others.
Environmental NoteH
Environmental notes provide tips on envi-
ronmental protection.
!
Highlights hazards that may result in
damage to your COMAND.
i
Helpful hints or further information you
may find useful.
��
Page 60 of 242
58 Audio
CD changer* operation
�Insert an audio CD or a MP3 CD into
the CD slot 2 within approx. 15
seconds. Insert the CD face up.
The CD is pulled in. The red LED in the
corresponding magazine compartment
button 3 lights up continuously. The
system starts playing the CD.
The loading procedure is completed.
�Retract the CD changer* (�page 56).
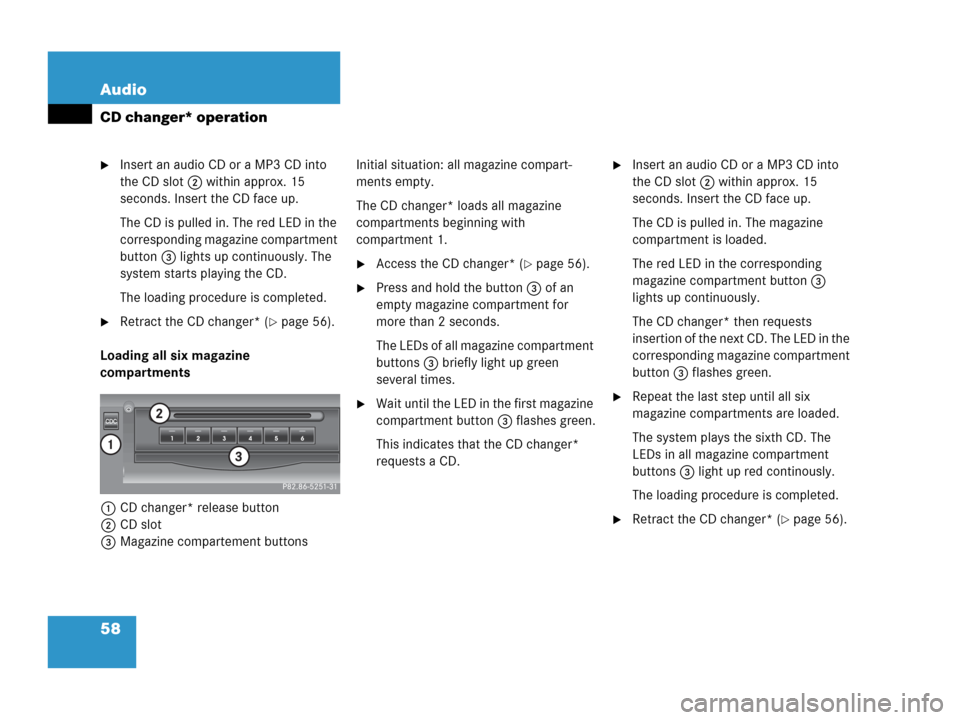
Loading all six magazine
compartments
1CD changer* release button
2CD slot
3Magazine compartement buttonsInitial situation: all magazine compart-
ments empty.
The CD changer* loads all magazine
compartments beginning with
compartment 1.
�Access the CD changer* (�page 56).
�Press and hold the button 3 of an
empty magazine compartment for
more than 2 seconds.
The LEDs of all magazine compartment
buttons 3 briefly light up green
several times.
�Wait until the LED in the first magazine
compartment button 3 flashes green.
This indicates that the CD changer*
requests a CD.
�Insert an audio CD or a MP3 CD into
the CD slot 2 within approx. 15
seconds. Insert the CD face up.
The CD is pulled in. The magazine
compartment is loaded.
The red LED in the corresponding
magazine compartment button 3
lights up continuously.
The CD changer* then requests
insertion of the next CD. The LED in the
corresponding magazine compartment
button 3 flashes green.
�Repeat the last step until all six
magazine compartments are loaded.
The system plays the sixth CD. The
LEDs in all magazine compartment
buttons 3 light up red continously.
The loading procedure is completed.
�Retract the CD changer* (�page 56).
Page 150 of 242
148 Navigation*
Important notes
� Important notes
WarningG
For safety reasons, you should only enter a
destination when the vehicle is stationary.
When the vehicle is in motion, a passenger
should enter the destination. Study manual
and select route before driving.
Do not watch display screen or operate but-
tons while the vehicle is in motion - let voice
instructions guide you. Stop at a safe locati-
on before using buttons or making correc-
tions.
Traffic regulations always have priority over
any route recommendations given.
Bear in mind that at a speed of just 30 mph
(approximately 50 km/h), your car is co-
vering a distance of 44 feet (approximately
14 m) every second.
The route calculated by COMAND is a re-
commendation on how to best reach your
selected destination.
During route guidance, you will not receive
any information on
�Traffic lights
�Stop and yield signs
�Parking or stopping zones
�One-way streets
�Narrow bridges
�Similar traffic regulation data
You should therefore always strictly observe
traffic regulations while driving. Drive care-
fully and always obey traffic laws and road
signs even if they contradict COMAND in-
structions.
WarningG
The Navigation DVD module contains a
Class 1 laser product. There is a danger of
invisible laser radiation if the cover is ope-
ned or damaged.
Do not remove the cover. The Navigation
DVD module does not contain any parts ser-
viceable by the user. For safety reasons,
have any necessary service work performed
by qualified personnel.
The display unit can cause injury if contac-
ted when open. Return the display unit after
inserting a Navigation DVD to its closed
position (
�page 210).
Page 181 of 242
179 Navigation*
Route guidance
Route guidance in these areas
When you are
�entering a partially digitized area
or
�starting route guidance within such an
area,
the navigation system will inform you that
turn by turn guidance cannot be provided
with corresponding navigation displays
and voice announcements.Map display
Within these areas the display shows a
split screen with the map on the left-hand
side and a direction arrow on the right side
pointing to the destination instead of the
symbol for the next driving maneuver
(�page 180).
Route presentation
Usually the map highlights the active route
on verified roads with a blue line.
After route calculation, the route may
contain unverified road sections. Here, the
exact route guidance is suppressed and
these route sections will appear as blue
dotted lines. This type of line e.g. connects
two verified road sections, which are
displayed as blue lines or connects the end
of a verified road with a stopover or
destination located on an unverified road.
i
Displayed or audible distance to the
beginning of such an area is an
estimation. The actual distance may
differ.
WarningG
If the origin and destination are located very
close to each other, the system may not pro-
vide the shortest path to the destination
when you are travelling in an unverified area.
In most cases you will be directed to a veri-
fied road closest to the destination. This
may appear to be a long and unconvenient
route but it is safer. At your own risk, you
may choose to drive on the unverified roads
to the destination.
Page 182 of 242
180 Navigation*
Route guidance
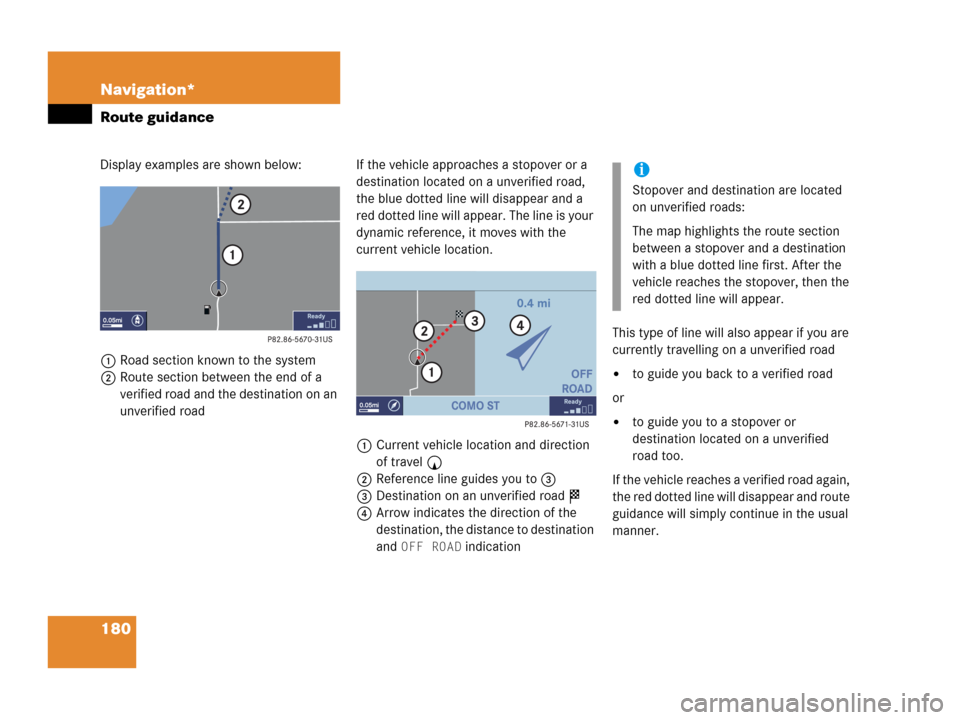
Display examples are shown below:
1Road section known to the system
2Route section between the end of a
verified road and the destination on an
unverified roadIf the vehicle approaches a stopover or a
destination located on a unverified road,
the blue dotted line will disappear and a
red dotted line will appear. The line is your
dynamic reference, it moves with the
current vehicle location.
1Current vehicle location and direction
of travel y
2Reference line guides you to 3
3Destination on an unverified road $
4Arrow indicates the direction of the
destination, the distance to destination
and
OFF ROAD indicationThis type of line will also appear if you are
currently travelling on a unverified road
�to guide you back to a verified road
or
�to guide you to a stopover or
destination located on a unverified
road too.
If the vehicle reaches a verified road again,
the red dotted line will disappear and route
guidance will simply continue in the usual
manner.
i
Stopover and destination are located
on unverified roads:
The map highlights the route section
between a stopover and a destination
with a blue dotted line first. After the
vehicle reaches the stopover, then the
red dotted line will appear.