Page 315 of 595

314 Controls in detail
Loading
Use of the cargo net is a particularly impor-
tant safety factor when the vehicle is load-
ed higher than the top of the seat
backrests with smaller objects. For your
safety, always use the cargo net when
transporting cargo.
The cargo net can be installed in two
locations:
1Holder in B-pillar
2Holder in C-pillar�With the cargo compartment expanded
in part (
�page 307), use holders
above C-pillars2 and the cargo
tie-down rings behind the third-row
seat backrest (
�page 305).
�With the cargo compartment fully ex-
panded (
�page 308), use holders
above B-pillars1 and the cargo
tie-down rings in the second-row foot-
well (
�page 305).
�Open the zipper on the cargo net pack-
age.
�Roll out the cargo net.
�Unfold the cargo net.
The cargo net bars must audibly
engage.Installing the cargo net
Cargo net bar hung up behind the B-pillar
1Holder
2Cargo net bar
�Hang cargo net bar2 on holder1 as
indicated by the arrow.
�Push cargo net bar2 forward into
holder1 in direction of arrow.
Page 316 of 595
315 Controls in detail
Loading
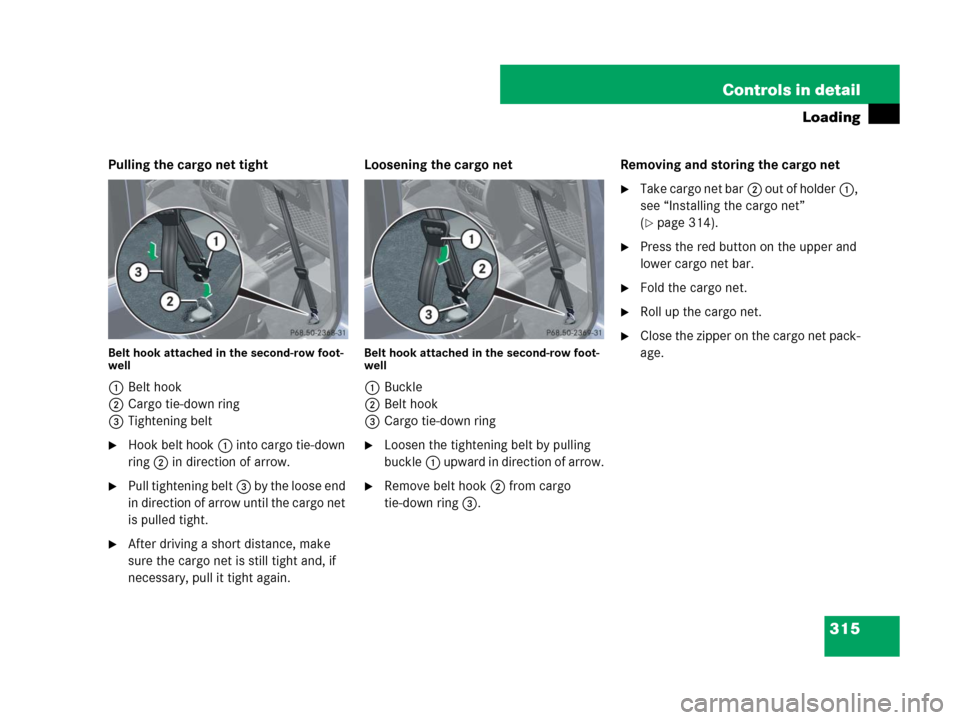
Pulling the cargo net tight
Belt hook attached in the second-row foot-
well
1Belt hook
2Cargo tie-down ring
3Tightening belt
�Hook belt hook1 into cargo tie-down
ring2 in direction of arrow.
�Pull tightening belt3 by the loose end
in direction of arrow until the cargo net
is pulled tight.
�After driving a short distance, make
sure the cargo net is still tight and, if
necessary, pull it tight again.Loosening the cargo net
Belt hook attached in the second-row foot-
well
1Buckle
2Belt hook
3Cargo tie-down ring
�Loosen the tightening belt by pulling
buckle1 upward in direction of arrow.
�Remove belt hook2 from cargo
tie-down ring3.Removing and storing the cargo net
�Take cargo net bar2 out of holder1,
see “Installing the cargo net”
(
�page 314).
�Press the red button on the upper and
lower cargo net bar.
�Fold the cargo net.
�Roll up the cargo net.
�Close the zipper on the cargo net pack-
age.
Page 317 of 595

316 Controls in detail
Useful features
Storage compartments Glove box/CD changer
1Glove box lid release
2Glove box lid
Opening the glove box
�Pull lid release1 in direction of arrow.
Glove box lid2 opens downward.
Closing the glove box
�Push glove box lid2 up to close.Releasing CD changer
1Release button
2AUX-socket (Vehicles without Rear
Seat Entertainment System*)
3CD changer
�Open the glove box (�page 316).
�Press release button1.
CD changer3 is released and swings
down automatically.
For information on CD changer operation,
see separate COMAND system operating
instructions.
Warning!G
To help avoid personal injury during a colli-
sion or sudden maneuver, exercise care
when storing objects in the vehicle. Put lug-
gage or cargo in the cargo compartment if
possible. Do not pile luggage or cargo higher
than the seat backs.
If so equipped, always use the cargo net*
when transporting cargo. The cargo net*
cannot secure hard or heavy objects.
Parcel nets cannot secure hard or heavy ob-
jects.
Keep compartment lids closed. This will help
to prevent stored objects from being thrown
about and injuring vehicle occupants during
�braking
�vehicle maneuvers
�an accident
Page 318 of 595
317 Controls in detail
Useful features
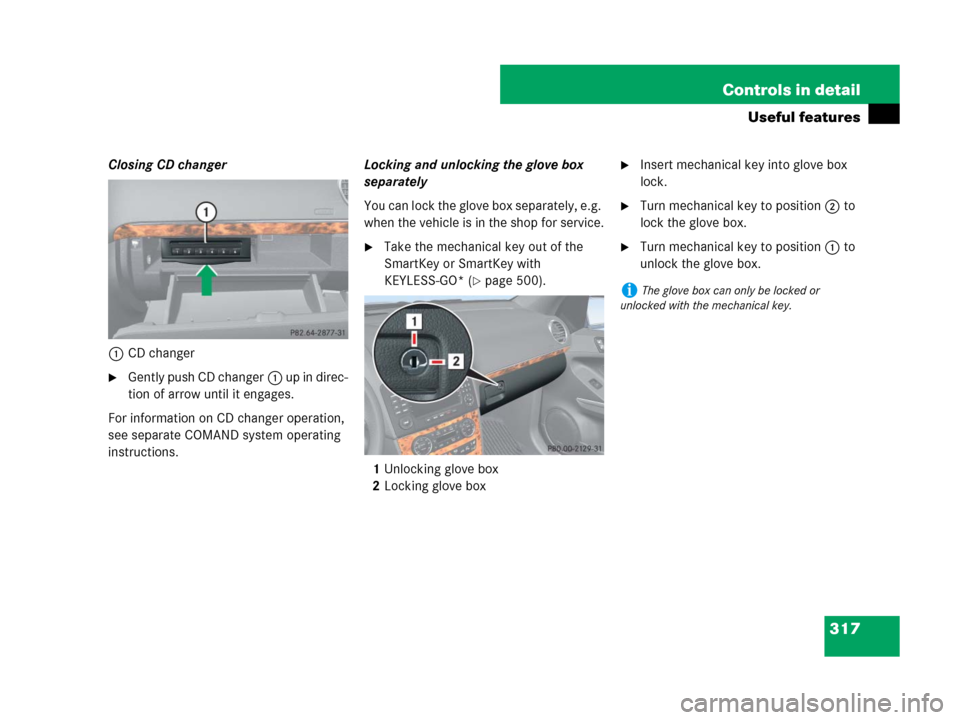
Closing CD changer
1CD changer
�Ge ntly pu sh CD c ha nger1 up in direc-
tion of arrow until it engages.
For information on CD changer operation,
see separate COMAND system operating
instructions.Locking and unlocking the glove box
separately
You can lock the glove box separately, e.g.
when the vehicle is in the shop for service.
�Take the mechanical key out of the
SmartKey or SmartKey with
KEYLESS-GO* (
�page 500).
1Unlocking glove box
2Locking glove box
�Insert mechanical key into glove box
lock.
�Turn mechanical key to position2 to
lock the glove box.
�Turn mechanical key to position1 to
unlock the glove box.
iThe glove box can only be locked or
unlocked with the mechanical key.
Page 319 of 595
318 Controls in detail
Useful features
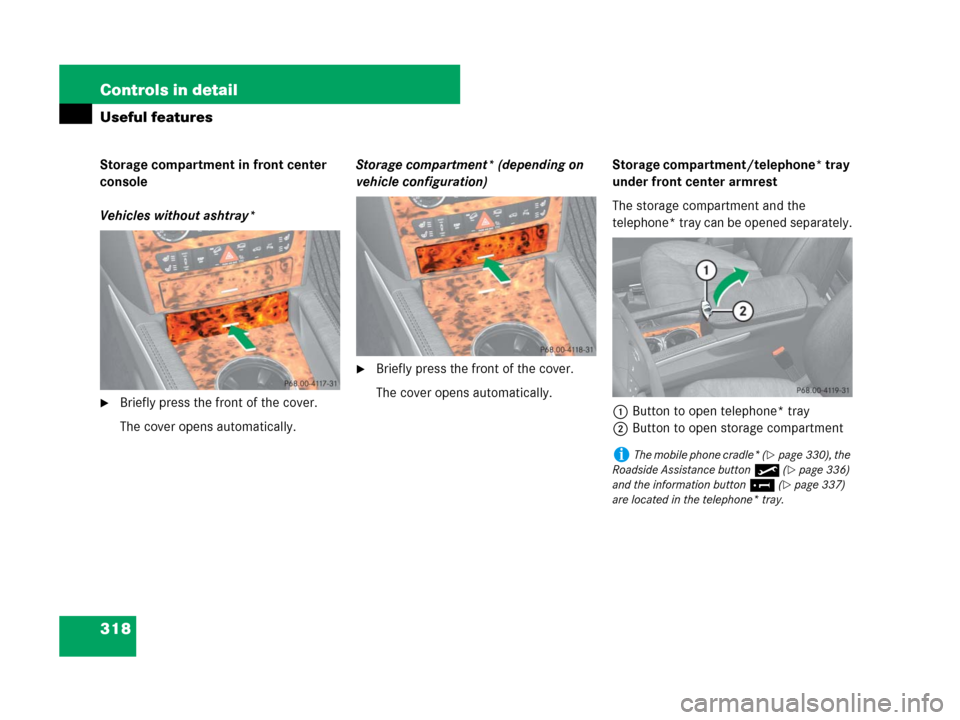
Storage compartment in front center
console
Vehicles without ashtray*
�Briefly press the front of the cover.
The cover opens automatically.Storage compartment* (depending on
vehicle configuration)
�Briefly press the front of the cover.
The cover opens automatically.Storage compartment/telephone* tray
under front center armrest
The storage compartment and the
telephone* tray can be opened separately.
1Button to open telephone* tray
2Button to open storage compartment
iThe mobile phone cradle* (�page 330), the
Roadside Assistance button• (
�page 336)
and the information button¡ (
�page 337)
are located in the telephone* tray.
Page 320 of 595
319 Controls in detail
Useful features
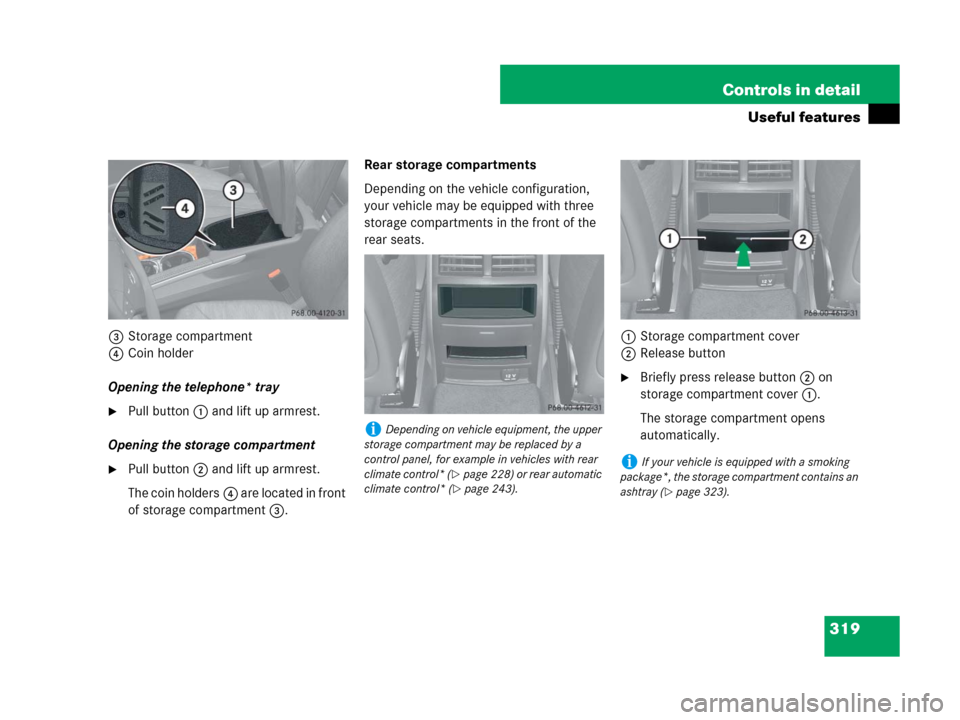
3Storage compartment
4Coin holder
Opening the telephone* tray
�Pull button1 and lift up armrest.
Opening the storage compartment
�Pull button2 and lift up armrest.
The coin holders4 are located in front
of storage compartment3.Rear storage compartments
Depending on the vehicle configuration,
your vehicle may be equipped with three
storage compartments in the front of the
rear seats.
1Storage compartment cover
2Release button
�Briefly press release button2 on
storage compartment cover1.
The storage compartment opens
automatically.
iDepending on vehicle equipment, the upper
storage compartment may be replaced by a
control panel, for example in vehicles with rear
climate control* (
�page 228) or rear automatic
climate control* (
�page 243).
iIf your vehicle is equipped with a smoking
package*, the storage compartment contains an
ashtray (
�page 323).
Page 321 of 595

320 Controls in detail
Useful features
Parcel nets Parcel net in front passenger footwell
A small convenience parcel net is located
in the front passenger footwell. It is intend-
ed for small and light items, such as road
maps, mail, etc.
1Parcel netParcel nets on front seat backrests
A small convenience parcel net is located
on each of the front seat backrests. It is in-
tended for small and light items, such as
road maps, mail, etc.
1Parcel net
Warning!G
Do not place objects with a combined
weight of more than 4.4 lb (2 kg) into the
parcel net on the back of the front passen-
ger seat. Otherwise, the Occupant Classifi-
cation System* OCS (
�page 81) may not
be able to properly approximate the occu-
pant weight category.
Parcel nets are intended for storing
light-weight items only.
Heavy objects, objects with sharp edges or
fragile objects may not be transported in the
parcel nets. In an accident, during hard
braking, or sudden maneuvers, they could
be thrown around inside the vehicle and
cause injury to vehicle occupants.
Parcel nets cannot protect transported
goods in the event of an accident.
Page 322 of 595

321 Controls in detail
Useful features
Cup holders
Cup holder in front of armrest
A cup holder and a card/ticket holder are
located in the front center console.
1Cup holderCup holder in rear armrest (second-row
seats)
1Cup holder
�Pull the armrest down by its top.
Warning!G
In order to help prevent spilling liquids on
vehicle occupants and/or vehicle equip-
ment, only use containers that fit into the
cup holder. Use lids on open containers and
do not fill containers to a height where the
contents, especially hot liquids, could spill
during braking, vehicle maneuvers, or an
accident. Liquids spilled on vehicle occu-
pants may cause serious personal injury.
Liquids spilled on vehicle equipment may
cause damage not covered by the
Mercedes-Benz Limited Warranty.
When not in use, keep rear cup holder
closed. An open cup holder may cause injury
to you or others when contacted during
braking, vehicle maneuvers, or in an acci-
dent.
Keep in mind that objects placed in a cup
holder may come loose during braking,
vehicle maneuvers, or an accident and be
thrown around in the vehicle interior.
Objects thrown around in the vehicle interi-
or may cause an accident and/or serious
personal injury.
iThe front cup holder can be removed for
cleaning purposes (
�page 322).
!Close the cup holder before folding the arm-
rest upwards.