Page 128 of 522
127 Controls in detail
Locking and unlocking
�
Turn the mechanical key clockwise to
position2 to lock the trunk.
The trunk remains locked even when the
vehicle is centrally unlocked.
�
Insert the mechanical key in the trunk
lid lock.
�
Turn the mechanical key counterclock-
wise to neutral position1 to unlock the
trunk.
You can now open the trunk
(�page 120).
Automatic central locking
The doors and the trunk automatically lock
when the ignition is switched on and the
wheels are turning at vehicle speeds of ap-
proximately 9 mph (15 km / h) or more.
The locking knobs in the doors move down.
You can open a locked door from the in-
side. Open door only when conditions are
safe to do so.
You can deactivate the automatic locking
mode using the control system
(�page 176).
Locking and unlocking from the inside
You can lock or unlock the doors and the
trunk from inside using the central locking
switch. This can be useful, for example, if
you want to lock the vehicle before starting
to drive.
The fuel filler flap cannot be locked or un-
locked with the central locking switch.
i
You can only cancel the separate trunk lock-
ing mode by means of the mechanical key.
i
The doors are designed to unlock automati-
cally after an accident if the force of the impact
exceeds a preset threshold. The vehicle locks au-
tomatically when the ignition is switched on and
the wheels are turning at vehicle speeds of ap-
proximately 9 mph (15 km/h) or more. You could
therefore lock yourself out when the vehicle
�
is pushed or towed
�
is on a test stand
Warning!
G
When leaving the vehicle, always remove the
SmartKey or SmartKey with KEYLESS-GO*
from the starter switch, take it with you, and
lock the vehicle. Do not leave children unat-
tended in the vehicle, or with access to an
unlocked vehicle. A child’s unsupervised ac-
cess to a vehicle could result in an accident
and/or serious personal injury.
Page 131 of 522
130 Controls in detailSeatsFolding head restraints back with
switch in the center console
The rear seat head restraints can be folded
backward for increased visibility.
1Head restraint release switch�
Switch on the ignition (
�page 37).
�
Press the symbol-side on switch1to
release the head restraints.
The head restraints will fold backward.Placing head restraints upright
�
Pull the head restraint forward until it
locks into position.Removing and installing rear seat head
restraints* (vehicles with split rear
bench seat* only)
1Release catch
Removing rear seat head restraints
�
Fold the backrest forward
(�page 277).
�
Fold back head restraint (
�page 130).
�
Press head restraint release catch1
and pull the head restraints out of the
guides.
�
Fold the backrest back to its original
position.
!
Make sure the head restraints engage when
placing them upright. Otherwise their protective
function cannot be assured.
Page 132 of 522
131 Controls in detailSeats
Installing rear seat head restraintsLumbar support
The curvature of the front seats can be ad-
justed to help enhance lower back support
and seating comfort.
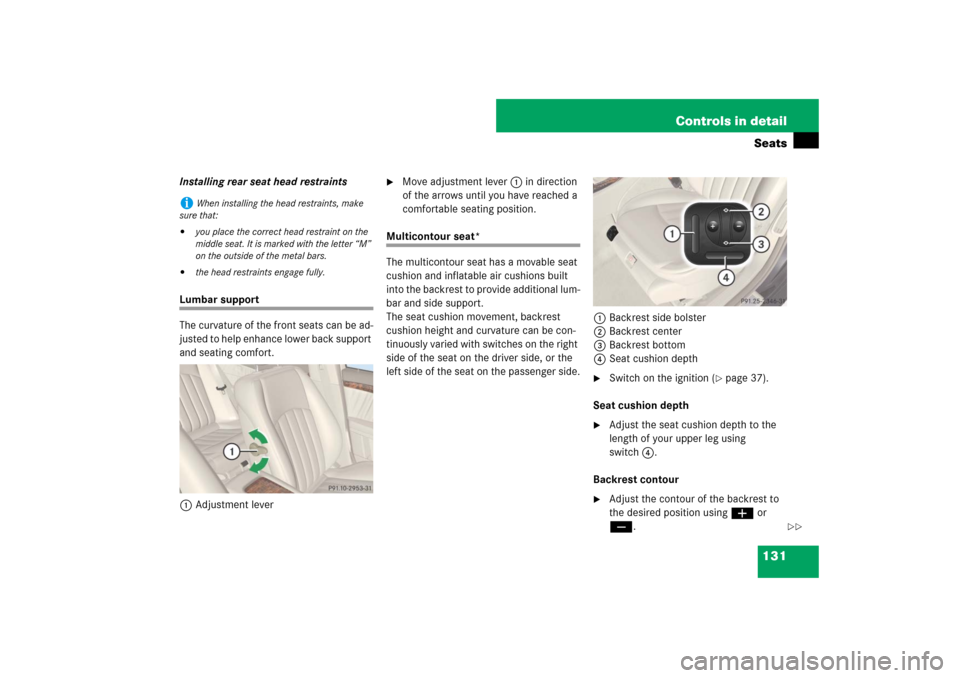
1Adjustment lever
�
Move adjustment lever1 in direction
of the arrows until you have reached a
comfortable seating position.
Multicontour seat*
The multicontour seat has a movable seat
cushion and inflatable air cushions built
into the backrest to provide additional lum-
bar and side support.
The seat cushion movement, backrest
cushion height and curvature can be con-
tinuously varied with switches on the right
side of the seat on the driver side, or the
left side of the seat on the passenger side.1Backrest side bolster
2Backrest center
3Backrest bottom
4Seat cushion depth
�
Switch on the ignition (
�page 37).
Seat cushion depth
�
Adjust the seat cushion depth to the
length of your upper leg using
switch4.
Backrest contour
�
Adjust the contour of the backrest to
the desired position using æ or
ç.
i
When installing the head restraints, make
sure that:
�
you place the correct head restraint on the
middle seat. It is marked with the letter “M”
on the outside of the metal bars.
�
the head restraints engage fully.
��
Page 134 of 522
133 Controls in detailSeats
Switching seat heating on�
Switch on the ignition (
�page 37).
�
Press switch1.
Three red indicator lamps on the switch
come on.
�
Continue pressing switch1 until de-
sired seat heating level is reached.
Switching seat heating off
�
Press switch1 repeatedly until all in-
dicator lamps go out.
Seat ventilation*
The blue indicator lamps on the switch
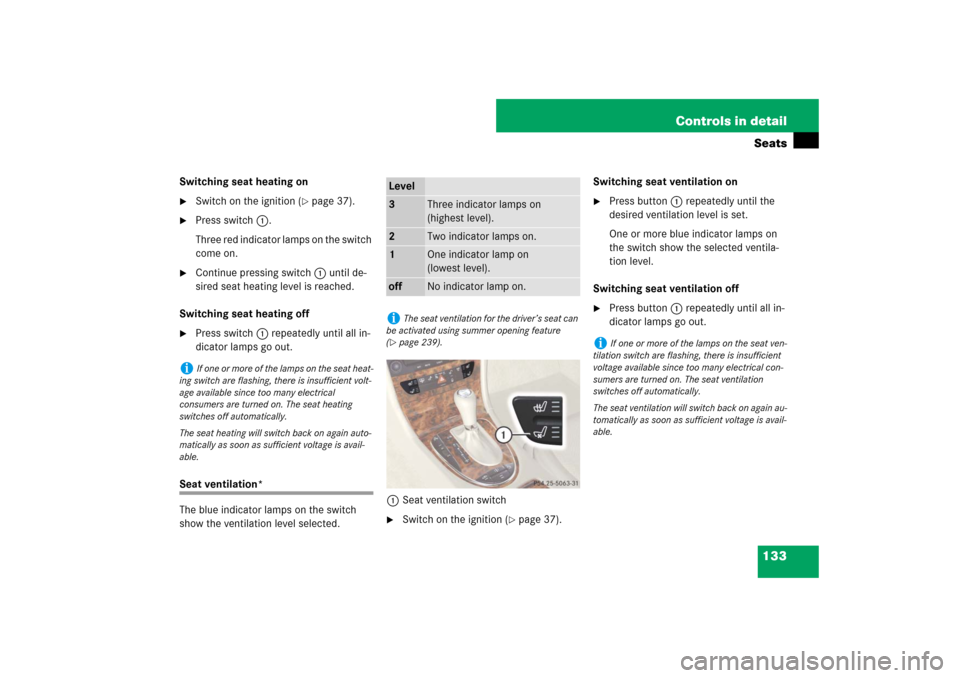
show the ventilation level selected.1Seat ventilation switch
�
Switch on the ignition (
�page 37).Switching seat ventilation on
�
Press button1 repeatedly until the
desired ventilation level is set.
One or more blue indicator lamps on
the switch show the selected ventila-
tion level.
Switching seat ventilation off
�
Press button1 repeatedly until all in-
dicator lamps go out.
i
If one or more of the lamps on the seat heat-
ing switch are flashing, there is insufficient volt-
age available since too many electrical
consumers are turned on. The seat heating
switches off automatically.
The seat heating will switch back on again auto-
matically as soon as sufficient voltage is avail-
able.
Level3
Three indicator lamps on
(highest level).
2
Two indicator lamps on.
1
One indicator lamp on
(lowest level).
off
No indicator lamp on.
i
The seat ventilation for the driver’s seat can
be activated using summer opening feature
(
�page 239).
i
If one or more of the lamps on the seat ven-
tilation switch are flashing, there is insufficient
voltage available since too many electrical con-
sumers are turned on. The seat ventilation
switches off automatically.
The seat ventilation will switch back on again au-
tomatically as soon as sufficient voltage is avail-
able.
Page 136 of 522
135 Controls in detail
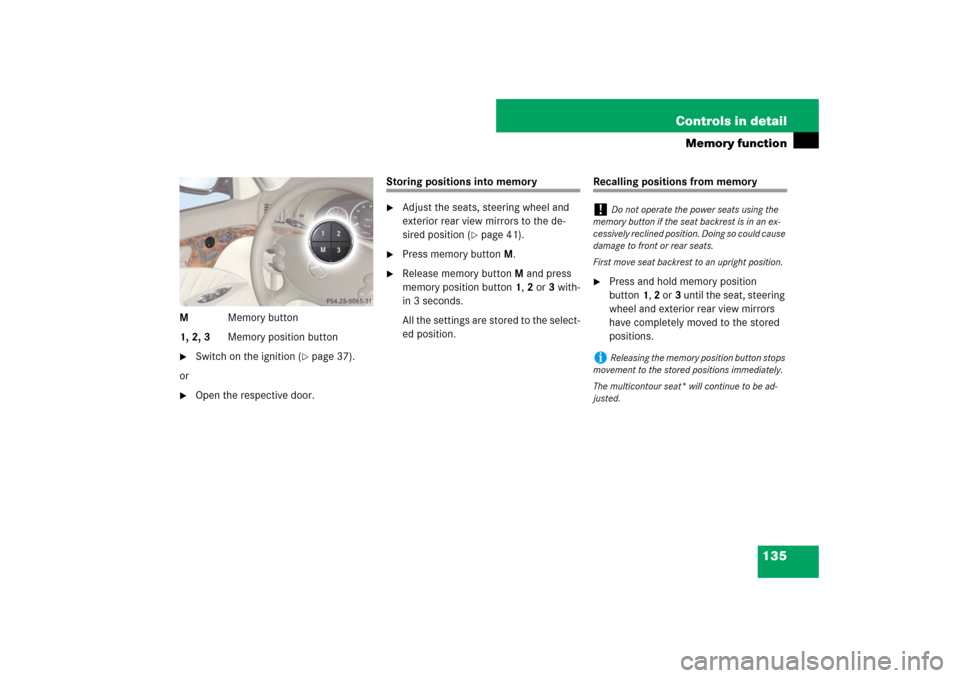
Memory function
MMemory button
1, 2, 3Memory position button�
Switch on the ignition (
�page 37).
or
�
Open the respective door.
Storing positions into memory�
Adjust the seats, steering wheel and
exterior rear view mirrors to the de-
sired position (
�page 41).
�
Press memory buttonM.
�
Release memory buttonM and press
memory position button 1, 2 or 3 with-
in 3 seconds.
All the settings are stored to the select-
ed position.
Recalling positions from memory�
Press and hold memory position
button1, 2 or3 until the seat, steering
wheel and exterior rear view mirrors
have completely moved to the stored
positions.
!
Do not operate the power seats using the
memory button if the seat backrest is in an ex-
cessively reclined position. Doing so could cause
damage to front or rear seats.
First move seat backrest to an upright position.
i
Releasing the memory position button stops
movement to the stored positions immediately.
The multicontour seat* will continue to be ad-
justed.
Page 137 of 522
136 Controls in detailMemory functionStoring exterior rear view mirror park-ing position
For easier parking, you can adjust the pas-
senger-side exterior rear view mirror so
that you can see the right rear wheel as
soon as you engage reverse gearR.
For information on activating the parking
position, see “Activating exterior rear view
mirror parking position” (
�page 200).
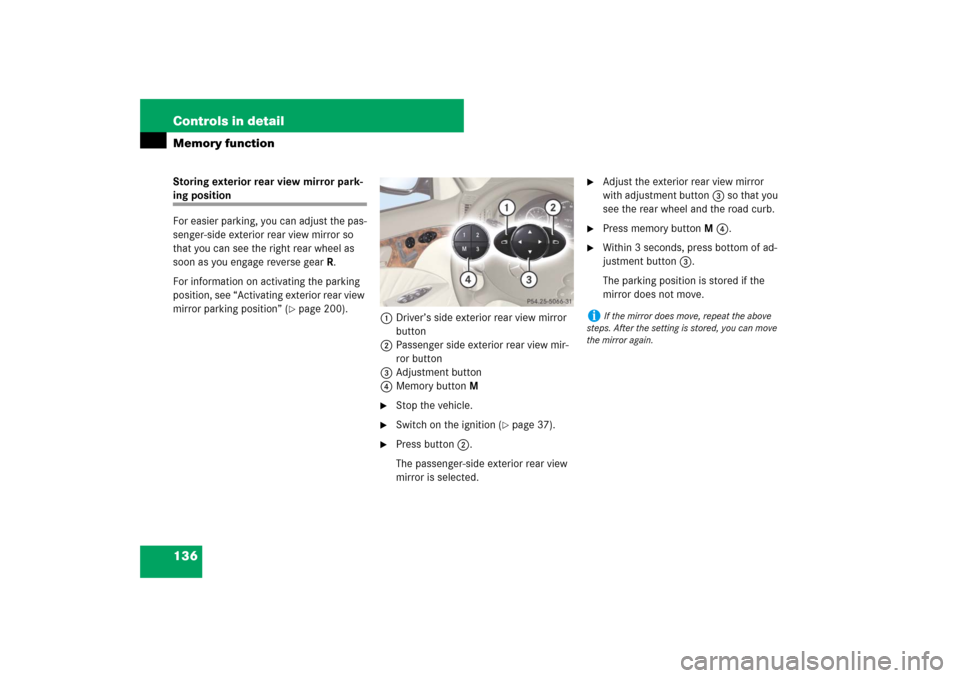
1Driver’s side exterior rear view mirror
button
2Passenger side exterior rear view mir-
ror button
3Adjustment button
4Memory button M
�
Stop the vehicle.
�
Switch on the ignition (
�page 37).
�
Press button2.
The passenger-side exterior rear view
mirror is selected.
�
Adjust the exterior rear view mirror
with adjustment button3 so that you
see the rear wheel and the road curb.
�
Press memory button M 4.
�
Within 3 seconds, press bottom of ad-
justment button3.
The parking position is stored if the
mirror does not move.
i
If the mirror does move, repeat the above
steps. After the setting is stored, you can move
the mirror again.
Page 145 of 522
144 Controls in detailLightingHazard warning flasher
The hazard warning flasher can be
switched on at all times, even with the
SmartKey removed from the starter switch
or with the SmartKey with KEYLESS-GO*
removed from the vehicle.
The hazard warning flasher switches on au-
tomatically when an air bag deploys.
The hazard warning flasher switch is locat-
ed on the upper part of the center console.
1Hazard warning flasher switchSwitching on hazard warning flasher
�
Press the hazard warning flasher
switch1.
All turn signals lamps are flashing.Switching off hazard warning flasher
�
Press hazard warning flasher switch1
again.
i
With the hazard warning flasher activated
and the combination switch set for either left or
right turn, only the respective left or right turn
signals will operate when the ignition is switched
on.
i
If the hazard warning flasher has been acti-
vated automatically, press hazard warning flash-
er switch1 once to switch it off.
Page 149 of 522
148 Controls in detailInstrument clusterA full view illustration of the instrument
cluster can be found in the “At a glance”
section of this manual (
�page 26).
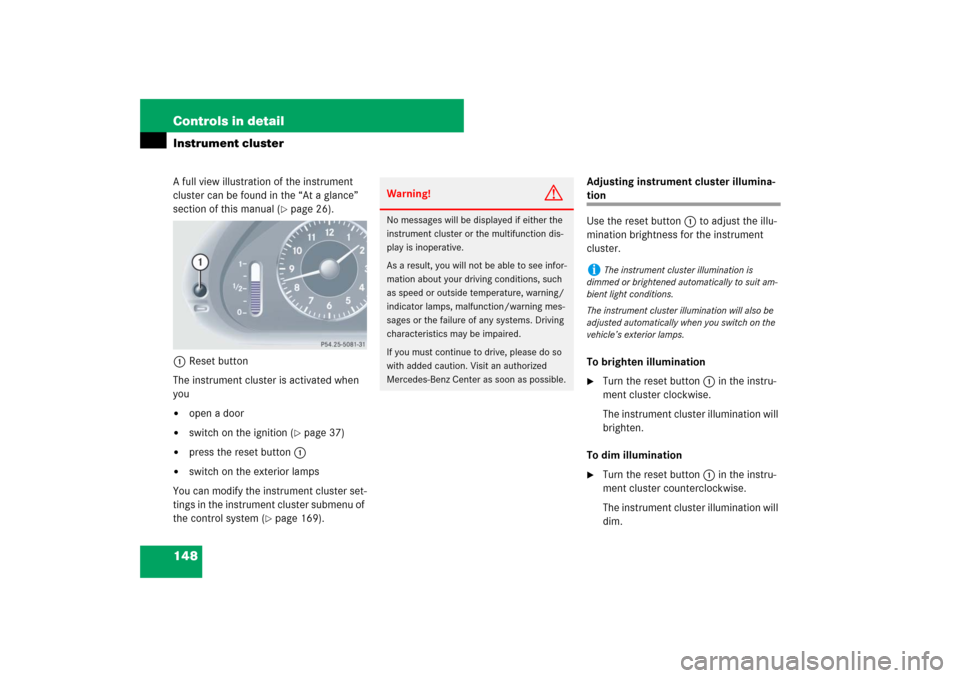
1Reset button
The instrument cluster is activated when
you
�
open a door
�
switch on the ignition (
�page 37)
�
press the reset button1
�
switch on the exterior lamps
You can modify the instrument cluster set-
tings in the instrument cluster submenu of
the control system (
�page 169).Adjusting instrument cluster illumina-
tion
Use the reset button1 to adjust the illu-
mination brightness for the instrument
cluster.
To brighten illumination�
Turn the reset button1 in the instru-
ment cluster clockwise.
The instrument cluster illumination will
brighten.
To dim illumination
�
Turn the reset button1 in the instru-
ment cluster counterclockwise.
The instrument cluster illumination will
dim.
Warning!
G
No messages will be displayed if either the
instrument cluster or the multifunction dis-
play is inoperative.
As a result, you will not be able to see infor-
mation about your driving conditions, such
as speed or outside temperature, warning/
indicator lamps, malfunction/warning mes-
sages or the failure of any systems. Driving
characteristics may be impaired.
If you must continue to drive, please do so
with added caution. Visit an authorized
Mercedes-Benz Center as soon as possible.
i
The instrument cluster illumination is
dimmed or brightened automatically to suit am-
bient light conditions.
The instrument cluster illumination will also be
adjusted automatically when you switch on the
vehicle’s exterior lamps.