Page 153 of 522
152 Controls in detailControl systemMultifunction steering wheel
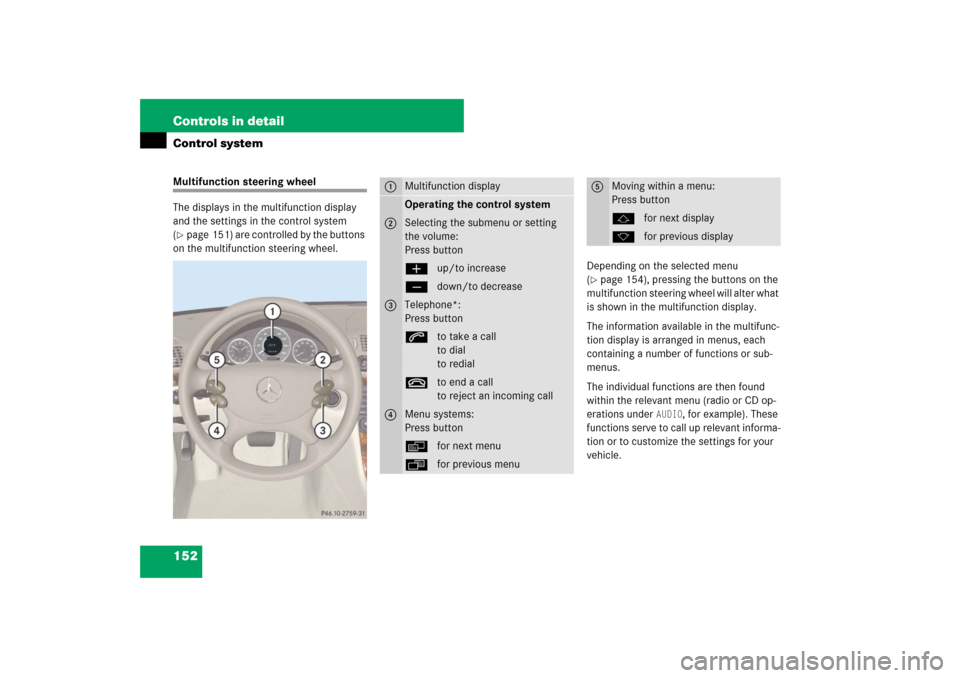
The displays in the multifunction display
and the settings in the control system
(�page 151) are controlled by the buttons
on the multifunction steering wheel.
Depending on the selected menu
(
�page 154), pressing the buttons on the
multifunction steering wheel will alter what
is shown in the multifunction display.
The information available in the multifunc-
tion display is arranged in menus, each
containing a number of functions or sub-
menus.
The individual functions are then found
within the relevant menu (radio or CD op-
erations under
AUDIO
, for example). These
functions serve to call up relevant informa-
tion or to customize the settings for your
vehicle.
1
Multifunction displayOperating the control system
2
Selecting the submenu or setting
the volume:
Press buttonæup/to increaseçdown/to decrease
3
Telephone*:
Press buttonsto take a call
to dial
to redialtto end a call
to reject an incoming call
4
Menu systems:
Press buttonèfor next menuÿfor previous menu
5
Moving within a menu:
Press buttonjfor next displaykfor previous display
Page 158 of 522

157 Controls in detail
Control system
Standard display menu�
Press buttonk orj repeatedly
to select the functions in the standard
display menu.
The following functions are available:
Display digital speedometer
�
Press button k orj repeatedly
until the digital speedometer appears
in the multifunction display.
AMG menu
The main screen of the AMG menu shows
you the gear currently engaged as well as
the engine oil temperature.�
Press buttonè orÿ repeatedly
until the AMG menu appears.
1Gear indicator
2Engine oil temperatureUse buttons k or j to select the fol-
lowing functions in the AMG menu:
Function
Page
Calling up digital speedometer
157
Calling up maintenance service
indicator
366
i
This function is only available in AMG vehi-
cles.
i
The engine oil temperature symbol flashes if
the engine oil temperature has not yet reached
80°C. During this time, avoid driving at full en-
gine speed.
Function
Page
Vehicle supply voltage
158
RACETIMER
158
Overall analysis
160
Lap analysis
160
i
If the engine reaches the overspeed range in
the manual shift program, the menu will be
shown in red. In addition, you will see
UP next to
gear indicator1 as a reminder to upshift.
Page 159 of 522
158 Controls in detailControl systemVehicle supply voltage�
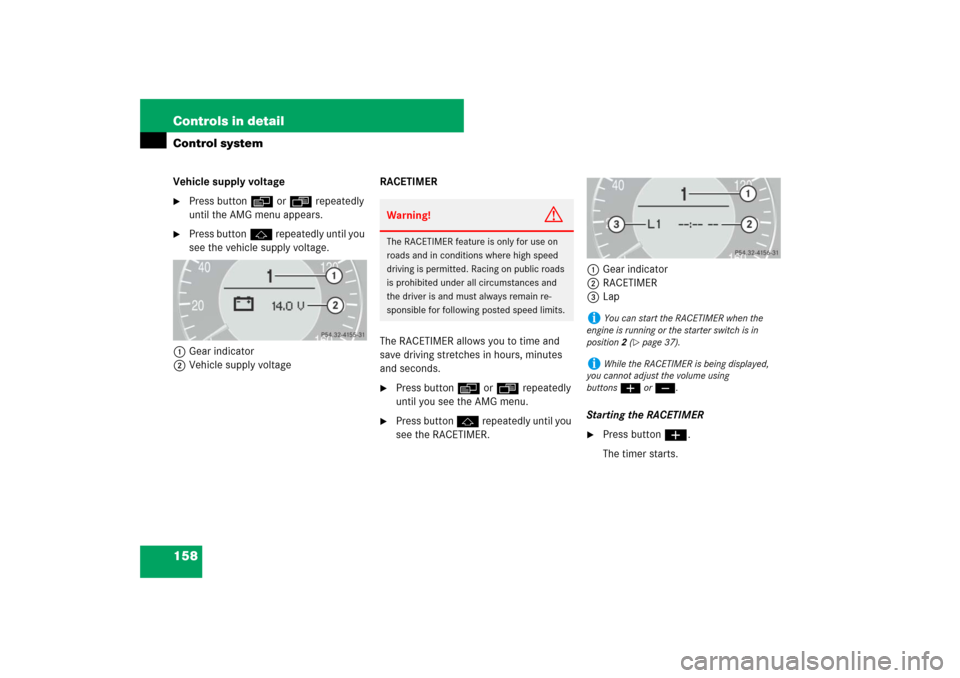
Press buttonè orÿ repeatedly
until the AMG menu appears.
�
Press buttonj repeatedly until you
see the vehicle supply voltage.
1Gear indicator
2Vehicle supply voltageRACETIMER
The RACETIMER allows you to time and
save driving stretches in hours, minutes
and seconds.
�
Press button è or ÿ repeatedly
until you see the AMG menu.
�
Press button j repeatedly until you
see the RACETIMER.1Gear indicator
2RACETIMER
3Lap
Starting the RACETIMER
�
Press button æ.
The timer starts.
Warning!
G
The RACETIMER feature is only for use on
roads and in conditions where high speed
driving is permitted. Racing on public roads
is prohibited under all circumstances and
the driver is and must always remain re-
sponsible for following posted speed limits.
i
You can start the RACETIMER when the
engine is running or the starter switch is in
position2 (
�page 37).
i
While the RACETIMER is being displayed,
you cannot adjust the volume using
buttonsæ or ç.
Page 183 of 522
182 Controls in detailControl system�
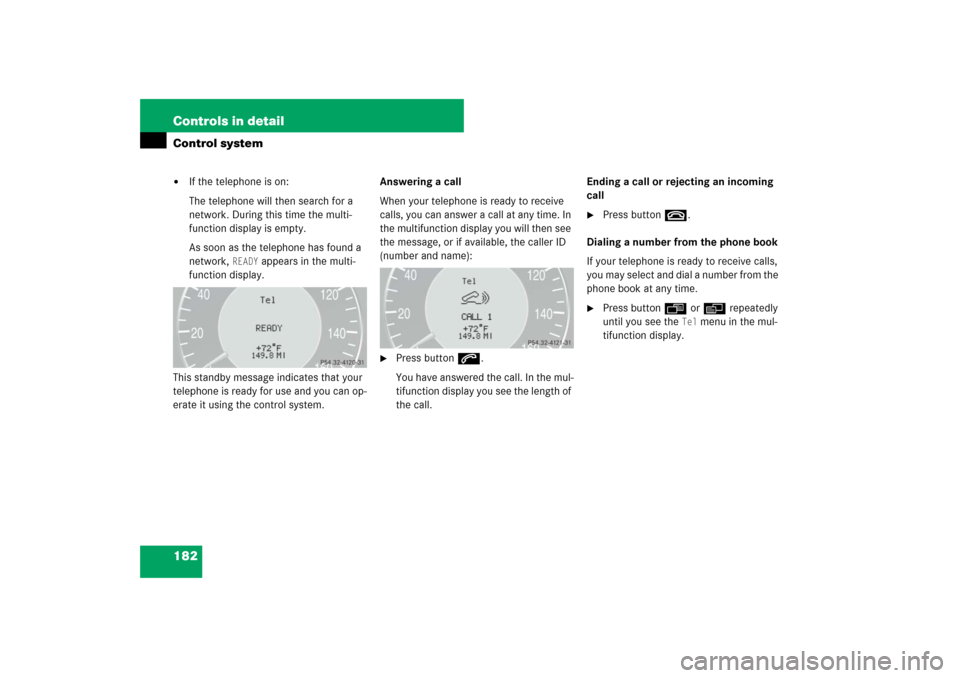
If the telephone is on:
The telephone will then search for a
network. During this time the multi-
function display is empty.
As soon as the telephone has found a
network,
READY
appears in the multi-
function display.
This standby message indicates that your
telephone is ready for use and you can op-
erate it using the control system.Answering a call
When your telephone is ready to receive
calls, you can answer a call at any time. In
the multifunction display you will then see
the message, or if available, the caller ID
(number and name):
�
Press buttons.
You have answered the call. In the mul-
tifunction display you see the length of
the call.Ending a call or rejecting an incoming
call
�
Press buttont.
Dialing a number from the phone book
If your telephone is ready to receive calls,
you may select and dial a number from the
phone book at any time.
�
Press buttonÿ orè repeatedly
until you see the
Tel
menu in the mul-
tifunction display.
Page 184 of 522

183 Controls in detail
Control system
�
Press buttonj ork.
The control system reads the phone
book which is stored in the telephone.
This may take several minutes. In the
multifunction display you will see the
message
Please wait
.
When the message
Please wait
disap-
pears, the phone book has been load-
ed.
�
Press buttonj ork repeatedly
until the desired name appears in the
multifunction display.
The stored names are displayed in as-
cending or descending alphabetical or-
der.
�
Press buttons.
The system dials the selected phone
number.�
If the connection is successful, the
name of the party you are calling
and the duration of the call will ap-
pear in the multifunction display.
�
If no connection is made, the con-
trol system stores the dialed num-
ber in the redial memory.Redialing
The control system stores the most recent-
ly dialed phone numbers. This eliminates
the need to search through your entire
phone book.
�
Press buttonÿ orè repeatedly
until you see the
Tel
menu in the mul-
tifunction display.
�
Press buttons.
In the multifunction display you see the
first number in the redial memory.
�
Press buttonj ork repeatedly
until the desired name appears in the
multifunction display.
�
Press buttons.
The control system dials the selected
phone number.
i
If you press and hold buttonj ork
for longer than 1 second, the system scrolls rap-
idly through the list of names until you release
the button again.
Cancel the quick search mode by pressing
buttont.
Page 201 of 522
200 Controls in detailGood visibilityActivating exterior rear view mirror
parking position
Follow these steps to activate the mirror
parking position so that the passen-
ger-side exterior rear view mirror will be
turned downward to the stored position.
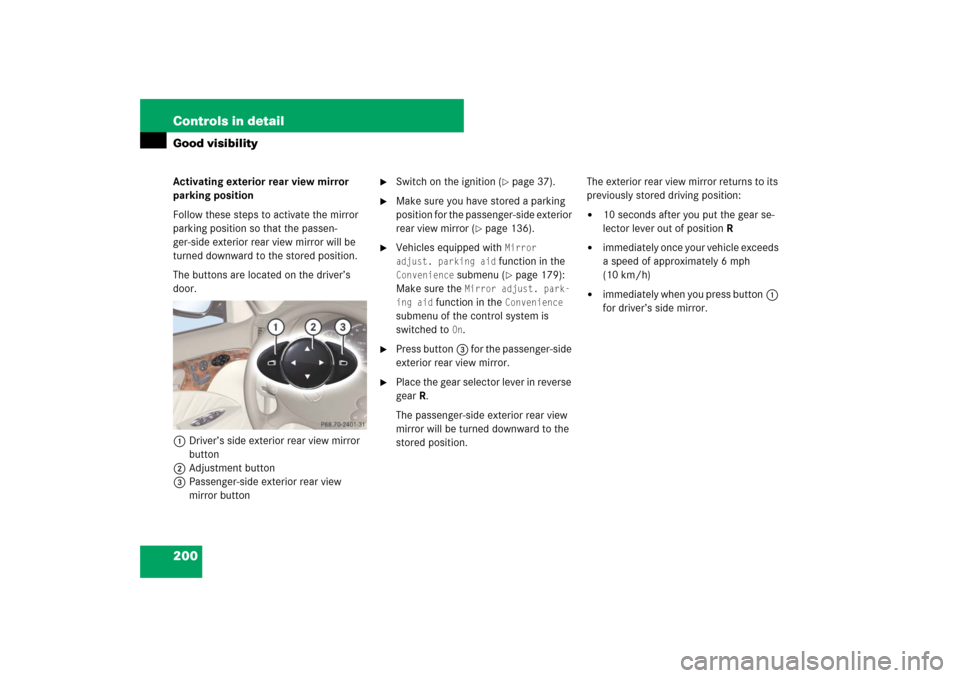
The buttons are located on the driver’s
door.
1Driver’s side exterior rear view mirror
button
2Adjustment button
3Passenger-side exterior rear view
mirror button
�
Switch on the ignition (
�page 37).
�
Make sure you have stored a parking
position for the passenger-side exterior
rear view mirror (
�page 136).
�
Vehicles equipped with
Mirror
adjust. parking aid function in the
Convenience
submenu (
�page 179):
Make sure the
Mirror adjust. park-
ing aid
function in the
Convenience
submenu of the control system is
switched to
On.
�
Press button3 for the passenger-side
exterior rear view mirror.
�
Place the gear selector lever in reverse
gearR.
The passenger-side exterior rear view
mirror will be turned downward to the
stored position.The exterior rear view mirror returns to its
previously stored driving position:
�
10 seconds after you put the gear se-
lector lever out of positionR
�
immediately once your vehicle exceeds
a speed of approximately 6 mph
(10 km/h)
�
immediately when you press button1
for driver’s side mirror.
Page 230 of 522
229 Controls in detail
4-zone automatic climate control
Adjusting air volume
Use buttonsU (
�page 222) or
(
�page 223) for automatic mode or air
volume buttons� orQ
(�page 222) or (
�page 223) to adjust air
volume manually.
Nine blower speeds are available.
�
Press button� to decrease or
buttonQ to increase air volume to
the desired level.
The
AUTO
indicator for air volume in the
display4 (
�page 222) or
(
�page 223) goes out. The selected
blower speed is shown in the
display4. Automatic air distribution
remains switched on.
The indicator lamps on the U but-
tons remain lit.
Front defroster
You can use this setting to defrost the
windshield, for example if it is iced up.
You can also defog the windshield and the
windows.
Activating�
Press button0 or P
(�page 222) or (
�page 223).
The indicator lamp on the button
comes on. Display4 (
�page 222) or
(
�page 223) is cleared.The air conditioning switches
automatically to the following functions:
�
cooling on to dehumidify
�
maximum blowing and heating power
(depends on cooling temperature)
�
air flows onto the windshield and the
front windows
�
the air recirculation mode is switched
off
Deactivating
�
Press button0 or P
(�page 222) or (
�page 223) again.
The indicator lamp on the button goes
out. Defrosting is turned off.
The previous settings are once again in
effect.
i
Keep this setting selected only until the
windshield or the windows are clear again.
i
If you have switched on the defrost function
using the0 or P button, you cannot make
any other settings.
i
The cooling remains switched on.
Page 237 of 522
236 Controls in detail4-zone automatic climate controlYou should raise or lower the temperature
setting in small increments, preferably
starting at 72°F (22°C). The adjusted tem-
perature appears in the display 5. The
rear climate control will adjust to the set
temperature as fast as possible.
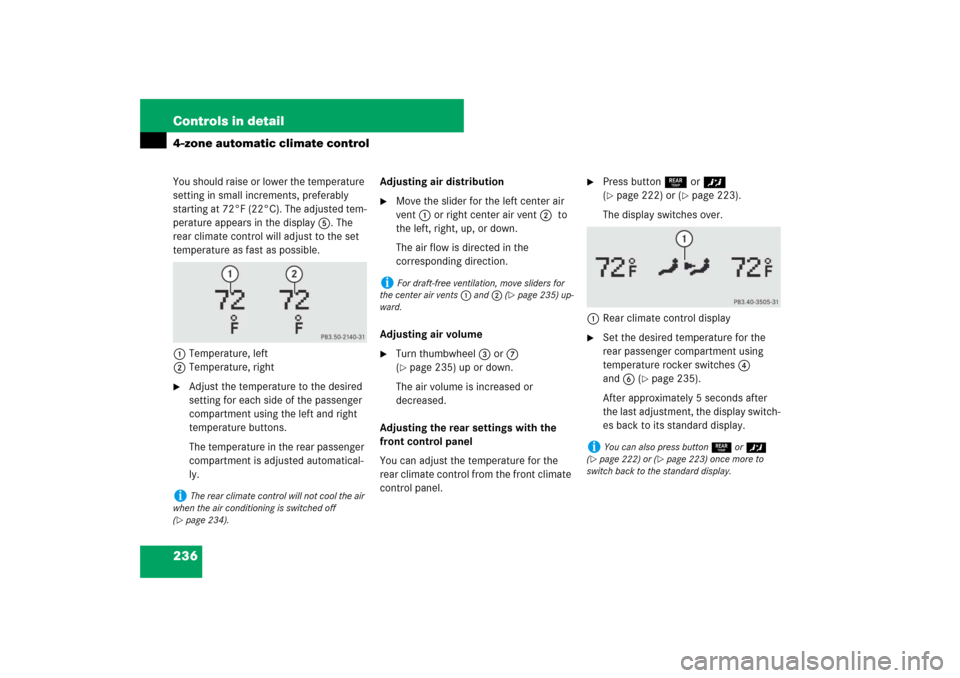
1Temperature, left
2Temperature, right�
Adjust the temperature to the desired
setting for each side of the passenger
compartment using the left and right
temperature buttons.
The temperature in the rear passenger
compartment is adjusted automatical-
ly.Adjusting air distribution
�
Move the slider for the left center air
vent1 or right center air vent2 to
the left, right, up, or down.
The air flow is directed in the
corresponding direction.
Adjusting air volume
�
Turn thumbwheel3 or 7
(�page 235) up or down.
The air volume is increased or
decreased.
Adjusting the rear settings with the
front control panel
You can adjust the temperature for the
rear climate control from the front climate
control panel.
�
Press button5 or ™
(�page 222) or (
�page 223).
The display switches over.
1Rear climate control display
�
Set the desired temperature for the
rear passenger compartment using
temperature rocker switches4
and6 (
�page 235).
After approximately 5 seconds after
the last adjustment, the display switch-
es back to its standard display.
i
The rear climate control will not cool the air
when the air conditioning is switched off
(
�page 234).
i
For draft-free ventilation, move sliders for
the center air vents1 and2 (
�page 235) up-
ward.
i
You can also press button5 or ™
(
�page 222) or (
�page 223) once more to
switch back to the standard display.