Page 41 of 481

40 Getting started
Adjusting
Seat adjustment
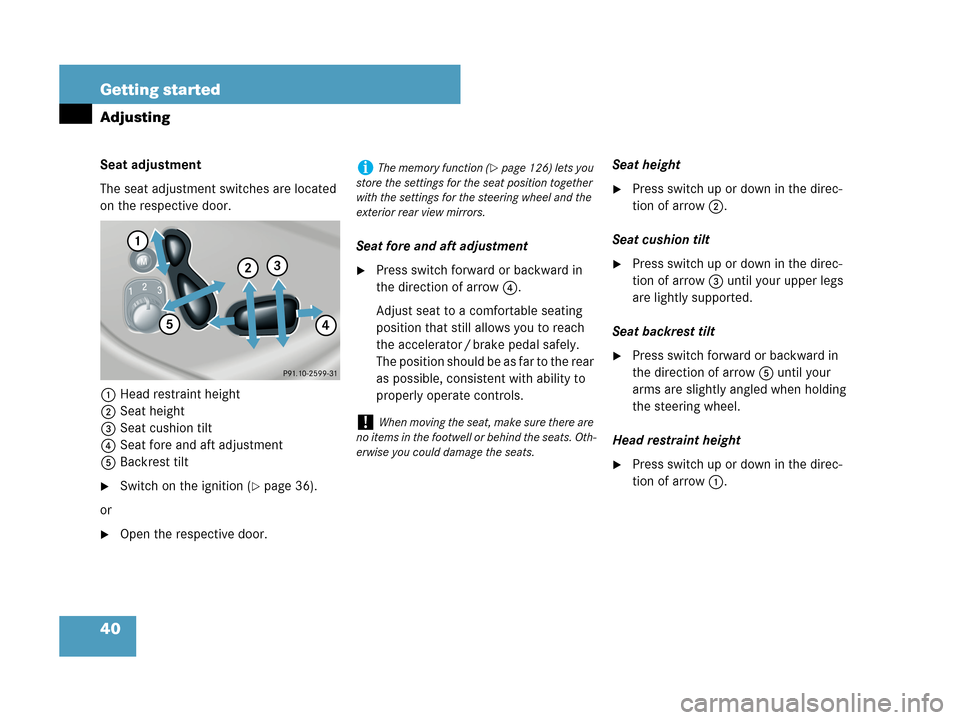
The seat adjustment switches are located
on the respective door.
1Head restraint height
2Seat height
3Seat cushion tilt
4Seat fore and aft adjustment
5Backrest tilt
�Switch on the ignition (�page 36).
or
�Open the respective door.Seat fore and aft adjustment
�Press switch forward or backward in
the direction of arrow4.
Adjust seat to a comfortable seating
position that still allows you to reach
the accelerator / brake pedal safely.
The position should be as far to the rear
as possible, consistent with ability to
properly operate controls.Seat height
�Press switch up or down in the direc-
tion of arrow2.
Seat cushion tilt
�Press switch up or down in the direc-
tion of arrow3 until your upper legs
are lightly supported.
Seat backrest tilt
�Press switch forward or backward in
the direction of arrow5 until your
arms are slightly angled when holding
the steering wheel.
Head restraint height
�Press switch up or down in the direc-
tion of arrow1.
iThe memory function (�page 126) lets you
store the settings for the seat position together
with the settings for the steering wheel and the
exterior rear view mirrors.
!When moving the seat, make sure there are
no items in the footwell or behind the seats. Oth-
erwise you could damage the seats.
Page 121 of 481

120 Controls in detail
Seats
For information on seat adjustment, see
“Adjusting” (
�page 39).
Front seat active head restraints
You cannot remove the active head re-
straints on the driver’s and front passen-
ger’s seat.
For removal of the active head restraints
we recommend that you contact an
authorized Mercedes-Benz Center.
For information on head restraint adjust-
ment, see “Seats” (
�page 39).For information on active head restraints,
see “Active head restraints” (
�page 79).
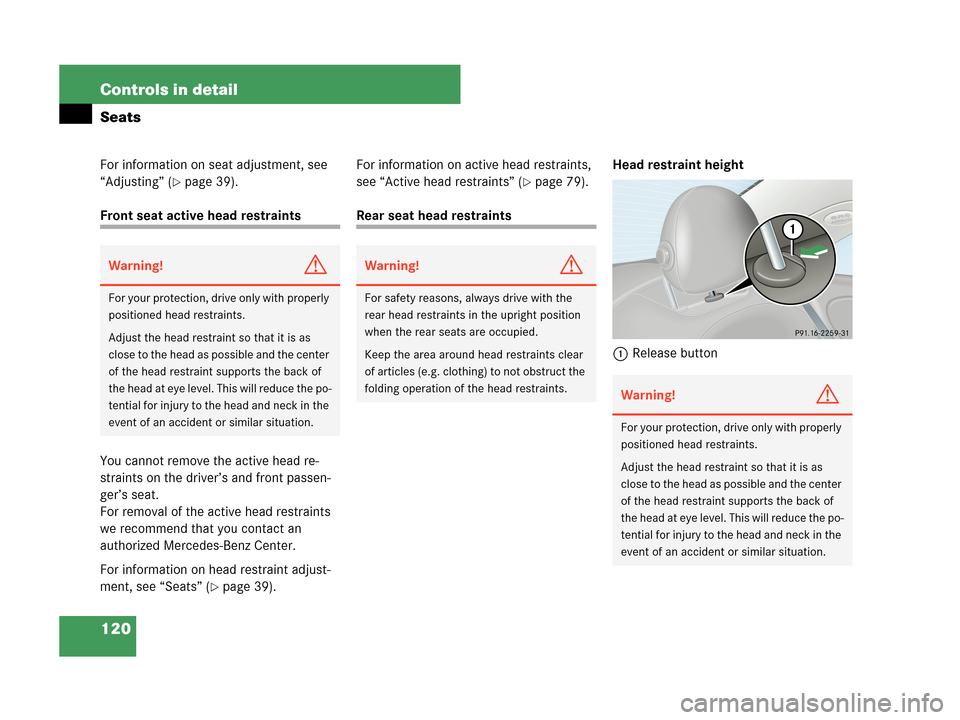
Rear seat head restraintsHead restraint height
1Release button
Warning!G
For your protection, drive only with properly
positioned head restraints.
Adjust the head restraint so that it is as
close to the head as possible and the center
of the head restraint supports the back of
the head at eye level. This will reduce the po-
tential for injury to the head and neck in the
event of an accident or similar situation.
Warning!G
For safety reasons, always drive with the
rear head restraints in the upright position
when the rear seats are occupied.
Keep the area around head restraints clear
of articles (e.g. clothing) to not obstruct the
folding operation of the head restraints.
Warning!G
For your protection, drive only with properly
positioned head restraints.
Adjust the head restraint so that it is as
close to the head as possible and the center
of the head restraint supports the back of
the head at eye level. This will reduce the po-
tential for injury to the head and neck in the
event of an accident or similar situation.
Page 124 of 481

123 Controls in detail
Seats
Removing rear seat head restraints
�Fold back head restraint (�page 121).
�Pull head restraint to its highest
position.
�Push release button1 and pull out
head restraint.
Installing rear head restraints
�Insert head restraint and push it down
until it engages.
�Push release button1 and adjust
head restraint to desired position.
Multicontour seat*
The multicontour seat has a movable seat
cushion and inflatable air cushions built
into the backrest to provide additional
lumbar and side support.
The seat cushion movement, backrest
cushion height and curvature can be
continuously varied with switches on the
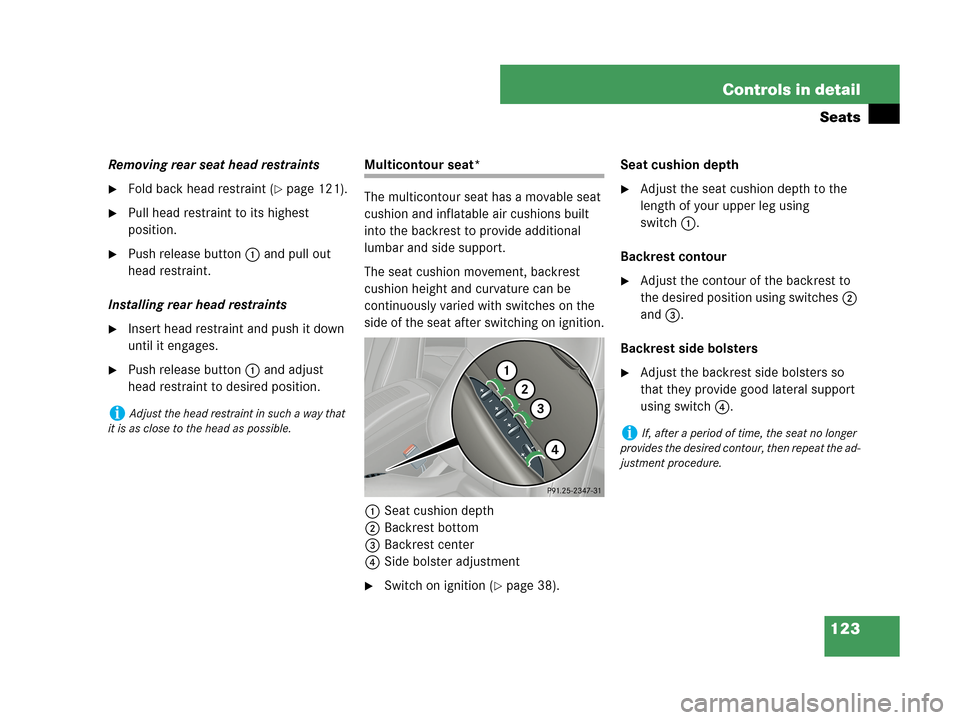
side of the seat after switching on ignition.
1Seat cushion depth
2Backrest bottom
3Backrest center
4Side bolster adjustment
�Switch on ignition (�page 38).Seat cushion depth
�Adjust the seat cushion depth to the
length of your upper leg using
switch1.
Backrest contour
�Adjust the contour of the backrest to
the desired position using switches2
and3.
Backrest side bolsters
�Adjust the backrest side bolsters so
that they provide good lateral support
using switch4.
iAdjust the head restraint in such a way that
it is as close to the head as possible.
iIf, after a period of time, the seat no longer
provides the desired contour, then repeat the ad-
justment procedure.