Page 175 of 481
174 Controls in detail
Automatic transmission
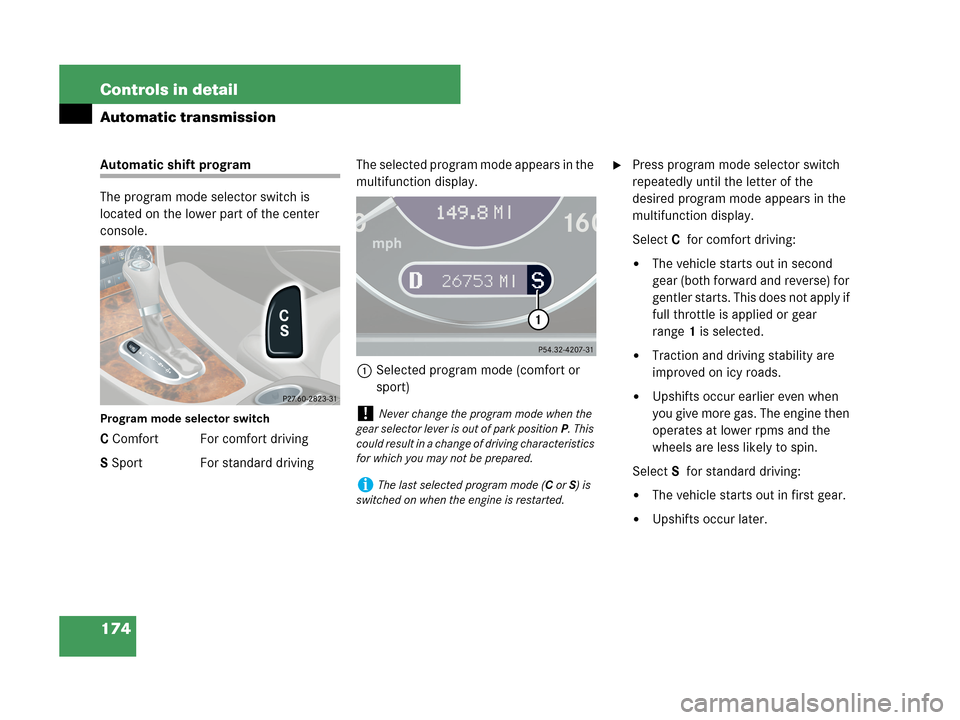
Automatic shift program
The program mode selector switch is
located on the lower part of the center
console.
Program mode selector switch
C Comfort For comfort driving
S Sport For standard drivingThe selected program mode appears in the
multifunction display.
1Selected program mode (comfort or
sport)
�Press program mode selector switch
repeatedly until the letter of the
desired program mode appears in the
multifunction display.
SelectCfor comfort driving:
�The vehicle starts out in second
gear (both forward and reverse) for
gentler starts. This does not apply if
full throttle is applied or gear
range1 is selected.
�Traction and driving stability are
improved on icy roads.
�Upshifts occur earlier even when
you give more gas. The engine then
operates at lower rpms and the
wheels are less likely to spin.
SelectSfor standard driving:
�The vehicle starts out in first gear.
�Upshifts occur later.
!Never change the program mode when the
gear selector lever is out of park positionP. This
could result in a change of driving characteristics
for which you may not be prepared.
iThe last selected program mode (CorS) is
switched on when the engine is restarted.
Page 176 of 481
175 Controls in detail
Automatic transmission
Gear selector lever one-touch
gearshifting
With the gear selector lever in drive
positionD, you can limit or extend the gear
range.Limiting gear range
�Briefly press the gear selector lever to
the left in theD-direction.
The transmission will shift to the next
lower gear as permitted by the shift
program. This action simultaneously
limits the gear range of the transmis-
sion (
�page 173).!Allow engine to warm up under low load use.
Do not place full load on the engine until the
operating temperature has been reached.
Shift into reverse gearR or park positionP only
when the vehicle is stopped.
Avoid spinning of a drive wheel when driving off
on slippery road surfaces. This may cause seri-
ous damage to the drivetrain which is not cov-
ered by the Mercedes-Benz Limited Warranty.
Warning!G
On slippery road surfaces, never downshift
in order to obtain braking action. This could
result in drive wheel slip and reduced
vehicle control. Your vehicle’s ABS will not
prevent this type of loss of control.
iTo avoid overrevving the engine when down-
shifting, the transmission will not shift to a lower
gear if the engine’s max. speed would be
exceeded.
Page 177 of 481
176 Controls in detail
Automatic transmission
Extending gear range
�Briefly press the gear selector lever to
the right in theD+direction.
The transmission will shift to the next
higher gear as permitted by the shift
program. This action simultaneously
extends the gear range of the transmis-
sion.Canceling gear range limit�Press and hold the gear selector lever
in theD+direction until
D reappears in
the multifunction display (
�page 170).
The transmission will shift from the
current gear range directly to gear
rangeD.Shifting into optimal gear range
�Press and hold the gear selector lever
in theD-direction.
The transmission will automatically
select the gear range suited for optimal
acceleration and deceleration. This will
involve shifting down one or more
gears.
iIf you press on the accelerator when the en-
gine has reached its rpm limit, the transmission
will upshift beyond any gear range limit selected.
Page 178 of 481
177 Controls in detail
Automatic transmission
Steering wheel gearshift control
one-touch gearshifting*
With the gear selector lever in drive
positionD, you can limit or extend the gear
range.
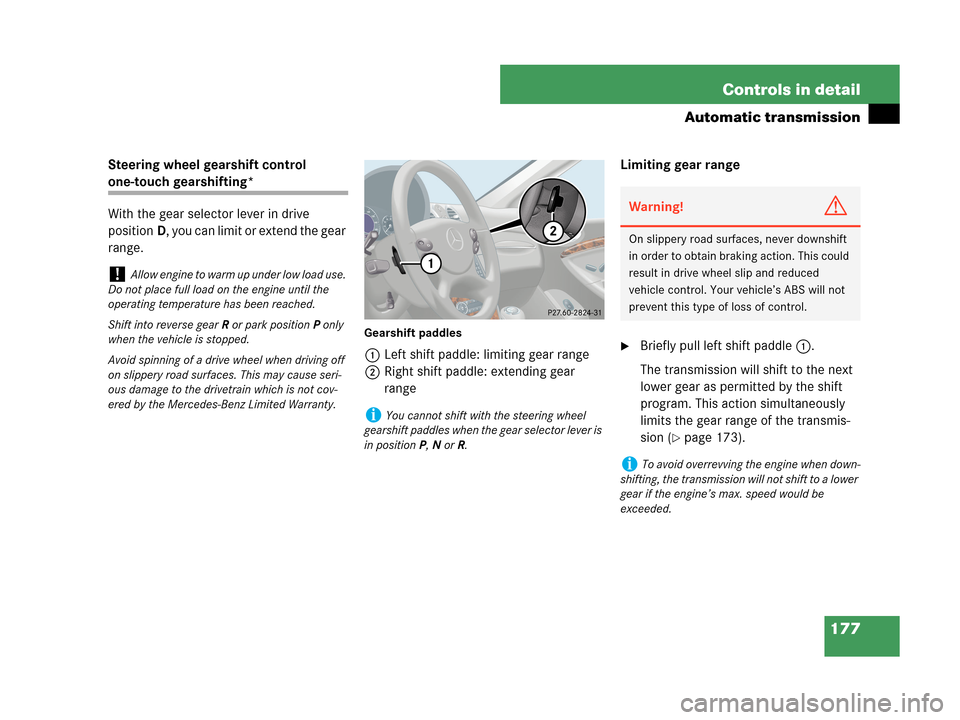
Gearshift paddles
1Left shift paddle: limiting gear range
2Right shift paddle: extending gear
rangeLimiting gear range�Briefly pull left shift paddle1.
The transmission will shift to the next
lower gear as permitted by the shift
program. This action simultaneously
limits the gear range of the transmis-
sion (
�page 173).
!Allow engine to warm up under low load use.
Do not place full load on the engine until the
operating temperature has been reached.
Shift into reverse gearR or park positionP only
when the vehicle is stopped.
Avoid spinning of a drive wheel when driving off
on slippery road surfaces. This may cause seri-
ous damage to the drivetrain which is not cov-
ered by the Mercedes-Benz Limited Warranty.
iYou cannot shift with the steering wheel
gearshift paddles when the gear selector lever is
in positionP,N orR.
Warning!G
On slippery road surfaces, never downshift
in order to obtain braking action. This could
result in drive wheel slip and reduced
vehicle control. Your vehicle’s ABS will not
prevent this type of loss of control.
iTo avoid overrevving the engine when down-
shifting, the transmission will not shift to a lower
gear if the engine’s max. speed would be
exceeded.
Page 179 of 481
178 Controls in detail
Automatic transmission
Extending gear range
�Briefly pull right shift paddle2.
The transmission will shift to the next
higher gear as permitted by the shift
program. This action simultaneously
extends the gear range of the transmis-
sion.Canceling gear range limit�Pull and hold right shift paddle2
until
D reappears in the multifunction
display (
�page 170).
The transmission will shift from the
current gear range directly to gear
rangeD.
Shifting into optimal gear range
�Pull and hold left shift paddle1.
The transmission will automatically
select the gear range suited for optimal
acceleration and deceleration. This will
involve shifting down one or more
gears.Emergency operation
(Limp-Home Mode)
If vehicle acceleration becomes less re-
sponsive or sluggish or the transmission
no longer shifts, the transmission is most
likely operating in limp-home (emergency
operation) mode. In this mode only second
gear and reverse gear can be selected.
�Stop the vehicle in a safe location.
�Move the gear selector lever to park
positionP.
�Turn off the engine.
�Wait at least 10 seconds before
restarting.
�Restart the engine.
�Move the gear selector lever to
positionD (for second gear) or
positionR.
�Have the transmission checked at an
authorized Mercedes-Benz Center as
soon as possible.
iIf you press on the accelerator when the en-
gine has reached its rpm limit, the transmission
will upshift beyond any gear range limit selected.
Page 256 of 481
255 Controls in detail
Driving systems
Canceling cruise control
There are several ways to cancel cruise
control:
�Step on the brake pedal.
Cruise control is canceled. The last
speed set is stored for later use.
or
�Briefly push the cruise control lever to
position3.
Cruise control is canceled. The last
speed set is stored for later use.
iThe last stored speed is canceled when you
turn off the engine.
iCruise control automatically switched off, if
�you step on the brake pedal.
�you press the parking brake pedal.
In this case the segments in the multifunc-
tion display (
�page 254) go out and no
warning sounds.
�the vehicle speed is below 20 mph
(30 km/h).
�ESP® is in operation or switched off with the
ESP® switch (�page 92).
�you move the gear selector lever in
positionN while driving.
The segments in the multifunction display
(
�page 254) go out, and an acoustic warning
sounds.
!Moving gear selector lever to positionN
while driving also cancels cruise control. Howev-
er, the gear selector lever should not be moved
to positionN while driving except to coast when
the vehicle is in danger of skidding (e.g. on icy
roads).
iDepressing the accelerator pedal does not
deactivate cruise control. After brief accelera-
tion (e.g. for passing), cruise control will resume
the last speed set.
Page 258 of 481

257 Controls in detail
Driving systems
Parktronic system (Parking assist)*,
Canada only
The Parktronic system is an electronic aid
designed to assist the driver during park-
ing maneuvers. It visually and audibly indi-
cates the relative distance between the
vehicle and an obstacle.
The Parktronic system is automatically ac-
tivated when you switch on the ignition
(
�page 36) and placed the gear selector
lever in positionD,R,orN.The Parktronic system deactivates at
speeds over approximately 11 mph
(18 km/h). At lower speeds the Parktronic
system turns on again.
The Parktronic system also deactivates
when you place the gear selector lever in
positionP.
The Parktronic system monitors the sur-
roundings of your vehicle with six sensors
in the front bumper and four sensors in the
rear bumper.
1Sensors in the front bumper
Warning!G
Parktronic is a supplemental system. It is
not intended to, nor does it replace, the
need for extreme care. The responsibility
during parking and other critical maneuvers
always rests with the driver.
Special attention must be paid to objects
with smooth surfaces or low silhouettes
(e.g. trailer couplings, painted posts or road
curbs). Such objects may not be detected by
the system and can damage the vehicle.
The operational function of the Parktronic
system can be affected by dirty sensors, es-
pecially at times of snow and ice, see
“Cleaning the Parktronic system* sensors
(Canada only)” (
�page 350).
Interference caused by other ultrasonic sig-
nals (e.g. working jackhammers, car wash,
or the air brakes of trucks) can cause the
system to send erratic indications, and
should be taken into consideration.
Warning!G
Make sure no persons or animals are in the
area in which you are maneuvering. You
could otherwise injure them.
Page 260 of 481
259 Controls in detail
Driving systems
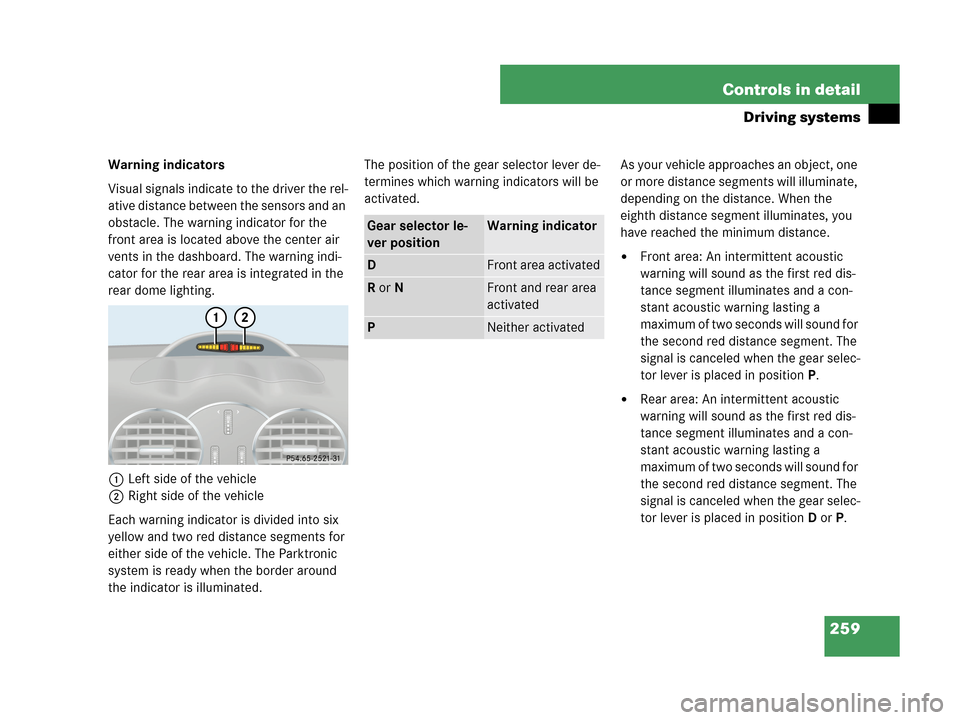
Warning indicators
Visual signals indicate to the driver the rel-
ative distance between the sensors and an
obstacle. The warning indicator for the
front area is located above the center air
vents in the dashboard. The warning indi-
cator for the rear area is integrated in the
rear dome lighting.
1Left side of the vehicle
2Right side of the vehicle
Each warning indicator is divided into six
yellow and two red distance segments for
either side of the vehicle. The Parktronic
system is ready when the border around
the indicator is illuminated.The position of the gear selector lever de-
termines which warning indicators will be
activated.As your vehicle approaches an object, one
or more distance segments will illuminate,
depending on the distance. When the
eighth distance segment illuminates, you
have reached the minimum distance.
�Front area: An intermittent acoustic
warning will sound as the first red dis-
tance segment illuminates and a con-
stant acoustic warning lasting a
maximum of two seconds will sound for
the second red distance segment. The
signal is canceled when the gear selec-
tor lever is placed in positionP.
�Rear area: An intermittent acoustic
warning will sound as the first red dis-
tance segment illuminates and a con-
stant acoustic warning lasting a
maximum of two seconds will sound for
the second red distance segment. The
signal is canceled when the gear selec-
tor lever is placed in position DorP.
Gear selector le-
ver positionWarning indicator
DFront area activated
R or NFront and rear area
activated
PNeither activated