Page 152 of 723
151 Control systems
COMAND navigation (introduction)
Updating
After you have loaded the DVD, you will
see a message to the effect that the disc
does not contain a recognizable audio for-
mat.
�Confirming message: Press n.
COMAND checks whether the map
software on the DVD is compatible with
the vehicle’s navigation system and
whether it is compatible with the cur-
rent system software.
Map software is compatible with the
navigation system and the current sys-
tem software
COMAND now checks whether the map
data on the DVD is already installed.
Map data is not yet installed
You will see a comparison of the version
statuses in the display and a prompt will
appear asking whether you want to contin-
ue with the update.
�Select “Yes” or “No”.
If you select “No”, COMAND automati-
cally ejects the DVD and the map data
is not updated.
�Take DVD out of the slot.
If you select “Yes”, the map data is up-
dated.
Map data is already installed
You will see a message that the map data
is already installed and a prompt will ap-
pear asking you whether you want to con-
tinue with the update.
�Select “Yes” or “No”.
If you select “No”, COMAND automati-
cally ejects the DVD and the map data
is not updated.
�Take DVD out of slot.
If you select “Yes”, the existing map
data is saved again.Updating the map data
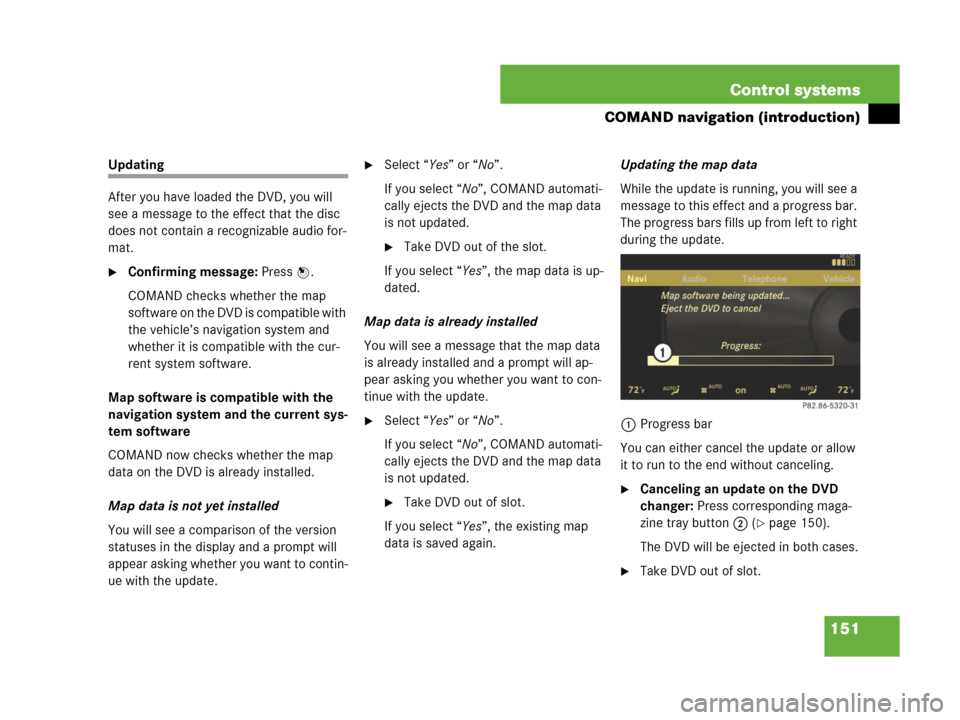
While the update is running, you will see a
message to this effect and a progress bar.
The progress bars fills up from left to right
during the update.
1Progress bar
You can either cancel the update or allow
it to run to the end without canceling.�Canceling an update on the DVD
changer: Press corresponding maga-
zine tray button 2 (
�page 150).
The DVD will be ejected in both cases.
�Take DVD out of slot.
Page 161 of 723
160 Control systems
COMAND navigation (introduction)
�Adjusting: Select “Navi” � “Navi” �
“Map Display”.
The map display list appears. A dot R
indicates the current setting.
�Select “Standard symbols”, “Personal
symbols” or “No symbols”.
If you select “Personal symbols”, the
list of POIs appears.
�Switching POI symbol display on
or off: Select the desired POI.
The corresponding symbol displays
are switched on or off, depending
on the previous status. A check-
mark indicates which status is ac-
tive. You can switch on the symbol
displays for more than one POI.
�Exiting menu: Slide omp or press
back button L in the center console
(
�page 82).
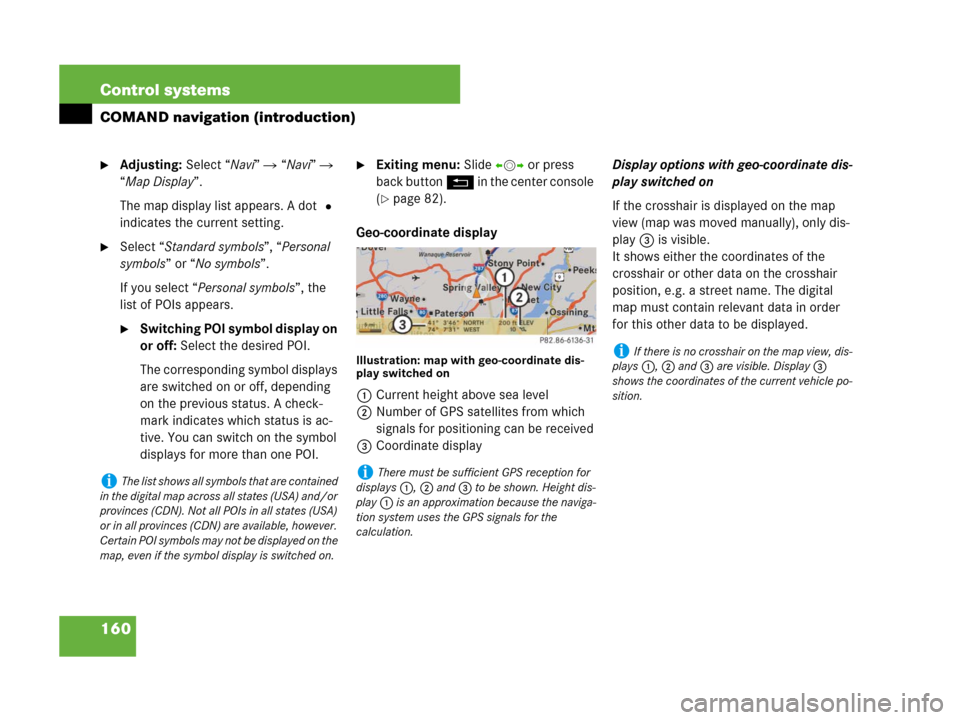
Geo-coordinate display
Illustration: map with geo-coordinate dis-
play switched on
1Current height above sea level
2Number of GPS satellites from which
signals for positioning can be received
3Coordinate displayDisplay options with geo-coordinate dis-
play switched on
If the crosshair is displayed on the map
view (map was moved manually), only dis-
play 3 is visible.
It shows either the coordinates of the
crosshair or other data on the crosshair
position, e.g. a street name. The digital
map must contain relevant data in order
for this other data to be displayed.
iThe list shows all symbols that are contained
in the digital map across all states (USA) and/or
provinces (CDN). Not all POIs in all states (USA)
or in all provinces (CDN) are available, however.
Certain POI symbols may not be displayed on the
map, even if the symbol display is switched on. iThere must be sufficient GPS reception for
displays 1, 2 and 3 to be shown. Height dis-
play 1 is an approximation because the naviga-
tion system uses the GPS signals for the
calculation.
iIf there is no crosshair on the map view, dis-
plays 1, 2 and 3 are visible. Display 3
shows the coordinates of the current vehicle po-
sition.
Page 162 of 723
161 Control systems
COMAND navigation (introduction)
Switching the geo-coordinate display on
or off
�Select “Navi” � “Navi” � “Map Dis-
play”.
The map display list appears.
�Select “Coordinates”.
The geo-coordinate display is switched
on or off, depending on the previous
status. A checkmark indicates which
status is active.
�Exiting menu: Slide omp or press
back button L in the center console
(
�page 82).Setting route mode
�Select “Navi” � “Navi” � “Mode”.
The mode list appears.
�Switching mode on or off:
Select desired modes.
Depending on the previous status, the
mode is switched on or off. A check-
mark indicates that the mode is
switched on. It is possible to switch on
more than one mode.
�Exiting menu: Slide omp or press
back button L in the center console
(
�page 82).
COMAND will verify whether it can in-
corporate the modes if you select them
with route guidance active.
If it can, COMAND calculates a new
route while incorporating the modes
selected.
If it cannot, you will see and hear a cor-
responding message.
�Select “OK”.
COMAND calculates a new route.
Only those modes which can be in-
corporated are used.
iThis function allows you to set the following
options for route guidance:
�“Minimize Highways”
�“Minimize Toll Roads”
�“Minimize Tunnels”
�“Minimize Ferries/Motorail”
Page 217 of 723
216 Control systems
COMAND address book
�Switching between private and
business data: Select symbol 1.
The display switches to private or busi-
ness data, depending on the previous
status.
�Changing data field: Slide rmq re-
peatedly until desired entry is highlight-
ed.
or
�Select [ or ] repeatedly until de-
sired entry is highlighted.
�Entering data into a field:
Select desired characters one by one
from the input characters.
�Toggling upper and lower case for
the input characters: Select& or
(.
�Changing language for the input
characters: Select!.
�Select desired language.
�Changing character set for the input
characters: Select#.
Depending on the previous setting, you
will change to letters with special char-
acters or to numbers with special char-
acters.
�Moving cursor in the data field:
SelectY or Z.
�Deleting individual characters:
Select) and briefly press n.
The character to the left of the cursor is
deleted.
�Deleting an entire entry: Select)
and press and hold n until the entry is
deleted.
�Saving an entry: Select?.
�Canceling an entry: Select “Back”.
If one of the data fields contains new
data, a prompt will appear asking
whether you want to save the entry.
�Select “Yes” or “No”.
The entry will either be saved or
not, depending on your selection.
Page 221 of 723
220 Control systems
COMAND address book
Switching between private or business
data
�Select symbol 2.
The display switches to private or busi-
ness data, depending on the previous
status.
Selecting a different data field
�Rotate ymz or slide qmr.
Displaying abbreviated content in full
�Select “Options” � “Details”.
The display is shown in full.
�Closing entire display: Slide qmr or
omp or pressn.
Closing the detailed view
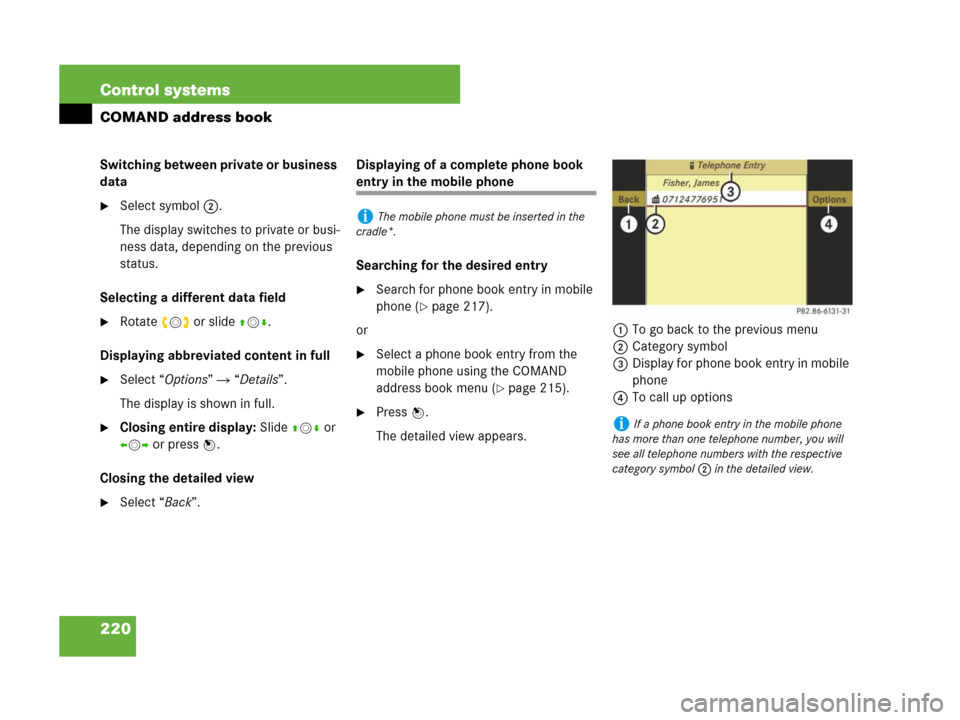
�Select “Back”.Displaying of a complete phone book
entry in the mobile phone
Searching for the desired entry
�Search for phone book entry in mobile
phone (
�page 217).
or
�Select a phone book entry from the
mobile phone using the COMAND
address book menu (
�page 215).
�Press n.
The detailed view appears.1To go back to the previous menu
2Category symbol
3Display for phone book entry in mobile
phone
4To call up options
iThe mobile phone must be inserted in the
cradle*.
iIf a phone book entry in the mobile phone
has more than one telephone number, you will
see all telephone numbers with the respective
category symbol 2 in the detailed view.
Page 260 of 723
259 Control systems
Instrument cluster control system
Assistance* (�page 268)Service (�page 269)Settings (�page 271)
Commands/submenus
Displaying the distance graphic*,
DISTRONIC Plus*Calling up vehicle malfunction, warning
and system status messages stored in
memorySetting daytime running lamp mode
(USA only)
Activating/deactivating PRE-SAFE®
Brake*
(vehicles with DISTRONIC Plus* only)Checking tire inflation pressureSwitching additional speedometer on or
off
Switching on the Dynamic Rear View
Monitor* automaticallyCalling up maintenance service displaySwitching radar sensors* on or off
(USA only)
Checking engine oil level (CL 600)
Page 263 of 723
262 Control systems
Instrument cluster control system
Route guidance active
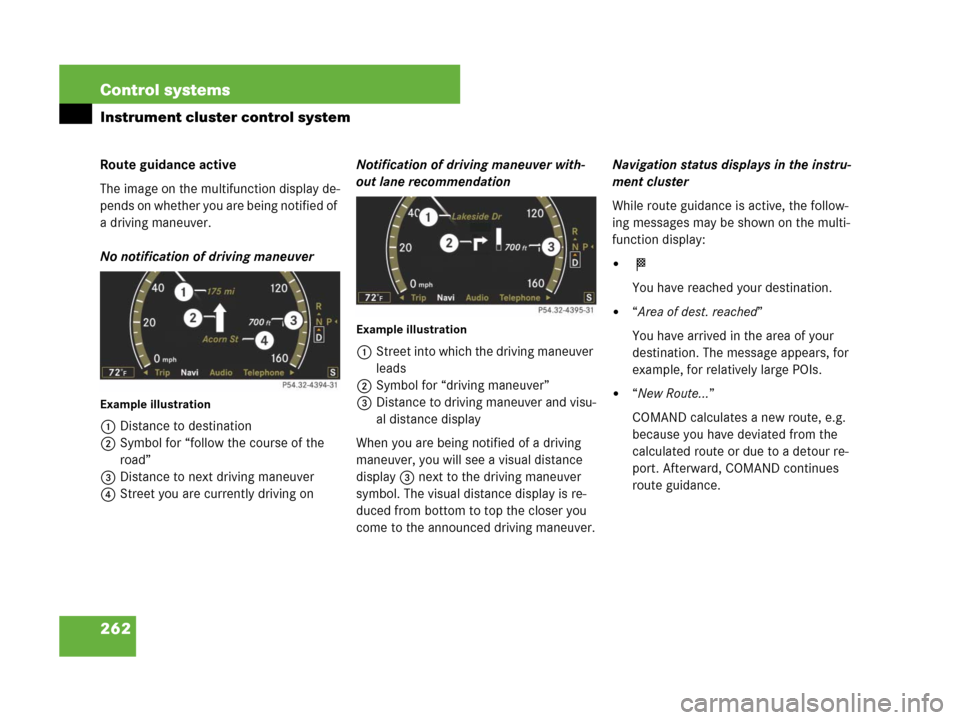
The image on the multifunction display de-
pends on whether you are being notified of
a driving maneuver.
No notification of driving maneuver
Example illustration
1Distance to destination
2Symbol for “follow the course of the
road”
3Distance to next driving maneuver
4Street you are currently driving onNotification of driving maneuver with-
out lane recommendation
Example illustration
1Street into which the driving maneuver
leads
2Symbol for “driving maneuver”
3Distance to driving maneuver and visu-
al distance display
When you are being notified of a driving
maneuver, you will see a visual distance
display 3 next to the driving maneuver
symbol. The visual distance display is re-
duced from bottom to top the closer you
come to the announced driving maneuver.Navigation status displays in the instru-
ment cluster
While route guidance is active, the follow-
ing messages may be shown on the multi-
function display:
�<
You have reached your destination.
�“Area of dest. reached”
You have arrived in the area of your
destination. The message appears, for
example, for relatively large POIs.
�“New Route…”
COMAND calculates a new route, e.g.
because you have deviated from the
calculated route or due to a detour re-
port. Afterward, COMAND continues
route guidance.
Page 269 of 723
268 Control systems
Instrument cluster control system
Answering a call
When your telephone is ready to receive
calls, you can answer a call at any time
with the ignition on. When you are in the
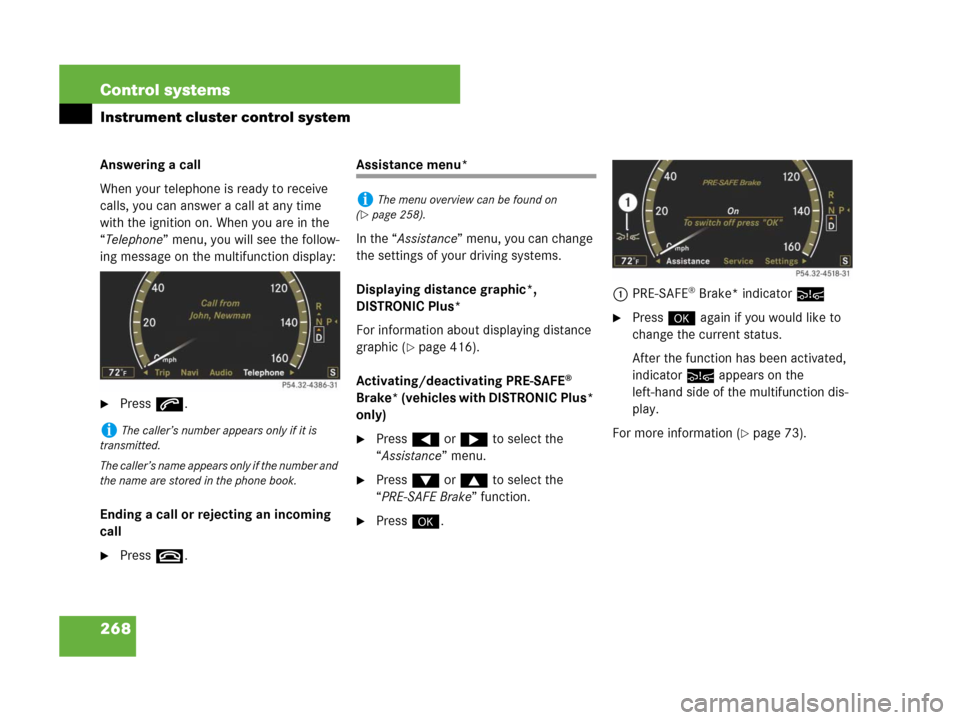
“Telephone” menu, you will see the follow-
ing message on the multifunction display:
�Press s.
Ending a call or rejecting an incoming
call
�Press t.
Assistance menu*
In the “Assistance” menu, you can change
the settings of your driving systems.
Displaying distance graphic*,
DISTRONIC Plus*
For information about displaying distance
graphic (
�page 416).
Activating/deactivating PRE-SAFE
®
Brake* (vehicles with DISTRONIC Plus*
only)
�Press ( or & to select the
“Assistance” menu.
�Press % or $ to select the
“PRE-SAFE Brake” function.
�Press #.1PRE-SAFE
® Brake* indicator:
�Press # again if you would like to
change the current status.
After the function has been activated,
indicator: appears on the
left-hand side of the multifunction dis-
play.
For more information (
�page 73).iThe caller’s number appears only if it is
transmitted.
The caller’s name appears only if the number and
the name are stored in the phone book.
iThe menu overview can be found on
(
�page 258).