2007 MERCEDES-BENZ C-CLASS ESTATE service reset
[x] Cancel search: service resetPage 14 of 377
11
Multi-function steering wheel
..3 6, 125
Multi-function steering wheel (12 -
button) see Luxury multi-function steering wheel N
Navigation On-board computer (luxury multi -
function steering wheel) . . . . . . . .135
NECK-PRO head restraint . . . . . . . . ..53
Resetting triggered NECK-PRO
head restraints . . . . . . . . . . . . . . . .303 O
On-board computer . . . . . . . . ..125, 129
On-board computer (luxury multi-
function steering wheel)
Audio menu . . . . . . . . . . . . . . . . . .137
Convenience submenu . . . . . . . . . .144
Display messages . . . . . . . . . . . . .236
Factory setting submenu . . . . . . . .144
Instrument cluster submenu . . . . .141
Lights submenu . . . . . . . . . . . . . . .142
Navigation menu . . . . . . . . . . . . . .135
Overview . . . . . . . . . . . . . . . . . . . .132
Service menu . . . . . . . . . . . . . . . . .140
Settings menu . . . . . . . . . . . . . . . .140
Standard display submenu . . . . . . .133
Telephone menu . . . . . . . . . . . . . .138 Time/date submenu . . . . . . . . . .
.142
Trip computer menu . . . . . . . . . . . .133
Vehicle submenu . . . . . . . . . . . . . .143
On-board computer (multi-func-
tion steering wheel)
Display messages . . . . . . . . . . . . .236
Message memory . . . . . . . . . . . . . .128
Overview . . . . . . . . . . . . . . . . . . . .127
Standard displa y.. . . . . . . . . . . . .128
Time/date . . . . . . . . . . . . . . . . . . .129
Trip computer . . . . . . . . . . . . . . . .128
One-touch gearshiftin g. . . . . . . . . . .119
Operating syste m
see On-board computer
Outside temperature display . . . . ..124
Overhead control panel Overview . . . . . . . . . . . . . . . . . . . . .40 P
Paint code number . . . . . . . . . . . . ..339
Panorama sliding sunroo f. . . . . . . . .176
Opening/closing . . . . . . . . . . . . . .176
Rain-closing feature . . . . . . . . . . . .178
Raising/lowering . . . . . . . . . . . . . .177
Resetting . . . . . . . . . . . . . . . . . . . .178
Parking . . . . . . . . . . . . . . . . . . . . . . . .116
Parking aid . . . . . . . . . . . . . . . . . . . . . .95
Parktronic . . . . . . . . . . . . . . . . . . .153 Parking brake
. . . . . . . . . . . . . . . . . . .116
Display message . . . . . . . . . . . . . .250
Parking lamps
Display message . . . . . . . . . . . . . .264
Parking loc k
Releasing manually (automatic
transmission ).. . . . . . . . . . . . . . . .303
Parking position
Exterior mirror . . . . . . . . . . . . . . . . .95
Parktronic . . . . . . . . . . . . . . . . . . . . . .153
Activating/deactivating . . . . . . . . .155
Malfunction . . . . . . . . . . . . . . . . . .293
Range of the sensors . . . . . . . . . . .153
Trailer towing . . . . . . . . . . . . . . . . .155
Warning display . . . . . . . . . . . . . . .154
PASSENGER AIRBAG OFF warning
lamp . . . . . . . . . . . . . . . . . . . . . . .55, 277
Performance . . . . . . . . . . . . . . . . . . .343
Permanent display On-board computer (luxury multi-
function steering wheel) . . . . . . . .142
Permanent Speedtronic . . . . . . . . ..151
Petrol Minimum grad e.. . . . . . . . . . . . . .205
Plastic trim
Cleaning . . . . . . . . . . . . . . . . . . . . .229
Power supply (trailer) . . . . . . . . . . ..225
Power window s
see Side window Index
204_AKB; 2; 3, en-GB
mkalafa,
2007-06-26T23:11:51+02:00 - Seite 11
Page 16 of 377
13
Seat heating
. . . . . . . . . . . . . . . . . . . . .91
Securing a load . . . . . . . . . . . . . . . . .182
Selector lever Display message . . . . . . . . . . . . . .242
Positions . . . . . . . . . . . . . . . . . . . .118
Service
Calling up the due date (on-board
computer) . . . . . . . . . . . . . . . . . . .226
Display Message . . . . . . . . . . . . . .226
On-board computer (luxury multi-
function steering wheel) . . . . . . . .140
Service indicator . . . . . . . . . . . . . . . .226
Service products . . . . . . . . . . . . . . . .360
Brake fluid . . . . . . . . . . . . . . . . . . .370
Coolant . . . . . . . . . . . . . . . . . . . . .368
Windscreen washer fluid . . . . . . . .371
Settings
Calling up a stored setting . . . . . . . .97
Factory (key ).. . . . . . . . . . . . . .76, 77
Factory (KEYLESS GO) . . . . . . . . . . .78
Factory (on-board computer,
luxury multi-function steering
wheel ).. . . . . . . . . . . . . . . . . . . . .144
On-board computer (luxury multi-
function steering wheel) . . . . . . . .140
Shift range s
Automatic transmission . . . . . . . . .119
Display in the speedometer . . . . . .118
Sidebags . . . . . . . . . . . . . . . . . . . . . . . .51 Side window
Fault . . . . . . . . . . . . . . . . . . . . . . . .295
Opening/closing . . . . . . . . . . . . . .110
Side window s
Cleaning . . . . . . . . . . . . . . . . . . . . .228
Ski rack . . . . . . . . . . . . . . . . . . . . . . . .181
Sliding/tilting sunroo f. . . . . . . . . . .173
Rain closing feature . . . . . . . . . . . .175
Resetting . . . . . . . . . . . . . . . . . . . .175
Snow chains . . . . . . . . . . . . . . . . . . . .217
Socket Cockpit . . . . . . . . . . . . . . . . . . . . . .198
Luggage compartment . . . . . . . . . .199
Rear compartment . . . . . . . . . . . . .198
Spare wheel
Fitting . . . . . . . . . . . . . . . . . . . . . . .319
Storage location . . . . . . . . . . . . . . .234
Technical data . . . . . . . . . . . . . . . .354
Spee d
Technical data . . . . . . . . . . . . . . . .343
Speed limiter
Speedtronic . . . . . . . . . . . . . . . . . .148
Speedometer
Digital (on-board computer, luxury
multi-function steering wheel) . . . .135
Segments . . . . . . . . . . . . . . . . . . . .124
Selecting display units (on-board
computer, luxury multi-function
steering wheel) . . . . . . . . . . . . . . .141 Speedtronic
. . . . . . . . . . . . . . . . . . . .148
Display message . . . . . . . . . . . . . .246
Permanent . . . . . . . . . . . . . . . . . . .151
Variabl e.. . . . . . . . . . . . . . . . . . . .149
SRS . . . . . . . . . . . . . . . . . . . . . . . . . . . .47
Display message . . . . . . . . . . . . . .271
Warning lamp . . . . . . . . . . . . . .47, 283
Standard display
On-board computer (luxury multi-
function steering wheel) . . . . . . . .133
On-board computer (multi-func-
tion steering wheel) . . . . . . . . . . . .128
Station
see Radio
Steering wheel
Adjusting . . . . . . . . . . . . . . . . . . . . .92
Buttons (on-board computer,
luxury multi-function steering
wheel ).. . . . . . . . . . . . . . . . . . . . .130
Buttons (on-board computer,
multi-function steering wheel) . . . .125
Storing settings . . . . . . . . . . . . . . . .96
Steering wheel gearshift paddles ..1 21
Stowage compartment . . . . . . . . . ..193
Armrest (under) . . . . . . . . . . . . . . .195
Centre console . . . . . . . . . . . . . . . .194
Dashboard (at the top) . . . . . . . . . .194
Glove compartment . . . . . . . . . . . .193
Rear seat armrest . . . . . . . . . . . . .195 Index
204_AKB; 2; 3, en-GB
mkalafa,
2007-06-26T23:11:51+02:00 - Seite 13
Page 56 of 377
Occupant safet
y 53
If you are driving faster than approximately
35 km/h, PRE-SAFE ®
takes the following
measures in the aforementioned situations:
R It tensions the front seat belts.
R On vehicles with the memory package*: it
adjusts the front-passenger seat to a more
favourable position.
R If the vehicle skids, it closes the sliding/
tilting sunroof* or panorama sliding/tilting
sunroof* and the side windows, leaving a
small gap.
If the hazardous situation passes without
resulting in an accident, PRE-SAFE ®
releases
the belt pretensioning. You can then readjust
the front-passenger seat and, on vehicles
with the memory package*, the sides win-
dows and the sliding/tilting sunroof* or pan-
orama sliding/tilting sunroof* .
If the seat belts are not released:
X Move the backrest or the seat back slightly
until the belt tension is reduced.
The locking mechanism releases. G
Risk of injury
Make sure that nobody can become trap -
ped as you adjust the seat. !
Make sure that there are no objects in the
footwell or behind the seats when adjustin g
the seats. You could otherwise damage the
seats and the objects . NECK-PRO head restrain
t
NECK-PRO head restraints are designed to
increase protection to the driver's and front-
passenger's head and neck. To this end, the
head restraints on the driver's and front-
passenger seats are moved forwards and
upwards in the event of a rear-end collision in
the direction of travel. This provides better
head support. G
Risk of injury
Head restraint covers prevent the NECK -
PRO head restraints from triggering cor-
rectly. Consequently, the NECK-PRO head
restraints cannot provide the intended level
of protection. Do not use head restraint
covers .
If the NECK-PRO head restraints are triggered
in an accident, you must reset the head
restraints on the driver's and front-passenger
seats (Y page 303). Head restraints that have
been triggered are tilted forwards. Children in the vehicle
If a child is travelling in your vehicle, secure
the child, preferably on a suitable seat in the
rear, using a child restraint system appropri-
ate to the size and age of the child and rec-
ommended for Mercedes-Benz vehicles. If
possible you should do this on a suitable rear
seat.
You can obtain information about the correct
child restraint system from any Mercedes-
Benz Service Centre.
i It is advisable to use Mercedes-Benz care
products to clean child restraint systems.
You can obtain information about this from
any Mercedes-Benz Service Centre. G
Risk of injury
Do not leave children unsupervised in the
vehicle, even if they are secured in a chil d
restraint system. They could be injured on
parts of the vehicle. They could be seriously
or even fatally injured by prolonged expo-
sure to extreme heat or cold.
Do not expose the child restraint system to
direct sunlight. The metallic parts of the
child restraint system could heat up and the
child could be burned by them. Safety
* optional
204_AKB; 2; 3, en-GB
mkalafa,
2007-06-26T23:11:51+02:00 - Seite 53 Z
Page 126 of 377

Instrument cluste
r 123Instrument cluster
You will find an illustration of the instrumen t
cluster in the "At a glance" section
( Y page 28). G
Risk of accident
No messages can be displayed if instru -
ment cluster and/or the multi-function dis-
play fail .
This means that you will not see information
about the driving situation, such as the
speed, outside temperature, warning/indi-
cator lamps, display messages or system
failures. The vehicle's handling character-
istics may be affected. Adjust your driving
style and speed accordingly.
Immediately consult a qualified specialist
workshop which has the necessary special-
ist knowledge and tools to carry out the
work required. Mercedes-Benz recom-
mends that you use a Mercedes-Benz
Service Centre for this purpose. In particu-
lar, work relevant to safety or on safety-
related systems must be carried out at a
qualified specialist workshop. Activating the multi-function displa
y
X Switch on the ignition.
The multi-function display is also activate d
when you switch on the lights or open th e
driver's door. Adjusting the instrument cluster
lighting
1
Brightness control
X Brighter or dimmer: turn clockwise or
anti-clockwise. Coolant temperature gaug
e
The coolant temperature gauge is in the
instrument cluster on the left-hand side. The
coolant temperature may rise to 120 †under
normal operating conditions and if the con-
centration of antifreeze/corrosion inhibitor is
correct. The coolant temperature may rise to
the top end of the scale at high outside tem-
peratures and on long uphill stretches. Resetting the trip meter
Vehicles with a 4-button multi-function
steering wheel: you can reset the trip meter
in the standard displa ymenu
( Y page 128).
Vehicles with a 12-button luxury multi-
function steering wheel* :you can find th e
"Reset values" function in the Tripmenu in
the on-board computer (Y page 135). Controls
* optional
204_AKB; 2; 3, en-GB
mkalafa,
2007-06-26T23:11:51+02:00 - Seite 123
Page 131 of 377
On-board computer (vehicles with multi-function steering wheel, 4 buttons)
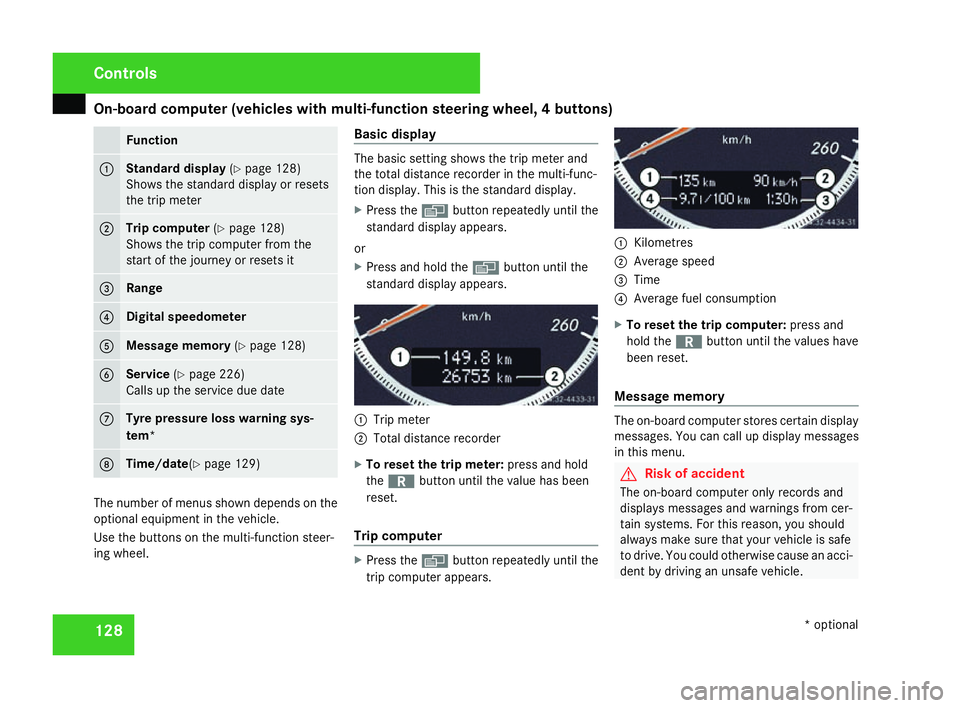
128 Function
1 Standard display
(Y page 128 )
Shows the standard display or resets
the trip mete r 2 Trip computer
(Y page 128 )
Shows the trip computer from the
start of the journey or resets it 3 Rang
e 4 Digital speedomete
r5 Message memory
(Y page 128 ) 6 Service
(Y page 226 )
Calls up the service due dat e7 Tyre pressure loss warning sys
-
tem * 8 Time/date
(Y page 129 ) The number of menus shown depends on the
optional equipment in the vehicle.
Use the buttons on the multi-function steer-
ing wheel. Basic display The basic setting shows the trip meter and
the total distance recorder in the multi-func-
tion display. This is the standard display .
X Press the èbutton repeatedly until the
standard display appears.
or
X Press and hold the èbutton until the
standard display appears. 1
Trip meter
2 Total distance recorder
X To reset the trip meter: press and hold
the í button until the value has been
reset .
Trip compute r X
Press the èbutton repeatedly until the
trip computer appears. 1
Kilometres
2 Average spee d
3 Time
4 Average fuel consumption
X To reset the trip computer: press and
hold the íbutton until the values have
been reset .
Message memory The on-board computer stores certain display
messages. You can call up display messages
in this menu. G
Risk of accident
The on-board computer only records and
displays messages and warnings from cer-
tain systems. For this reason, you shoul d
always make sure that your vehicle is safe
to drive. You could otherwise cause an acci-
dent by driving an unsafe vehicle .Cont
rols
* optional
204_AKB; 2; 3, en-GB
mkalafa,
2007-06-26T23:11:51+02:00 - Seite 128
Page 136 of 377
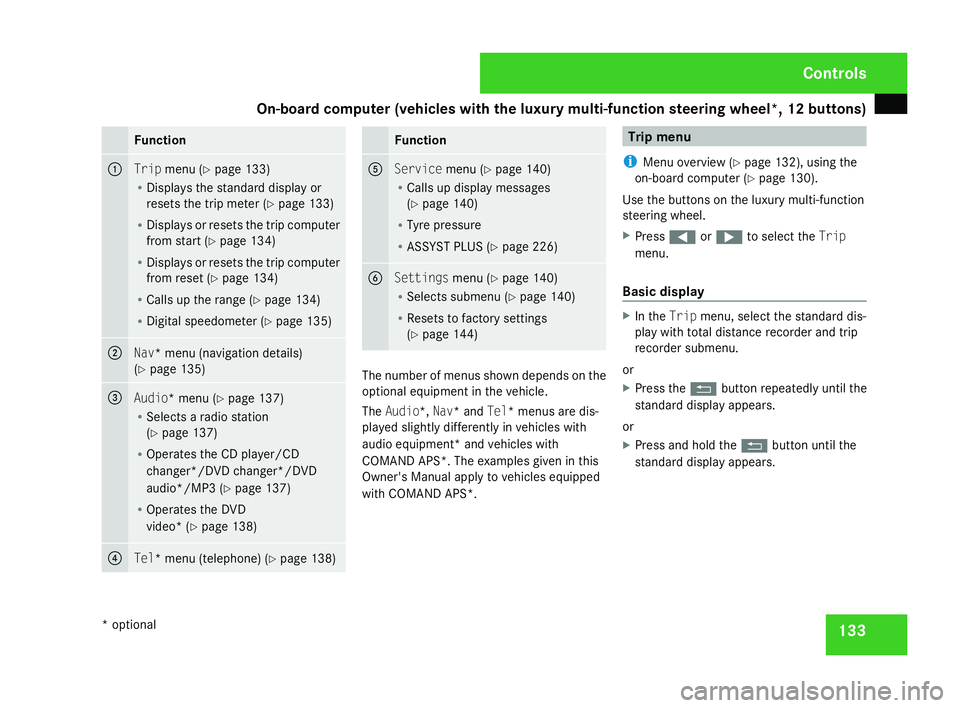
On-board computer (vehicles with the luxury multi-function steering wheel*, 12 buttons)
133Function
1
Trip
menu (Y page 133 )
R Displays the standard display or
resets the trip meter (Y page 133 )
R Displays or resets the trip compute r
from start (Y page 134 )
R Displays or resets the trip compute r
from reset (Y page 134 )
R Calls up the range (Y page 134 )
R Digital speedometer (Y page 135 ) 2
Nav* menu (navigation details)
( Y page 135 ) 3
Audio* menu
(Y page 137 )
R Selects a radio station
(Y page 137 )
R Operates the CD player/CD
changer*/DVD changer*/DVD
audio*/MP3 (Y page 137 )
R Operates the DVD
video* (Y page 138 ) 4
Tel* menu (telephone)
(Y page 138 ) Function
5
Service
menu(Y page 140 )
R Calls up display message s
( Y page 140 )
R Tyre pressure
R ASSYST PLUS (Y page 226 ) 6
Settings
menu(Y page 140 )
R Selects submenu (Y page 140 )
R Resets to factory setting s
( Y page 144 ) The number of menus shown depends on the
optional equipment in the vehicle.
The Audio*, Nav* and Tel* menus are dis-
played slightly differently in vehicles with
audio equipment* and vehicles with
COMAND APS*. The examples given in this
Owner's Manual apply to vehicles equipped
with COMAND APS*. Trip men
u
i Menu overview (Y page 132), using the
on-board computer (Y page 130).
Use the buttons on the luxury multi-function
steering wheel.
X Press (or& to select the Trip
menu.
Basic display X
In the Tripmenu, select the standard dis-
play with total distance recorder and trip
recorder submenu.
or
X Press the Lbutton repeatedly until the
standard display appears.
or
X Press and hold the Lbutton until the
standard display appears. Controls
* optional
204_AKB; 2; 3, en-GB
mkalafa,
2007-06-26T23:11:51+02:00 - Seite 133
Page 229 of 377
Service
226 Service
Active Service System
ASSYST PLUS, the Active Service System,
tells you when the next service is due.
Services that are due appear in the multi-
function display:
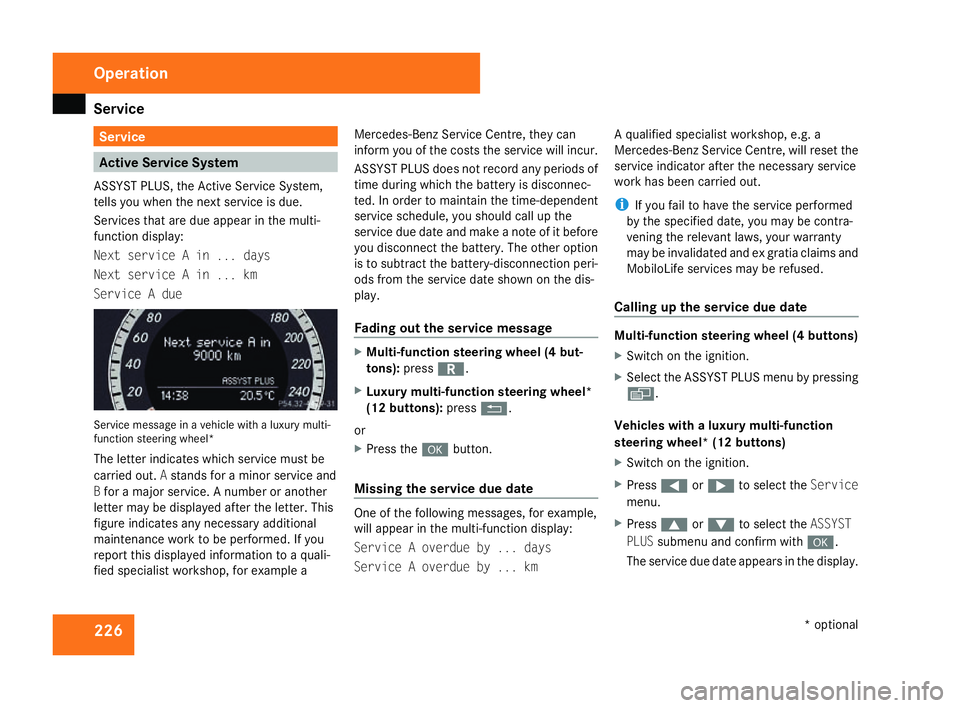
Next service A in ... days
Next service A in ... km
Service A due Service message in a vehicle with a luxury multi-
function steering wheel*
The letter indicates which service must be
carried out. Astands for a minor service and
B for a major service. A number or another
letter may be displayed after the letter. This
figure indicates any necessary additiona l
maintenance work to be performed. If you
report this displayed information to a quali-
fied specialist workshop, for example aMercedes-Benz Service Centre, they can
inform you of the costs the service will incur.
ASSYST PLUS does not record any periods of
time during which the battery is disconnec-
ted. In order to maintain the time-dependent
service schedule, you should call up the
service due date and make a note of it befor
e
you disconnect the battery. The other option
is to subtract the battery-disconnection peri-
ods from the service date shown on the dis-
play.
Fading out the service message X
Multi-function steering wheel (4 but-
tons) :press í.
X Luxury multi-function steering wheel*
(12 buttons): pressL.
or
X Press the #button.
Missing the service due dat e One of the following messages, for example,
will appear in the multi-function display:
Service A overdue by ... days
Service A overdue by ... kmA qualified specialist workshop, e.g.
a
Mercedes-Benz Service Centre, will reset the
service indicator after the necessary service
work has been carried out.
i If you fail to have the service performed
by the specified date, you may be contra-
vening the relevant laws, your warranty
may be invalidated and ex gratia claims and
MobiloLife services may be refused .
Calling up the service due date Multi-function steering wheel (4 buttons)
X
Switch on the ignition.
X Select the ASSYST PLUS menu by pressing
è .
Vehicles with a luxury multi-function
steering wheel* (12 buttons)
X Switch on the ignition.
X Press (or& to select the Service
menu.
X Press $or% to select the ASSYST
PLU Ssubmenu and confirm with #.
The service due date appears in the display .Operation
* optional
204_AKB; 2; 3, en-GB
mkalafa,
2007-06-26T23:11:51+02:00 - Seite 226
Page 306 of 377
Resetting triggered NECK-PRO head restraints
30
3 Releasing the parking lock manually
(vehicles with automatic transmis-
sion*)
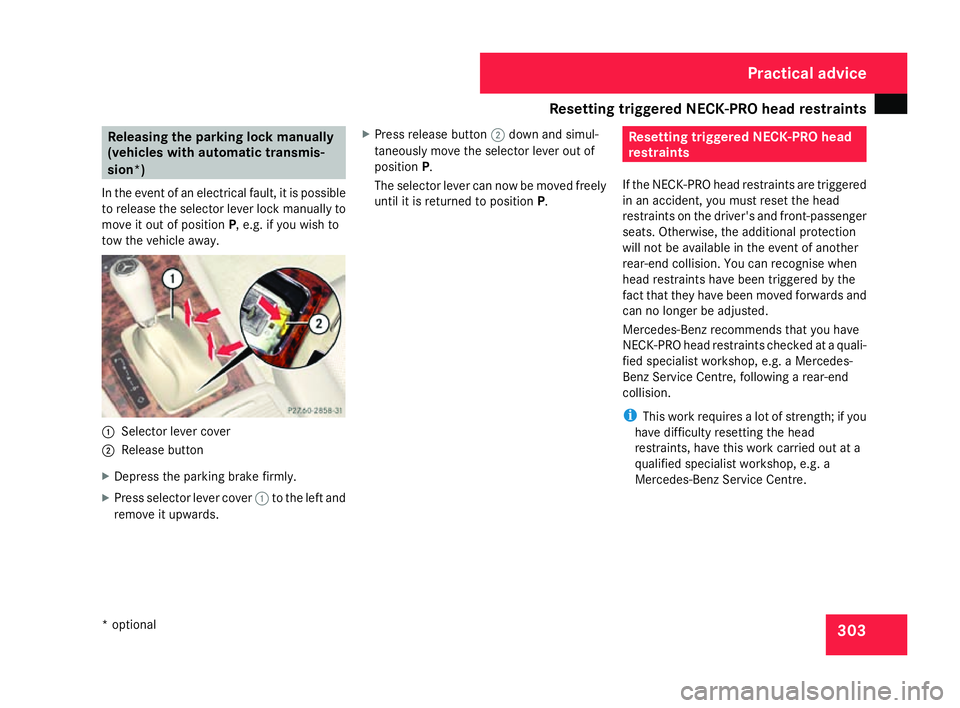
In the event of an electrical fault, it is possible
to release the selector lever lock manually to
move it out of position P, e.g. if you wish to
tow the vehicle away. 1
Selector lever cove r
2 Release butto n
X Depress the parking brake firmly.
X Press selector lever cover 1to the left and
remove it upwards . X
Press release button 2down and simul-
taneously move the selector lever out of
position P.
The selector lever can now be moved freely
until it is returned to position P. Resetting triggered NECK-PRO head
restraints
If the NECK-PRO head restraints are triggered
in an accident, you must reset the hea d
restraints on the driver's and front-passenge r
seats. Otherwise, the additional protection
will not be available in the event of another
rear-end collision. You can recognise when
head restraints have been triggered by the
fact that they have been moved forwards and
can no longer be adjusted.
Mercedes-Benz recommends that you have
NECK-PRO head restraints checked at a quali-
fied specialist workshop, e.g. a Mercedes-
Benz Service Centre, following a rear-end
collision.
i This work requires a lot of strength; if you
have difficulty resetting the head
restraints, have this work carried out at a
qualified specialist workshop, e.g. a
Mercedes-Benz Service Centre. Practical advice
* optional
204_AKB; 2; 3, en-GB
mkalafa,
2007-06-26T23:11:51+02:00 - Seite 303