Page 402 of 443

15
Getting started
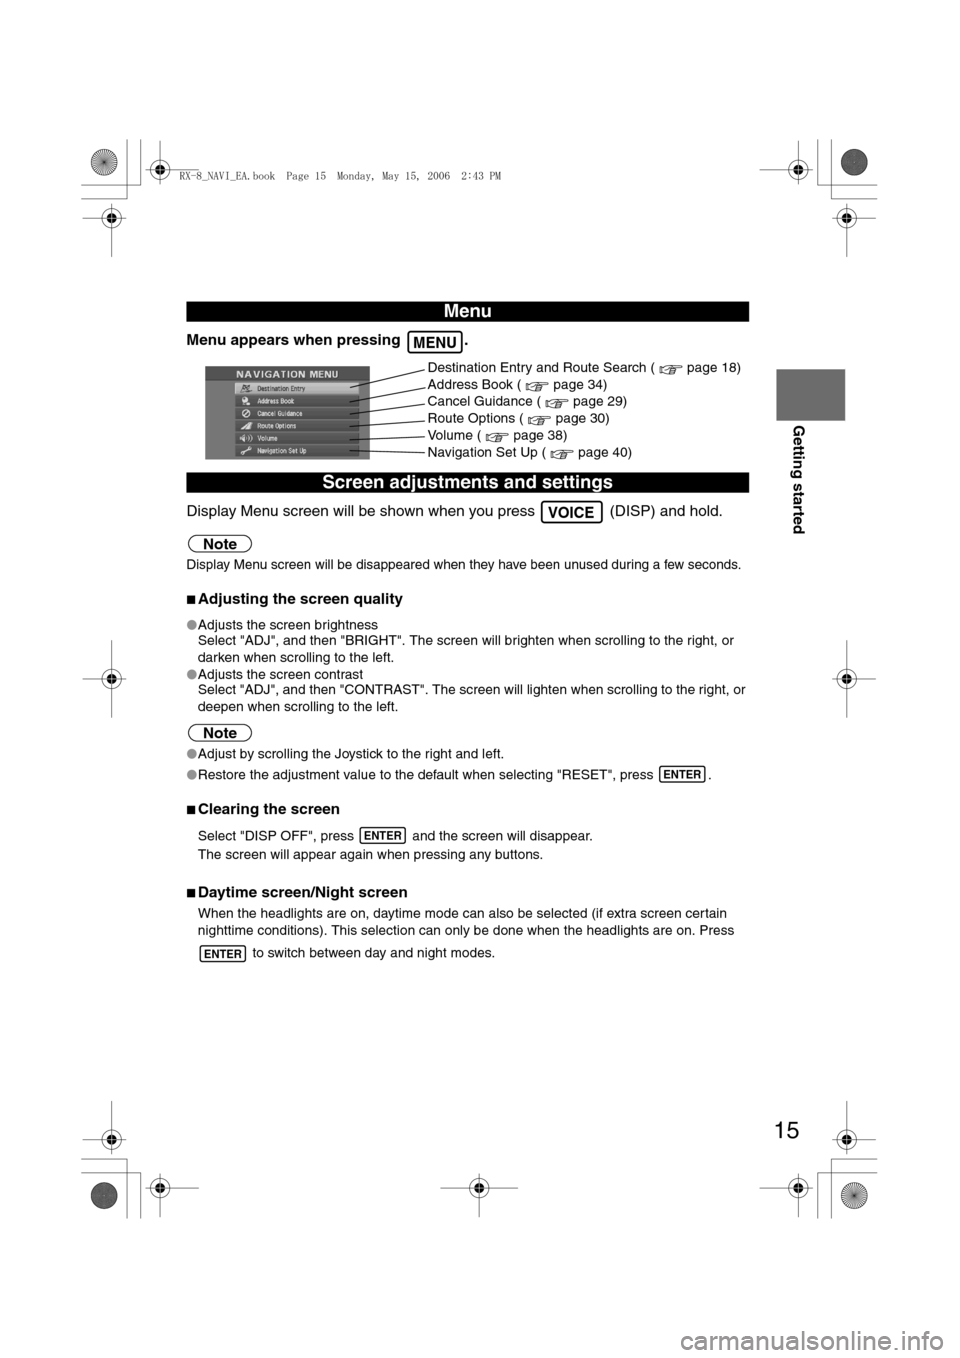
Menu appears when pressing .
Display Menu screen will be shown when you press (DISP) and hold.
Note
Display Menu screen will be disappeared when they have been unused during a few seconds.
nAdjusting the screen quality
lAdjusts the screen brightness
Select "ADJ", and then "BRIGHT". The screen will brighten when scrolling to the right, or
darken when scrolling to the left.
lAdjusts the screen contrast
Select "ADJ", and then "CONTRAST". The screen will lighten when scrolling to the right, or
deepen when scrolling to the left.
Note
lAdjust by scrolling the Joystick to the right and left.
lRestore the adjustment value to the default when selecting "RESET", press .
nClearing the screen
Select "DISP OFF", press and the screen will disappear.
The screen will appear again when pressing any buttons.
nDaytime screen/Night screen
When the headlights are on, daytime mode can also be selected (if extra screen certain
nighttime conditions). This selection can only be done when the headlights are on. Press
to switch between day and night modes.
Menu
Screen adjustments and settings
MENU
Destination Entry and Route Search ( page 18)
Address Book ( page 34)
Cancel Guidance ( page 29)
Route Options ( page 30)
Volume ( page 38)
Navigation Set Up ( page 40)
VOICE
ENTER
ENTER
ENTER
<0034003a000f001a0041003000230038002b0041002700230010004400510051004d00020002003200430049004700020013001700020002002f0051005000460043005b000e0002002f0043005b000200130017000e000200140012001200180002000200
14001c0016001500020032002f>
Page 420 of 443

33
Before
UseGetting
started
Routing
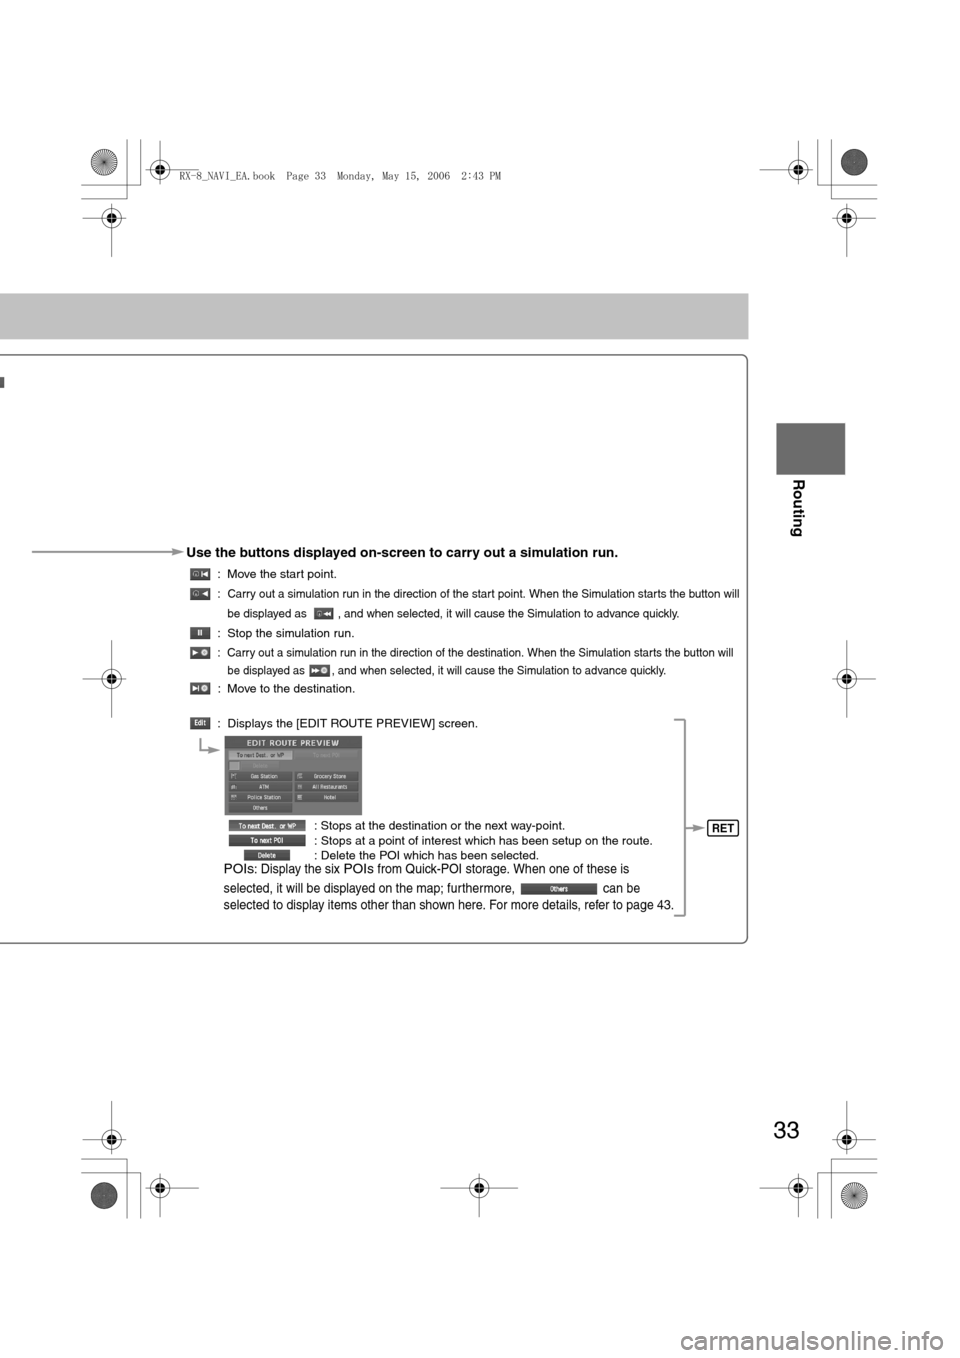
Use the buttons displayed on-screen to carry out a simulation run.
: Move the start point.
: Carry out a simulation run in the direction of the start point. When the Simulation starts the button will
be displayed as , and when selected, it will cause the Simulation to advance quickly.
: Stop the simulation run.
: Carry out a simulation run in the direction of the destination. When the Simulation starts the button will
be displayed as , and when selected, it will cause the Simulation to advance quickly.
: Move to the destination.
: Displays the [EDIT ROUTE PREVIEW] screen.
: Stops at the destination or the next way-point.
: Stops at a point of interest which has been setup on the route.
: Delete the POI which has been selected.
POIs: Display the six POIs from Quick-POI storage. When one of these is
selected, it will be displayed on the map; furthermore, can be
selected to display items other than shown here. For more details, refer to page 43.
RET
<0034003a000f001a0041003000230038002b0041002700230010004400510051004d00020002003200430049004700020015001500020002002f0051005000460043005b000e0002002f0043005b000200130017000e000200140012001200180002000200
14001c0016001500020032002f>
Page 441 of 443

54
Before
UseGetting
startedRoutingAddress
Book
Vo i c e Recognition
If necessary
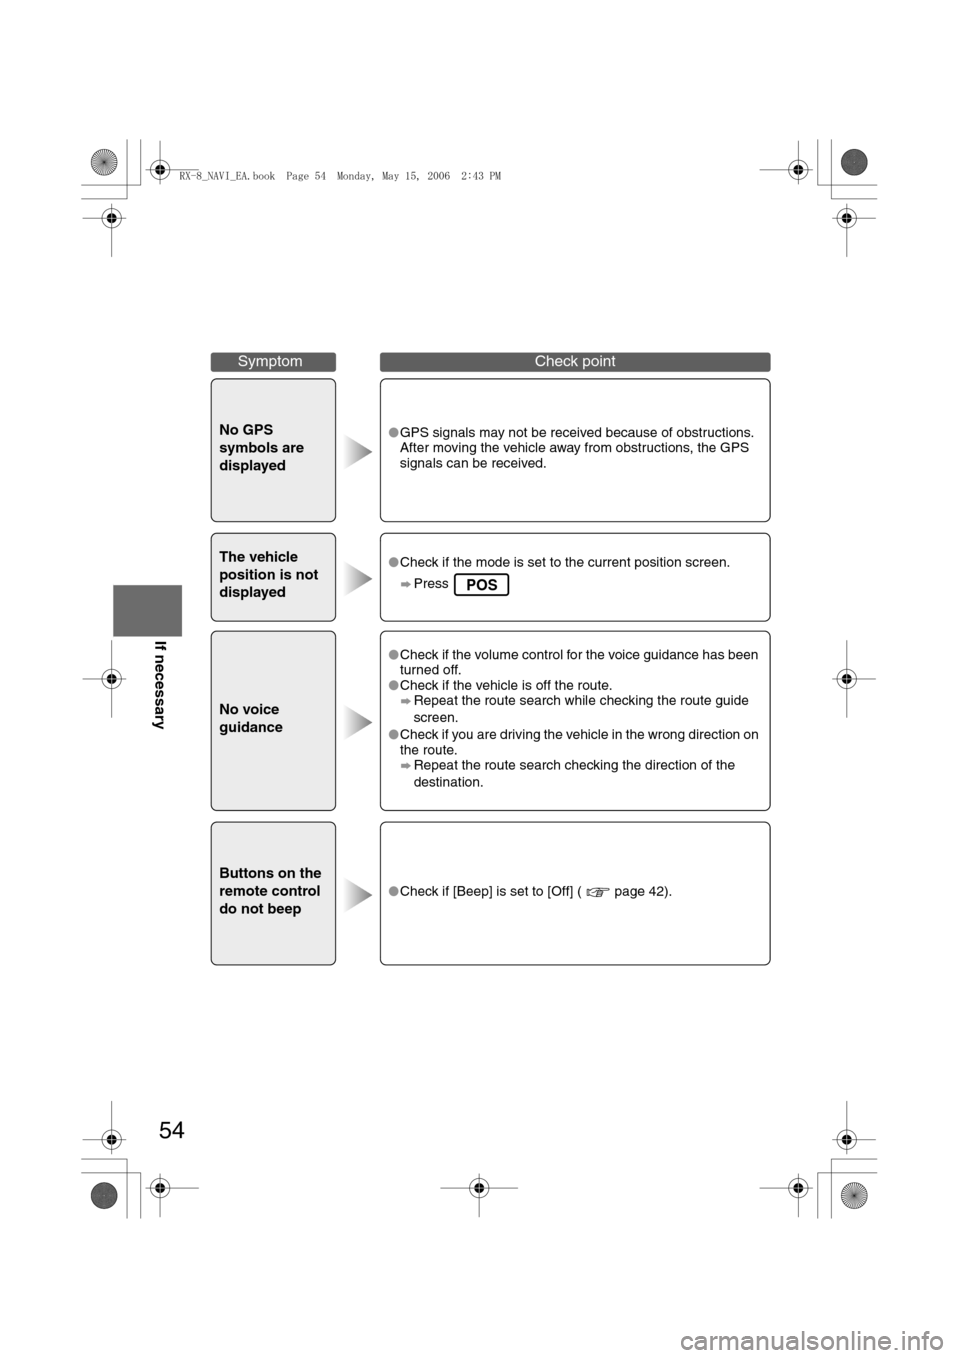
No GPS
symbols are
displayedlGPS signals may not be received because of obstructions.
After moving the vehicle away from obstructions, the GPS
signals can be received.
The vehicle
position is not
displayedlCheck if the mode is set to the current position screen.
Press
No voice
guidance
lCheck if the volume control for the voice guidance has been
turned off.
lCheck if the vehicle is off the route.
Repeat the route search while checking the route guide
screen.
lCheck if you are driving the vehicle in the wrong direction on
the route.
Repeat the route search checking the direction of the
destination.
Buttons on the
remote control
do not beep
lCheck if [Beep] is set to [Off] ( page 42).
SymptomCheck point
POS
<0034003a000f001a0041003000230038002b0041002700230010004400510051004d00020002003200430049004700020017001600020002002f0051005000460043005b000e0002002f0043005b000200130017000e000200140012001200180002000200
14001c0016001500020032002f>
Page:
< prev 1-8 9-16 17-24