Page 104 of 328

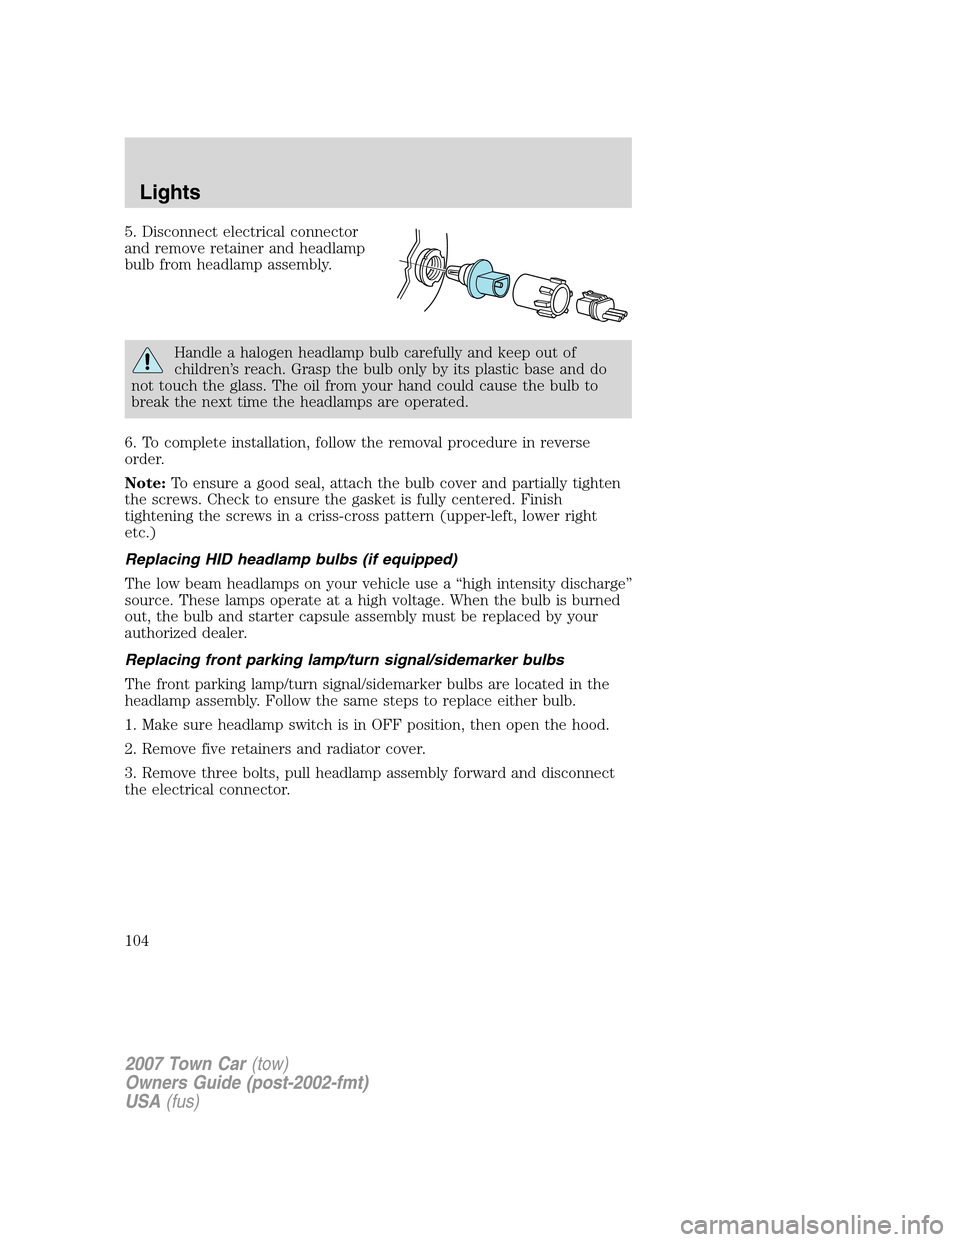
5. Disconnect electrical connector
and remove retainer and headlamp
bulb from headlamp assembly.
Handle a halogen headlamp bulb carefully and keep out of
children’s reach. Grasp the bulb only by its plastic base and do
not touch the glass. The oil from your hand could cause the bulb to
break the next time the headlamps are operated.
6. To complete installation, follow the removal procedure in reverse
order.
Note:To ensure a good seal, attach the bulb cover and partially tighten
the screws. Check to ensure the gasket is fully centered. Finish
tightening the screws in a criss-cross pattern (upper-left, lower right
etc.)
Replacing HID headlamp bulbs (if equipped)
The low beam headlamps on your vehicle use a “high intensity discharge”
source. These lamps operate at a high voltage. When the bulb is burned
out, the bulb and starter capsule assembly must be replaced by your
authorized dealer.
Replacing front parking lamp/turn signal/sidemarker bulbs
The front parking lamp/turn signal/sidemarker bulbs are located in the
headlamp assembly. Follow the same steps to replace either bulb.
1. Make sure headlamp switch is in OFF position, then open the hood.
2. Remove five retainers and radiator cover.
3. Remove three bolts, pull headlamp assembly forward and disconnect
the electrical connector.
2007 Town Car(tow)
Owners Guide (post-2002-fmt)
USA(fus)
Lights
104
Page 225 of 328

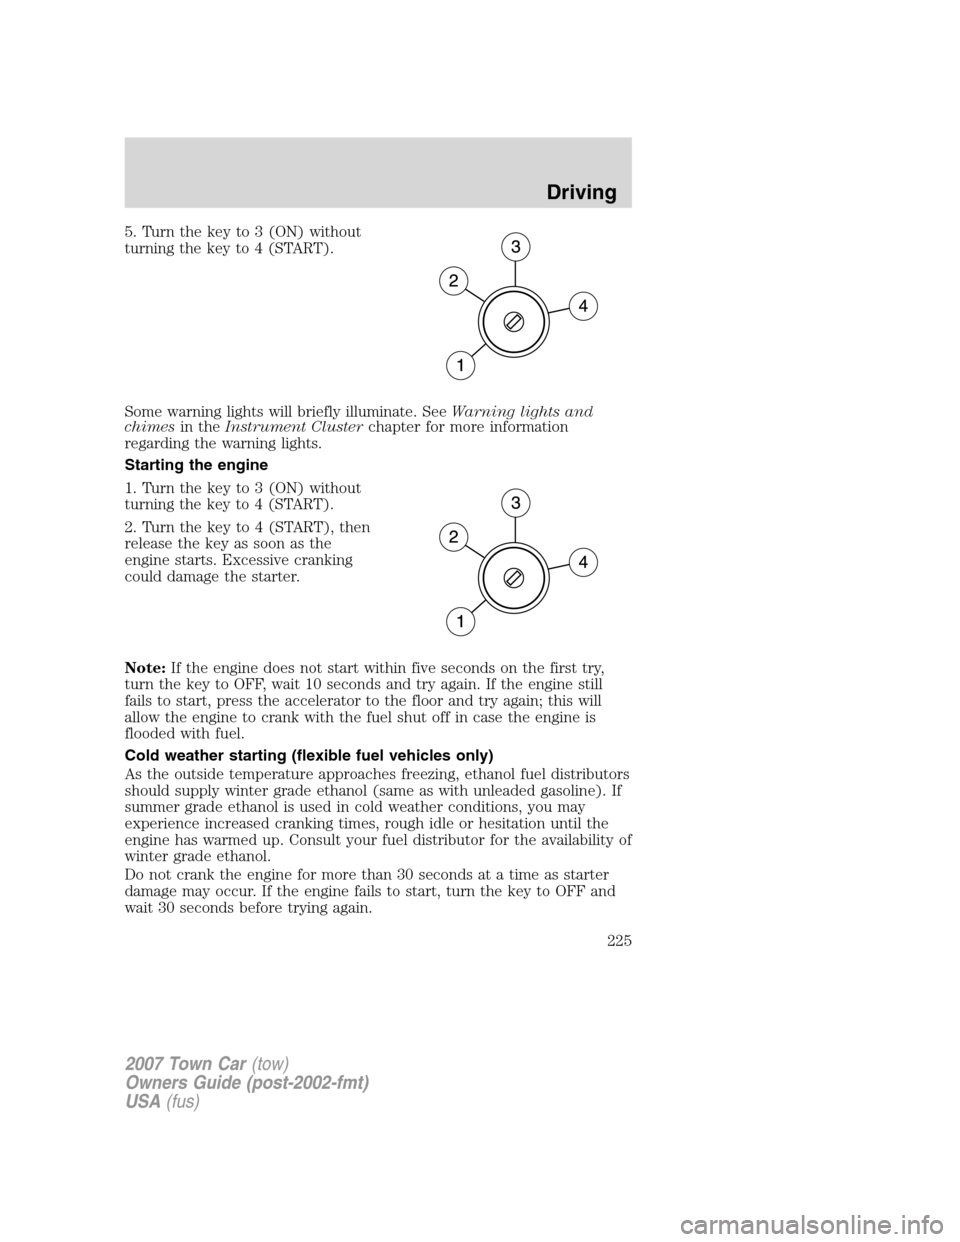
5. Turn the key to 3 (ON) without
turning the key to 4 (START).
Some warning lights will briefly illuminate. SeeWarning lights and
chimesin theInstrument Clusterchapter for more information
regarding the warning lights.
Starting the engine
1. Turn the key to 3 (ON) without
turning the key to 4 (START).
2. Turn the key to 4 (START), then
release the key as soon as the
engine starts. Excessive cranking
could damage the starter.
Note:If the engine does not start within five seconds on the first try,
turn the key to OFF, wait 10 seconds and try again. If the engine still
fails to start, press the accelerator to the floor and try again; this will
allow the engine to crank with the fuel shut off in case the engine is
flooded with fuel.
Cold weather starting (flexible fuel vehicles only)
As the outside temperature approaches freezing, ethanol fuel distributors
should supply winter grade ethanol (same as with unleaded gasoline). If
summer grade ethanol is used in cold weather conditions, you may
experience increased cranking times, rough idle or hesitation until the
engine has warmed up. Consult your fuel distributor for the availability of
winter grade ethanol.
Do not crank the engine for more than 30 seconds at a time as starter
damage may occur. If the engine fails to start, turn the key to OFF and
wait 30 seconds before trying again.
2007 Town Car(tow)
Owners Guide (post-2002-fmt)
USA(fus)
Driving
225
Page 243 of 328
Passenger compartment fuse panel
The fuse panel is located below and to the left of the steering wheel by
the brake pedal. Remove the panel cover to access the fuses.
To remove a fuse use the fuse puller tool provided on the fuse panel
cover.
The fuses are coded as follows.
Fuse/Relay
LocationFuse Amp
RatingPassenger Compartment Fuse Panel
Description
1 10A Starter relay coil
2 10A Restraint Control Module (RCM),
Occupant Classification Sensor (OCS),
Passenger Air bag Deactivation Indicator
(PADI)
3 10A Audio, Navigation control head
4 10A Back-up lamps
5 7.5A Lighting control module (LCM)
2007 Town Car(tow)
Owners Guide (post-2002-fmt)
USA(fus)
Roadside Emergencies
243
Page 247 of 328
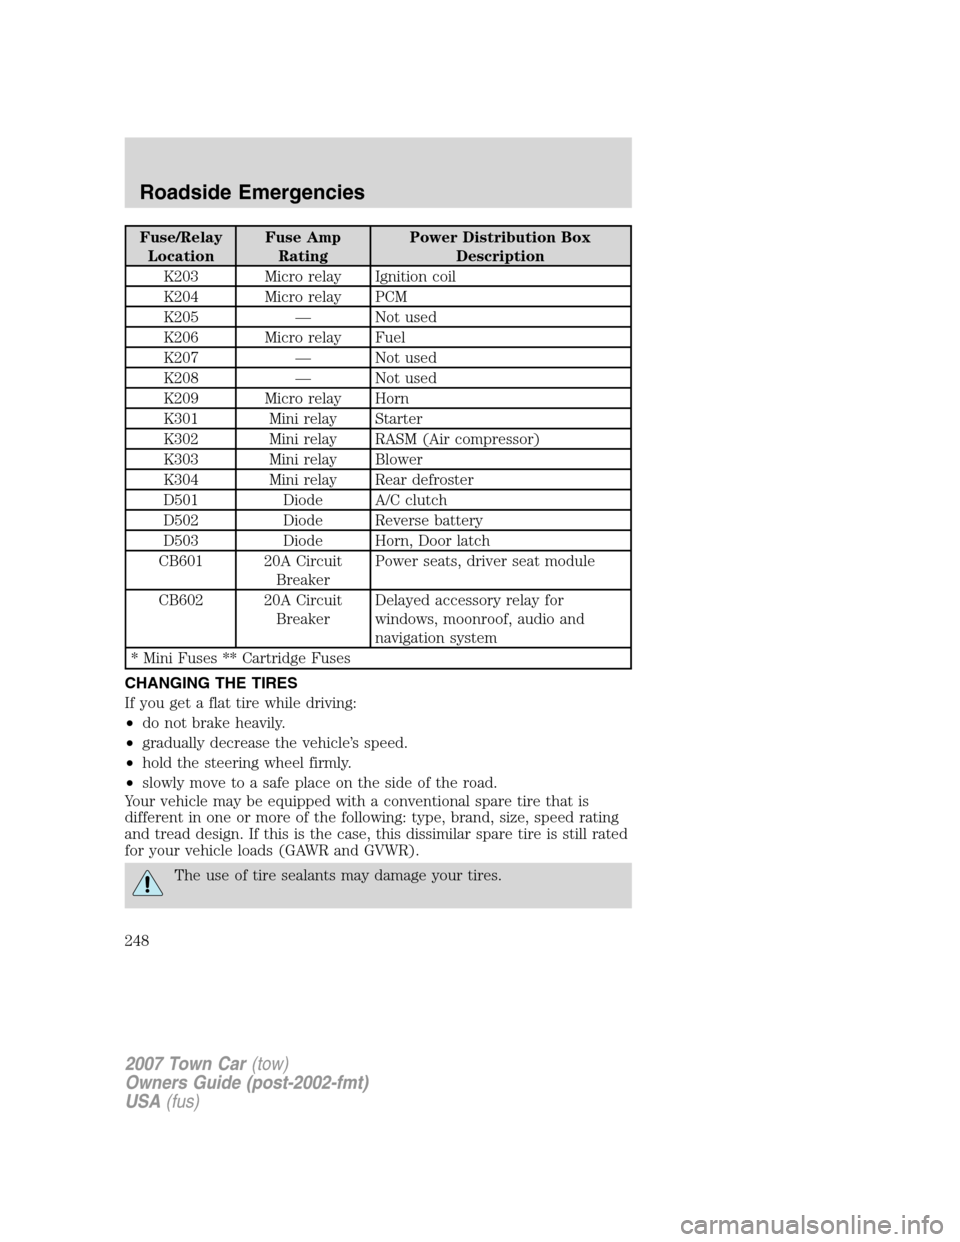
Fuse/Relay
LocationFuse Amp
RatingPower Distribution Box
Description
14 20A* Stop lamp switch
15 15A* Lumbar, Fuel door
16 20A* Heated seats
17 – Not used
18 – Not used
19 15A* Injectors
20 15A* PCM
21 15A* Powertrain loads and sensors
22 — Not used
23 10A* Heated mirrors
24 – Not used
101 40A** Blower relay feed
102 50A** Cooling fan
103 50A** Instrument panel fuse box feed #1
104 50A** Instrument panel fuse box feed #2
105 30A** Starter relay feed
106 40A** ABS module (Pump)
107 40A** Rear defroster relay feed
108 40A** Power Decklid Module (PDM)
109 20A** ABS module (Valves)
110 30A** Wiper module
111 20A** Rear power point #1
112 30A** RASM (Air compressor)
113 20A** Rear power point #2
114 20A** Instrument panel fuse box feed #3
115 20A** Rear cigar lighters
116 30A** Pulldown module
117 20A** Fog lamps
118 — Not used
K201 Micro relay A/C clutch
K202 Micro relay Fog lamps
2007 Town Car(tow)
Owners Guide (post-2002-fmt)
USA(fus)
Roadside Emergencies
247
Page 248 of 328

Fuse/Relay
LocationFuse Amp
RatingPower Distribution Box
Description
K203 Micro relay Ignition coil
K204 Micro relay PCM
K205 — Not used
K206 Micro relay Fuel
K207 — Not used
K208 — Not used
K209 Micro relay Horn
K301 Mini relay Starter
K302 Mini relay RASM (Air compressor)
K303 Mini relay Blower
K304 Mini relay Rear defroster
D501 Diode A/C clutch
D502 Diode Reverse battery
D503 Diode Horn, Door latch
CB601 20A Circuit
BreakerPower seats, driver seat module
CB602 20A Circuit
BreakerDelayed accessory relay for
windows, moonroof, audio and
navigation system
* Mini Fuses ** Cartridge Fuses
CHANGING THE TIRES
If you get a flat tire while driving:
•do not brake heavily.
•gradually decrease the vehicle’s speed.
•hold the steering wheel firmly.
•slowly move to a safe place on the side of the road.
Your vehicle may be equipped with a conventional spare tire that is
different in one or more of the following: type, brand, size, speed rating
and tread design. If this is the case, this dissimilar spare tire is still rated
for your vehicle loads (GAWR and GVWR).
The use of tire sealants may damage your tires.
2007 Town Car(tow)
Owners Guide (post-2002-fmt)
USA(fus)
Roadside Emergencies
248