Page 231 of 328
If the amount of effort required to steer your vehicle changes while
driving at a constant vehicle speed, have the power steering system
checked by your authorized dealer.
AIR SUSPENSION SYSTEM
The air suspension system is designed to improve ride, handling and
general vehicle performance during:
•Certain road conditions
•Steering maneuvers
•Braking
•Accelerations
This system keeps the rear of your vehicle at a constant level by
automatically adding air or releasing air from the springs.
If you exceed the load limit, the rear air suspension may not operate.
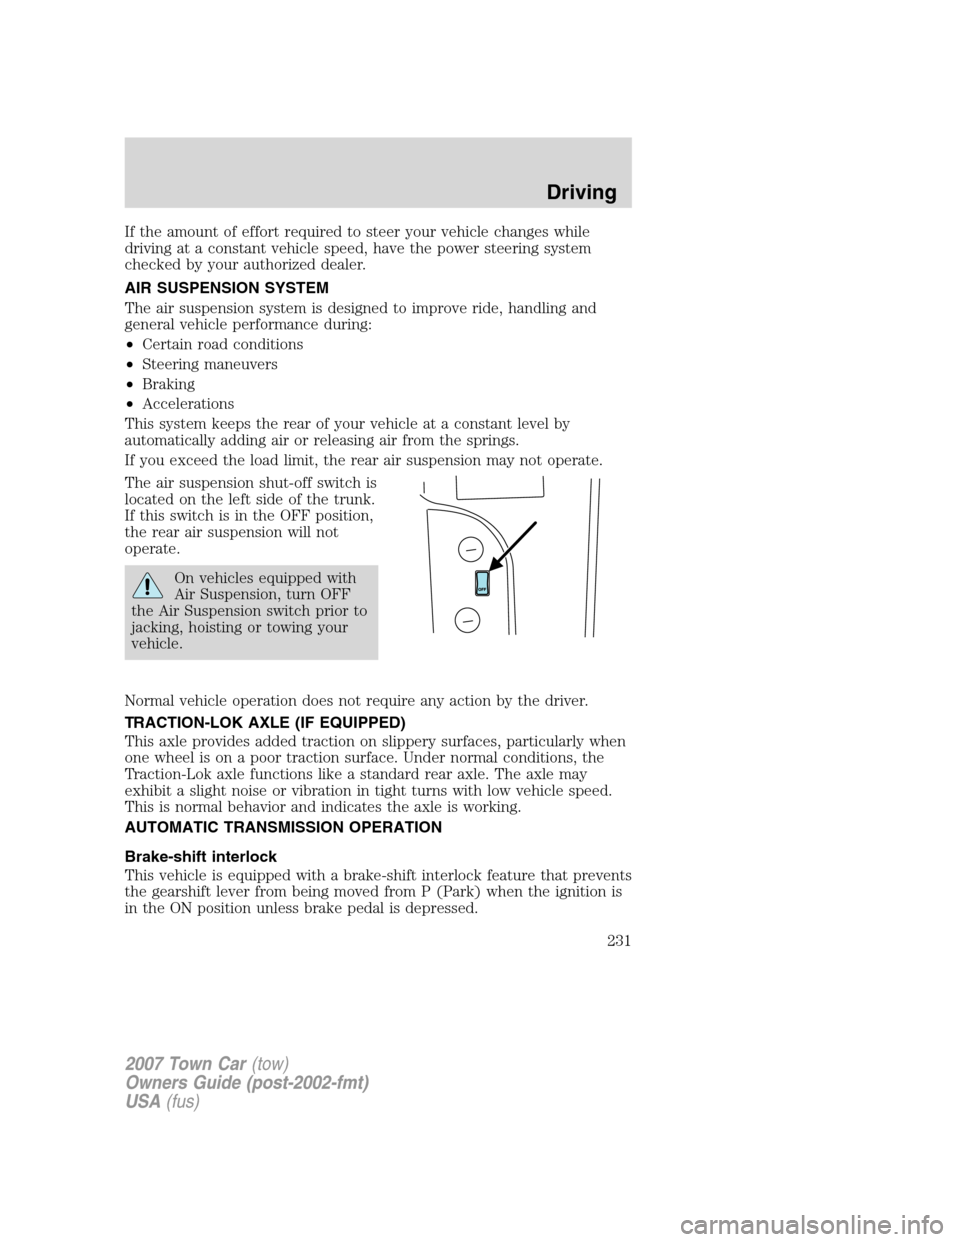
The air suspension shut-off switch is
located on the left side of the trunk.
If this switch is in the OFF position,
the rear air suspension will not
operate.
On vehicles equipped with
Air Suspension, turn OFF
the Air Suspension switch prior to
jacking, hoisting or towing your
vehicle.
Normal vehicle operation does not require any action by the driver.
TRACTION-LOK AXLE (IF EQUIPPED)
This axle provides added traction on slippery surfaces, particularly when
one wheel is on a poor traction surface. Under normal conditions, the
Traction-Lok axle functions like a standard rear axle. The axle may
exhibit a slight noise or vibration in tight turns with low vehicle speed.
This is normal behavior and indicates the axle is working.
AUTOMATIC TRANSMISSION OPERATION
Brake-shift interlock
This vehicle is equipped with a brake-shift interlock feature that prevents
the gearshift lever from being moved from P (Park) when the ignition is
in the ON position unless brake pedal is depressed.
2007 Town Car(tow)
Owners Guide (post-2002-fmt)
USA(fus)
Driving
231
Page 232 of 328
If you cannot move the gearshift lever out of P (Park) with ignition in
the ON position and the brake pedal depressed, it is possible that a fuse
has blown or the vehicle’s brakelamps are not operating properly. Refer
toFuses and relaysin theRoadside Emergencieschapter.
If the fuse is not blown, perform the following procedure:
1. Apply the parking brake, turn the ignition to 2 (ACC).
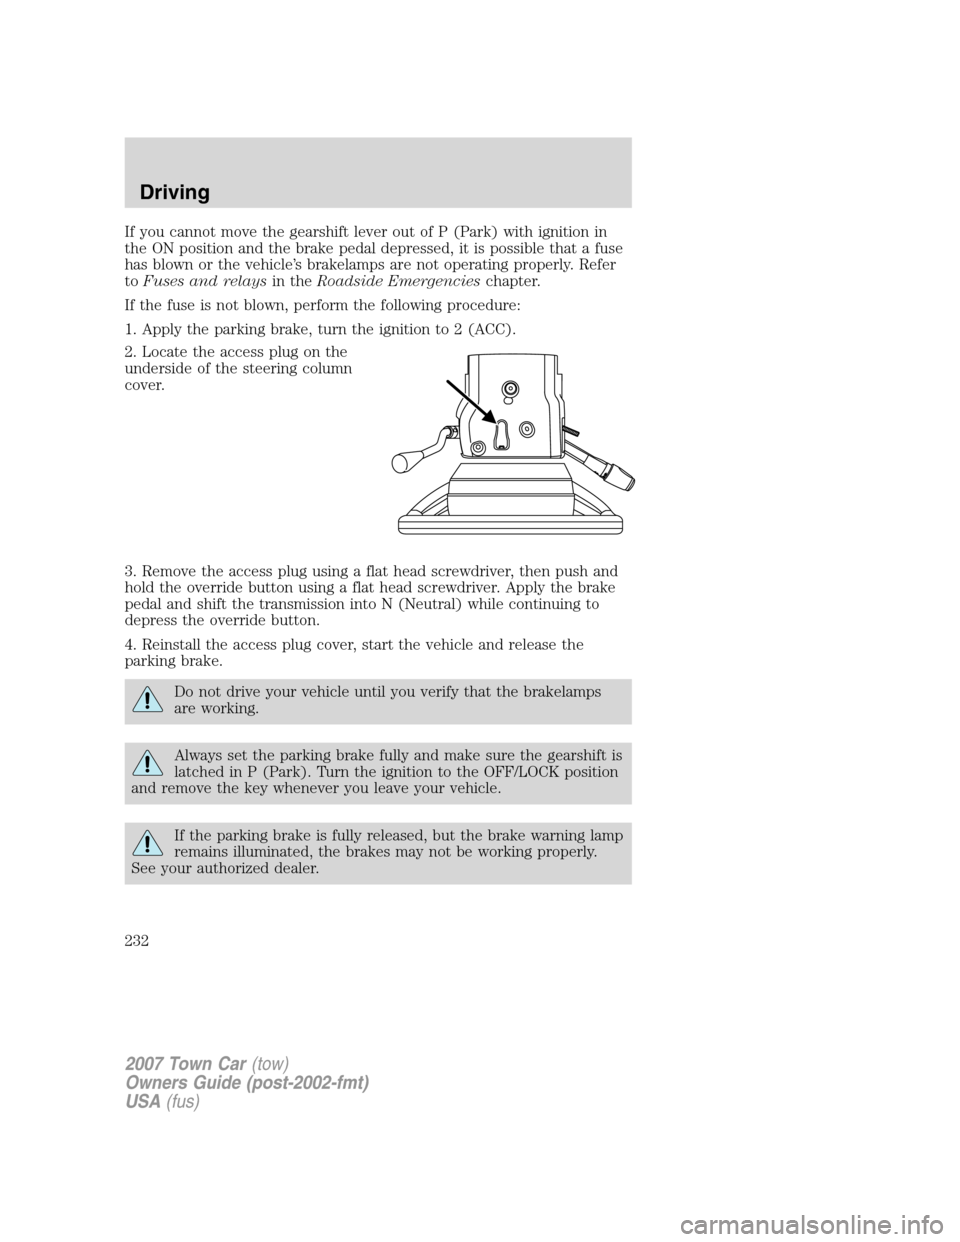
2. Locate the access plug on the
underside of the steering column
cover.
3. Remove the access plug using a flat head screwdriver, then push and
hold the override button using a flat head screwdriver. Apply the brake
pedal and shift the transmission into N (Neutral) while continuing to
depress the override button.
4. Reinstall the access plug cover, start the vehicle and release the
parking brake.
Do not drive your vehicle until you verify that the brakelamps
are working.
Always set the parking brake fully and make sure the gearshift is
latched in P (Park). Turn the ignition to the OFF/LOCK position
and remove the key whenever you leave your vehicle.
If the parking brake is fully released, but the brake warning lamp
remains illuminated, the brakes may not be working properly.
See your authorized dealer.
2007 Town Car(tow)
Owners Guide (post-2002-fmt)
USA(fus)
Driving
232
Page 233 of 328
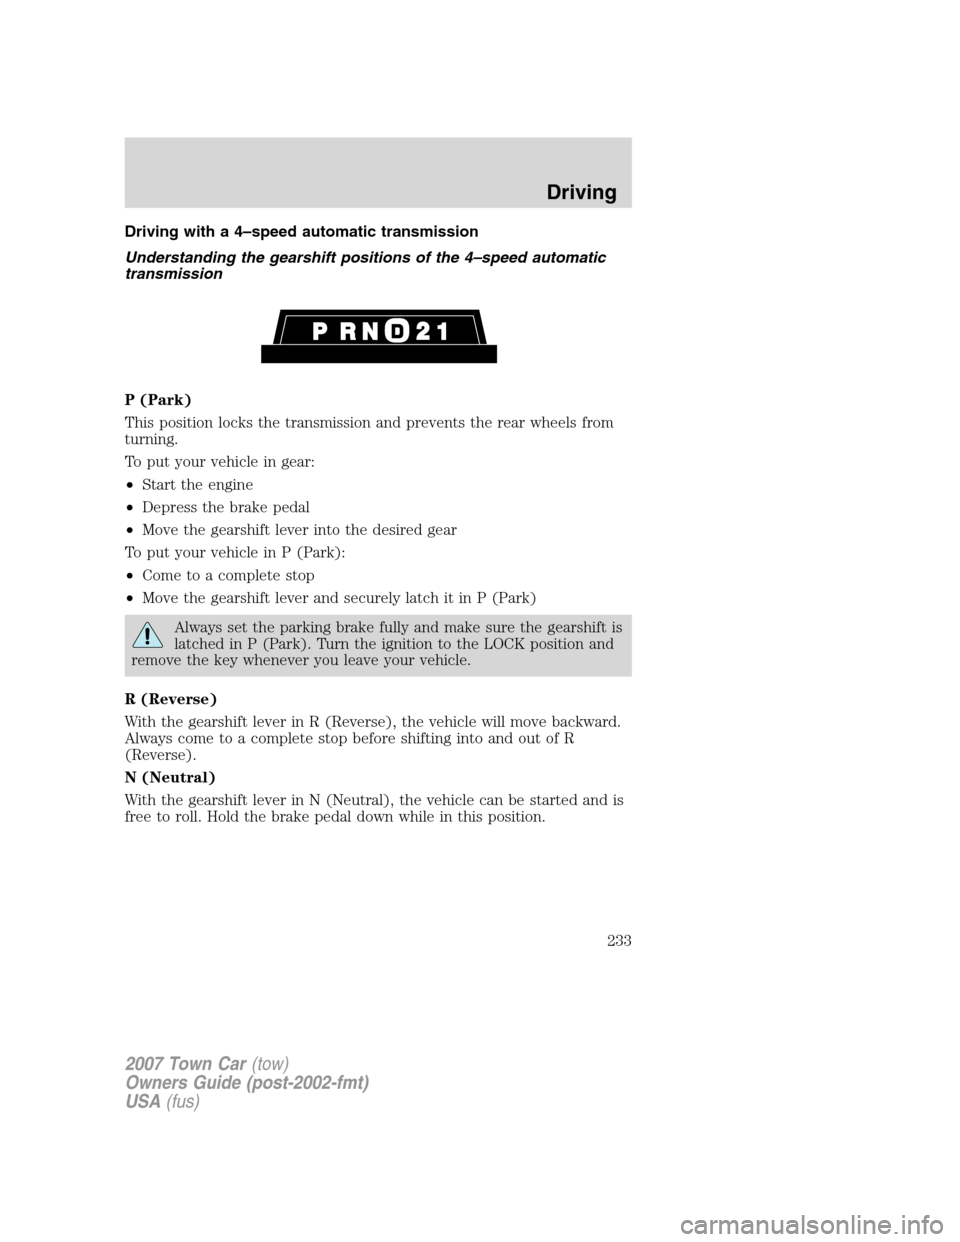
Driving with a 4–speed automatic transmission
Understanding the gearshift positions of the 4–speed automatic
transmission
P (Park)
This position locks the transmission and prevents the rear wheels from
turning.
To put your vehicle in gear:
•Start the engine
•Depress the brake pedal
•Move the gearshift lever into the desired gear
To put your vehicle in P (Park):
•Come to a complete stop
•Move the gearshift lever and securely latch it in P (Park)
Always set the parking brake fully and make sure the gearshift is
latched in P (Park). Turn the ignition to the LOCK position and
remove the key whenever you leave your vehicle.
R (Reverse)
With the gearshift lever in R (Reverse), the vehicle will move backward.
Always come to a complete stop before shifting into and out of R
(Reverse).
N (Neutral)
With the gearshift lever in N (Neutral), the vehicle can be started and is
free to roll. Hold the brake pedal down while in this position.
2007 Town Car(tow)
Owners Guide (post-2002-fmt)
USA(fus)
Driving
233
Page 236 of 328
Certain add-on devices such as large trailer hitches, bike or
surfboard racks and any device that may block the normal
detection zone of the reverse sensing system may create false beeps.
The system will assist the driver in detecting certain objects while the
vehicle moves in reverse at speeds less than 6 mph (10 km/h). The
system is not effective at speeds greater than 6 mph (10 km/h) and may
not detect certain angular or moving objects.
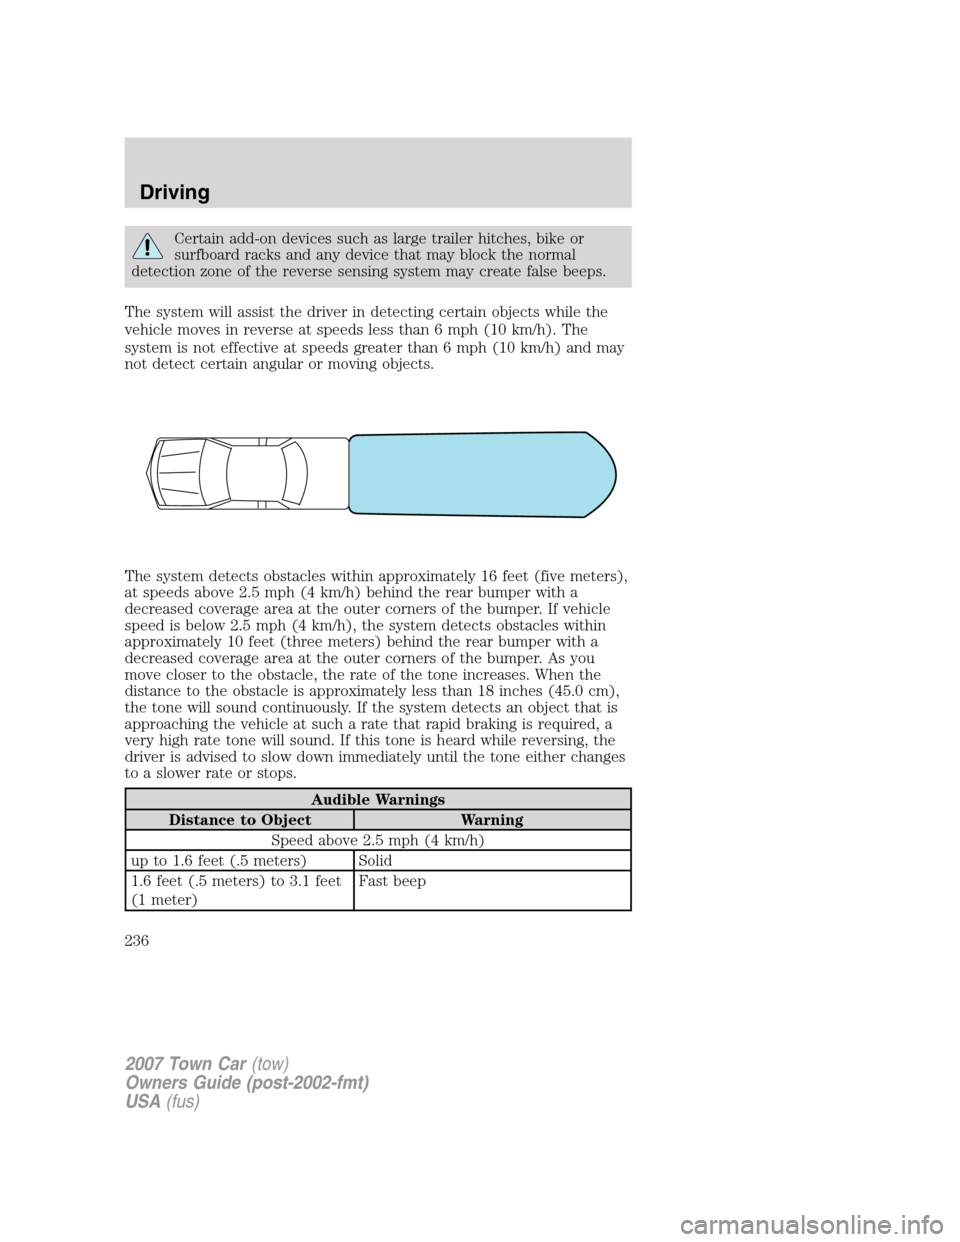
The system detects obstacles within approximately 16 feet (five meters),
at speeds above 2.5 mph (4 km/h) behind the rear bumper with a
decreased coverage area at the outer corners of the bumper. If vehicle
speed is below 2.5 mph (4 km/h), the system detects obstacles within
approximately 10 feet (three meters) behind the rear bumper with a
decreased coverage area at the outer corners of the bumper. As you
move closer to the obstacle, the rate of the tone increases. When the
distance to the obstacle is approximately less than 18 inches (45.0 cm),
the tone will sound continuously. If the system detects an object that is
approaching the vehicle at such a rate that rapid braking is required, a
very high rate tone will sound. If this tone is heard while reversing, the
driver is advised to slow down immediately until the tone either changes
to a slower rate or stops.
Audible Warnings
Distance to Object Warning
Speed above 2.5 mph (4 km/h)
up to 1.6 feet (.5 meters) Solid
1.6 feet (.5 meters) to 3.1 feet
(1 meter)Fast beep
2007 Town Car(tow)
Owners Guide (post-2002-fmt)
USA(fus)
Driving
236
Page 239 of 328
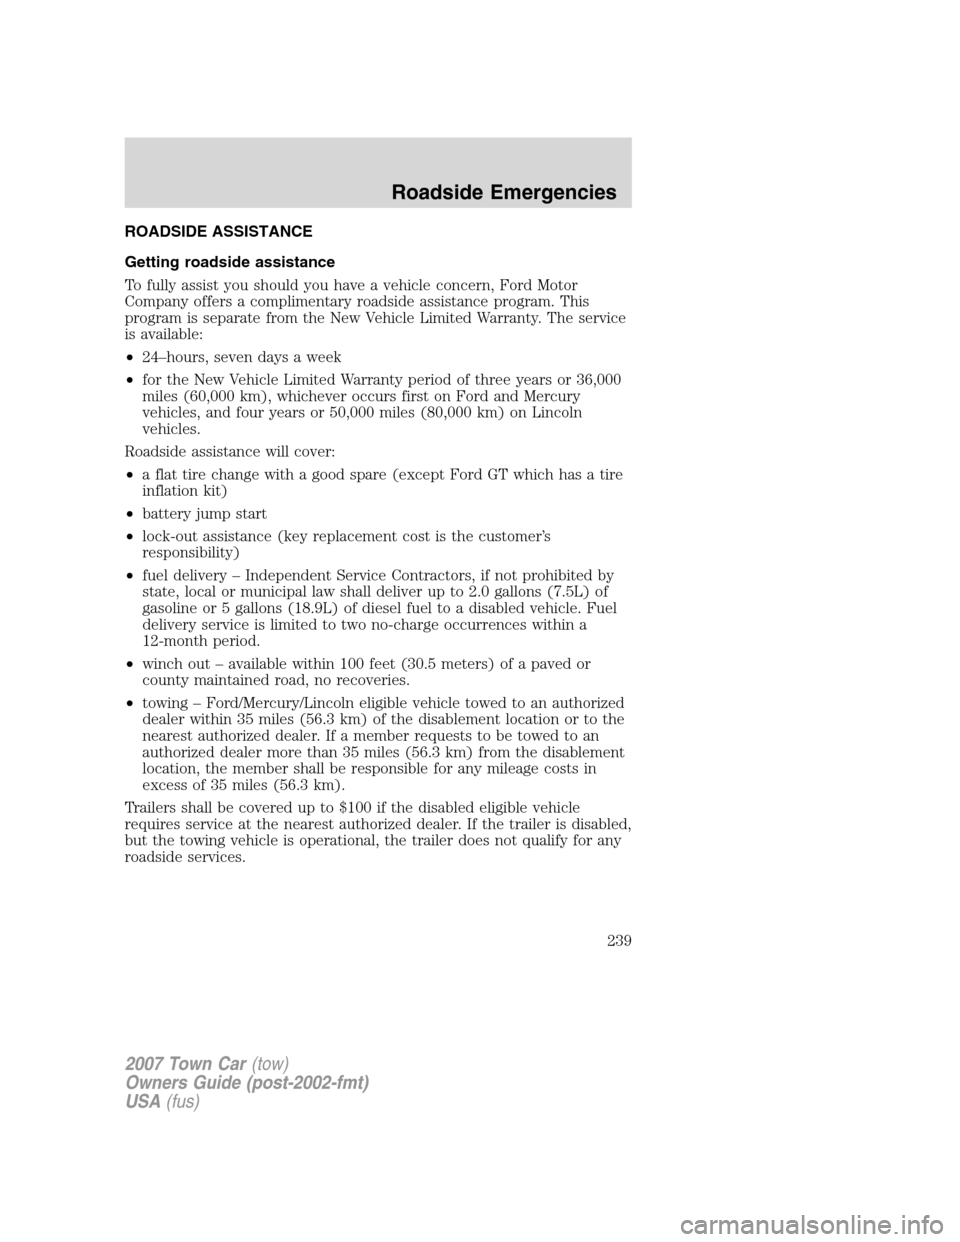
ROADSIDE ASSISTANCE
Getting roadside assistance
To fully assist you should you have a vehicle concern, Ford Motor
Company offers a complimentary roadside assistance program. This
program is separate from the New Vehicle Limited Warranty. The service
is available:
•24–hours, seven days a week
•for the New Vehicle Limited Warranty period of three years or 36,000
miles (60,000 km), whichever occurs first on Ford and Mercury
vehicles, and four years or 50,000 miles (80,000 km) on Lincoln
vehicles.
Roadside assistance will cover:
•a flat tire change with a good spare (except Ford GT which has a tire
inflation kit)
•battery jump start
•lock-out assistance (key replacement cost is the customer’s
responsibility)
•fuel delivery – Independent Service Contractors, if not prohibited by
state, local or municipal law shall deliver up to 2.0 gallons (7.5L) of
gasoline or 5 gallons (18.9L) of diesel fuel to a disabled vehicle. Fuel
delivery service is limited to two no-charge occurrences within a
12-month period.
•winch out – available within 100 feet (30.5 meters) of a paved or
county maintained road, no recoveries.
•towing – Ford/Mercury/Lincoln eligible vehicle towed to an authorized
dealer within 35 miles (56.3 km) of the disablement location or to the
nearest authorized dealer. If a member requests to be towed to an
authorized dealer more than 35 miles (56.3 km) from the disablement
location, the member shall be responsible for any mileage costs in
excess of 35 miles (56.3 km).
Trailers shall be covered up to $100 if the disabled eligible vehicle
requires service at the nearest authorized dealer. If the trailer is disabled,
but the towing vehicle is operational, the trailer does not qualify for any
roadside services.
2007 Town Car(tow)
Owners Guide (post-2002-fmt)
USA(fus)
Roadside Emergencies
239
Page 244 of 328
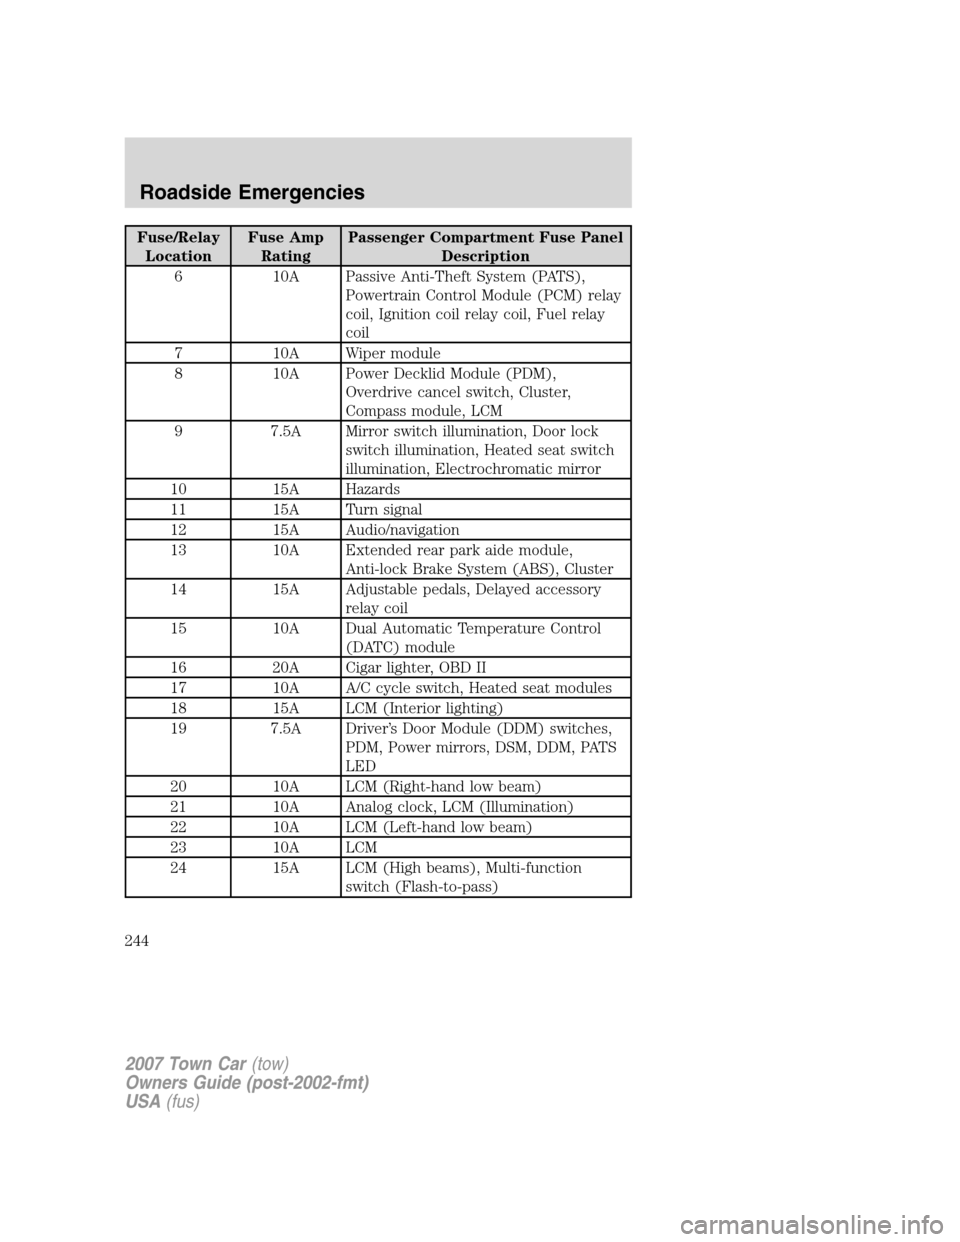
Fuse/Relay
LocationFuse Amp
RatingPassenger Compartment Fuse Panel
Description
6 10A Passive Anti-Theft System (PATS),
Powertrain Control Module (PCM) relay
coil, Ignition coil relay coil, Fuel relay
coil
7 10A Wiper module
8 10A Power Decklid Module (PDM),
Overdrive cancel switch, Cluster,
Compass module, LCM
9 7.5A Mirror switch illumination, Door lock
switch illumination, Heated seat switch
illumination, Electrochromatic mirror
10 15A Hazards
11 15A Turn signal
12 15A Audio/navigation
13 10A Extended rear park aide module,
Anti-lock Brake System (ABS), Cluster
14 15A Adjustable pedals, Delayed accessory
relay coil
15 10A Dual Automatic Temperature Control
(DATC) module
16 20A Cigar lighter, OBD II
17 10A A/C cycle switch, Heated seat modules
18 15A LCM (Interior lighting)
19 7.5A Driver’s Door Module (DDM) switches,
PDM, Power mirrors, DSM, DDM, PATS
LED
20 10A LCM (Right-hand low beam)
21 10A Analog clock, LCM (Illumination)
22 10A LCM (Left-hand low beam)
23 10A LCM
24 15A LCM (High beams), Multi-function
switch (Flash-to-pass)
2007 Town Car(tow)
Owners Guide (post-2002-fmt)
USA(fus)
Roadside Emergencies
244
Page 251 of 328
Tire change procedure
To help prevent the vehicle from moving when you change a tire,
be sure the parking brake is set, then block (in both directions)
the wheel that is diagonally opposite (other side and end of the
vehicle) to the tire being changed.
If the vehicle slips off the jack, you or someone else could be
seriously injured.
1. Park on a level surface, activate
hazard flashers and set parking
brake.
2. Place gearshift lever in P (Park),
turn engine OFF and block the
diagonally opposite wheel.
3. Remove the spare tire and the
jack. The jack is located in the trunk
(in a holder bracket), on the
right-hand side, next to the wheel
well.
HOOD
2007 Town Car(tow)
Owners Guide (post-2002-fmt)
USA(fus)
Roadside Emergencies
251
Page 252 of 328
On vehicles equipped with
Air Suspension, turn OFF
the Air Suspension switch prior to
jacking, hoisting or towing your
vehicle.
Refer toAir suspension systemin
theDrivingchapter for more
information.
4. Remove the lug wrench (A) from
the jack. Rotate the lug wrench
socket out from the handle.
5. Locate pry off notch (if
equipped) and remove the center
ornament from the aluminum wheel
with the tapered end of the wheel
nut wrench that came with your
vehicle. Insert and twist the handle,
then pry against the wheel.
6. Loosen each wheel lug nut
one-half turn counterclockwise but
do not remove them until the wheel is raised off the ground.
Before placing the jack under the vehicle, NOTE the jack location
markings:
OFF
A
2007 Town Car(tow)
Owners Guide (post-2002-fmt)
USA(fus)
Roadside Emergencies
252