Page 229 of 328
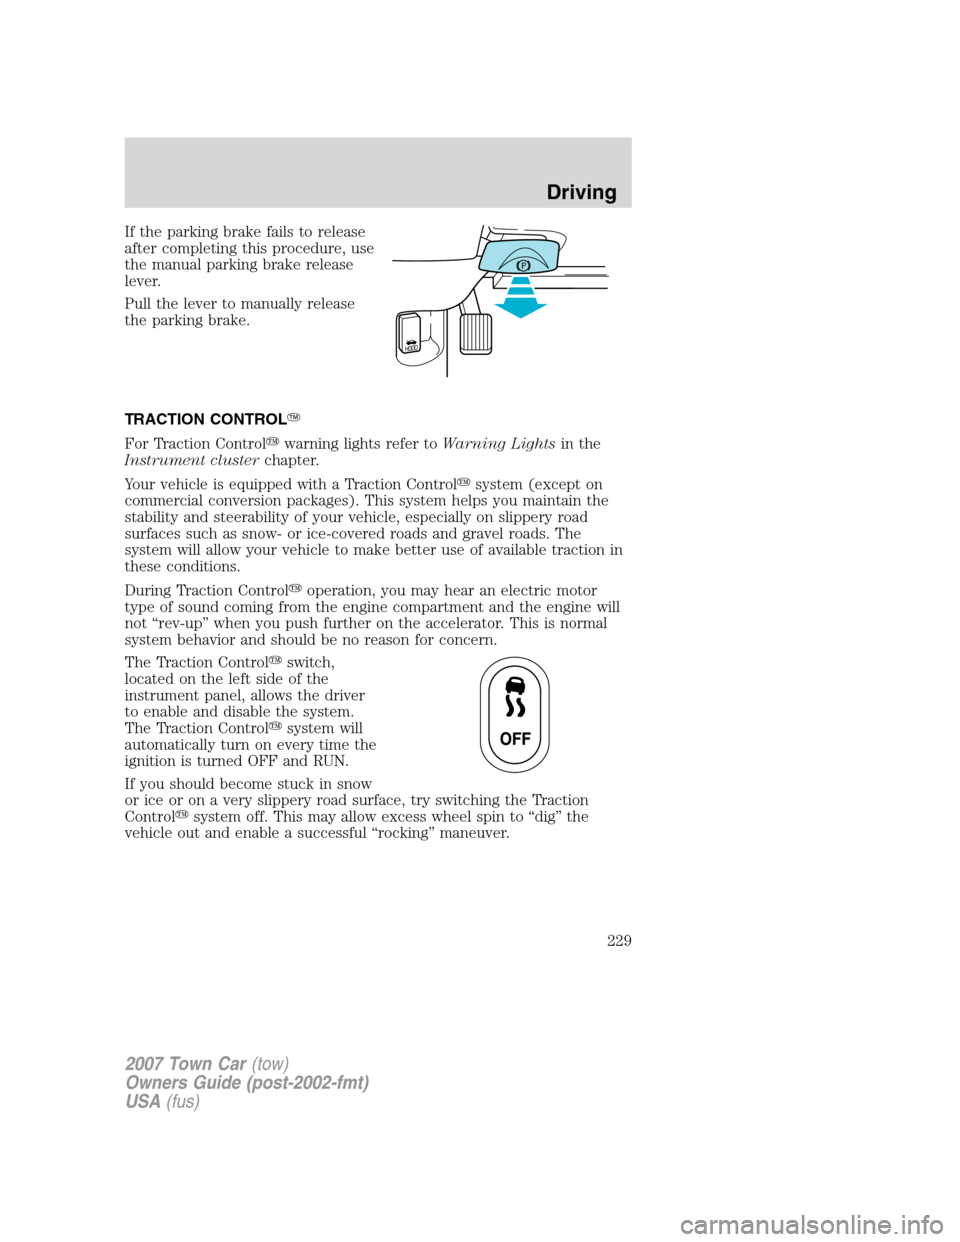
If the parking brake fails to release
after completing this procedure, use
the manual parking brake release
lever.
Pull the lever to manually release
the parking brake.
TRACTION CONTROL�
For Traction Control�warning lights refer toWarning Lightsin the
Instrument clusterchapter.
Your vehicle is equipped with a Traction Control�system (except on
commercial conversion packages). This system helps you maintain the
stability and steerability of your vehicle, especially on slippery road
surfaces such as snow- or ice-covered roads and gravel roads. The
system will allow your vehicle to make better use of available traction in
these conditions.
During Traction Control�operation, you may hear an electric motor
type of sound coming from the engine compartment and the engine will
not “rev-up” when you push further on the accelerator. This is normal
system behavior and should be no reason for concern.
The Traction Control�switch,
located on the left side of the
instrument panel, allows the driver
to enable and disable the system.
The Traction Control�system will
automatically turn on every time the
ignition is turned OFF and RUN.
If you should become stuck in snow
or ice or on a very slippery road surface, try switching the Traction
Control�system off. This may allow excess wheel spin to “dig” the
vehicle out and enable a successful “rocking” maneuver.
2007 Town Car(tow)
Owners Guide (post-2002-fmt)
USA(fus)
Driving
229
Page 231 of 328
If the amount of effort required to steer your vehicle changes while
driving at a constant vehicle speed, have the power steering system
checked by your authorized dealer.
AIR SUSPENSION SYSTEM
The air suspension system is designed to improve ride, handling and
general vehicle performance during:
•Certain road conditions
•Steering maneuvers
•Braking
•Accelerations
This system keeps the rear of your vehicle at a constant level by
automatically adding air or releasing air from the springs.
If you exceed the load limit, the rear air suspension may not operate.
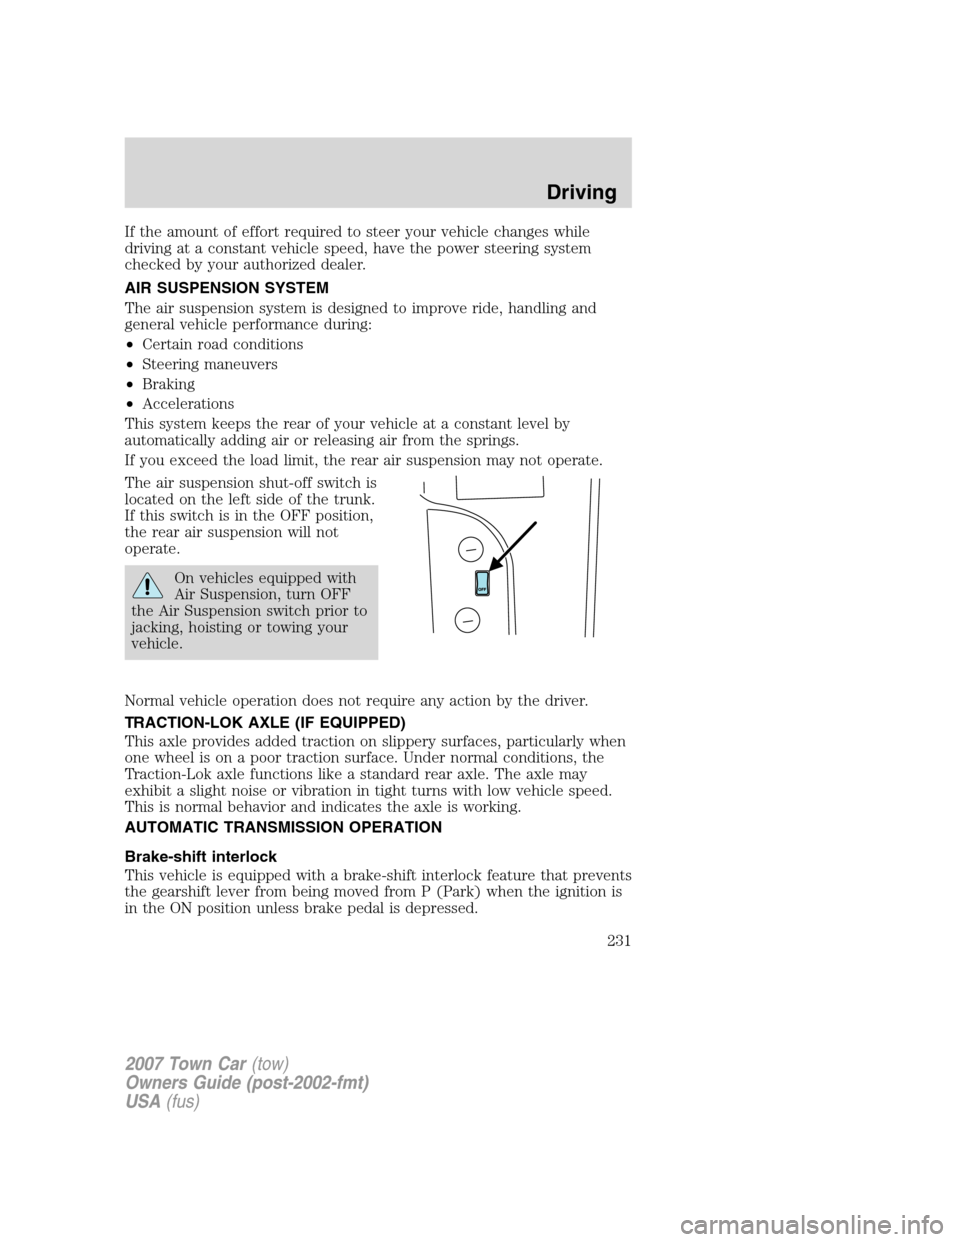
The air suspension shut-off switch is
located on the left side of the trunk.
If this switch is in the OFF position,
the rear air suspension will not
operate.
On vehicles equipped with
Air Suspension, turn OFF
the Air Suspension switch prior to
jacking, hoisting or towing your
vehicle.
Normal vehicle operation does not require any action by the driver.
TRACTION-LOK AXLE (IF EQUIPPED)
This axle provides added traction on slippery surfaces, particularly when
one wheel is on a poor traction surface. Under normal conditions, the
Traction-Lok axle functions like a standard rear axle. The axle may
exhibit a slight noise or vibration in tight turns with low vehicle speed.
This is normal behavior and indicates the axle is working.
AUTOMATIC TRANSMISSION OPERATION
Brake-shift interlock
This vehicle is equipped with a brake-shift interlock feature that prevents
the gearshift lever from being moved from P (Park) when the ignition is
in the ON position unless brake pedal is depressed.
2007 Town Car(tow)
Owners Guide (post-2002-fmt)
USA(fus)
Driving
231
Page 238 of 328
DRIVING THROUGH WATER
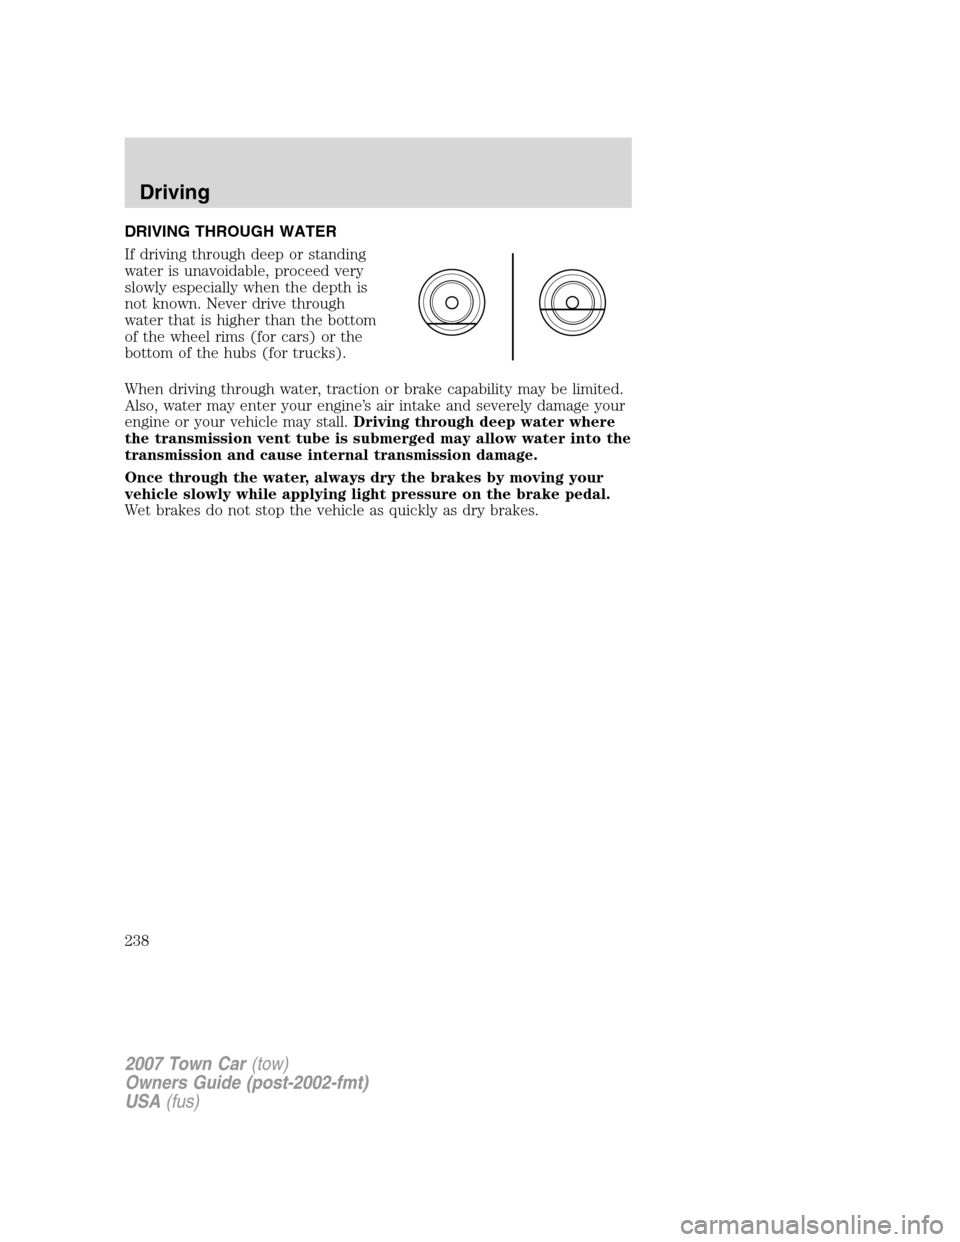
If driving through deep or standing
water is unavoidable, proceed very
slowly especially when the depth is
not known. Never drive through
water that is higher than the bottom
of the wheel rims (for cars) or the
bottom of the hubs (for trucks).
When driving through water, traction or brake capability may be limited.
Also, water may enter your engine’s air intake and severely damage your
engine or your vehicle may stall.Driving through deep water where
the transmission vent tube is submerged may allow water into the
transmission and cause internal transmission damage.
Once through the water, always dry the brakes by moving your
vehicle slowly while applying light pressure on the brake pedal.
Wet brakes do not stop the vehicle as quickly as dry brakes.
2007 Town Car(tow)
Owners Guide (post-2002-fmt)
USA(fus)
Driving
238
Page 243 of 328
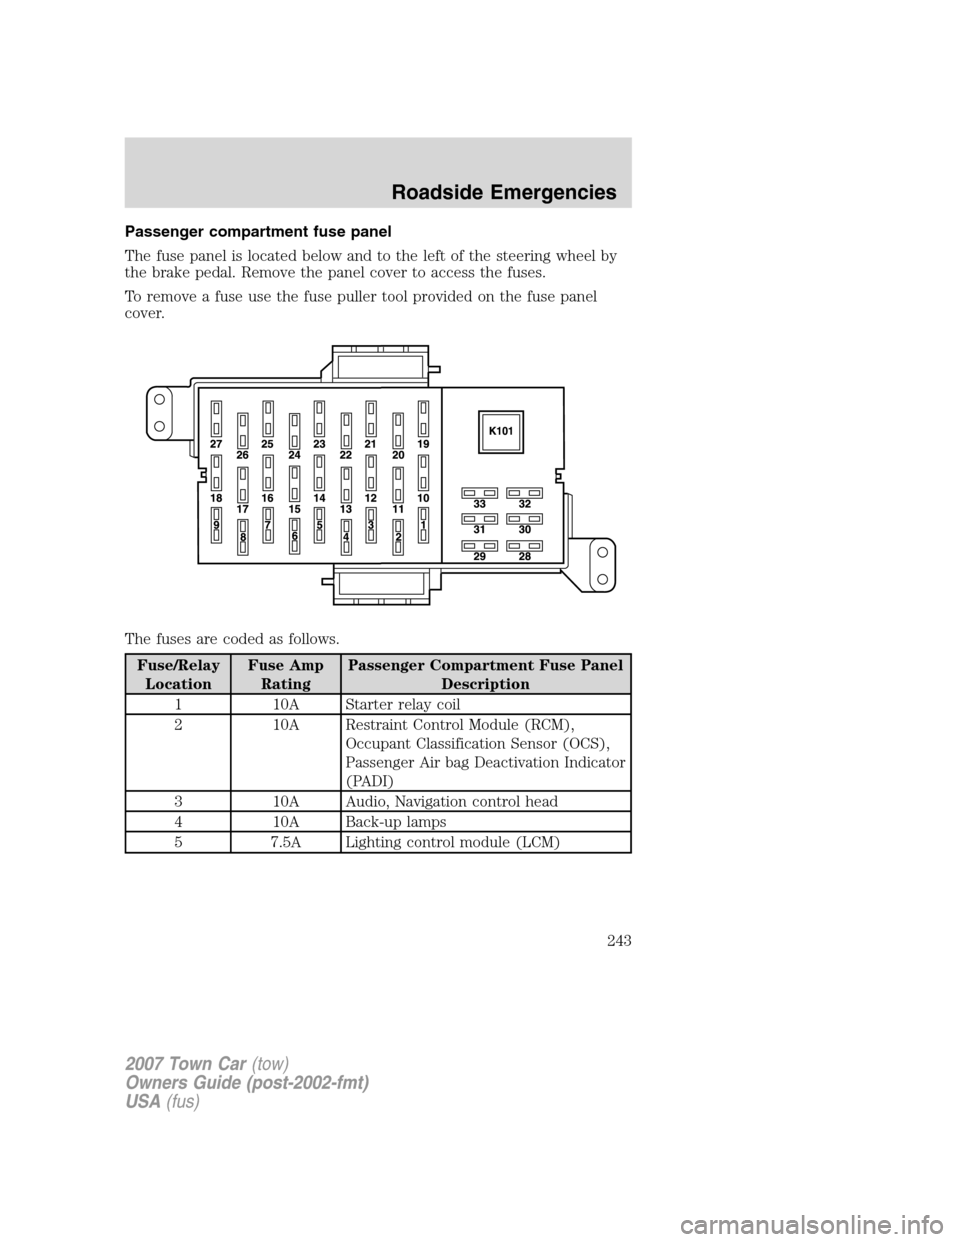
Passenger compartment fuse panel
The fuse panel is located below and to the left of the steering wheel by
the brake pedal. Remove the panel cover to access the fuses.
To remove a fuse use the fuse puller tool provided on the fuse panel
cover.
The fuses are coded as follows.
Fuse/Relay
LocationFuse Amp
RatingPassenger Compartment Fuse Panel
Description
1 10A Starter relay coil
2 10A Restraint Control Module (RCM),
Occupant Classification Sensor (OCS),
Passenger Air bag Deactivation Indicator
(PADI)
3 10A Audio, Navigation control head
4 10A Back-up lamps
5 7.5A Lighting control module (LCM)
2007 Town Car(tow)
Owners Guide (post-2002-fmt)
USA(fus)
Roadside Emergencies
243
Page 244 of 328
Fuse/Relay
LocationFuse Amp
RatingPassenger Compartment Fuse Panel
Description
6 10A Passive Anti-Theft System (PATS),
Powertrain Control Module (PCM) relay
coil, Ignition coil relay coil, Fuel relay
coil
7 10A Wiper module
8 10A Power Decklid Module (PDM),
Overdrive cancel switch, Cluster,
Compass module, LCM
9 7.5A Mirror switch illumination, Door lock
switch illumination, Heated seat switch
illumination, Electrochromatic mirror
10 15A Hazards
11 15A Turn signal
12 15A Audio/navigation
13 10A Extended rear park aide module,
Anti-lock Brake System (ABS), Cluster
14 15A Adjustable pedals, Delayed accessory
relay coil
15 10A Dual Automatic Temperature Control
(DATC) module
16 20A Cigar lighter, OBD II
17 10A A/C cycle switch, Heated seat modules
18 15A LCM (Interior lighting)
19 7.5A Driver’s Door Module (DDM) switches,
PDM, Power mirrors, DSM, DDM, PATS
LED
20 10A LCM (Right-hand low beam)
21 10A Analog clock, LCM (Illumination)
22 10A LCM (Left-hand low beam)
23 10A LCM
24 15A LCM (High beams), Multi-function
switch (Flash-to-pass)
2007 Town Car(tow)
Owners Guide (post-2002-fmt)
USA(fus)
Roadside Emergencies
244
Page 256 of 328
1.Use only a 12–volt supply to start your vehicle.
2. Do not disconnect the battery of the disabled vehicle as this could
damage the vehicle’s electrical system.
3. Park the booster vehicle close to the hood of the disabled vehicle
making sure the two vehiclesdo nottouch. Set the parking brake on
both vehicles and stay clear of the engine cooling fan and other moving
parts.
4. Check all battery terminals and remove any excessive corrosion before
you attach the battery cables. Ensure that vent caps are tight and level.
5. Turn the heater fan on in both vehicles to protect any electrical
surges. Turn all other accessories off.
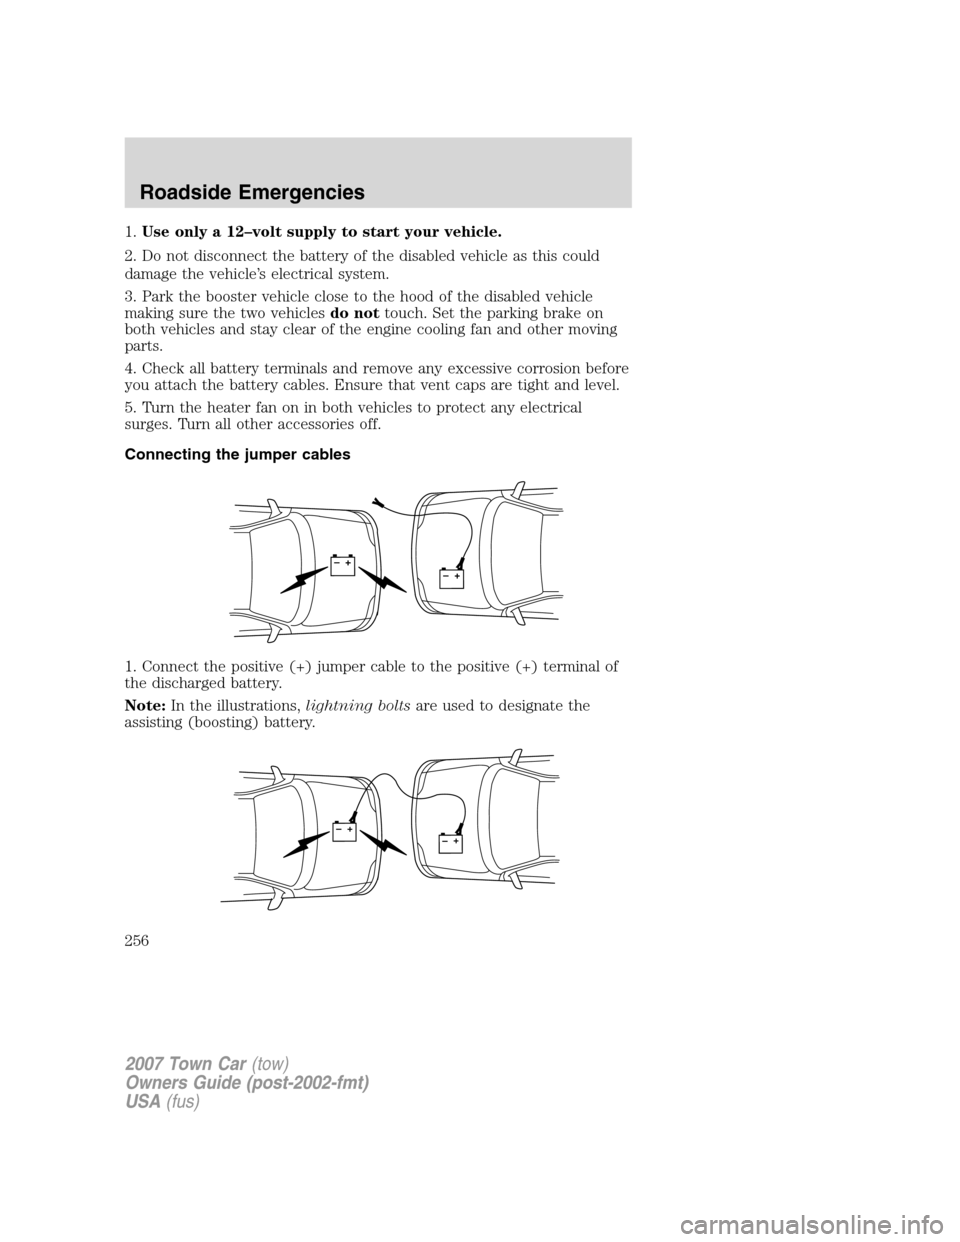
Connecting the jumper cables
1. Connect the positive (+) jumper cable to the positive (+) terminal of
the discharged battery.
Note:In the illustrations,lightning boltsare used to designate the
assisting (boosting) battery.
+–+–
+–+–
2007 Town Car(tow)
Owners Guide (post-2002-fmt)
USA(fus)
Roadside Emergencies
256
Page 284 of 328
Batteries normally produce explosive gases which can cause
personal injury. Therefore, do not allow flames, sparks or lighted
substances to come near the battery. When working near the battery,
always shield your face and protect your eyes. Always provide proper
ventilation.
When lifting a plastic-cased battery, excessive pressure on the
end walls could cause acid to flow through the vent caps,
resulting in personal injury and/or damage to the vehicle or battery.
Lift the battery with a battery carrier or with your hands on opposite
corners.
Keep batteries out of reach of children. Batteries contain sulfuric
acid. Avoid contact with skin, eyes or clothing. Shield your eyes
when working near the battery to protect against possible splashing of
acid solution. In case of acid contact with skin or eyes, flush
immediately with water for a minimum of 15 minutes and get prompt
medical attention. If acid is swallowed, call a physician immediately.
Battery posts, terminals and related accessories contain lead and
lead compounds.Wash hands after handling.
Because your vehicle’s engine is electronically controlled by a computer,
some control conditions are maintained by power from the battery. When
the battery is disconnected or a new battery is installed, the engine must
relearn its idle and fuel trim strategy for optimum driveability and
performance. To begin this process:
1. With the vehicle at a complete stop, set the parking brake.
2. Put the gearshift in P (Park), turn off all accessories and start the
engine.
3. Run the engine until it reaches normal operating temperature.
4. Allow the engine to idle for at least one minute.
5. Turn the A/C on and allow the engine to idle for at least one minute.
6. Release the parking brake. With your foot on the brake pedal and with
the A/C on, put the vehicle in D (Drive) and allow the engine to idle for
at least one minute.
7. Drive the vehicle to complete the relearning process.
2007 Town Car(tow)
Owners Guide (post-2002-fmt)
USA(fus)
Maintenance and Specifications
284
Page 300 of 328
•Resting your foot on the brake pedal while driving may reduce fuel
economy.
•Combine errands and minimize stop-and-go driving.
Maintenance
•Keep tires properly inflated and use only recommended size.
•Operating a vehicle with the wheels out of alignment will reduce fuel
economy.
•Use recommended engine oil. Refer toLubricant specificationsin
this chapter.
•Perform all regularly scheduled maintenance items. Follow the
recommended maintenance schedule and owner maintenance checks
found inscheduled maintenance information.
Conditions
•Heavily loading a vehicle or towing a trailer may reduce fuel economy
at any speed.
•Carrying unnecessary weight may reduce fuel economy (approximately
1 mpg [0.4 km/L] is lost for every 400 lb [180 kg] of weight carried).
•Adding certain accessories to your vehicle (for example bug
deflectors, rollbars/light bars, running boards, ski/luggage racks) may
reduce fuel economy.
•Using fuel blended with alcohol may lower fuel economy.
•Fuel economy may decrease with lower temperatures during the first
8–10 miles (12–16 km) of driving.
•Driving on flat terrain offers improved fuel economy as compared to
driving on hilly terrain.
•Transmissions give their best fuel economy when operated in the top
cruise gear and with steady pressure on the gas pedal.
•Close windows for high speed driving.
EPA window sticker
Every new vehicle should have the EPA window sticker. Contact your
authorized dealer if the window sticker is not supplied with your vehicle.
The EPA window sticker should be your guide for the fuel economy
comparisons with other vehicles.
It is important to note the box in the lower left corner of the window
sticker. These numbers represent the Range of MPG (L/100 km)
2007 Town Car(tow)
Owners Guide (post-2002-fmt)
USA(fus)
Maintenance and Specifications
300