Page 41 of 312

•Rotate fully to the right (past detent) to turn on interior lamps.
•Rotate to the left position (past detent) to turn off the interior lamps
and will also disable the illuminated entry feature.
At dusk and dawn, the LEDs are illuminated at six times the normal
intensity to enhance contrast and visibility. The system automatically
“dims down” as ambient light reaches the dash-mounted sensor.
The interior control lights dim progressively in four steps until they
reach nighttime operating levels. At all illumination levels, the lights can
be dimmed using the thumbwheel on the instrument panel.
AIMING THE HEADLAMPS
The headlamps on your vehicle are properly aimed at the assembly plant.
If your vehicle has been in an accident the alignment of your headlamps
should be checked by your authorized dealer.
Vertical aim adjustment
Before aim adjustment, disable the air suspension system. Refer to
Messagecenter in theDriver Controlschapter.
1. Park the vehicle directly in front of a wall or screen on a level surface,
approximately 25 feet (7.6 meters) away.
•(1) 8 feet (2.4 meters)
•(2) Center height of lamp to
ground
•(3) 25 feet (7.6 meters)
•(4) Horizontal reference line
2. Measure the height from the
center of your headlamp (indicated
by a 3.0 mm circle on the lens) to
the ground and mark an 8 foot (2.4
meter) horizontal reference line on
the vertical wall or screen at this height (a piece of masking tape works
well).
3. Turn on the low beam headlamps to illuminate the wall or screen and
open the hood. Cover one of the headlamps so no light hits the wall.
4. On the wall or screen you will
observe a light pattern with a
distinct horizontal edge towards the
2007 Navigator(nav)
Owners Guide (post-2002-fmt)
USA(fus)
Lights
41
Page 42 of 312

right. If this edge is not at the horizontal reference line, the beam will
need to be adjusted so the edge is at the same height as the horizontal
reference line.
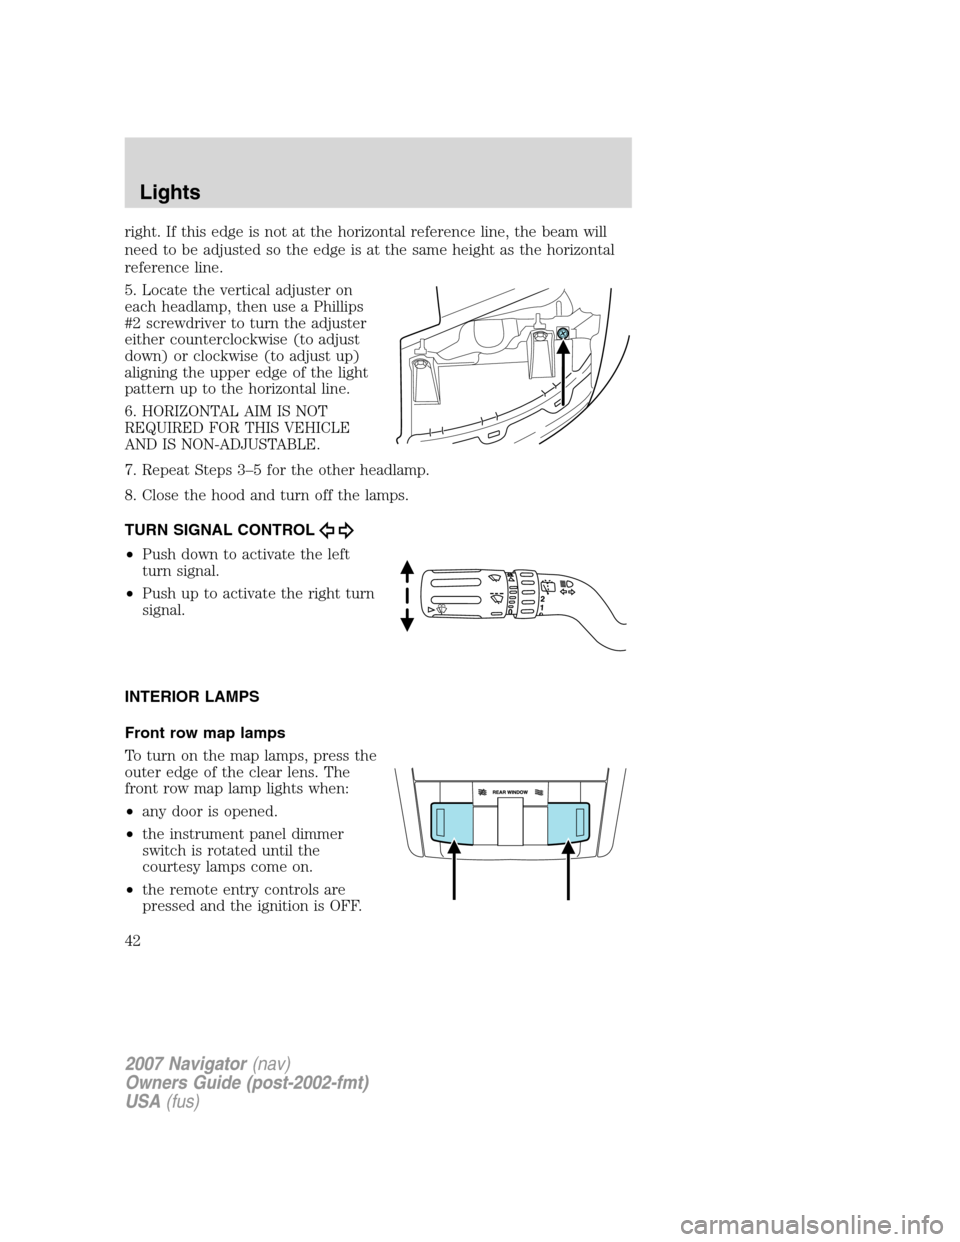
5. Locate the vertical adjuster on
each headlamp, then use a Phillips
#2 screwdriver to turn the adjuster
either counterclockwise (to adjust
down) or clockwise (to adjust up)
aligning the upper edge of the light
pattern up to the horizontal line.
6. HORIZONTAL AIM IS NOT
REQUIRED FOR THIS VEHICLE
AND IS NON-ADJUSTABLE.
7. Repeat Steps 3–5 for the other headlamp.
8. Close the hood and turn off the lamps.
TURN SIGNAL CONTROL
•Push down to activate the left
turn signal.
•Push up to activate the right turn
signal.
INTERIOR LAMPS
Front row map lamps
To turn on the map lamps, press the
outer edge of the clear lens. The
front row map lamp lights when:
•any door is opened.
•the instrument panel dimmer
switch is rotated until the
courtesy lamps come on.
•the remote entry controls are
pressed and the ignition is OFF.
2007 Navigator(nav)
Owners Guide (post-2002-fmt)
USA(fus)
Lights
42
Page 49 of 312

MULTI-FUNCTION LEVER
Windshield wiper:Rotate the end
of the control away from you to
increase the speed of the wipers;
rotate towards you to decrease the
speed of the wipers.
Speed dependent wipers:When
the wiper control is on, the speed of
the wipers will automatically adjust
with the vehicle speed. The faster your vehicle is travelling the faster the
wipers will go.
Windshield washer:Push the end
of the stalk:
•briefly: causes a single swipe of
the wipers without washer fluid.
•a quick push and hold: the wipers
will swipe three times with
washer fluid.
•a long push and hold: the wipers and washer fluid will be activated for
up to ten seconds.
Note:Do not operate the washer when the washer reservoir is empty.
This may cause the washer pump to overheat. Check the washer fluid
level frequently. Do not operate the wipers when the windshield is dry.
This may scratch the glass, damage the wiper blades and cause the wiper
motor to burn out. Before operating the wiper on a dry windshield,
always use the windshield washer. In freezing weather, be sure the wiper
blades are not frozen to the windshield before operating the wipers.
Rear window wiper/washer controls
For rear wiper operation, rotate the
rear window wiper and washer
control to the desired position.
Select:
INT 2 — Normal speed operation of
rear wiper.
INT 1 — Intermittent operation of
rear wiper.
OFF — Rear wiper and washer off.
2007 Navigator(nav)
Owners Guide (post-2002-fmt)
USA(fus)
Driver Controls
49
Page 50 of 312

For rear wash cycle, rotate (and hold as desired) the rear wiper/washer
control to either
position.
From either position, the control will automatically return to the INT 2
or OFF position.
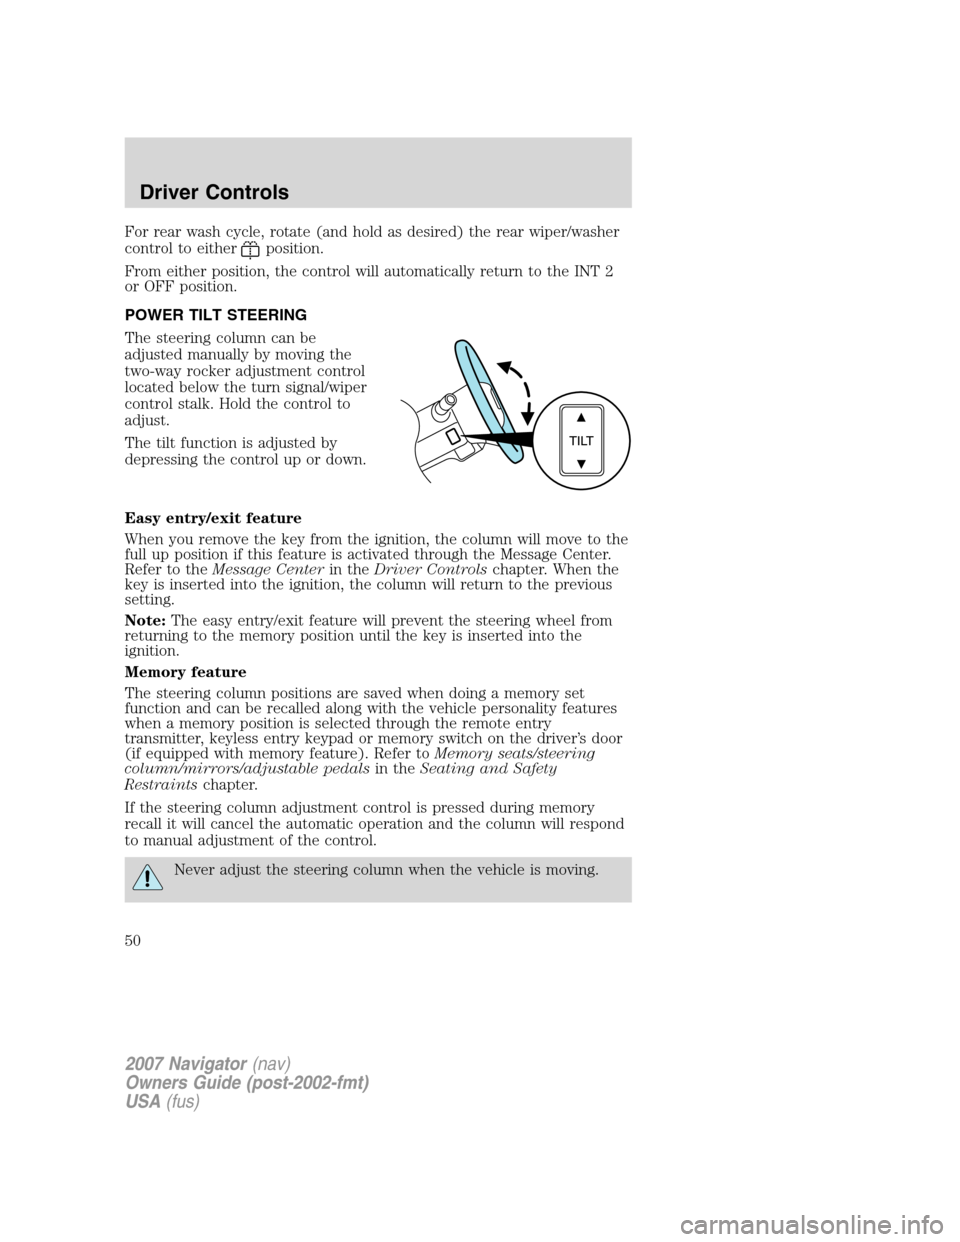
POWER TILT STEERING
The steering column can be
adjusted manually by moving the
two-way rocker adjustment control
located below the turn signal/wiper
control stalk. Hold the control to
adjust.
The tilt function is adjusted by
depressing the control up or down.
Easy entry/exit feature
When you remove the key from the ignition, the column will move to the
full up position if this feature is activated through the Message Center.
Refer to theMessage Centerin theDriver Controlschapter. When the
key is inserted into the ignition, the column will return to the previous
setting.
Note:The easy entry/exit feature will prevent the steering wheel from
returning to the memory position until the key is inserted into the
ignition.
Memory feature
The steering column positions are saved when doing a memory set
function and can be recalled along with the vehicle personality features
when a memory position is selected through the remote entry
transmitter, keyless entry keypad or memory switch on the driver’s door
(if equipped with memory feature). Refer toMemory seats/steering
column/mirrors/adjustable pedalsin theSeating and Safety
Restraintschapter.
If the steering column adjustment control is pressed during memory
recall it will cancel the automatic operation and the column will respond
to manual adjustment of the control.
Never adjust the steering column when the vehicle is moving.
2007 Navigator(nav)
Owners Guide (post-2002-fmt)
USA(fus)
Driver Controls
50
Page 51 of 312

On vehicles with memory feature, to prevent damage to the steering
column, the steering column is designed to set a stopping position just
short of the end of the column position. If the steering column
encounters an object while moving up or down, a new stopping position
will be set. To reset the steering column to its normal stopping position:
•After encountering the new stopping position, press the steering
column control again to override.
•Continue pressing the control until it reaches the end of the column
position.
•Continue pressing the control for approximately 2 seconds. You will
feel the steering column bounce back slightly.
ILLUMINATED VISOR MIRROR (IF EQUIPPED)
Lift the mirror cover to turn on the
visor mirror lamp.
Slide on rod feature
(if equipped)
Rotate the visor towards the side
window and extend it rearward for
additional sunlight coverage.
Note:To stow the visor back into
the headliner, visor must be
retracted before moving it back
towards the windshield.
OVERHEAD CONSOLE
The appearance of your vehicle’s overhead console will vary according to
your option package.
2007 Navigator(nav)
Owners Guide (post-2002-fmt)
USA(fus)
Driver Controls
51
Page 52 of 312
Forward storage bin (if equipped)
The storage compartment may be
used to store a pair of sunglasses.
Press the release area on the rear
edge of the bin door to open the
storage compartment. The door will
open to full open position.
Conversation mirror (if equipped)
On double bin overhead consoles, the conversation mirror allows the
driver to view the rear seating area.
This does not replace the rear view mirror.
Press the release area on the rear
edge of the bin door to open the
conversation mirror. The door will
open to full open position.
The rear view mirror may have to
be adjusted to its lower arm position
to prevent interference when the
conversation mirror is extended
down.
Power quarter rear windows
Press the
portion of the
control to open the power rear
quarter windows.
Press the left portion of the control
to close the power rear quarter
windows.
2007 Navigator(nav)
Owners Guide (post-2002-fmt)
USA(fus)
Driver Controls
52
Page 53 of 312
Do not leave children unattended in the vehicle and do not let
children play with the power rear quarter windows. They may
seriously injure themselves.
When closing the power rear quarter windows, you should verify
that it is free of obstructions and ensure that children and/or
pets are not in the proximity of the window opening.
CENTER CONSOLE
Your vehicle may be equipped with a variety of console features. These
include:
1. Cupholders
2. Utility compartment, Coin holder
slots, Tissue box holder
3. Power point and Rear audio
controls (if equipped)
4. Rear Cupholders
5. Side storage
Use only soft cups in the
cupholder. Hard objects can
injure you in a collision.
Rear center console features (if equipped)
The rear center console
incorporates the following features:
•utility compartment with tissue
box holder inside
•cupholders
•front storage bin
2007 Navigator(nav)
Owners Guide (post-2002-fmt)
USA(fus)
Driver Controls
53
Page 54 of 312

CLOCK
Press the right control to increase
the time displayed.
Press the left control to decrease
the time displayed.
AUXILIARY POWER POINT (12VDC)
Power outlets are designed for accessory plugs only. Do not insert
any other object in the power outlet as this will damage the
outlet and blow the fuse. Do not hang any type of accessory or
accessory bracket from the plug. Improper use of the power
outlet can cause damage not covered by your warranty.
An auxiliary power point is located
by the passenger’s ankle near the
floor in the front console bin.
Do not use the power point for
operating the cigarette lighter
element (if equipped).
To prevent the fuse from being
blown, do not use the power
point(s) over the vehicle capacity of
12 VDC/180W.
To prevent the battery from being discharged, do not use the power
point longer than necessary when the engine is not running.
Always keep the power point caps closed when not being used.
2007 Navigator(nav)
Owners Guide (post-2002-fmt)
USA(fus)
Driver Controls
54