Page 63 of 325

Knowing your vehicle54
3
WARNING
If the front passenger seat should
be modified for persons with dis-
abilities that may affect the opera-
tion of the occupant classification
system, contact an authorized Kia
dealer.
WARNING
If the "PASSENGER AIR BAG OFF"
indicator illuminates or blinks con-
tinuously when a person of adult
size sits in the front passenger's
seat, it could be because that per-
son isn't sitting properly in the seat.
If this happens, turn the vehicle off,
make sure the seat back is not
reclined, have the passenger center
on the seat cushion, with legs com-
fortably extended, and the safety
belt properly positioned. Restart
the vehicle and have the person
remain in this position long enough
to allow the system to detect the
person and activate the passenger
air bag.
WARNING
If the occupant classification sys-
tem is not working properly, the air
bag warning light ( ) on the
instrument panel will illuminate. If
there is a malfunction of the occu-
pant classification system, the
"PASSENGER AIR BAG OFF" indi-
cator will illuminate and the front
passenger's air bag will not deploy
in frontal crashes even if there is an
adult sized occupant in the front
passenger seat. If the SRS air bag
warning light does not illuminate
when the ignition key is turned to
"ON" position, if it remains illumi-
nated after blinking for approxi-
mately six seconds, or if it illumi-
nates while the vehicle is being
driven, have an authorized Kia deal-
er inspect the occupant classifica-
tion system with the SRS air bag
system as soon as possible.
AIR
BAG
WARNING
Even though your vehicle is
equipped with the occupant clas-
sification system, children aged
12 and under should be seated in
the rear seats. Do not install a
child restraint system in the front
passenger seat. The child could
be severely injured or killed if the
air bag deploys. Children are
afforded the most protection in
the event of an accident when
they are restrained by the proper
restraint system in the rear seat.
(Continued)
Page 70 of 325

361
Knowing your vehicle
Curtain air bag
Curtain air bags are designed to inflate
when the impact signal is delivered to the
side collision sensors, depending on the
severity, speed, and/or angle of the
impact or rollover.Although the front air bags (driver’s and
front passenger’s air bags and driver’s
knee air bag) are designed to inflate only
in frontal collision, it may inflate in any
collision if front impact sensors detect a
sufficient impact.
Curtain air bags are designed to inflate
only in side impact collision, but may
inflate in any collision if side impact sen-
sors detect a sufficient impact.
If the vehicle chassis is impacted by
bumps or objects on unimproved roads
or sidewalks, air bags may deploy. Drive
carefully on unimproved roads or on sur-
faces not designed for vehicle traffic to
prevent unintended air bag deployment.
To protect occupants, front air bags and
pre-tensioner safety belts may deploy in
certain side impact collisions.
Air bag non-inflation conditions In collisions, the vehicle safety belts
are sufficient to protect the vehicle
occupants and the air bags may not
deploy. In some cases, deploying air
bags in low-speed collisions can cause
a secondary impact to the occupants
(light abrasions, cuts, burns, etc.), or
loss of vehicle control.
OVQ036018N
S2BLA351
1VQA2086
Page 75 of 325

Knowing your vehicle66
3
Air bag warning lightThe purpose of air bag warning light in
your instrument panel is to alert you of a
potential problem with your air bag -
Supplemental Restraint System (SRS).
When the ignition switch is turned ON,
the indicator light should blink or illumi-
nate for approximately 6 seconds, then
go off.
Have the system checked if:
The light does not turn on briefly when
you turn the ignition ON.
The light stays on after the engine starts.
The light comes on while the vehicle is in motion.
Air bag (Supplemental Restraint
System) service Your Supplemental Restraint System is
virtually maintenance-free. There are no
parts which you can service.
You must have the system serviced
under the following circumstances:
If an air bag ever inflates, the air bagmust be replaced. Do not try to remove
or discard the air bag by yourself. This
must be done by an authorized Kia
dealer.
If the air bag warning indicator light alerts you to a problem, have the air
bag system checked as soon as possi-
ble. Otherwise, your air bag system
may be ineffective.
WARNING
Never put child restraint in thefront passenger seat. If the front
passenger air bag inflates, it may
cause severe or fatal injuries.
When children are seated in the rear outboard seats in which cur-
tain air bags are equipped, be
sure to put the child restraint sys-
tem as far away from the door
side as possible, and secure the
child restraint system to be
locked in position.
Inflation of curtain air bag could
cause severe injury or death due
to the expansion impact.
AIR
BAG
CAUTION
Do not modify any part of the air bag system. Modification could make the air bag system ineffectiveor could cause unnecessary deployment.
Page 78 of 325
369
Knowing your vehicle
Opening the hood:1. Pull the release lever on the lower leftside of the instrument panel to unlatch
the hood. The hood should pop open
slightly. 2. Go to the front of the vehicle, raise the
hood slightly, pull the secondary latch
inside of the hood center and lift the
hood. 3. Raise the hood. It will raise completely
by itself after it has been raised
halfway.HOOD
E2BLA419C
OBL026001
E2BLA317A
Page 80 of 325

371
Knowing your vehicle
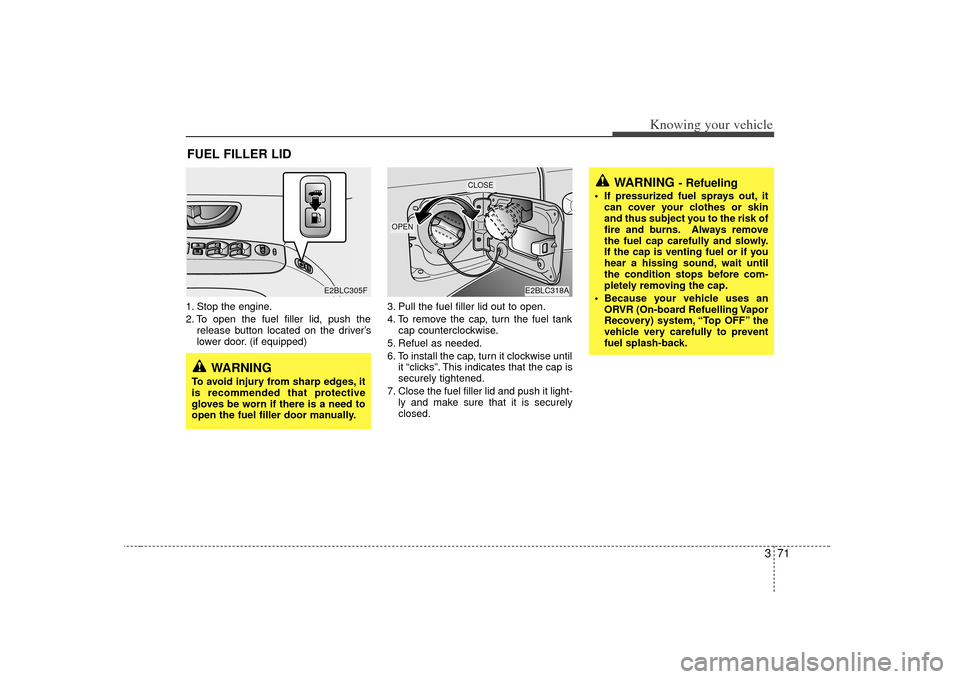
1. Stop the engine.
2. To open the fuel filler lid, push therelease button located on the driver’s
lower door. (if equipped) 3. Pull the fuel filler lid out to open.
4. To remove the cap, turn the fuel tank
cap counterclockwise.
5. Refuel as needed.
6. To install the cap, turn it clockwise until it “clicks”. This indicates that the cap is
securely tightened.
7. Close the fuel filler lid and push it light- ly and make sure that it is securely
closed.FUEL FILLER LID
WARNING
- Refueling
If pressurized fuel sprays out, itcan cover your clothes or skin
and thus subject you to the risk of
fire and burns. Always remove
the fuel cap carefully and slowly.
If the cap is venting fuel or if you
hear a hissing sound, wait until
the condition stops before com-
pletely removing the cap.
Because your vehicle uses an ORVR (On-board Refuelling Vapor
Recovery) system, “Top OFF” the
vehicle very carefully to prevent
fuel splash-back.
E2BLC305F
E2BLC318A
OPEN
CLOSE
WARNING
To avoid injury from sharp edges, it
is recommended that protective
gloves be worn if there is a need to
open the fuel filler door manually.
Page 82 of 325

373
Knowing your vehicle
✽
✽NOTICEIf the fuel filler lid will not open in cold
weather because the area around it is
frozen, push or lightly tap the lid.
Manual fuel filler lid release
(if equipped)If the fuel filler lid is not open by using the
remote button, open it by pulling out the
emergency handle which is located in the
right side storage in a cargo area.
(Continued)
DO NOT use matches or a lighter
and DO NOT SMOKE or leave a lit
cigarette in your vehicle while at a
gas station especially during
refueling. Automotive fuel is high-
ly flammable and can, when ignit-
ed, result in fire.
If a fire breaks out during refuel- ing, leave the vicinity of the vehi-
cle, and immediately contact the
manager of the gas station and
then contact the local fire depart-
ment or 911.
CAUTION
Make sure to refuel with unleaded fuel only.
Check to make sure the fuel filler cap is securely closed after refu-eling. A loose fuel filler cap may cause the "Check Engine"(Malfunction Indicator) light in the instrument panel to illuminateunnecessarily.
If the fuel filler cap requires replacement, use only a genuineKia cap or the equivalent speci-fied for your vehicle. An incorrect fuel filler cap can result in a seri-ous malfunction of the fuel sys- tem or emission control system.
Do not spill fuel on the exterior surfaces of the vehicle. Any typeof fuel spilled on painted surfacesmay damage the paint.
E2BLA614D
Page 85 of 325

Knowing your vehicle76
3Outside rearview mirror heater
(if equipped) The outside rearview mirror heater is
actuated in connection with the rear win-
dow defroster. To heat the outside
rearview mirror glass, push the button for
the rear window defroster.
The rearview mirror heater (and rear win-
dow defroster) will not operate unless the
engine is running.
The outside rearview mirror glass will be
heated for defrosting or defogging and
will give you improved rear vision in
inclement weather conditions. Push the
button again to turn the heater off. The
outside rearview mirror heater automati-
cally turns off after 20 minutes.
Day/night rearview mirror Adjust the rearview mirror to center on
the view through the rear window. Make
this adjustment before you start driving.
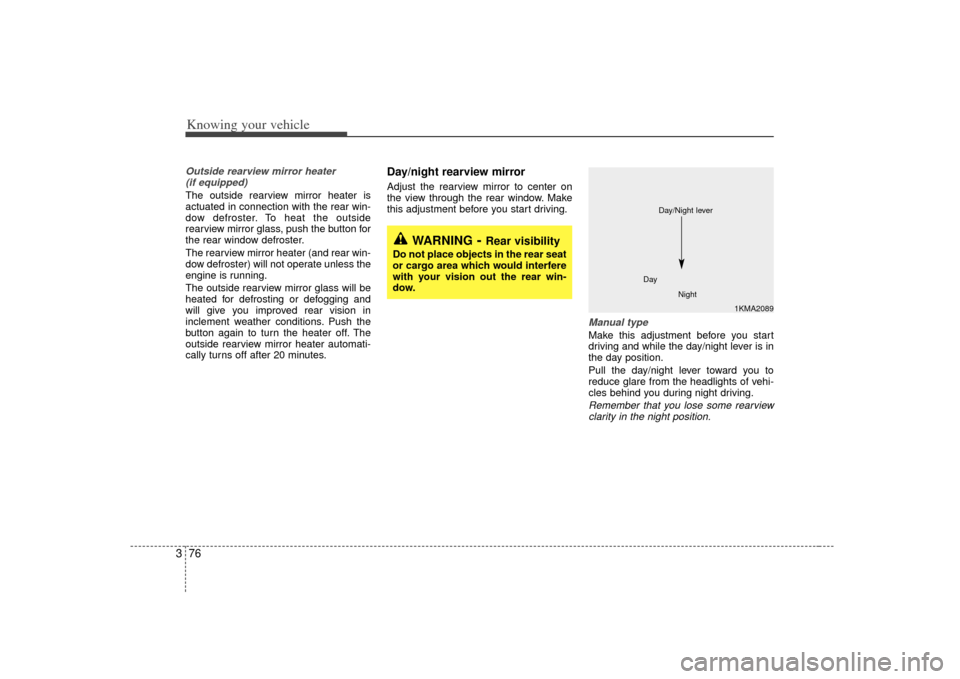
Manual type Make this adjustment before you start
driving and while the day/night lever is in
the day position.
Pull the day/night lever toward you to
reduce glare from the headlights of vehi-
cles behind you during night driving.Remember that you lose some rearviewclarity in the night position.
1KMA2089
Day
Night
Day/Night lever
WARNING
- Rear visibility
Do not place objects in the rear seat
or cargo area which would interfere
with your vision out the rear win-
dow.
Page 86 of 325

377
Knowing your vehicle
Electric type (if equipped)The electric day/night rearview mirror
automatically controls the glare from the
headlights of the car behind you in night-
time or low light driving conditions. The
sensor mounted in the mirror senses the
light level around the vehicle, and
through a chemical reaction, automati-
cally controls the headlight glare from
vehicles behind you.
When the engine is running, the glare is
automatically controlled by the sensor
mounted in the rearview mirror.
Whenever the shift lever is shifted into
reverse (R), the mirror will automatically
go to the brightest setting in order to
improve the drivers view behind the vehi-
cle.To operate the electric rearview mirror
Press the “I” button (
➀) to turn the auto-
matic- dimming function on. The mirror
indicator light will illuminate.
Press the “O” button (➁) to turn the auto-
matic- dimming function off. The mirror
indicator light will turn off.
2GHN3310
➀
➁
CAUTION
When cleaning the mirror, use a paper towel or similar materialdampened with glass cleaner. Do not spray glass cleaner directly onthe mirror as that may cause the liq-uid cleaner to enter the mirror hous-ing.
WARNING
When backing up, we recommend
the driver use the rear window
rather than the rearview mirror to
see objects in the road.
Indicator light