2007 KIA Sorento tow
[x] Cancel search: towPage 64 of 325

355
Knowing your vehicle
(Continued)
If a very low weight adult is seat-ed in the front passenger seat, the
occupant classification system
may or may not turn off the right
front passenger air bag, depend-
ing upon the person's seating
position and body type. Everyone
in your vehicle should wear a
safety belt properly -- whether or
not there is an air bag for that per-
son.
If the front seat passenger changes their seating position
(for example, by not sitting
upright, by sitting on the edge of
the seat, or by otherwise being
out of position), the "PASSEN-
GER AIR BAG OFF" indicator may
be turned on, and the passenger
air bag may not deploy in a colli-
sion. Always be sure to sit prop-
erly in the front passenger seat
and wear the safety belt properly.
(Continued)
(Continued)
(Continued)
(Continued)
(Continued)
1KMN36611KMN3662
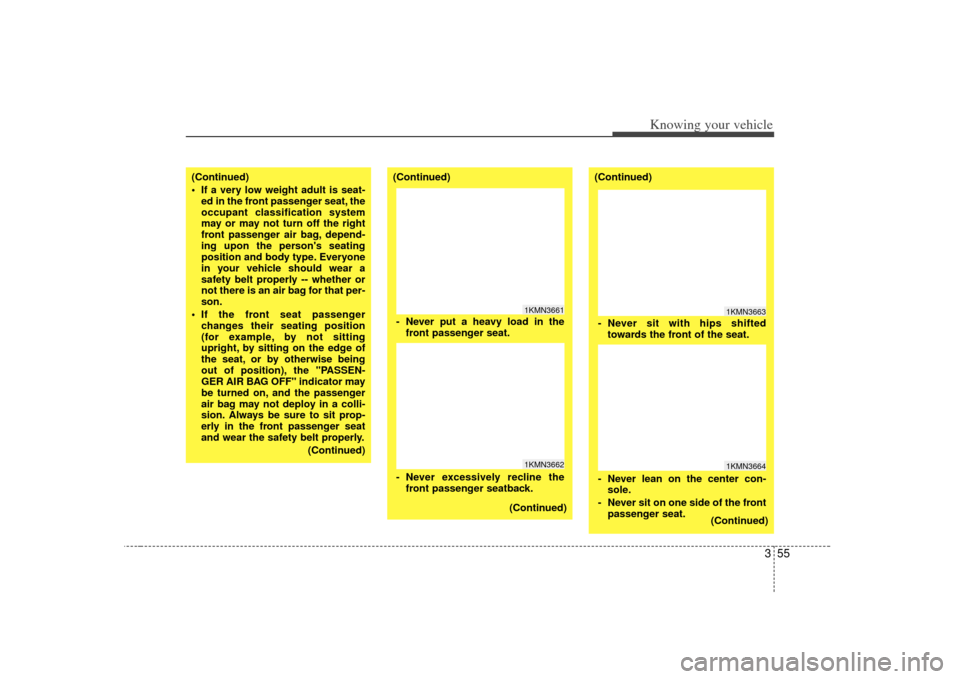
- Never put a heavy load in thefront passenger seat.
- Never excessively recline the front passenger seatback.
1KMN36631KMN3664
- Never sit with hips shiftedtowards the front of the seat.
- Never lean on the center con- sole.
- Never sit on one side of the front passenger seat.
Page 84 of 325

375
Knowing your vehicle
Electric remote control (if equipped)The electric remote control mirror switch
allows you to adjust the position of the
left and right outside rearview mirrors. To
adjust the position of either mirror, move
the lever to R or L to select the right side
mirror or the left side mirror, then press a
corresponding point on the mirror adjust-
ment control to position the selected mir-
ror up, down, left or right.
After adjustment, put the lever into neu-
tral position to prevent the inadvertent
adjustment.
Folding the outside rearview mirrorTo fold outside rearview mirror, grasp the
housing of mirror and then fold it toward
the rear of the vehicle.
LRE1BLA255
CAUTION
The mirrors stop moving when they reach the maximum adjust-ing angles, but the motor contin-ues to operate while the switch is depressed. Do not depress theswitch longer than necessary, themotor may be damaged.
Do not attempt to adjust the out- side rearview mirror by hand.Doing so may damage the parts.
E1V2B03032
Page 85 of 325

Knowing your vehicle76
3Outside rearview mirror heater
(if equipped) The outside rearview mirror heater is
actuated in connection with the rear win-
dow defroster. To heat the outside
rearview mirror glass, push the button for
the rear window defroster.
The rearview mirror heater (and rear win-
dow defroster) will not operate unless the
engine is running.
The outside rearview mirror glass will be
heated for defrosting or defogging and
will give you improved rear vision in
inclement weather conditions. Push the
button again to turn the heater off. The
outside rearview mirror heater automati-
cally turns off after 20 minutes.
Day/night rearview mirror Adjust the rearview mirror to center on
the view through the rear window. Make
this adjustment before you start driving.
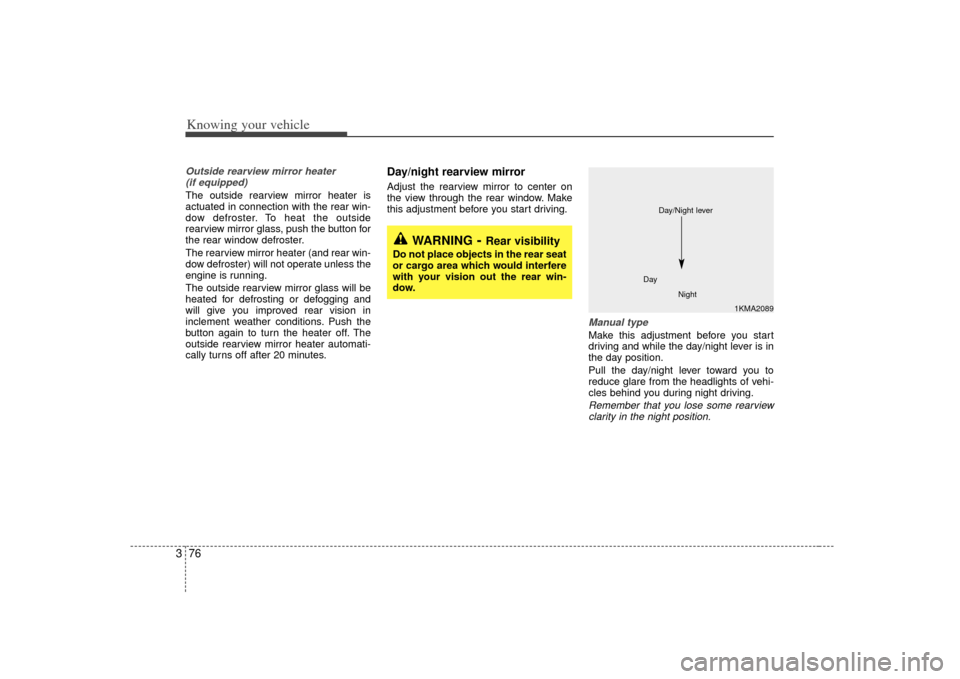
Manual type Make this adjustment before you start
driving and while the day/night lever is in
the day position.
Pull the day/night lever toward you to
reduce glare from the headlights of vehi-
cles behind you during night driving.Remember that you lose some rearviewclarity in the night position.
1KMA2089
Day
Night
Day/Night lever
WARNING
- Rear visibility
Do not place objects in the rear seat
or cargo area which would interfere
with your vision out the rear win-
dow.
Page 86 of 325

377
Knowing your vehicle
Electric type (if equipped)The electric day/night rearview mirror
automatically controls the glare from the
headlights of the car behind you in night-
time or low light driving conditions. The
sensor mounted in the mirror senses the
light level around the vehicle, and
through a chemical reaction, automati-
cally controls the headlight glare from
vehicles behind you.
When the engine is running, the glare is
automatically controlled by the sensor
mounted in the rearview mirror.
Whenever the shift lever is shifted into
reverse (R), the mirror will automatically
go to the brightest setting in order to
improve the drivers view behind the vehi-
cle.To operate the electric rearview mirror
Press the “I” button (
➀) to turn the auto-
matic- dimming function on. The mirror
indicator light will illuminate.
Press the “O” button (➁) to turn the auto-
matic- dimming function off. The mirror
indicator light will turn off.
2GHN3310
➀
➁
CAUTION
When cleaning the mirror, use a paper towel or similar materialdampened with glass cleaner. Do not spray glass cleaner directly onthe mirror as that may cause the liq-uid cleaner to enter the mirror hous-ing.
WARNING
When backing up, we recommend
the driver use the rear window
rather than the rearview mirror to
see objects in the road.
Indicator light
Page 109 of 325

Knowing your vehicle100
3AUDIO SYSTEMUnderstanding Radio ReceptionYour vehicle's radio is able to receive AM
and FM transmissions. To optimize the
enjoyment of your vehicle's radio, you
should have a basic understanding of
how radio signals are transmitted and
received.
Radio signals (AM and FM) are broad-
cast from the transmitter towers of radio
stations in your vicinity. Your car radio
receives these signals through the radio
antenna. These signals received are
directed to the audio system where they
are processed, amplified and then con-
verted into sound that is emitted from the
audio system's speakers. The quality of the audio reproduction that
you hear depends on many factors. One
important factor is signal strength. A
clear and strong signal results in clear,
static-free sound. A weak signal normal-
ly results in garbled sound with frequent
breaks and also static. The radio anten-
na's ability to receive clear and strong
radio signals depends on how close it is
to the transmitting source and also
whether there are physical obstructions
(buildings or mountains) between the
transmitter and antenna. For example, if
you are driving away from the transmit-
ting source, you can expect gradual dete-
rioration in the quality of the reception.
AM mode Amplitude Modulation (AM) broadcasts
makes use of low-frequency radio waves
to carry the signals to your car antenna.
Low frequency radio waves typically trav-
el further and better than higher frequen-
cy radio waves (e.g. FM radio signals).
This means that, compared to FM broad-
casts, your car can travel further from an
AM transmitting source before you expe-
rience deterioration in signal strength
and clarity. One reason why AM radio
signals can travel further is because they
can 'bend' or 'go around' physical
obstructions in their path to your car
radio antenna.
DCM06004
Page 128 of 325

3 119
Knowing your vehicle
Troubleshooting Poor Radio
ReceptionProblem:
Fading Signals / Interference /
Increased interference/ Static
FM Broadcasts - The further you move
away from the radio station's transmitting
source (normally within a city or town),
the weaker the signal will be. You might
experience abrupt breaks in transmis-
sion, garbled sound and also static even
though your radio remains tuned to the
same frequency.
AM Broadcasts - Even though AM radio
signals travel further and stronger than
FM radio signals, weather or terrain con-
ditions might adversely affect your radio's
ability to receive the signals.
Solution:
Use your audio system's Scan function to
automatically search for and select
another radio station with good signal
strength. Problem:
High-pitched static, distortion or a
'fluttering' sound (Multi-Path
Cancellation)
Radio stations transmitting on frequen-
cies that are very close to each other
may cause distortion or 'fluttering'. This
effect is known as Multi-Path
Cancellation. This normally occurs when
your tuner is receiving a station's trans-
mission as both direct and 'reflected'
radio signals or when your tuner receives
signals from more than 1 radio station
transmitting on frequencies that are very
close to each other.
Solution:
If the problem is caused by a temporary
deterioration in the signal strength of one
station's transmission, reduce the levels
of your audio system's Treble and Middle
settings to suppress the sound. If the
problem is caused by interference from
another station, select another radio sta-
tion with good and clear signal strength.
Problem:
Interference from another FM radio
broadcast ('station-swapping')
FM radio stations transmit on frequen-
cies that are very close to each other on
the FM band. When you travel further
and further away from a transmitting
source, the signal strength of that trans-
mission decreases. Your radio's ability to
'lock' on to that specific frequency is
affected. This is because your radio is
designed to lock on to the strongest sig-
nal it can detect. Therefore, another radio
station broadcasting on a frequency very
close to your original station could 'inter-
fere' with your reception and you might
start to hear the broadcast of the second
station. You will normally experience this
when you are moving away from a weak
signal and towards a stronger one.
Page 132 of 325

Driving your vehicle24Illuminated ignition switch
(if equipped)Whenever a door is opened, the ignition
switch will be illuminated for your con-
venience, provided the ignition switch is
not in the ON position. The light will go off
approximately 30 seconds after closing
the door or when the ignition switch is
turned on.
Ignition switch and anti-theft
steering column lock
Ignition switch positionLOCKThe steering wheel locks to protect
against theft. The ignition key can be
removed only in the LOCK position.
When turning the ignition switch to the
LOCK position, push the key inward at
the ACC position (Type A) and turn the
key toward the LOCK position.
ACC (Accessory)
The steering wheel is unlocked and elec-
trical accessories are operative.
ON
The warning lights can be checked
before the engine is started. This is the
normal running position after the engine
is started.Do not leave the ignition switch ON if theengine is not running to prevent batterydischarge.
IGNITION SWITCH
PUSH
LOCKACCONSTART
E2BLA401A
1KMA30131KMB3013
Type AType B
Page 144 of 325

Driving your vehicle14
4Knob positionThis is used to set different positions.
2HI (Rear-wheel drive)
This mode is used, when driving on nor-
mal roads and highway.
4HI (High-range 4-wheel drive)
This mode is used, when driving off-
roads, wet or snow covered roads with
normal speed.
The 4WD indicator light
()
will be
turned on to remind you that you are in
the 4HI mode.
4LO (Low-range 4-wheel drive)
Use 4LO for climbing or descending hills,
off-roads driving and towing the vehicle,
especially when increased power is
required.
The 4WD LOW indicator light
( )
will
be turned on to remind you that you are
in the 4LO mode.
Transfer shift knob operationBy turning the transfer knob (4HI, 4LO),
both front and rear axles are engaged.
This improves the traction characteristic.
2HI ➝ ➝
4HI
Turn the transfer knob from the 2HI mode
to 4HI mode at speed below 80 km/h (50
mph).
It is not necessary to depress the clutch
pedal or put the shift lever into N
(Neutral) position (Manual transmission)
or put the shift lever into N (Neutral) posi-
tion (Automatic transmission).
Perform this operation when driving
straight. There will be a few seconds of
time delay before come into 4HI mode
when you shift the knob to 4 HI from 2HI. 4HI
➝ ➝
2HI
Turn the transfer knob from the 4HI mode
to the 2HI mode at speed below 80 km/h
(50 mph). It is not necessary to depress
the clutch pedal (Manual transmission) or
put the shift lever into N (Neutral)
(Automatic transmission). Perform this
operation when driving straight.
If the transfer mode does not shift into
2HI mode when you turn the transfer
knob to 2HI, drive straight ahead with
accelerating or decelerating, or drive in
reverse.
4WD
LOW