2007 KIA Sedona tow
[x] Cancel search: towPage 269 of 344

Driving your vehicle32
4
Parking on hills Generally, you should not park your vehi-
cle, with a trailer attached, on a hill.
People can be seriously or fatally injured,
and both your vehicle and the trailer can
be damaged if they begin a downhill tra-
jectory.
However, if you ever have to park your
trailer on a hill, here’s how to do it:
1. Apply your brakes, but don’t shift into
gear.
2. Have someone place chocks under the trailer wheels.
3. When the wheel chocks are in place, release the brakes until the chocks
absorb the load.
4. Reapply the brakes. Apply your park- ing brake, and then shift to P (Park) for
an automatic transaxle.
5. Release the brakes.
When you are ready to leave after parking on a hill 1. With the automatic transaxle in P (Park), apply your brakes and hold the
brake pedal down while you:
and
2. Slowly remove your foot from the brake pedal.
3. Drive slowly until the trailer is clear of the chocks.
4. Stop and have someone pick up and store the chocks.
CAUTION
When towing a trailer on steep grades (in excess of 6%) payclose attention to the enginecoolant temperature gauge toensure the engine does not over-heat. If the needle of the coolant temperature gauge moves acrossthe dial towards “H” (HOT), pullover and stop as soon as it is safe to do so, and allow the engine toidle until it cools down. You mayproceed once the engine hascooled sufficiently.
You must decide driving speed depending on trailer weight anduphill grade to reduce the possi-bility of engine and transaxle overheating.
WARNING
- Parking on a hill
Parking your vehicle on a hill with a
trailer attached could cause serious
injury or death, should the trailer
break lose.
WARNING
- Parking brake
It can be dangerous to get out of
your vehicle if the parking brake is
not firmly set.
If you have left the engine running,
the vehicle can move suddenly. You
or others could be seriously or
fatally injured.
Page 270 of 344

433
Driving your vehicle
Maintenance when trailer towing Your vehicle will need service more often
when you regularly pull a trailer.
Important items to pay particular atten-
tion to include engine oil, automatic
transaxle fluid, axle lubricant and cooling
system fluid. Brake condition is another
important item to frequently check. Each
item is covered in this manual, and the
Index will help you find them quickly. If
you’re trailering, it’s a good idea to review
these sections before you start your trip.
Don’t forget to also maintain your trailer
and hitch. Follow the maintenance
schedule that accompanied your trailer
and check it periodically. Preferably, con-
duct the check at the start of each day’s
driving. Most importantly, all hitch nuts
and bolts should be tight.
If you do decide to pull a trailerHere are some important points if you
decide to pull a trailer:
government have varying trailering
laws. Make sure your hitch, mirrors,
lights and wiring arrangements are
legal, not only where you live, but also
where you’ll be driving. A good source
for this information is provincial or local
law enforcement agencies.
Consider using a sway control. You can ask a hitch dealer about sway control.
After your odometer indicates 800 km (500 miles) or more, you can tow a
trailer. For the first 800 km (500 miles)
that you tow a trailer, don’t drive over
80 km/h (50 mph) and don’t make
starts at full throttle. This helps your
engine and other parts of your vehicle
“wear” in at the heavier loads.
Always drive your vehicle at a moder- ate speed (less than 100 km/h (60
mph)).
On a long uphill grade, do not exceed 70 km/h (45 mph) or the posted towing
speed limit, whichever is lower.
The important considerations have to do with weight:
CAUTION
Due to higher load during trailer usage, overheating might occurin hot days or during uphill driv-ing. If the coolant gauge indicates over-heating, switch off the A/Cand stop the vehicle in a safe areato cool down the engine.
When towing check transaxle fluid more frequently.
If your vehicle is not equipped with the air conditioner, youshould install a condenser fan to improve engine performancewhen towing a trailer.
Page 271 of 344
Driving your vehicle34
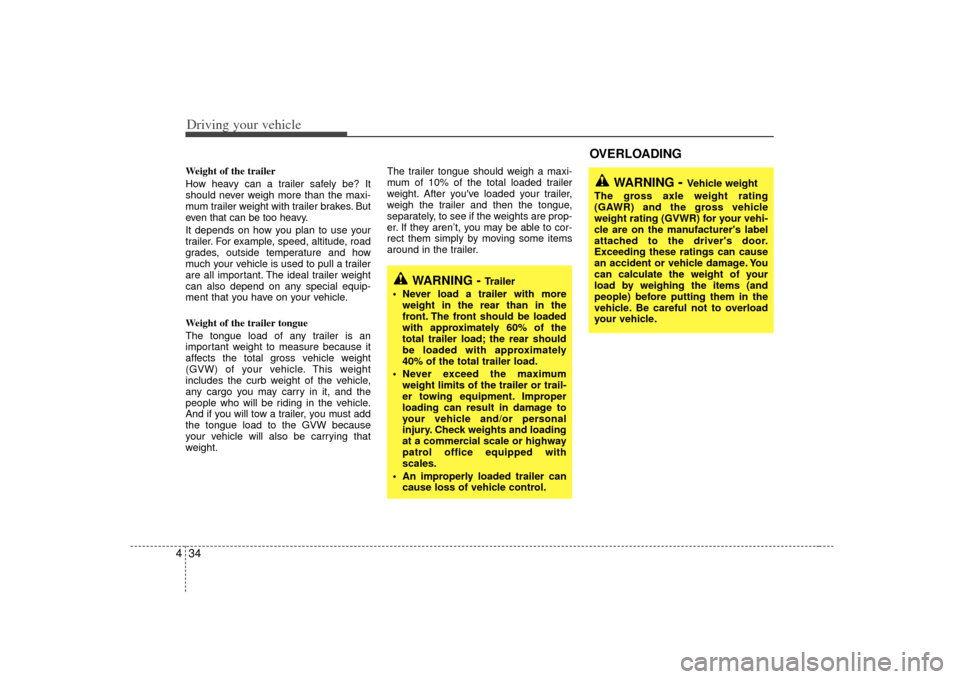
4Weight of the trailer
How heavy can a trailer safely be? It
should never weigh more than the maxi-
mum trailer weight with trailer brakes. But
even that can be too heavy.
It depends on how you plan to use your
trailer. For example, speed, altitude, road
grades, outside temperature and how
much your vehicle is used to pull a trailer
are all important. The ideal trailer weight
can also depend on any special equip-
ment that you have on your vehicle.
Weight of the trailer tongue
The tongue load of any trailer is an
important weight to measure because it
affects the total gross vehicle weight
(GVW) of your vehicle. This weight
includes the curb weight of the vehicle,
any cargo you may carry in it, and the
people who will be riding in the vehicle.
And if you will tow a trailer, you must add
the tongue load to the GVW because
your vehicle will also be carrying that
weight. The trailer tongue should weigh a maxi-
mum of 10% of the total loaded trailer
weight. After you've loaded your trailer,
weigh the trailer and then the tongue,
separately, to see if the weights are prop-
er. If they aren’t, you may be able to cor-
rect them simply by moving some items
around in the trailer.
WARNING -
Trailer
Never load a trailer with more weight in the rear than in the
front. The front should be loaded
with approximately 60% of the
total trailer load; the rear should
be loaded with approximately
40% of the total trailer load.
Never exceed the maximum weight limits of the trailer or trail-
er towing equipment. Improper
loading can result in damage to
your vehicle and/or personal
injury. Check weights and loading
at a commercial scale or highway
patrol office equipped with
scales.
An improperly loaded trailer can cause loss of vehicle control.
WARNING
- Vehicle weight
The gross axle weight rating
(GAWR) and the gross vehicle
weight rating (GVWR) for your vehi-
cle are on the manufacturer's label
attached to the driver's door.
Exceeding these ratings can cause
an accident or vehicle damage. You
can calculate the weight of your
load by weighing the items (and
people) before putting them in the
vehicle. Be careful not to overload
your vehicle.
OVERLOADING
Page 273 of 344
5
Road warning / 5-2
Emergency starting / 5-2
If the engine overheats / 5-5
If you have a flat tire / 5-6
Towing / 5-15
What to do in an emergency
Page 274 of 344

What to do in an emergency25ROAD WARNING Hazard warning flasher The hazard warning flasher serves as a
warning to other drivers to exercise
extreme caution when approaching,
overtaking, or passing your vehicle.It should be used whenever emergency
repairs are being made or when the vehi-
cle is stopped near the edge of a road-
way.
Depress the flasher switch with the igni-
tion switch in any position. The flasher
switch is located in the center console
switch panel. All turn signal lights will
flash simultaneously.
• The hazard warning flasher operates
whether your vehicle is running or not.
The turn signals do not work when the hazard flasher is on.
Care must be taken when using the hazard warning flasher while the vehi-
cle is being towed.
Jump starting Jump starting can be dangerous if done
incorrectly. Therefore, to avoid harm to
yourself or damage to your vehicle or
battery, follow the jump starting proce-
dures. If in doubt, we strongly recom-
mend that you have a competent techni-
cian or towing service jump start your
vehicle.EMERGENCY STARTING
CAUTION
Use only a 12-volt jumper system.You can damage a 12-volt starting motor, ignition system, and otherelectrical parts beyond repair by use of a 24-volt power supply (eithertwo 12-volt batteries in series or a 24-volt motor generator set).
OVQ036059NOVQ036060N
Type AType B
Page 276 of 344

What to do in an emergency45Jump starting procedure 1. Make sure the booster battery is 12-volt and that its negative terminal is
grounded.
2. If the booster battery is in another vehicle, do not allow the vehicles to
touch.
3. Turn off all unnecessary electrical loads.
4. Connect the jumper cables in the exact sequence shown in the previous illus-
tration. First connect one end of a
jumper cable to the positive terminal of
the discharged battery (1), then con-
nect the other end to the positive ter-
minal on the booster battery (2).
Proceed to connect one end of the
other jumper cable to the negative ter-
minal of the booster battery (3), then
the other end to a solid, stationary,
metallic point (for example, the engine
lifting bracket) away from the battery
(4). Do not connect it to or near any
part that moves when the engine is
cranked. Do not allow the jumper cables to con-
tact anything except the correct bat-
tery terminals or the correct ground.
Do not lean over the battery when
making connections.
5. Start the engine of the vehicle with the booster battery and let it run at 2,000
rpm, then start the engine of the vehi-
cle with the discharged battery.
If the cause of your battery discharging isnot apparent, you should have your vehi-cle checked by an Authorized Kia Dealer.
Push-starting Vehicles equipped with automatic
transaxle cannot be push-started.
Follow the directions in this section for
jump-starting.
CAUTION
Never tow a vehicle to start itbecause the sudden surge forwardwhen the engine starts could cause a collision with the tow vehicle.
CAUTION
- Battery cables
Do not connect the jumper cablefrom the negative terminal of thebooster battery to the negative ter-minal of the discharged battery. This can cause the discharged bat-tery to overheat and crack, releas-ing battery acid.
Page 281 of 344

59
What to do in an emergency
Do not take this vehicle through anautomatic car wash while the com-
pact spare tire is installed.
Do not use tire chains on the com- pact spare tire. Because of the
smaller size, a tire chain will not fit
properly. This could damage the
vehicle and result in loss of the
chain.
The compact spare tire should not be installed on the front axle if the
vehicle must be driven in snow or
on ice.
Do not use the compact spare tire on any other vehicle because this
tire has been designed especially
for your vehicle.
The compact spare tire’s tread life is shorter than a regular tire.
Inspect your compact spare tire
regularly and replace worn com-
pact spare tires with the same size
and design, mounted on the same
wheel.
Changing tires Jacking instructions The jack is provided for emergency
tire changing only.
To prevent the jack from “rattling”
while the vehicle is in motion, lower
the jack to the lowest position, place
the jack in the luggage side trim and
turn the wing bolt (1) clockwise firmly.
Make sure the jack is secured firmly
by trying to move the jack forward
and backward. Follow jacking instructions to reduce
the possibility of personal injury.
WARNING
- Changing
tires
Never attempt vehicle repairs in the traffic lanes of a public
road or highway.
Always move the vehicle com- pletely off the road and onto
the shoulder before trying to
change a tire. The jack should
be used on level firm ground.
If you cannot find a firm, level
place off the road, call a tow-
ing service company for
assistance.
Be sure to use the correct front and rear jacking posi-
tions on the vehicle; never use
the bumpers or any other part
of the vehicle for jack support.
(Continued)
OVQ056007N
Page 286 of 344
What to do in an emergency14
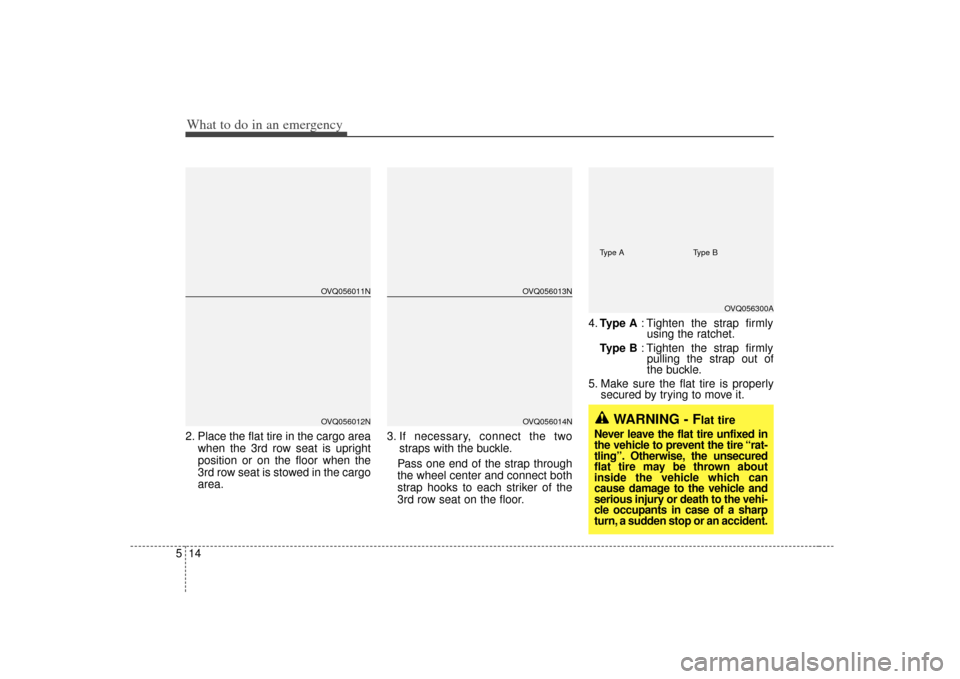
52. Place the flat tire in the cargo area
when the 3rd row seat is upright
position or on the floor when the
3rd row seat is stowed in the cargo
area. 3. If necessary, connect the two
straps with the buckle.
Pass one end of the strap through
the wheel center and connect both
strap hooks to each striker of the
3rd row seat on the floor. 4.
Type A : Tighten the strap firmly
using the ratchet.
Type B : Tighten the strap firmly
pulling the strap out of
the buckle.
5. Make sure the flat tire is properly secured by trying to move it.
OVQ056013NOVQ056014N
OVQ056011NOVQ056012N
OVQ056300A
WARNING - F
lat tire
Never leave the flat tire unfixed in
the vehicle to prevent the tire “rat-
tling”. Otherwise, the unsecured
flat tire may be thrown about
inside the vehicle which can
cause damage to the vehicle and
serious injury or death to the vehi-
cle occupants in case of a sharp
turn, a sudden stop or an accident.Type A Type B