2007 KIA Sedona ECO mode
[x] Cancel search: ECO modePage 206 of 344
3 197
Features of your vehicle
6. BOOKMARK (MARK) ButtonWhen the CD player unit is operating, the
desired track on the disc can be book-
marked by using the MARK button.(MP3
CD only)
Press the MARK button for more than0.8 seconds to bookmark the desired
track.
“M” will be displayed on the LCD and
“MEMORY(1~50)” will display for
approximately five seconds with beep
sound.
To play a bookmarked track, press the
MARK button within 0.8 seconds and
select the bookmarked track to play.
To erase a bookmarked track, press the MARK button for more than 0.8
seconds. The unit will beep once when
the bookmark is erased.✽ ✽ NOTICETracks stored on Mark Memory will be
automatically erased after you eject CDs
that contain those tracks. 7. SCROLL ButtonPress the button, and you can check the
file names with more than 16 characters
on MP3 CD(max 34 characters.). The button doesn’t work on file names
less than 16 characters.
8. EQ ButtonPress the EQ button to select the CLAS-
SIC, POPS, ROCK, JAZZ and OFF
MODE for the desired tone quality. Each
press of the button changes the display
as follows;9. CD EJECT ButtonWhen the button is pressed with a CD
loaded, the CD will eject.
Forcing to eject : To force to eject a CD,
press this button for more than 3 sec-
onds.
(Do this only when a CD is jammed and
you can not eject it in the normal way -
e.g.) in case that you have inserted 2
CDs by mistake)10. CD SCAN Button To playback the first 10 seconds of
each track, press the CD SCAN button
more than 0.8 seconds.
To playback the first 10 seconds of each track in the selected folder, press
the CD SCAN button within 0.8 sec-
onds. (MP3 CD only) Press the CD SCAN button again with-
in 10 sec. when you have reached the
desired track.
11. FILE SEARCH Knob (TUNE Select Knob) You can skip the track (file) by turning
the FILE SEARCH knob clockwise or
counterclockwise.
After selecting the desired track (file),
press the FILE SEARCH knob to play-
back the track (file).
If you do not press the FILE SEARCH
knob within five seconds, the search
will stop.12. DIRECTORY SEARCH (DIR) Button You can move through the folder by
pushing the DIR button to up ( ) and
down( ).
After moving the desired folder, press the FILE SEARCH knob to play back in
the selected folder. If you do not press
the FILE SEARCH knob within 5 sec-
onds, the folder searching function will
be released. It can not be operated in a
single folder.
CLASSIC➟ POPS➟ROCK➟ JAZZ➟OFF
Page 210 of 344
3 201
Features of your vehicle
6. CD SCAN ButtonWhen you press the button, frequency is
changed and the next channel is
received automatically.
To stay on a station, press the CD SCAN
button again.7. EQ Button or AUX ButtonPress the EQ button to select the CLAS-
SIC, POPS, ROCK, JAZZ and OFF
MODE for the desired tone quality. Each
press of the button changes the display
as follows;
If the button is written AUX, it willchange to AUX mode when you press
the button, and the button has no EQ
function.
The AUX button is functional only if RSE unit is on.
You can enjoy the RSE audio through the speakers in AUX mode.
The speaker volume level is adjustable by VOLUME(+,-) key, on RSE unit or
wireless remote control.
Refer to the “RSE” in this section for details RSE operation. RSE : Rear Seat Entertainment
System(A/V).
8. PRESET STATION Select ButtonsSix stations for AM, FM1 and FM2
respectively can be preset in the elec-
tronic memory circuit.HOW TO PRESET STATIONSSix AM and twelve FM stations may be
programmed into the memory of the
radio. Then, by simply pressing the AM/
FM band select button and/or one of the
six station select buttons, you may recall
any of these stations instantly. To pro-
gram the stations, follow these steps:
Press AM/FM selector to set the band
for AM, FM1 and FM2.
Select the desired station to be stored by seek or manual tuning.
Determine the preset station select button you wish to use to access that
station. Press and hold the station select but-
ton for more than 0.8 seconds. A select
button indicator will show in the display
indicating which select button you have
depressed. The frequency display will
flash after it has been stored into the
memory. You should then release the
button, and proceed to program the
next desired station. A total of 18 sta-
tions can be programmed by selecting
one AM and two FM stations per but-
ton.
When completed, any preset station may be recalled by selecting AM, FM1
or FM2 band and the appropriate sta-
tion button.
CLASSIC➟ POPS➟ROCK➟ JAZZ➟OFF
CAUTION
Do not place beverages close to
the audio system. The audio sys-tem mechanism may be damagedif you spill them.
Do not strike or allow anything to impact the audio system, damageto the system mechanisms couldoccur.
Page 212 of 344

3 203
Features of your vehicle
1. TAPE PROGRAM Button This allows you to play the reverse sideof the tape by merely depressing the
program button. An arrow will appear in
the display to show tape direction.
Push the TAPE button while the tape is in the tape deck, to turn on that func-
tion without pushing the Power ON-
OFF control knob.2. TAPE EJECT Button When the button is pressed with acassette loaded, the cassette will eject.
When the button is pressed during FF/REW mode, the cassette will eject.3. AUTO MUSIC SEARCH (AMS) ButtonPress the button to find the starting point
of each song in a prerecorded music
tape. The quiet space between songs
(must have at least 4 sec. gap) can be
identified by the AUTO MUSIC SEARCH
button.
Pressing the button will play the
beginning of the next music segment.
Pressing the button will start replay at the beginning of the music just lis-
tened to.
To stop FF or REW action, press the button again.
4. FF/REW Button Forward tape winding starts when the
FF button is pressed during PLAY or
REW mode.
Tape PLAY starts when the FF button is pressed again during FF mode.
Tape rewinding starts when the REW button is pressed during PLAY or FF
mode.
Tape PLAY starts when the REW but- ton pressed again during REW mode.5. REPEAT (RPT) Button To repeat the track you are currentlylistening to, press the RPT button. To
cancel, press again.
If you do not release RPT operation when the track ends, it will automati-
cally be replayed.
This process will be continued until you
push the button again or turn the
power OFF then ON.6. DOLBY ButtonIf you get background noise during tape
PLAY, you can reduce this considerably
by merely pressing the DOLBY button. If
you want to cancel the DOLBY feature,
press the button again.
7. EQ Button or AUX ButtonPress the EQ button to select the CLAS-
SIC, POPS, ROCK, JAZZ and OFF
MODE for the desired tone quality. Each
press of the button changes the display
as follows;
If the button is labeled AUX, it will
change to AUX mode when you press
the button, and the button has no EQ
function.
The AUX button is functional only if RSE unit is on.
You can enjoy the RSE audio through the speakers in AUX mode.
The speaker volume level is adjustable by VOLUME(+,-) key, on RSE unit or
wireless remote control.
* Refer to the “RSE” in this section for details RSE operation.
* RSE : Rear Seat Entertainment System(A/V).CLASSIC➟ POPS➟ROCK➟ JAZZ➟OFF
Page 216 of 344
3 207
Features of your vehicle
✽
✽NOTICEPlayback of MP3 and WMA file formats
are supported. Load to play time for
these formats may be longer due to the
compressed nature of these discs.3. CD EJECT Button When the button is pressed with a
CD loaded, the CD will eject.
To eject all of the discs, press this but- ton for one second or more.4. TRACK UP/DOWN Button The desired track on the disc currentlybeing played can be selected using the
track number.
Press once to skip forward to the beginning of the next track.
Press once to skip back to the beginning of the track.
Press before playback begins to quickly move backward through a CD.
5. SCROLL ButtonPress the button, and you can check the file
names with more than 16 characters on
MP3 CD(max 34 characters).
The button doesn’t work on file names
less than 16 characters.6. FF/REW ButtonIf you want to fast forward or reverse
through the compact disc track, push and
hold the FF or REW button.
When you release the button, the compact
disc player will resume playing.7. EQ Button or AUX ButtonPress the EQ button to select the CLAS-
SIC, POPS, ROCK, JAZZ and OFF
MODE for the desired tone quality. Each
press of the button changes the display
as follows; If the button is labeled AUX, it will
change to AUX mode when you press
the button, and the button has no EQ
function.
The AUX button is functional only if RSE unit is on.
You can enjoy the RSE audio through the speakers in AUX mode.
The speaker volume level is adjustable by VOLUME(+,-) key, on RSE unit or wire-
less remote control.
* Refer to the “RSE” in this section for details RSE operation.
* RSE : Rear Seat Entertainment System(A/V).
8. CD SCAN Button To playback the first 10 seconds ofeach track, press the CD SCAN button
more than 0.8 seconds.
To playback the first 10 seconds of each track in the selected folder, press
the CD SCAN button within 0.8 sec-
onds. (MP3 CD only)
Press the CD SCAN button again with- in 10 sec. when you have reached the
desired track.
CLASSIC➟ POPS➟ROCK➟ JAZZ➟OFF
Page 217 of 344
Features of your vehicle208
39. BOOKMARK (MARK) ButtonWhen the CD player unit is operating, the
desired track on the disc can be book-
marked by using the MARK button.
Press the MARK button for more than
0.8 seconds to bookmark the desired
track.
“M” will be displayed on the LCD and
“MEMORY(1~50)” will display for
approximately five seconds with beep
sound.
To play the bookmarked tracks, press
the MARK button within 0.8 seconds
and select the bookmarked track to
play.
To erase a bookmarked track, press the MARK button for more than 0.8 sec-
onds. The unit will beep once when the
bookmark is erased.
If you want to delete all tracks stored on
Mark Memory, press FILE SEARCH Knob
in the Mark Play mode for more than 0.8
seconds. You will hear a beep sound and all
tracks will be deleted from Mark Memory
with “MARK DELETE ALL” displayed on the
LCD.
✽ ✽ NOTICETracks stored on Mark Memory will be
automatically erased after you eject CDs
that contain those tracks. 10. REPEAT (RPT) Button To repeat the track you are currently
listening to, press the RPT button.
To cancel, press it again.
To repeat the music within selected CD, press the RPT button for more
than 0.8 seconds.
To cancel, press it again for more than
0.8 seconds.
To repeat the music within currently played folder, press the RPT button for
more than 0.8 seconds.
To cancel, press it again(MP3 CD
only).
If you do not release RPT operation after all the tracks are played back, the
unit will play back again from the first
track.
This process will be continued until you
push the button again or turn the power
OFF then ON.
11. RANDOM (RDM) ButtonWith random, you can listen to the tracks
in random, rather than sequential order
on one disc.
To use random, do the following:
Press the RDM button to listen torecorded tracks in random sequence.
Press RDM again to cancel or turn the
power OFF then ON. The unit defaults
to playing tracks in sequential order.
To listen to the music within the select- ed folder in random order, press the
RDM button within a second. To can-
cel, press it again or turn the power
OFF then ON. (MP3 CD only)12. DISC UP/DOWN Button By pressing "DISC "/"DISC "while CD changer is playing you can
move backward or forward to the next
disc and playback automatically
begins.
If any of the slots do not contain a CD, your car audio will skip the empty slot
and play only those that contain a CD.
When switching CD’s, the LCD dis-
plays the selected CD’s number.
Page 219 of 344
Features of your vehicle210
3WelcomeThe Rear Seat Entertainment (RSE)
System is a compact, built-in, easy-to-use
entertainment system designed to provide
family fun while you are on the road. Enjoy
great quality sound from the 11 speakers,
or have a private, quiet viewing with the
wireless headphones.
The display unit is mounted to the ceiling
in the rear passenger area of the vehicle,
allowing rear-seat passengers to play
DVD movies, video CDs or music CDs.
Users may also plug in a game platform or
VHS player. Headphones, game car-
tridges and other accessories can be kept
neatly out of the way in the 3rd-row arm-
rest compartment.System OverviewThe RSE System includes a mounted
color monitor with a built-in audio/video
control panel and a DVD player. It also
includes a remote control and two (2)
sets of battery-operated wireless head-
phones (batteries are included).
Connections / SetupThe RSE system is designed to make
your time on the road more enjoyable.
Please follow these instructions carefully
to get the most out of your RSE.
✽ ✽
NOTICERSE operation is prevented during the
first 2 seconds after the ignition switch is
turned to ignition on or accessory mode.The RSE system is already set up and
ready for use. The system is always
“awake” when the vehicle's ignition is
turned on or when the vehicle is in
“accessory power mode.”
REAR SEAT ENTERTAINMENT SYSTEM (IF EQUIPPED)
CAUTION
Refrain from using food or drinks
near the RSE, the wireless head-phones or the remote control.
Direct sunlight may interfere with the headphone's operation andperformance.
Normal RSE operation cannot be guaranteed with unofficial dupli-cated discs.
In order to prevent inadvertent battery discharge, the RSE willremain in standby mode when ignition switch is turn to ignitionON or accessory mode.
Use of rear seat entertainment system without the engine run-ning will reduce battery power.
CAUTION
Disclaimer: The RSE system is pro-grammed to the regional display formats for your region (NTSC orPAL). Please note that your RSE willnot read DVDs from a differentregion.
Page 222 of 344
3 213
Features of your vehicle
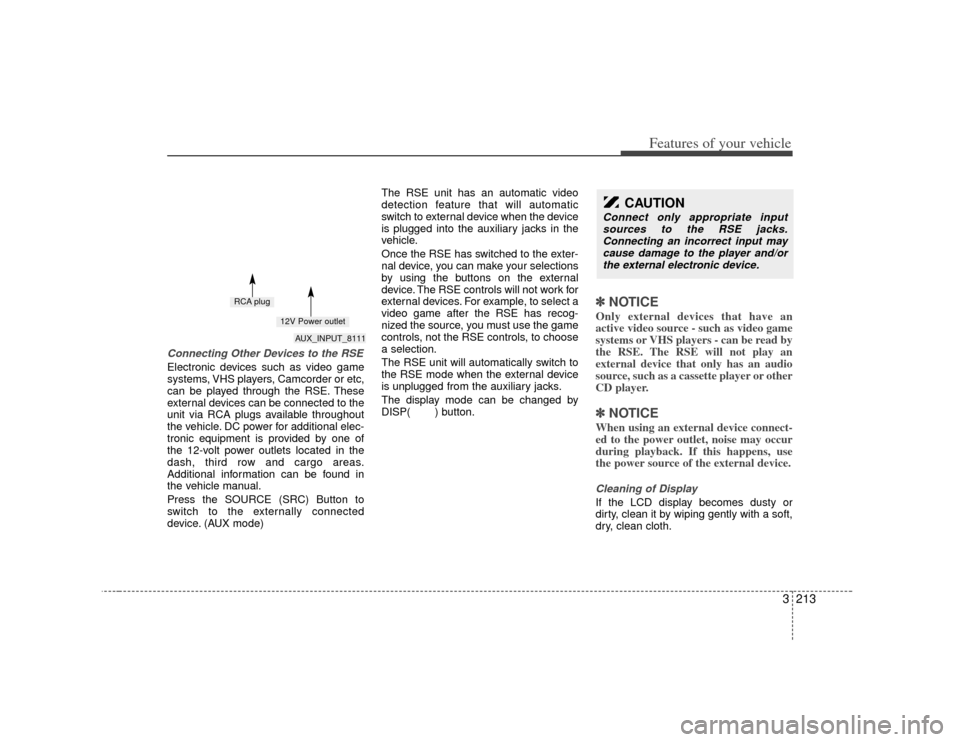
Connecting Other Devices to the RSEElectronic devices such as video game
systems, VHS players, Camcorder or etc,
can be played through the RSE. These
external devices can be connected to the
unit via RCA plugs available throughout
the vehicle. DC power for additional elec-
tronic equipment is provided by one of
the 12-volt power outlets located in the
dash, third row and cargo areas.
Additional information can be found in
the vehicle manual.
Press the SOURCE (SRC) Button to
switch to the externally connected
device. (AUX mode)The RSE unit has an automatic video
detection feature that will automatic
switch to external device when the device
is plugged into the auxiliary jacks in the
vehicle.
Once the RSE has switched to the exter-
nal device, you can make your selections
by using the buttons on the external
device. The RSE controls will not work for
external devices. For example, to select a
video game after the RSE has recog-
nized the source, you must use the game
controls, not the RSE controls, to choose
a selection.
The RSE unit will automatically switch to
the RSE mode when the external device
is unplugged from the auxiliary jacks.
The display mode can be changed by
DISP( ) button.
✽ ✽
NOTICEOnly external devices that have an
active video source - such as video game
systems or VHS players - can be read by
the RSE. The RSE will not play an
external device that only has an audio
source, such as a cassette player or other
CD player.✽ ✽NOTICEWhen using an external device connect-
ed to the power outlet, noise may occur
during playback. If this happens, use
the power source of the external device.Cleaning of DisplayIf the LCD display becomes dusty or
dirty, clean it by wiping gently with a soft,
dry, clean cloth.
CAUTION
Connect only appropriate input
sources to the RSE jacks.Connecting an incorrect input may cause damage to the player and/orthe external electronic device.
AUX_INPUT_8111
RCA plug
12V Power outlet
Page 223 of 344

Features of your vehicle214
3Using the DVD playerDisc compatibilityYour RSE player accepts and plays all
DVDs in 4:3 (normal) and 16:9 (wide
screen) video formats. With DVDs that
offer multiple formats, the default format
is 16:9 and will stay that way unless the
user changes the format. (See “Display”
to learn how to adjust the format.)✽ ✽
NOTICE• The DVD player has the capability to
play DVD-Video, DVD-R, DVD-RW,
CD-DA, CD-R, CD-RW and Video-
CD.
• The DVD player has the capability to play CD-DA, DVD, VCD, PCM,
Dolby Digital and DTS formats.
• Please refer to the appendix for the error messages.Loading a DiscInsert the disc part way into the load slot.
The player will automatically grip the disc
and pull it in the rest of the way. The play-
er will display “reading” on the screen
and show the “Kia Motors” logo before
beginning the DVD. The player is only capable of reading the
bottom side of a disc. When inserting a
single-sided disc, the label side should
be up. When inserting a two-sided disc,
the desired play side should be down.
✽ ✽
NOTICE• Because there is no universal standard
for DVD programming, your disc may
behave differently than below. Some
DVDs may present warning messages
about unauthorized duplication, some
will go directly to a menu and others
may start playing the movie immedi-
ately.
• When the vehicle's ignition is active, the loading of any playable disc will
cause the player to initialize and auto-
matically play the disc. If a disc was
playing prior to the ignition being
turned off, it will not automatically
replay once the ignition is turned on
again. Instead, it will go into standby
mode. Press the SRC or
PLAY/PAUSE( ) button to “wake
up” the unit and resume disc play.
Disc ProtectionThe player has an Auto-Reload Disc
Protection feature to protect discs from
accidental damage. If an ejected disc is
not removed within 25 seconds after
being ejected, it will be pulled back into
the player. The disc will not begin playing.
Disc can be played by the SRC or
PLAY/PAUSE( ) buttons.DVD ControlsYou can control your DVD by using the
buttons on the unit's control panel or by
using the remote control. Instructions for
the controls listed below are the same
whether you are using the control panel
or the remote control. However, there are
functions that are only available from the
remote control. These buttons and their
functionality are discussed in the
“REMOTE CONTROL” section begin-
ning.