Page 217 of 456
Operation Instructions - CD Mode
NOTE:The ignition switch must be in the ON or ACC
position to operate the radio.
Inserting The Compact Disc (Single CD Player)
Gently insert one CD into the CD player with the CD
label facing up. The CD will automatically be pulled into
the CD Player and the CD icon will illuminate on the
radio display.
If the volume control is ON, the unit will switch to CD
mode and begin to play. The display will show the track
number and play time in minutes and seconds. Play will
begin at the start of track one.
NOTE:
•On some vehicles, you may insert or eject a disc with
the radio or ignition switch OFF.
•If you insert a disc with the ignition ON and the radio
OFF, the CD will automatically be pulled into the CD
Player.
•This radio does not play discs with MP3 tracks.
SEEK Button (CD Mode)
Press the right side of the SEEK button for the next track
on the CD. Press the left side of the button to return to the
beginning of the current track, or return to the beginning
of the previous track if the CD is within the first 10
seconds of the current selection.
MUTE Button (CD Mode)
Press the MUTE button to cancel the sound from the
speakers.�MUTE�will display. Press the MUTE button a
second time and the sound from the speakers will return.
Rotating the volume control or turning OFF the ignition
will also return the sound from the speakers.
UNDERSTANDING YOUR INSTRUMENT PANEL 217
4
Page 219 of 456
Operation Instructions - Auxiliary Mode
The auxiliary (AUX) jack is an audio input jack, which
allows the user to plug in a portable device such as an
MP3 player, cassette player, or microphone and utilize
the vehicle’s audio system to amplify the source and play
through the vehicle speakers.
The auxiliary mode becomes active when an electrical
device is plugged into the AUX jack using a standard 3.5
mm stereo audio cable and the user presses and releases
the MODE button until AUX appears on the display.
NOTE:The radio will return to the last stored mode if
the ignition switch is turned from the OFF/LOCK posi-
tion to the ACC position, the radio is turned on, and the
radio was previously in the AUX mode.
SEEK Button (Auxiliary Mode)
No function.
MUTE Button (Auxiliary Mode)
Press the MUTE button to cancel the sound from the
speakers.�MUTE�will display. Press the MUTE button a
second time and the sound from the speakers will return.
Rotating the volume control or turning OFF the ignition
will also return the sound from the speakers.
SCAN Button (Auxiliary Mode)
No function.
EJECT Button (Auxiliary Mode)
No function.
PSCAN Button (Auxiliary Mode)
No function.
UNDERSTANDING YOUR INSTRUMENT PANEL 219
4
Page 227 of 456
System Activation
To activate your Sirius Satellite Radio service, call the
toll-free number 888-539-7474, or visit the Sirius web site
at www.sirius.com. Please have the following informa-
tion available when activating your system:
1. The Electronic Serial Number/Sirius Identification
Number (ESN/SID).
2. Credit card information.
3. Your Vehicle Identification Number.
Electronic Serial Number/Sirius Identification
Number (ESN/SID)
The Electronic Serial Number/Sirius Identification Num-
ber is needed to activate your Sirius Satellite Radio
system. To access the ESN/SID, refer to the following
steps:
ESN/SID Access with REC Radios
Refer to the “Navigation User’s Manual” for details on
satellite radio operation.
ESN/SID Access with REF Radios
With the ignition switch in the ACCESSORY position and
the radio OFF, press the Eject or CD Eject (depending on
the radio type) and Time buttons simultaneously for 3
seconds. The first four digits of the twelve-digit ESN/SID
number will be displayed. Press the SEEK UP button to
display the next four digits. Continue to press the SEEK
UP button until all twelve ESN/SID digits have been
displayed. The SEEK DOWN will page down until the
first four digits are displayed. The radio will exit the
ESN/SID mode when any other button is pushed, the
ignition is turned OFF, or 5 minutes has passed since any
button was pushed.
UNDERSTANDING YOUR INSTRUMENT PANEL 227
4
Page 228 of 456
ESN/SID Access with RAQ Radios
With the ignition switch in the ACCESSORY position and
the radio OFF, press the CD Eject and TIME buttons
simultaneously for 3 seconds. All twelve ESN/SID num-
bers will be displayed. The radio will exit the ESN/SID
mode when any other button is pushed, the ignition is
turned OFF, or 5 minutes has passed since any button
was pushed.
Selecting Satellite Mode in REF Radios
Press the MODE button repeatedly until�SA�appears in
the display. A CD may remain in the radio while in the
Satellite radio mode.
Selecting Satellite Mode in RAQ Radios
Press the MODE button repeatedly until the word
�SIRIUS�appears in the display. These radios will also
display the following:
•After 3 seconds, the current channel name and channel
number will be displayed for 5 seconds.
•The current program type and channel number will
then be displayed for 5 seconds.
•The current channel number will then be displayed
until an action occurs.
A CD may remain in the radio while in the Satellite radio
mode.
Selecting a Channel
Press and release the SEEK or TUNE buttons to search for
the next channel. Press the top of the button to search up
and the bottom of the button to search down. Holding the
TUNE button causes the radio to bypass channels until
the button is released.
Press and release the SCAN button (if equipped) to
automatically change channels every 7 seconds. The
radio will pause on each channel for 7 seconds before
moving on to the next channel. The word�SCAN�will
appear in the display between each channel change. Press
the SCAN button a second time to stop the search.
228 UNDERSTANDING YOUR INSTRUMENT PANEL
Page 233 of 456
CLIMATE CONTROLS
Manual Air Conditioning and Heating System — If
Equipped
The controls for the heating/air conditioning and venti-
lation system in this vehicle consist of a series of rotary
knobs. These comfort controls can be set to obtain desired
interior conditions.The instrument panel features four dual-vane airflow
registers. Two registers are located on the outer ends of
the instrument panel and two are located in the center of
the instrument panel. These registers can be closed to
partially block airflow, and they can be adjusted to direct
airflow where the occupant desires.
Blower Control
The rotary knob on the left controls the
blower and can be set in one of four
speeds and OFF.The blower fan mo-
tor will remain on until the system is
turned to the OFF position or the
ignition is turned OFF.
Manual Air Conditioning and Heating Controls
UNDERSTANDING YOUR INSTRUMENT PANEL 233
4
Page 251 of 456
STARTING PROCEDURES
Before starting your vehicle, adjust your seat, adjust both
inside and outside mirrors, and fasten your seat belts.
CAUTION!
Long periods of engine idling, especially at high
engine speeds can cause excessive exhaust tempera-
tures which can damage your vehicle. Do not leave
your vehicle unattended with the engine running.
WARNING!
Do not leave children or animals inside parked
vehicles in hot weather. Interior heat build up may
cause serious injury or death.
Start the engine with the gear selector in the N (Neutral)
or P (Park) position. Apply the brakes before shifting to
any driving gear.
Normal Starting
Do notpress the accelerator. Turn the ignition key briefly
to START position, and release it. The starter motor will
continue to run, but will automatically disengage itself
when the engine is running.
STARTING AND OPERATING 251
5
Page 252 of 456
NOTE:The starter motor may run up to 30 seconds in
very cold conditions until the engine is started. The
starter can be disengaged by turning the ignition key to
the OFF position, if required.Extreme Cold Weather (below –20°F (–29°C)
To insure reliable starting at these temperatures, use of an
externally powered electric engine block heater (available
from your authorized dealer) is recommended.
If Engine Fails to Start
If the engine fails to start after you have followed the
“Normal Starting” or “Extreme Cold Weather” proce-
dures, it may be flooded. Push the accelerator pedal all
the way to the floor and hold it there while cranking the
engine. This should clear any excess fuel in case the
engine is flooded.
CAUTION!
To prevent damage to the starter, do not crank the
engine for more than 15 seconds at a time. Wait 10 to
15 seconds before trying again.
Ignition Key Positions
252 STARTING AND OPERATING
Page 256 of 456
WARNING!
It is dangerous to shift the selector lever out of P
(Park) or N (Neutral) if the engine speed is higher
than idle speed. If your foot is not firmly on the
brake pedal, the vehicle could accelerate quickly
forward or in reverse. You could lose control of the
vehicle and hit someone or something. Only shift
into gear when the engine is idling normally and
when your foot is firmly on the brake pedal.
Brake/Transmission Interlock System
This system prevents you from moving the gear shift out
of P (Park) and into any gear unless the brake pedal is
pressed. This system is active only while the ignition
switch is in the ON position. Always depress thebrake
pedal first,before moving the gear selector out of P
(Park).
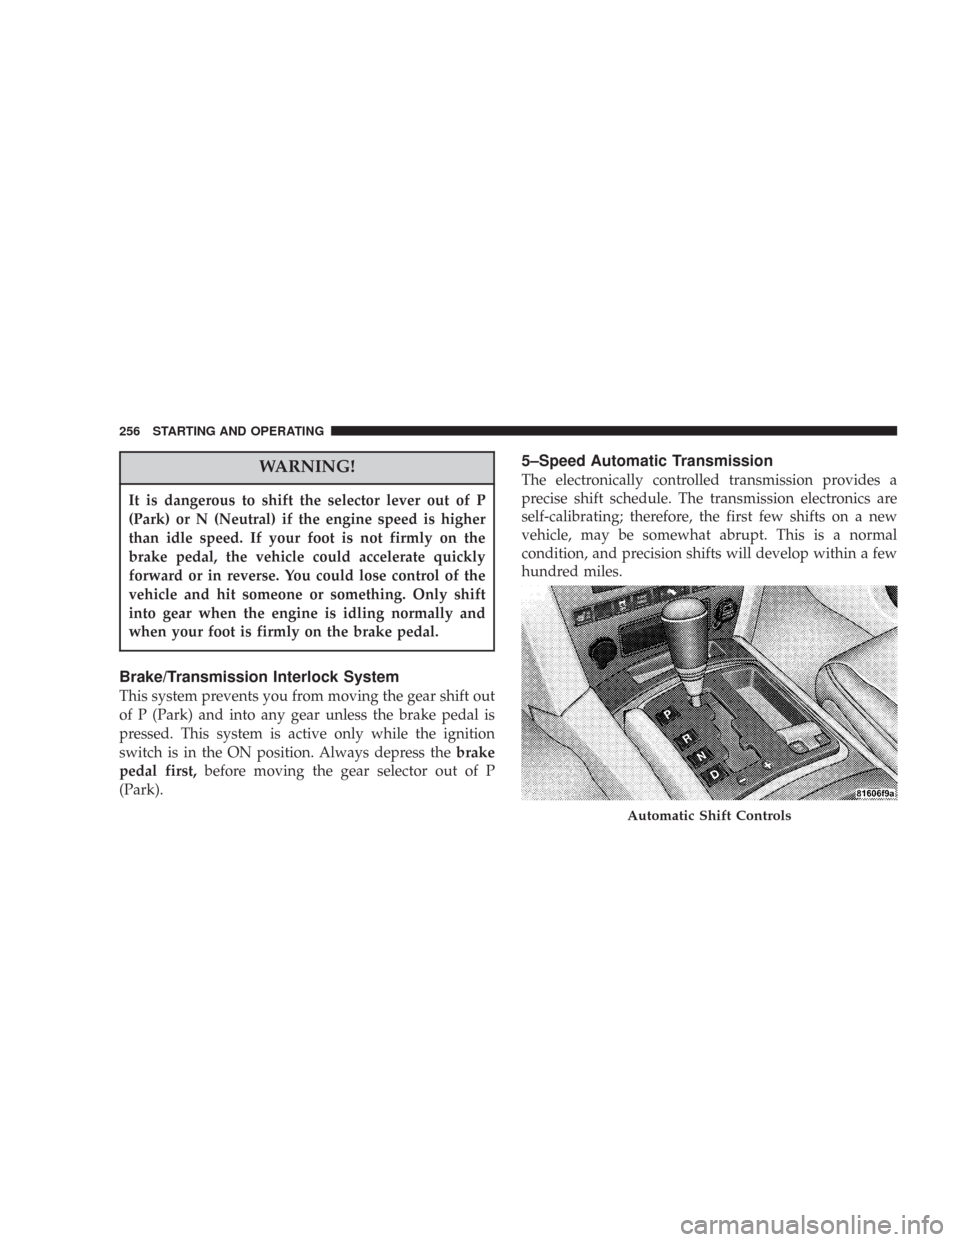
5–Speed Automatic Transmission
The electronically controlled transmission provides a
precise shift schedule. The transmission electronics are
self-calibrating; therefore, the first few shifts on a new
vehicle, may be somewhat abrupt. This is a normal
condition, and precision shifts will develop within a few
hundred miles.
Automatic Shift Controls
256 STARTING AND OPERATING