2007 HYUNDAI TUCSON lights
[x] Cancel search: lightsPage 256 of 306
6
DO-IT-YOURSELF MAINTENANCE
21
CHECKING AND REPLACING
FUSES
!
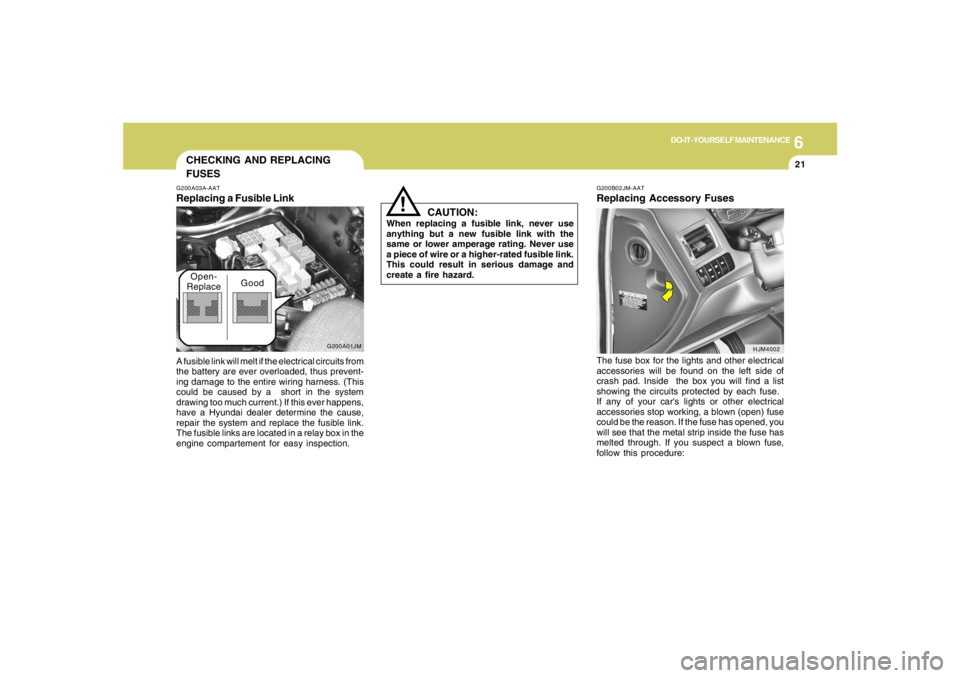
G200B02JM-AATReplacing Accessory Fuses
CAUTION:
When replacing a fusible link, never use
anything but a new fusible link with the
same or lower amperage rating. Never use
a piece of wire or a higher-rated fusible link.
This could result in serious damage and
create a fire hazard.
The fuse box for the lights and other electrical
accessories will be found on the left side of
crash pad. Inside the box you will find a list
showing the circuits protected by each fuse.
If any of your car's lights or other electrical
accessories stop working, a blown (open) fuse
could be the reason. If the fuse has opened, you
will see that the metal strip inside the fuse has
melted through. If you suspect a blown fuse,
follow this procedure:
G200A03A-AATReplacing a Fusible LinkA fusible link will melt if the electrical circuits from
the battery are ever overloaded, thus prevent-
ing damage to the entire wiring harness. (This
could be caused by a short in the system
drawing too much current.) If this ever happens,
have a Hyundai dealer determine the cause,
repair the system and replace the fusible link.
The fusible links are located in a relay box in the
engine compartement for easy inspection.
HJM4002
G200A01JM
Open-
ReplaceGood
Page 260 of 306
6
DO-IT-YOURSELF MAINTENANCE
25
HEADLIGHT AIMING ADJUSTMENT
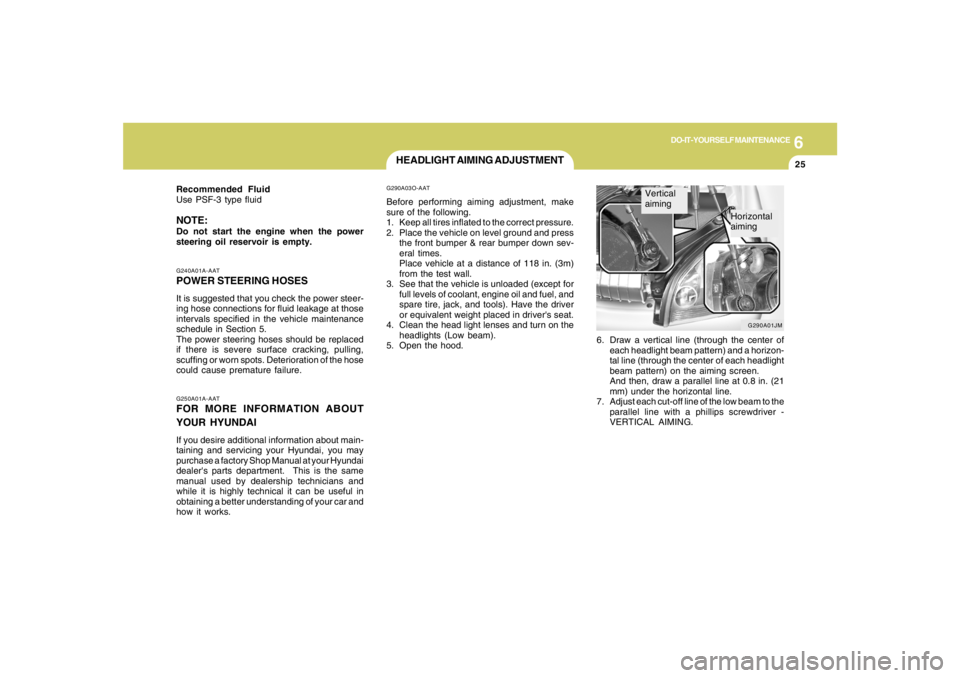
6. Draw a vertical line (through the center of
each headlight beam pattern) and a horizon-
tal line (through the center of each headlight
beam pattern) on the aiming screen.
And then, draw a parallel line at 0.8 in. (21
mm) under the horizontal line.
7. Adjust each cut-off line of the low beam to the
parallel line with a phillips screwdriver -
VERTICAL AIMING.
G290A03O-AATBefore performing aiming adjustment, make
sure of the following.
1. Keep all tires inflated to the correct pressure.
2. Place the vehicle on level ground and press
the front bumper & rear bumper down sev-
eral times.
Place vehicle at a distance of 118 in. (3m)
from the test wall.
3. See that the vehicle is unloaded (except for
full levels of coolant, engine oil and fuel, and
spare tire, jack, and tools). Have the driver
or equivalent weight placed in driver's seat.
4. Clean the head light lenses and turn on the
headlights (Low beam).
5. Open the hood.
G250A01A-AATFOR MORE INFORMATION ABOUT
YOUR HYUNDAIIf you desire additional information about main-
taining and servicing your Hyundai, you may
purchase a factory Shop Manual at your Hyundai
dealer's parts department. This is the same
manual used by dealership technicians and
while it is highly technical it can be useful in
obtaining a better understanding of your car and
how it works.G240A01A-AATPOWER STEERING HOSESIt is suggested that you check the power steer-
ing hose connections for fluid leakage at those
intervals specified in the vehicle maintenance
schedule in Section 5.
The power steering hoses should be replaced
if there is severe surface cracking, pulling,
scuffing or worn spots. Deterioration of the hose
could cause premature failure. Recommended Fluid
Use PSF-3 type fluidNOTE:Do not start the engine when the power
steering oil reservoir is empty.
G290A01JM
Vertical
aiming
Horizontal
aiming
Page 261 of 306
6
DO-IT-YOURSELF MAINTENANCE
26
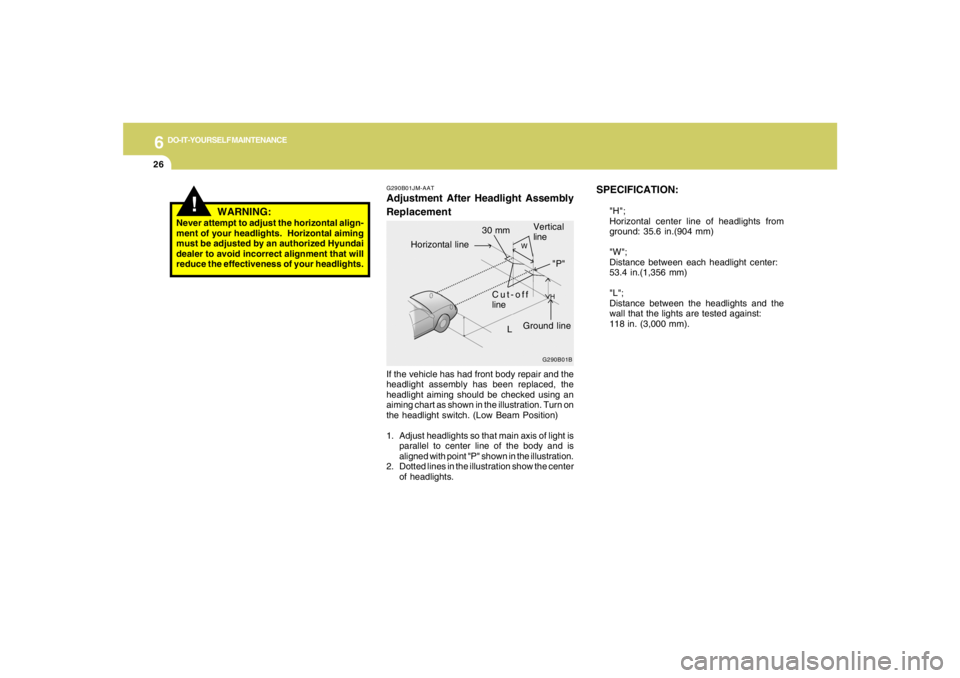
SPECIFICATION:
"H";
Horizontal center line of headlights from
ground: 35.6 in.(904 mm)
"W";
Distance between each headlight center:
53.4 in.(1,356 mm)
"L";
Distance between the headlights and the
wall that the lights are tested against:
118 in. (3,000 mm).
G290B01JM-AATAdjustment After Headlight Assembly
ReplacementIf the vehicle has had front body repair and the
headlight assembly has been replaced, the
headlight aiming should be checked using an
aiming chart as shown in the illustration. Turn on
the headlight switch. (Low Beam Position)
1. Adjust headlights so that main axis of light is
parallel to center line of the body and is
aligned with point "P" shown in the illustration.
2. Dotted lines in the illustration show the center
of headlights.
G290B01B
L
W
H
Cut-off
line
Ground line
"P" Horizontal line
Vertical
line
30 mm
!
WARNING:
Never attempt to adjust the horizontal align-
ment of your headlights. Horizontal aiming
must be adjusted by an authorized Hyundai
dealer to avoid incorrect alignment that will
reduce the effectiveness of your headlights.
Page 302 of 306
10
INDEX
4
H
Hazard Warning System ..................................................................1-62
Heating and Cooling Control .............................................................1-88
Heating and Ventilation
Air flow control..............................................................................1-90
Air intake control switch ...............................................................1-89
Bi-level heating.............................................................................1-94
Defrosting / Defogging .................................................................1-94
Fan speed control (Blower control) .............................................1-89
Temperature control....................................................................1-93
High-Mounted Rear Stop Light .........................................................1-80
Hood Release....................................................................................1-82
Horn.................................................................................................1-85
How to Use Luggage Room.............................................................1-77
I
Ignition Switch ...................................................................................... 2-5
Instrument Cluster and Indicator Lights...........................................1-46
Instrument Panel Light Control (Rheostat).......................................1-64
Interior Light.......................................................................................1-69
J
Jump Starting...................................................................................... 3-3
K
Keys................................................................................................... 1-3
If you lose your keys ...................................................................3-19
Positions......................................................................................... 2-5L
Light Bulbs Replacement..................................................................6-27
Luggage Compartment Light ............................................................1-77
Luggage Net ......................................................................................1-79
M
Maintenance Intervals
Explanation of scheduled maintenance items ............................... 5-7
Maintenance under severe usage conditions............................... 5-6
Scheduled maintenance................................................................ 5-4
Service requirements.................................................................... 5-2
Mirrors
Automatic Dimming Rear View Mirror With Compass ................1-73
Day-night inside rearview mirror .................................................1-73
Outside rearview mirror ...............................................................1-71
Outside rearview mirror Heater ..................................................
1-72
O
Odometer / Trip Odometer ...............................................................1-54
Occupant Classification System ......................................................1-38
P
Parking Brake....................................................................................1-75
Power Outlet......................................................................................1-65
Power Steering Fluid Level ...............................................................6-24
Page 304 of 306
10
INDEX
6
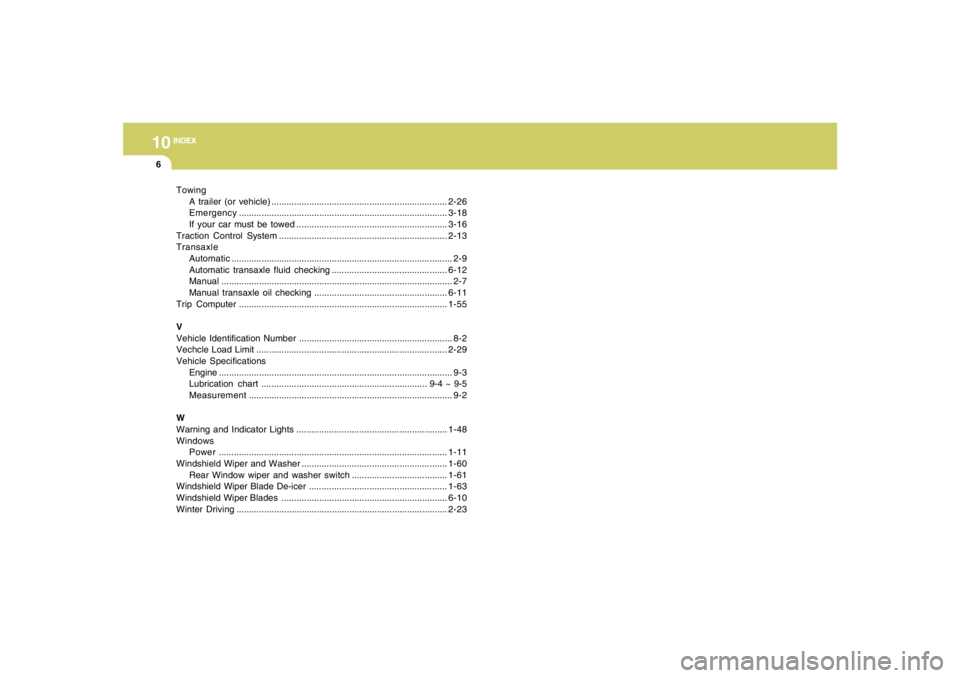
Towing
A trailer (or vehicle)......................................................................2-26
Emergency...................................................................................3-18
If your car must be towed ............................................................3-16
Traction Control System ...................................................................2-13
Transaxle
Automatic........................................................................................ 2-9
Automatic transaxle fluid checking ..............................................6-12
Manual............................................................................................ 2-7
Manual transaxle oil checking.....................................................6-11
Trip Computer...................................................................................1-55
V
Vehicle Identification Number............................................................. 8-2
Vechcle Load Limit ............................................................................2-29
Vehicle Specifications
Engine ............................................................................................. 9-3
Lubrication chart .................................................................. 9-4 ~ 9-5
Measurement................................................................................. 9-2
W
Warning and Indicator Lights ............................................................1-48
Windows
Power...........................................................................................1-11
Windshield Wiper and Washer ..........................................................1-60
Rear Window wiper and washer switch......................................1-61
Windshield Wiper Blade De-icer .......................................................1-63
Windshield Wiper Blades ..................................................................6-10
Winter Driving....................................................................................2-23