2007 HYUNDAI TUCSON fuel
[x] Cancel search: fuelPage 65 of 306
1
FEATURES OF YOUR HYUNDAI
53
!
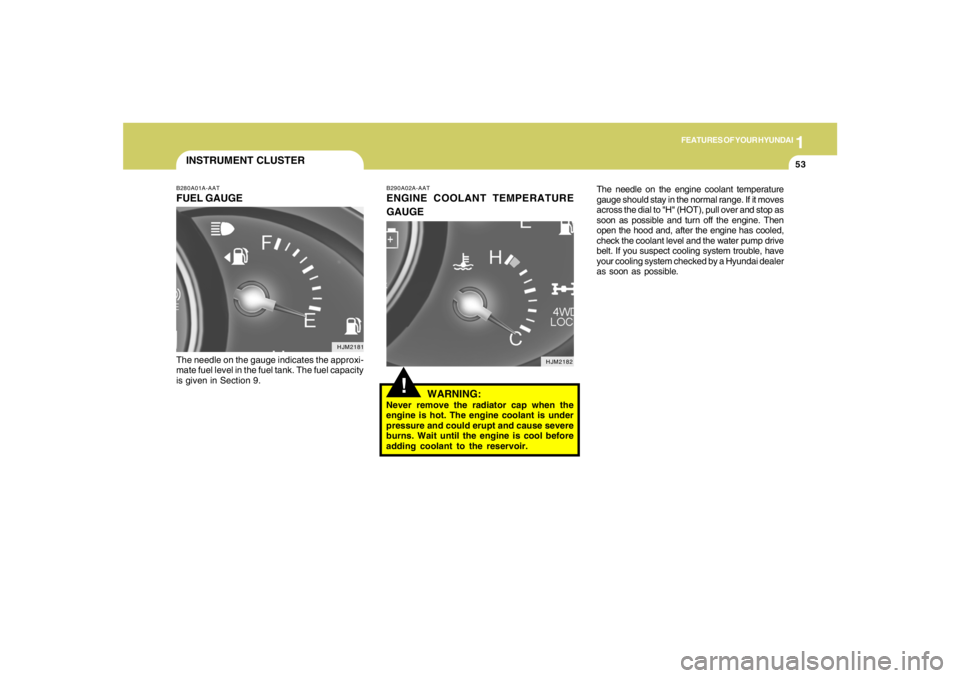
B290A02A-AATENGINE COOLANT TEMPERATURE
GAUGE
WARNING:Never remove the radiator cap when the
engine is hot. The engine coolant is under
pressure and could erupt and cause severe
burns. Wait until the engine is cool before
adding coolant to the reservoir.
B280A01A-AATFUEL GAUGEThe needle on the gauge indicates the approxi-
mate fuel level in the fuel tank. The fuel capacity
is given in Section 9.INSTRUMENT CLUSTER
HJM2182 HJM2181
The needle on the engine coolant temperature
gauge should stay in the normal range. If it moves
across the dial to "H" (HOT), pull over and stop as
soon as possible and turn off the engine. Then
open the hood and, after the engine has cooled,
check the coolant level and the water pump drive
belt. If you suspect cooling system trouble, have
your cooling system checked by a Hyundai dealer
as soon as possible.
Page 67 of 306
1
FEATURES OF YOUR HYUNDAI
55
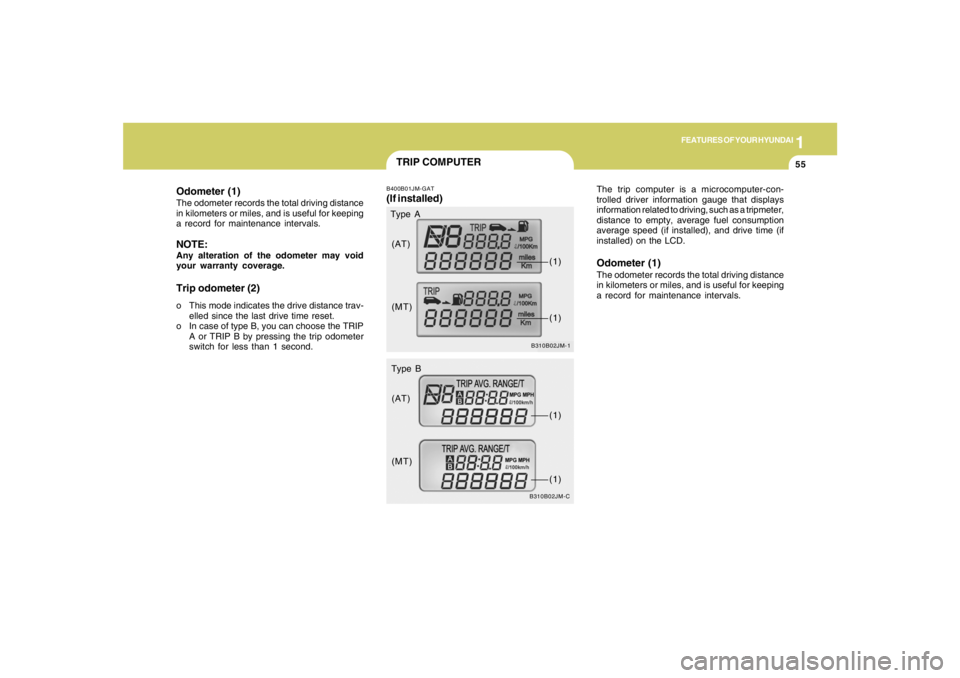
Odometer (1)The odometer records the total driving distance
in kilometers or miles, and is useful for keeping
a record for maintenance intervals.NOTE:Any alteration of the odometer may void
your warranty coverage.Trip odometer (2)o This mode indicates the drive distance trav-
elled since the last drive time reset.
o In case of type B, you can choose the TRIP
A or TRIP B by pressing the trip odometer
switch for less than 1 second.
B310B02JM-CB310B02JM-1
Type B Type A
(AT)
(MT)
(AT)
(MT)(1)
(1)(1)(1)
TRIP COMPUTERB400B01JM-GAT(If installed)
The trip computer is a microcomputer-con-
trolled driver information gauge that displays
information related to driving, such as a tripmeter,
distance to empty, average fuel consumption
average speed (if installed), and drive time (if
installed) on the LCD.Odometer (1)The odometer records the total driving distance
in kilometers or miles, and is useful for keeping
a record for maintenance intervals.
Page 68 of 306
1FEATURES OF YOUR HYUNDAI56
Trip Computer Switch
HJM2185
TRIPMETER
DISTANCE TO EMPTY
AVERAGE FUEL CONSUMPTION
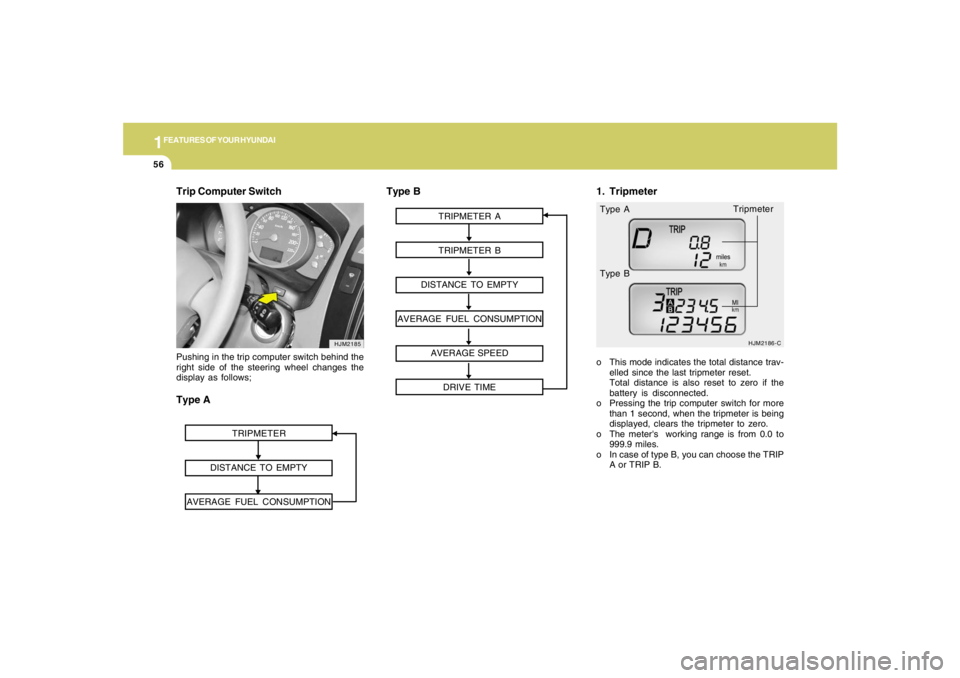
Pushing in the trip computer switch behind the
right side of the steering wheel changes the
display as follows;Type A
TRIPMETER A
TRIPMETER B
DISTANCE TO EMPTY
AVERAGE FUEL CONSUMPTION
AVERAGE SPEED
DRIVE TIME
HJM2186-C
o This mode indicates the total distance trav-
elled since the last tripmeter reset.
Total distance is also reset to zero if the
battery is disconnected.
o Pressing the trip computer switch for more
than 1 second, when the tripmeter is being
displayed, clears the tripmeter to zero.
o The meter's working range is from 0.0 to
999.9 miles.
o In case of type B, you can choose the TRIP
A or TRIP B. Type A
Type B
Type B
1. Tripmeter
Tripmeter
Page 69 of 306
1
FEATURES OF YOUR HYUNDAI
57
o The distance to empty can vary accord-
ing to the driving conditions, driving
pattern or vehicle speed.
HJM2187-B
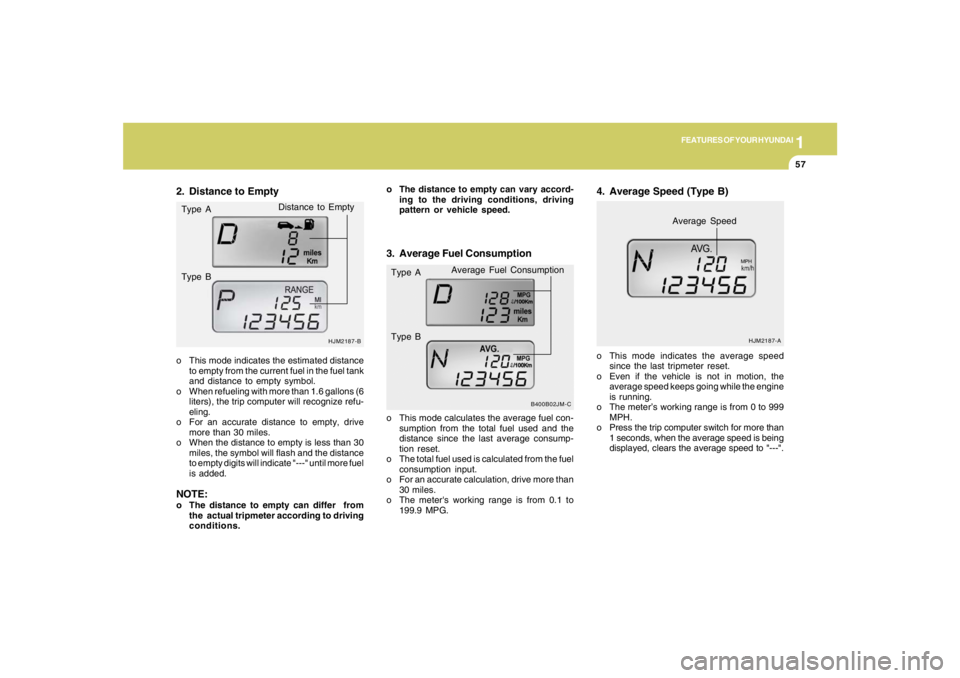
o This mode indicates the estimated distance
to empty from the current fuel in the fuel tank
and distance to empty symbol.
o When refueling with more than 1.6 gallons (6
liters), the trip computer will recognize refu-
eling.
o For an accurate distance to empty, drive
more than 30 miles.
o When the distance to empty is less than 30
miles, the symbol will flash and the distance
to empty digits will indicate "---" until more fuel
is added.NOTE:o The distance to empty can differ from
the actual tripmeter according to driving
conditions.2. Distance to Empty
Distance to Empty
3. Average Fuel Consumptiono This mode calculates the average fuel con-
sumption from the total fuel used and the
distance since the last average consump-
tion reset.
o The total fuel used is calculated from the fuel
consumption input.
o For an accurate calculation, drive more than
30 miles.
o The meter's working range is from 0.1 to
199.9 MPG.
B400B02JM-C
Type A
Type BAverage Fuel Consumption
o This mode indicates the average speed
since the last tripmeter reset.
o Even if the vehicle is not in motion, the
average speed keeps going while the engine
is running.
o The meter’s working range is from 0 to 999
MPH.
o Press the trip computer switch for more than
1 seconds, when the average speed is being
displayed, clears the average speed to "---".4. Average Speed (Type B)
HJM2187-A
Average Speed
MPH
Type A
Type B
Page 90 of 306
1FEATURES OF YOUR HYUNDAI78
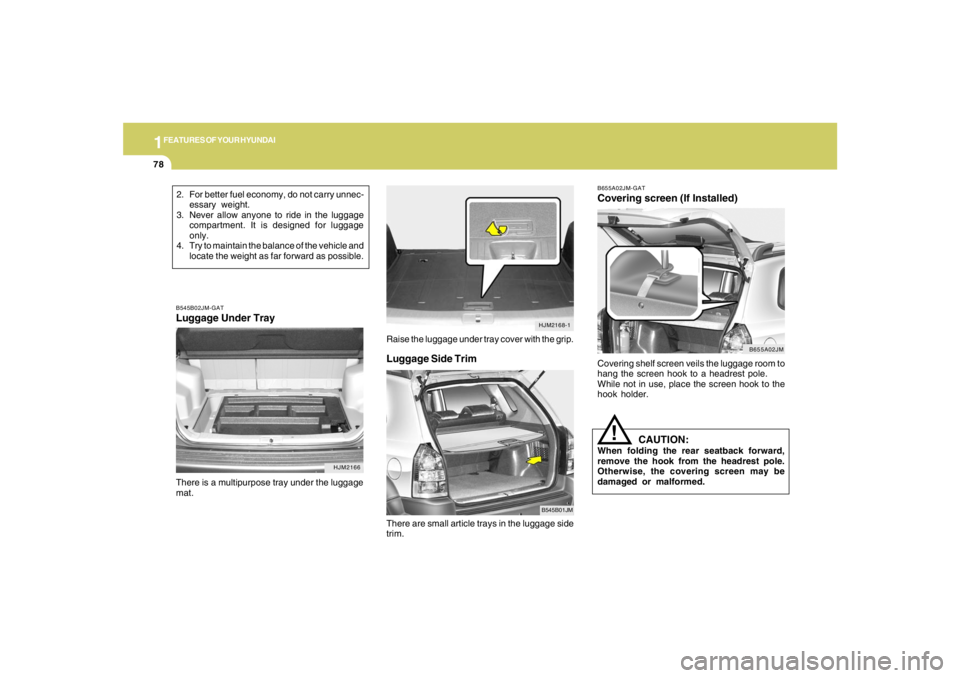
Luggage Side Trim
B545B01JM
There are small article trays in the luggage side
trim.
B655A02JM-GATCovering screen (If Installed)Covering shelf screen veils the luggage room to
hang the screen hook to a headrest pole.
While not in use, place the screen hook to the
hook holder.
B655A02JM
CAUTION:
When folding the rear seatback forward,
remove the hook from the headrest pole.
Otherwise, the covering screen may be
damaged or malformed.
!
Raise the luggage under tray cover with the grip.
HJM2168-1
2. For better fuel economy, do not carry unnec-
essary weight.
3. Never allow anyone to ride in the luggage
compartment. It is designed for luggage
only.
4. Try to maintain the balance of the vehicle and
locate the weight as far forward as possible.
HJM2166 B545B02JM-GAT
Luggage Under TrayThere is a multipurpose tray under the luggage
mat.
Page 92 of 306
1FEATURES OF YOUR HYUNDAI80
!
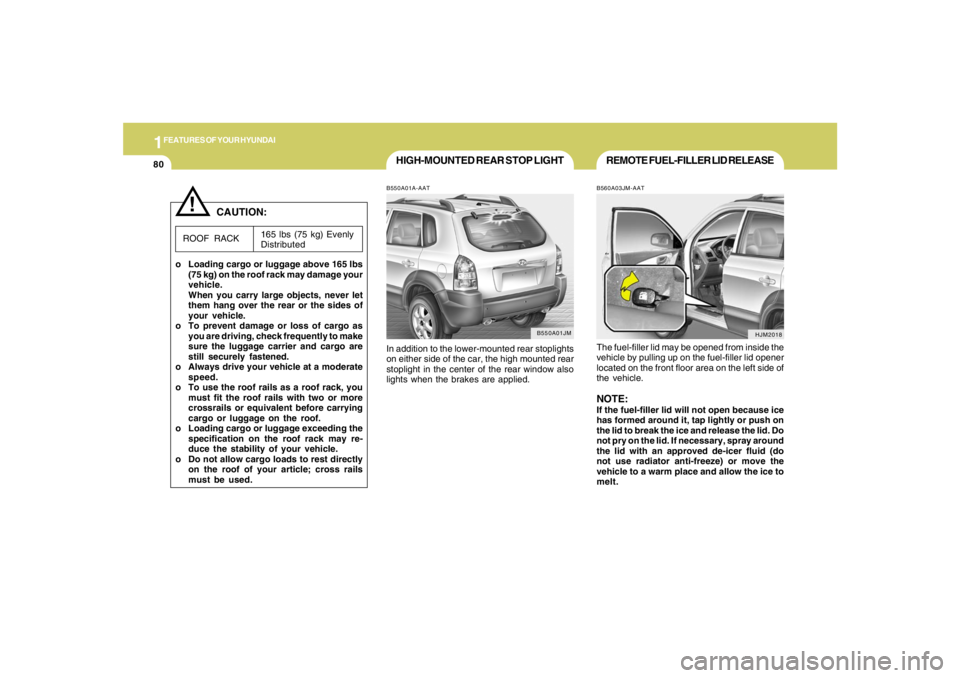
HIGH-MOUNTED REAR STOP LIGHTB550A01A-AATIn addition to the lower-mounted rear stoplights
on either side of the car, the high mounted rear
stoplight in the center of the rear window also
lights when the brakes are applied.
B550A01JM
165 lbs (75 kg) Evenly
Distributed
ROOF RACK
CAUTION:
o Loading cargo or luggage above 165 lbs
(75 kg) on the roof rack may damage your
vehicle.
When you carry large objects, never let
them hang over the rear or the sides of
your vehicle.
o To prevent damage or loss of cargo as
you are driving, check frequently to make
sure the luggage carrier and cargo are
still securely fastened.
o Always drive your vehicle at a moderate
speed.
o To use the roof rails as a roof rack, you
must fit the roof rails with two or more
crossrails or equivalent before carrying
cargo or luggage on the roof.
o Loading cargo or luggage exceeding the
specification on the roof rack may re-
duce the stability of your vehicle.
o Do not allow cargo loads to rest directly
on the roof of your article; cross rails
must be used.
HJM2018
REMOTE FUEL-FILLER LID RELEASEB560A03JM-AATThe fuel-filler lid may be opened from inside the
vehicle by pulling up on the fuel-filler lid opener
located on the front floor area on the left side of
the vehicle.NOTE:If the fuel-filler lid will not open because ice
has formed around it, tap lightly or push on
the lid to break the ice and release the lid. Do
not pry on the lid. If necessary, spray around
the lid with an approved de-icer fluid (do
not use radiator anti-freeze) or move the
vehicle to a warm place and allow the ice to
melt.
Page 93 of 306

1
FEATURES OF YOUR HYUNDAI
81
B560A01JM
!
o Tighten the cap until it clicks, otherwise
the "
" light will illuminate.
o If you open the fuel filler cap during high
ambient temperatures, a slight "pres-
sure sound" may be heard. This is nor-
mal and not a cause for concern.
Whenever you open the fuel filler cap,
turn it slowly.
o Do not "top-off" after the nozzle auto-
matically shuts off when refueling.
o Automotive fuels are flammable/explo-
sive materials. When refueling, please
note the following guidelines carefully.
- Before touching the fuel nozzle or fuel
filler cap, have one's hands in contact
with metal parts away from the filler
neck to discharge static electricity.
- Do not get back in the vehicle while
refueling. Do not operate anything
that can produce static electricity.
Static electricity discharge can ignite
fuel vapors resulting in explosion.
- When using a portable fuel container
be sure to place the container on the
ground while refueling. Static elec-
tricity discharge from the container
can ignite fuel vapors causing a fire.
While starting refueling contact should
be maintained until the filling is com-
plete.
!
WARNING:
o Gasoline vapors are dangerous. Before
refueling, always stop the engine and
never smoke or allow sparks and open
flames near the filler area.
o Never operate your vehicle without a
filler cap properly installed, flammable
vapors and gasoline could leak out in
dangerous situations such as a collision
or rollover. If the filler cap must be
replaced, only use genuine Hyundai re-
placement parts.
o After refueling, make sure the fuel cap is
installed securely to prevent fuel spill-
age in the event of an accident.
- Do not use cellular phones around a
gas station. The electric current or
electronic interference from cellular
phones can ignite fuel vapors causing
a fire.
- When refueling always shut the en-
gine off. Sparks by electrical equip-
ment of the engine can ignite fuel
vapors causing a fire. After refueling,
check to make sure the fuel filler cap
is securely closed, and then start the
engine.
- Do not smoke or try to light cigarettes
around a gas station. Automotive fu-
els are flammable.
WARNING:
Page 170 of 306
2
DRIVING YOUR HYUNDAI
4
TO START THE ENGINEC030A01E-AATCOMBINATION IGNITION SWITCHo If your Hyundai is equipped with a manual
transaxle, place the shift lever in neutral and
depress the clutch pedal fully.
o If your Hyundai has an automatic transaxle,
place the shift lever in "P" (park).
o To start the engine, insert the ignition key and
turn it to the "START" position. Release it as
soon as the engine starts. Do not hold the
key in the "START" position for more that 15
seconds.NOTE:o For safety, the engine will not start if the
clutch pedal is not depressed fully
(Manual Transaxle) or the shift lever is
not in "P" or "N" Position (Automatic
Transaxle).
o The ignition key cannot be turned from
"ACC" position to "LOCK" position un-
less the shift lever is in the "P" (Park)
position or the negative battery terminal
is disconnected from the battery. To
remove the key, always confirm that the
shift lever is securely positioned in "P"
(Park) (For Automatic Transaxle).
o For additional information about start-
ing, see page 2-6.
BEFORE STARTING THE ENGINEC020A03A-AATBefore you start the engine, you should always:
1. Look around the vehicle to be sure there are
no flat tires, puddles of oil, water or other
indications of possible trouble.
2. After entering the car, check to be sure the
parking brake is engaged.
3. Check that all windows, and lights are clean.
4. Check that the interior and exterior mirrors
are clean and in position.
5. Check your seat, seatback and headrest to
be sure they are in their proper positions.
6. Lock all the doors.
7. Fasten your seat belt and be sure that all
other occupants have fastened theirs.
8. Turn off all lights and accessories that are
not needed.
9. When you turn the ignition switch to "ON",
check that all appropriate warning lights are
operating and that you have sufficient fuel.
10.Check the operation of warning lights and all
bulbs when key is in the "ON" position.
!
WARNING:
o All passengers must be properly belted
whenever the vehicle is moving. Refer to
pages: 1-18 through 1-24 for more infor-
mation on their proper use.
o Always check the surrounding areas near
your vehicle for people, especially chil-
dren, before putting a car into 'drive.'
!
WARNING:
Always wear appropriate shoes when oper-
ating your vehicle.
Unsuitable shoes (high heels, ski boots,
etc.) may interfere with your ability to use
the brake and accelerator pedal, and the
clutch (if installed).