2007 Hyundai Terracan ABS
[x] Cancel search: ABSPage 14 of 291

YOUR VEHICLE AT A GLANCE
B255A01HP-GAT INDICATOR SYMBOLS ON THE INSTRUMENT CLUSTER
Turn Signal Indicator Lights
ABS Service Reminder Indicator (SRI) (If Installed) High Beam Indicator Light Low Oil Pressure Warning Light Parking Brake/Low Brake Fluid Level Warning Light Charging System Warning Light
Tail Gate Open Warning Light
Door Ajar Warning Light Low Fuel Level Warning Light
Front Fog Indicator Light
O/D OFF Indicator Light (If Installed)
Immobilizer Warning Indicator Light (If Installed)
SRS (Airbag) Service Reminder Indicator (SRI) (If Installed) Seat Belt Warning Light Cruise Indicator Light (If Installed)
Malfunction Indicator Light (If Installed)
A/T(Automatic Transmission) Oil Temperature Warning Light (If Installed)
4WD LOW Indicator Light 4WD HIGH Indicator Light (Part-time 4WD only)
4WD System Warning Light (Full-time 4WD only)
Fuel Filter Warning Light (Diesel Engine)
Brake Vacuum Warning Light (Diesel Engine)
* More detailed explanations of these items will be found beginning on page 1-58.
Diesel Preheat Indicator Light (Diesel Engine)
Page 52 of 291

1FEATURES OF YOUR HYUNDAI
38
!WARNING:
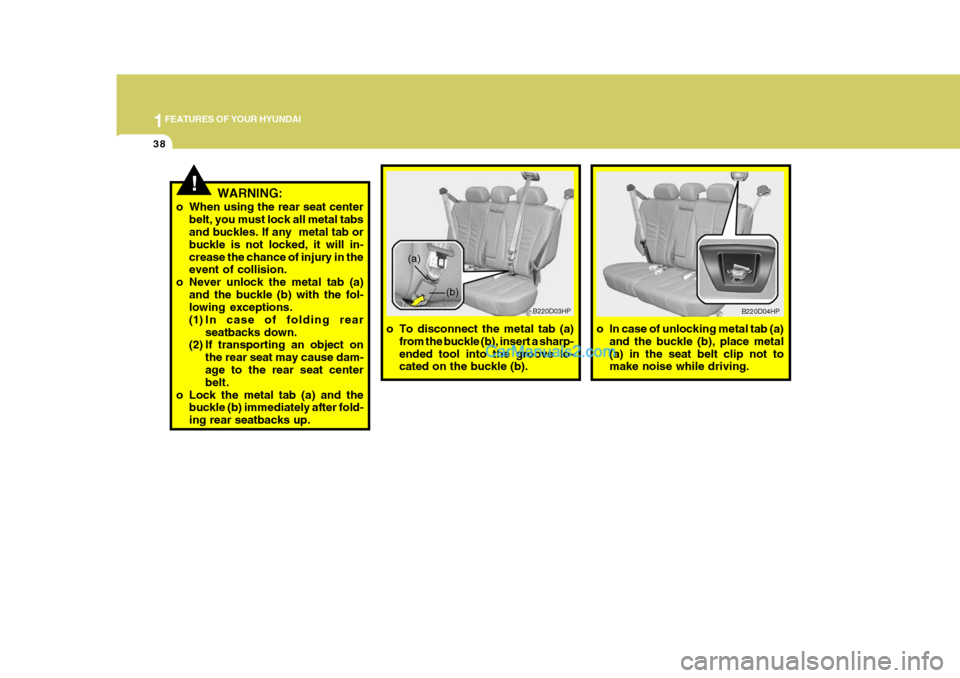
o When using the rear seat center belt, you must lock all metal tabs and buckles. If any metal tab or buckle is not locked, it will in-crease the chance of injury in the event of collision.
o Never unlock the metal tab (a)
and the buckle (b) with the fol-lowing exceptions.
(1) In case of folding rear seatbacks down.
(2) If transporting an object on
the rear seat may cause dam- age to the rear seat center belt.
o Lock the metal tab (a) and the buckle (b) immediately after fold-ing rear seatbacks up. o To disconnect the metal tab (a)
from the buckle (b), insert a sharp-ended tool into the groove lo- cated on the buckle (b). B220D03HP
o In case of unlocking metal tab (a)and the buckle (b), place metal (a) in the seat belt clip not to make noise while driving. B220D04HP
(a)
(b)
Page 59 of 291

1
FEATURES OF YOUR HYUNDAI
45
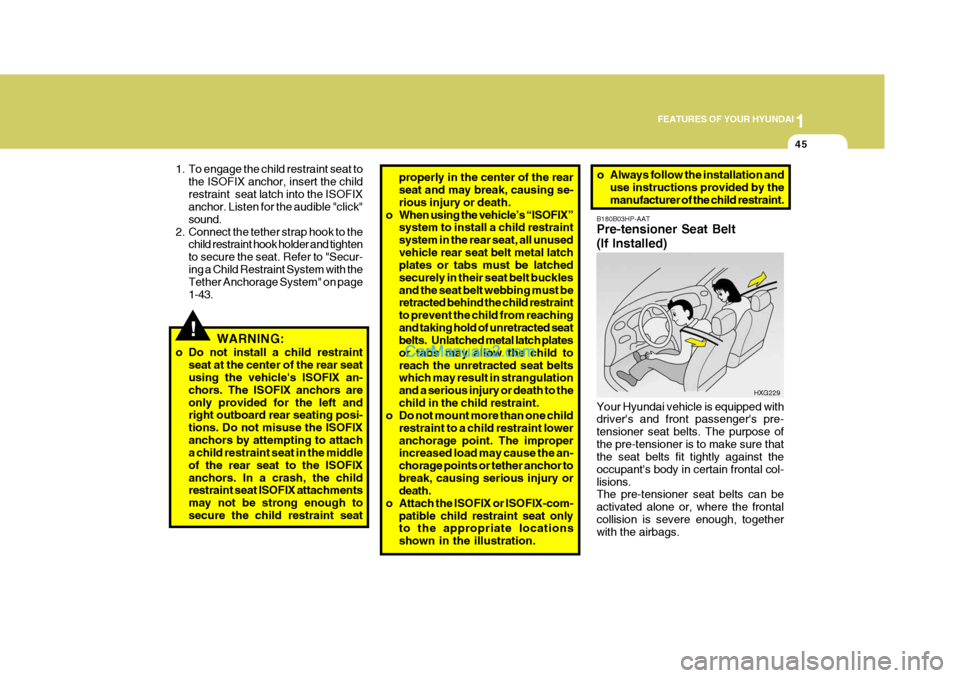
B180B03HP-AAT Pre-tensioner Seat Belt (If Installed) Your Hyundai vehicle is equipped with driver's and front passenger's pre- tensioner seat belts. The purpose ofthe pre-tensioner is to make sure that the seat belts fit tightly against the occupant's body in certain frontal col-lisions. The pre-tensioner seat belts can be activated alone or, where the frontalcollision is severe enough, together with the airbags. HXG229
o Always follow the installation and
use instructions provided by themanufacturer of the child restraint.
!
1. To engage the child restraint seat tothe ISOFIX anchor, insert the child restraint seat latch into the ISOFIX anchor. Listen for the audible "click" sound.
2. Connect the tether strap hook to the child restraint hook holder and tightento secure the seat. Refer to "Secur-ing a Child Restraint System with the Tether Anchorage System" on page 1-43.
WARNING:
o Do not install a child restraint seat at the center of the rear seat using the vehicle's ISOFIX an- chors. The ISOFIX anchors areonly provided for the left and right outboard rear seating posi- tions. Do not misuse the ISOFIXanchors by attempting to attach a child restraint seat in the middle of the rear seat to the ISOFIXanchors. In a crash, the child restraint seat ISOFIX attachments may not be strong enough tosecure the child restraint seat properly in the center of the rear seat and may break, causing se- rious injury or death.
o When using the vehicle’s “ISOFIX” system to install a child restraintsystem in the rear seat, all unusedvehicle rear seat belt metal latch plates or tabs must be latched securely in their seat belt bucklesand the seat belt webbing must be retracted behind the child restraint to prevent the child from reachingand taking hold of unretracted seat
belts. Unlatched metal latch plates or tabs may allow the child toreach the unretracted seat belts which may result in strangulation and a serious injury or death to thechild in the child restraint.
o Do not mount more than one child
restraint to a child restraint loweranchorage point. The improper increased load may cause the an- chorage points or tether anchor tobreak, causing serious injury or death.
o Attach the ISOFIX or ISOFIX-com- patible child restraint seat onlyto the appropriate locations shown in the illustration.
Page 69 of 291

1
FEATURES OF YOUR HYUNDAI
55
1. Tachometer
2. Turn Signal Indicator Light
3. Coolant Temperature Gauge
4. Fuel Gauge
5. Speedometer
6. ABS Service Reminder Indicator (SRI) (If Installed)
7. Supplemental Restraint (AirBag) System Service Reminder lndicator (SRI) (If Installed)
8. Low Oil Pressure Warning Light
9. Parking Brake/Low Brake Fluid Level Warning Light
10.Charging System Warning Light
11.A/T Oil Temperature Warning Light (If Installed)
12.Overdrive Off Indicator Light (If Installed)
13.High Beam Indicator Light 14.Front Fog Indicator Light
15.Automatic Transmission Position Indicator Light (If Installed)
16.Cruise Indicator Light (If Installed)
17.4WD LOW Indicator Light
18.4WD HIGH Indicator Light (Part-time 4WD)
/4WD System Warning Light (Full-time 4WD)
19.Malfunction Indicator Light (MIL) (If Installed)
20.Trip Odometer
21.Odometer 22.Trip Odometer Reset Knob
23.Tail Gate Open Warning Light
24.Door Ajar Warning Light
25.Seat Belt Warning Light
26.Low Fuel Warning Light
Page 71 of 291

1
FEATURES OF YOUR HYUNDAI
57
1. Tachometer
2. Turn Signal Indicator Light
3. Coolant Temperature Gauge
4. Fuel Gauge
5. Speedometer
6. Immobilizer Warning Light (2.9 CRDi only)(If Installed)
7. Diesel Preheat Indicator Light
8. ABS Service Reminder Indicator (SRI) (If Installed)
9. Supplemental Restraint (AirBag) System Service Reminder Indicator (SRI) (If Installed)
10.Fuel Filter Warning Light
11.Brake Vacuum Warning Light
12.Low Oil Pressure Warning Light
13.Parking Brake/Low Brake Fluid Level
Warning Light
14.Charging System Warning Light
15.A/T Oil Temperature Warning Light (If Installed) 16.Overdrive Off Indicator Light (If Installed)
17.High Beam Indicator Light
18.Front Fog Indicator Light
19.Automatic Transmission Position Indicator Light
(If Installed)
20.Cruise Indicator Light (If Installed)
21.4WD LOW Indicator Light
22.4WD HIGH Indicator Light (Part-time 4WD) / 4WD System Warning Light (Full-time 4WD)
23.Malfunction Indicator Light (MIL) (If Installed)
24.Trip Odometer
25.Odometer
26.Trip Odometer Reset Knob
27.Tail Gate Open Warning Light
28.Door Ajar Warning Light
29.Seat Belt Warning Light
30.Low Fuel Warning Light
Page 72 of 291

1FEATURES OF YOUR HYUNDAI
58WARNING AND INDICATOR LIGHTS
!
B260D01A-AAT
Turn Signal Indicator Lights
The blinking green arrows on the in- strument panel show the direction indi-cated by the turn signals. If the arrow comes on but does not blink, blinks more rapidly than normal, or does notblink at all, a malfunction in the turn signal system is indicated. Your dealer should be consulted for repairs. B260P02Y-AAT
ABS Service Reminder Indicator (SRI)(If Installed)
When the key is turned to the "ON" position, the Anti-Lock Brake System SRI will come on and then go off in afew seconds. If the ABS SRI remains on, comes on while driving, or does not come on when the key is turned to the"ON" position, this indicates that there may be a problem with the ABS. If this occurs, have your vehiclechecked by your Hyundai dealer as soon as possible. The normal braking system will still be operational, butwithout the assistance of the anti-lock brake system. WARNING:
If the both ABS SRI and ParkingBrake/ Low Brake fluid level warn- ing lights remain "ON" or come onwhile driving, there may be a prob- lem with E.B.D (Electronic Brake Force Distribution).If this occurs, avoid sudden stops and have your vehicle checked by your Hyundai dealer as soon aspossible. B260F01A-AAT High Beam Indicator Light
The high beam indicator light comes on whenever the headlights areswitched to the high beam or flash position.
Page 157 of 291

2
Engine Exhaust Can Be Dangerous! ........................... 2-2
Before Starting the Engine ........................................... 2-3
Key Positions ................................................................ 2-4Starting......................................................................... 2-5
Operating the Manual Transmission ............................ 2-7
Automatic Transmission ............................................... 2-9
Four-Wheel Drive (4WD) ............................................ 2-14
Anti-Lock Brake System (ABS) .................................. 2-21
Limited-Slip Differential (LSD) .................................... 2-22
Good Braking Practices ............................................. 2-22
Driving for Economy ................................................... 2-23
Smooth Cornering ...................................................... 2-25
Winter Driving ............................................................. 2-25
Trailer or Vehicle Towing ........................................... 2-28
DRIVING YOUR HYUNDAI
2
Page 177 of 291

2
DRIVING YOUR HYUNDAI
21ANTI-LOCK BRAKE SYSTEM (ABS)
!WARNING:
o Avoid high cornering speeds.
o Do not make quick steering wheel movements, such as sharp lane charges or fast, sharp turns.
o The risk of rollover is greatly in-
creased if you lose control ofyour vehicle at highway speeds.
o In a collision crash, an unbelted
person is significantly more likelyto die than a person wear a seatbelt.
o Loss of control often occurs if two or more wheels drop off theroadway and the driver oversteers to reenter the roadway.
o In the event your vehicle leaves the roadway, do not steer sharply.Instead, slow down before pull-ing back into the travel lanes. C120A02A-AAT (If Installed) The Anti-Lock Brake System (ABS) is designed to prevent wheel lock-upduring sudden braking or on hazard- ous road surfaces. The ABS control module monitors the wheel speed andcontrols the pressure applied to each brake. Thus, in emergency situations or on slick roads, ABS will increasevehicle control during braking. NOTE: During ABS operation, a slight pul- sation may be felt in the brake pedal when the brakes are applied. Also, a noise may be heard in the enginecompartment while braking. These conditions are normal and indicate that the anti-lock brake system isfunctioning properly.!WARNING:
ABS will not prevent accidents due to improper or dangerous drivingmaneuvers. Even though vehicle control is improved during emer- gency braking, always maintain asafe distance between you and ob- jects ahead. Vehicle speeds should always be reduced during extremeroad conditions. The braking distance for cars equipped with an anti-lock brakingsystem may be longer than for those without it in the following road con- ditions. During these conditions thevehicle should be driven at reduced speeds.
o Rough, gravel or snow-covered roads.
o With tire chains installed.
o Roads where the road surface is pitted or has different surfaceheight.
The safety features of an ABSequipped vehicle should not betested by high speed driving or cornering. This could endanger the safety of yourself or others.