2007 Hyundai Terracan parking brake
[x] Cancel search: parking brakePage 105 of 291

1
FEATURES OF YOUR HYUNDAI
91PARKING BRAKE
B530A02A-AAT Always engage the parking brake be- fore leaving the car. This also turns on the parking brake indicator light when the key is in the "ON" or "START" position. Before driving away, be surethat the parking brake is fully released and the indicator light is off.
o To engage the parking brake, first apply the foot brake and then without pressing the release button in, pullthe parking brake lever up as far as possible. In addition it is recom- mended that when parking the ve-hicle on a gradient, the shift lever should be positioned in the appropri- ate low gear on manual transmissionvehicles or in the P (Park) position on automatic transmission vehicles. B530A01HP
B520B02O-GAT Electric type (If Installed) The electric type day/night inside rear- view mirror automatically controls the glare of headlights of the car behindyou.
1. Pressing the
button turns the auto-
dimming function OFF which is indi- cated by the green status indicator LED turning off.
2. Pressing the
button again turns
the auto-dimming function ON which is indicated by the green status indi- cator LED turning on.
NOTE: The mirror defaults to the "ON" posi- tion each time the vehicle is started. HLZ2068-1
CAUTION:
Driving with the parking brake ap-plied will cause excessive brake pad (or lining) and brake rotor wear.
o To release the parking brake, first apply the foot brake and pull the praking brake lever slightly. Sec- ondly, depress the release buttonand lower the parking brake lever while holding the button.
!
Page 159 of 291
2
DRIVING YOUR HYUNDAI
3
!
BEFORE STARTING THE ENGINE
C020A02A-AAT Before you start the engine, you should always:
1. Look around the vehicle to be sure
there are no flat tires, puddles of oil, water or other indications of possible trouble.
2. After entering the car, check to be sure the parking brake is engaged.
3. Check that all windows, and lights are clean.
4. Check that the interior and exterior
mirrors are clean and in position.
5. Check your seat, seatback and headrest to be sure they are in theirproper positions.
6. Lock all the doors.
7. Fasten your seat belt and be sure
that all other occupants have fas- tened theirs.
8. Turn off all lights and accessories
that are not needed.
9. When you turn the ignition switch to "ON", check that all appropriatewarning lights are operating andthat you have sufficient fuel.
10. Check the operation of warning
lights and all bulbs when key is inthe "ON" position.
WARNING:
Your vehicle is equipped with tires designed to provide for safe ride and handling capability.Do not use a size and type of tire and wheel that is different from the one that was originally installed onyour vehicle. It can affect the safety and performance of your vehicle, which could lead to handling fail-ure or rollover and serious injury. When replacing the tires, be sure to equip all four tires with the tire andwheel of the same size, type, tread, brand and load-carrying capacity. If you nevertheless decide to equipyour vehicle with any tire/wheel combination not recommended by Hyundai for off-road driving, youshould not use these tires for high- way driving.
!WARNING:
Always wear appropriate shoes when operating your vehicle.Unsuitable shoes (high heels, ski boots, etc.) may interfere with your ability to use the brake and accelera-tor pedal, and the clutch (if installed).
Page 162 of 291

2 DRIVING YOUR HYUNDAI
6
(1) When the atmospheric tempera-ture is moderate or the engine is warm: Start the engine without de- pressing the accelerator pedal.
(2) When the atmospheric tempera- ture is low and the engine iscold:Start the engine while depress- ing the accelerator pedal. If the atmospheric temperature is verylow, setting the ignition switch to "ON" for one or two seconds before attempting to start theengine will make it easier to start.
6. Turn the ignition key to the "START" position and release it when the engine starts.
NOTE: If the engine were not started within 2 seconds after the preheating is completed, turn the ignition key once more to the "LOCK" positionduring 10 seconds, and then to the "ON" position, in order to preheat again.
5. Operate the accelerator pedal as
described below in accordance with the atmospheric temperature and/ or engine condition. (Diesel Engine (2.5 TCI) Only)Amber lamp ON
C050B01HP
Amber lamp OFF
C050B01HP-GAT NORMAL CONDITIONS Starting Procedure:
1. Insert key and fasten the seat belt.
2. Apply the parking brake.
3. If your Hyundai is equipped with a
manual transmission, place the shift lever in neutral and depress the clutch pedal fully. If your Hyundai has an automatic transmission,place the shift lever in "P" (park).
4. On vehicles equipped with the die-
sel preheat indication lamp, turn theignition key to the "ON" position. The diesel-preheat indicator lamp will first illuminate in amber, andthen after a short time, the amber illumination will go off, indicating that preheating is completed.
Page 164 of 291

2 DRIVING YOUR HYUNDAI
8
Shift
from-to
1-2 2-3 3-4 4-5 C070D02O-AAT Good Driving Practices
o Never take the car out of gear and
coast down a hill. This is extremely hazardous. Always leave the car in gear.
o Don't "ride" the brakes. This can cause them to overheat and mal-function. Instead, when you are driv- ing down a long hill, slow down andshift to a lower gear. When you do this, engine braking will help slow the car.
o Slow down before shifting to a lower gear. This will help avoid over-rev-ving the engine, which can causedamage.
o Slow down when you encounter
cross winds. This gives you muchbetter control of your car.
o Be sure the car is completely stopped
before you attempt to shift into re-verse. The transmission can be damaged if you do not. To shift into reverse, depress the clutch, movethe shift lever to neutral, wait three seconds, then shift to the reverse position.
C070E03A-GAT RECOMMENDED SHIFT POINTS
Recommended 20 km/h (15 mph) 40 km/h (25 mph) 55 km/h (35 mph) 75 km/h (45 mph)
The shift points as shown above are recommended for optimum fuel economy and performance.
C070B01A-AAT Using the Clutch The clutch should be pressed all the way to the floor before shifting, thenreleased slowly. The clutch pedal should always be used after fully re- turning to the original position. Do notrest your foot on the clutch pedal while driving. This can cause unnecessary wear. Do not partially engage the clutchto hold the car on an incline. This causes unnecessary wear. Use the parking brake to hold the car on anincline. Do not operate the clutch pedal rapidly and repeatedly.
!
o During cold weather, shifting may
be difficult until the transmis- sion lubricant has warmed up. This is normal and not harmful to the transmission.
o If you 've come to a complete stop and it's hard to shift into 1stor R(Reverse), put the shift leverin N(Neutral) position and release the clutch. Press the clutch pedal back down, and then shift into1st or R(Reverse) gear position.
o Do not use the shift lever as a
handrest during driving, as thiscan result in premature wear of the transmission shift forks.
CAUTION:
When downshifting from fifth gearto fourth gear, caution should be taken not to inadvertently press thegear shift lever sideways in such a manner that second gear is en- gaged. Such a drastic downshiftmay cause the engine speed to in- crease to the point that the tachom- eter will enter the red-zone. Suchover-revving of the engine may possibly cause engine damage.
Page 166 of 291

2 DRIVING YOUR HYUNDAI
10
!
C090B01HP-GAT The function of each position is as follows:
o P (Park): Use to hold the vehicle in place when parked or while starting the engine. Whenever parking the car, apply theparking brake and shift the selector lever to the "P" (Park) position.
CAUTION:
Never place the selector lever in the"P" (Park) position unless the ve- hicle is fully stopped.Failure to observe this caution will cause severe damage to the trans- mission. C090C01A-AAT
o R (Reverse): Use for backing up the vehicle. Bring the car to a complete stop before shifting the selector lever to "R" posi-tion. C090D01HP-GAT
o N (Neutral): In the "N" position, the transmission is in neutral, which means that no gearsare engaged. The engine can be started with the shift lever in "N" position, although this is not recommended ex-cept if the engine stalls while the car is moving.
C090E01HP-GAT
o D (Drive): Use for normal driving. The transmis- sion will automatically shift through a four-gear sequence, giving besteconomy and power. Never down-shift manually to "2" position or "L" position when vehicle speed is more than 96km/h (60 mph).
CAUTION:
Never shift into "R" or "P" positionwhile the vehicle is moving.
NOTE: Depress the brake pedal andpush the button when shifting. Push the button when shifting. The selector lever can beshifted freely.
For optimum fuel economy, acceler- ate gradually. The transmission will automatically shift to the second, thirdand overdrive gears.
!
Page 168 of 291
2 DRIVING YOUR HYUNDAI
12
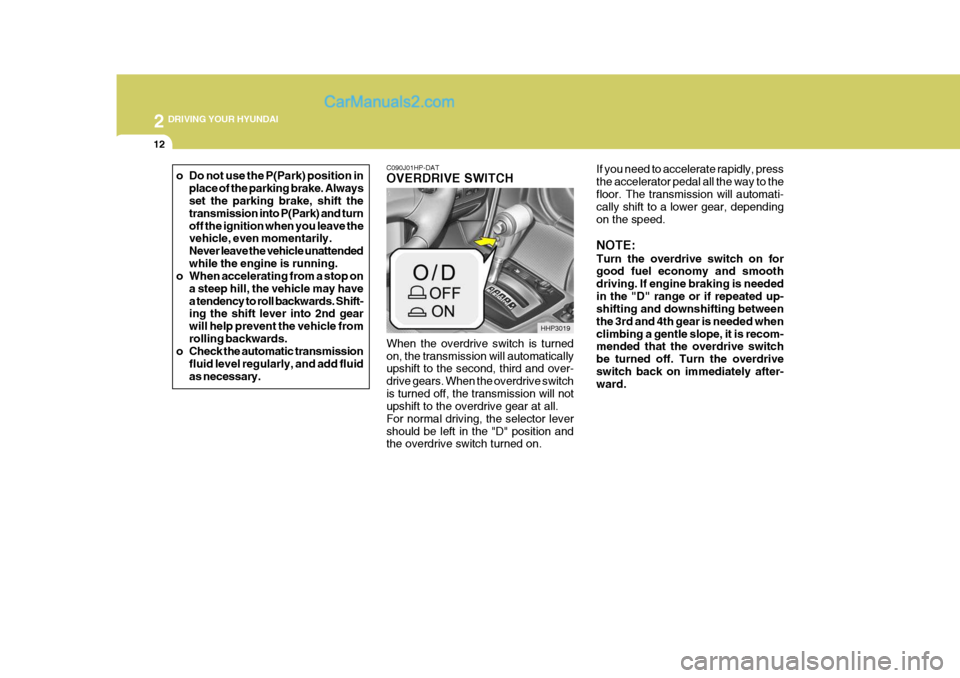
C090J01HP-DAT OVERDRIVE SWITCH When the overdrive switch is turned on, the transmission will automatically upshift to the second, third and over- drive gears. When the overdrive switchis turned off, the transmission will not upshift to the overdrive gear at all. For normal driving, the selector levershould be left in the "D" position and the overdrive switch turned on. If you need to accelerate rapidly, press the accelerator pedal all the way to thefloor. The transmission will automati- cally shift to a lower gear, depending on the speed. NOTE: Turn the overdrive switch on for good fuel economy and smooth driving. If engine braking is neededin the "D" range or if repeated up- shifting and downshifting between the 3rd and 4th gear is needed whenclimbing a gentle slope, it is recom- mended that the overdrive switch be turned off. Turn the overdriveswitch back on immediately after- ward.
HHP3019
o Do not use the P(Park) position in
place of the parking brake. Alwaysset the parking brake, shift the transmission into P(Park) and turnoff the ignition when you leave the vehicle, even momentarily. Never leave the vehicle unattendedwhile the engine is running.
o When accelerating from a stop on
a steep hill, the vehicle may havea tendency to roll backwards. Shift- ing the shift lever into 2nd gear will help prevent the vehicle fromrolling backwards.
o Check the automatic transmission
fluid level regularly, and add fluidas necessary.
Page 169 of 291
2
DRIVING YOUR HYUNDAI
13
!
C090N04A-AAT Good Driving Practices
o Never move the gear selector lever
from "P" or "N" to any other position with the accelerator pedal de- pressed.
o Never move the gear selector lever into "P" when the vehicle is in mo-tion.
o Be sure the car is completely stopped before you attempt to shift into "R".
o Never take the car out of gear and
coast down a hill. This may be ex- tremely hazardous. Always leave the car in gear when moving.
o Do not "ride" the brakes. This can cause them to overheat and mal-function. Instead, when you are driv- ing down a long hill, slow down andshift to a lower gear. When you do this, engine braking will help slow the car.
o Slow down before shifting to a lower gear. Otherwise, the lower gear maynot be engaged.
o Always use the parking brake. Do not depend on placing the transmis-sion in "P" to keep the car frommoving. o Exercise extreme caution when driv-
ing on a slippery surface. Be espe-cially careful when braking, acceler-ating or shifting gears. On a slippery surface, an abrupt change in ve- hicle speed can cause the drivewheels to lose traction and the ve- hicle to go out of control.
o Turn the overdrive switch on for good fuel economy and smooth driv-ing. If engine braking is needed in the "D" range or if repeated upshift-ing and downshifting between 3rd and 4th gear is needed when climb- ing a gentle slope, it is recommended that the overdrive switch be turned off. Turn the overdrive switch backon immediately afterward.
o Optimum vehicle performance and
economy is obtained by smoothlydepressing and releasing the accel- erator pedal.
WARNING:
o Avoid high cornering speeds.
o Do not make quick steering wheel movements, such as sharp lane changes or fast, sharp turns. o Always wear your seat belts.
In a collision crash, an unbelted person is significantly more likelyto die than a person wearing a seat belt.
o The risk of rollover is greatly in- creased if you lose control ofyour vehicle at highway speeds.
o Loss of control often occurs if
two or more wheels drop off theroadway and the driver oversteers to reenter the roadway.
o In the event your vehicle leaves the roadway, do not steer sharply.Instead, slow down before pull-ing back into the travel lanes.
o Never exceed posted speed lim-
its.
o If your vehicle becomes stuck in snow, mud, sand, etc., then youmay attempt to rock the vehiclefree by moving it forward and back- ward. Do not attempt this proce- dure if people or objects are any-where near the vehicle. During the rocking operation the vehicle may suddenly move forward of back-ward as it becomes unstuck, caus- ing injury or damage to nearby people or objects.
Page 175 of 291
2
DRIVING YOUR HYUNDAI
19
!
Roll tester (Speedometer)
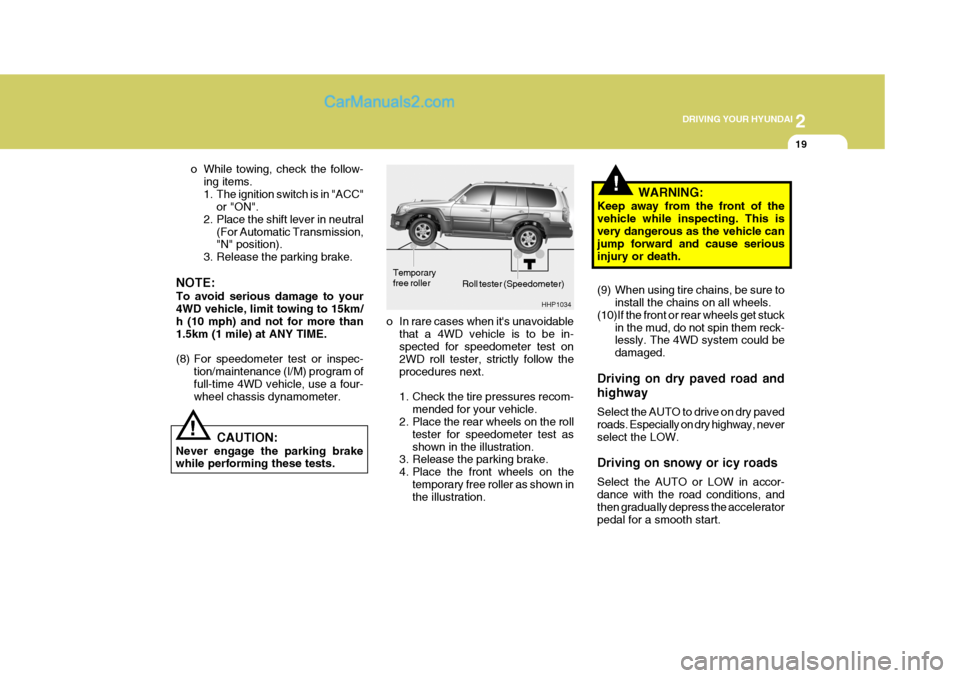
o In rare cases when it's unavoidable that a 4WD vehicle is to be in- spected for speedometer test on 2WD roll tester, strictly follow theprocedures next.
1. Check the tire pressures recom- mended for your vehicle.
2. Place the rear wheels on the roll
tester for speedometer test as shown in the illustration.
3. Release the parking brake.
4. Place the front wheels on the
temporary free roller as shown in the illustration. WARNING:
Keep away from the front of the vehicle while inspecting. This is very dangerous as the vehicle can jump forward and cause seriousinjury or death.
(9) When using tire chains, be sure to install the chains on all wheels.
(10)If the front or rear wheels get stuck in the mud, do not spin them reck- lessly. The 4WD system could be damaged.
Driving on dry paved road and highway Select the AUTO to drive on dry paved roads. Especially on dry highway, neverselect the LOW. Driving on snowy or icy roads Select the AUTO or LOW in accor- dance with the road conditions, and then gradually depress the accelerator pedal for a smooth start.
! CAUTION:
Never engage the parking brake while performing these tests. o While towing, check the follow-
ing items.
1. The ignition switch is in "ACC" or "ON".
2. Place the shift lever in neutral
(For Automatic Transmission, "N" position).
3. Release the parking brake.
NOTE: To avoid serious damage to your 4WD vehicle, limit towing to 15km/ h (10 mph) and not for more than1.5km (1 mile) at ANY TIME.
(8) For speedometer test or inspec- tion/maintenance (I/M) program of full-time 4WD vehicle, use a four- wheel chassis dynamometer. HHP1034
Temporary free roller