2007 Hyundai Santa Fe tire
[x] Cancel search: tirePage 12 of 355

YOUR VEHICLE AT A GLANCE
F10
B255A01CM-AATINDICATOR SYMBOLS ON THE INSTRUMENT CLUSTER* More detailed explanations of these items will be found beginning on page 1-64.
AWD System Warning LightMalfunction Indicator Light
SRS (Air bag) Service Reminder Indicator (SRI) Tail Gate Open Warning LightLow Fuel Level Warning LightDoor Ajar Warning LightABS Service Reminder IndicatorTurn Signal Indicator LightsHigh Beam Indicator Light
Low Oil Pressure Warning Light
Parking Brake/Brake Fluid Level Warning Light
Charging System Warning LightImmobilizer Warning Light (If Installed)
AWD Lock Indicator LightCruise SET Indicator LightCruise Indicator LightLow Windshield Washer Fluid Level Warning Light
Seat Belt Warning Light
Electronic Stability Control (ESC) Indicator
Lights
TPMS (Tire pressure monitoring system) malfunc-
tion indicatorLow tire pressure telltale
Low tire pressure position telltale
Page 42 of 355

1FEATURES OF YOUR HYUNDAI30
!
OCM052307
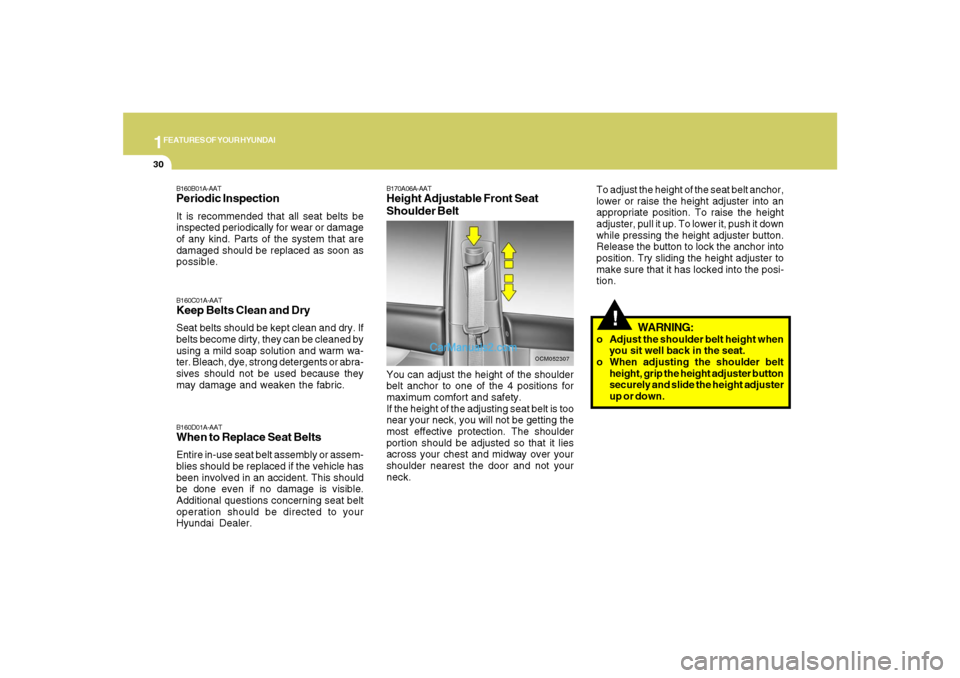
B170A06A-AATHeight Adjustable Front Seat
Shoulder BeltYou can adjust the height of the shoulder
belt anchor to one of the 4 positions for
maximum comfort and safety.
If the height of the adjusting seat belt is too
near your neck, you will not be getting the
most effective protection. The shoulder
portion should be adjusted so that it lies
across your chest and midway over your
shoulder nearest the door and not your
neck.To adjust the height of the seat belt anchor,
lower or raise the height adjuster into an
appropriate position. To raise the height
adjuster, pull it up. To lower it, push it down
while pressing the height adjuster button.
Release the button to lock the anchor into
position. Try sliding the height adjuster to
make sure that it has locked into the posi-
tion.
B160C01A-AATKeep Belts Clean and DrySeat belts should be kept clean and dry. If
belts become dirty, they can be cleaned by
using a mild soap solution and warm wa-
ter. Bleach, dye, strong detergents or abra-
sives should not be used because they
may damage and weaken the fabric.B160D01A-AATWhen to Replace Seat BeltsEntire in-use seat belt assembly or assem-
blies should be replaced if the vehicle has
been involved in an accident. This should
be done even if no damage is visible.
Additional questions concerning seat belt
operation should be directed to your
Hyundai Dealer.B160B01A-AATPeriodic InspectionIt is recommended that all seat belts be
inspected periodically for wear or damage
of any kind. Parts of the system that are
damaged should be replaced as soon as
possible.
WARNING:
o Adjust the shoulder belt height when
you sit well back in the seat.
o When adjusting the shoulder belt
height, grip the height adjuster button
securely and slide the height adjuster
up or down.
Page 51 of 355

1
FEATURES OF YOUR HYUNDAI
39
!
WARNING:
o A child can be seriously injured or
killed in a collision if the child restraint
is not properly anchored to the car
and the child is not properly restrained
in the child restraint. Always follow
the child seat manufacturer’s instruc-
tions for installation and use.
o Adjust the rear seatback in a semi-
reclined position from the upright po-
sition, before installing the Child Re-
straint Seat. With the seatback in the
proper reclining angle, push and pull
the child restraint seat in different
directions to be sure it is secure.
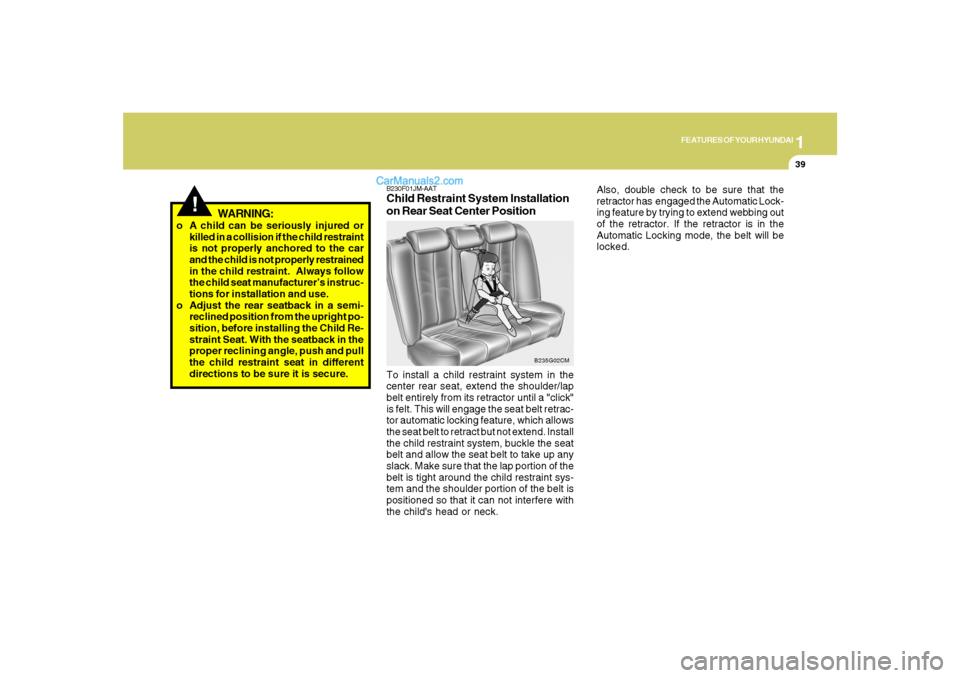
B230F01JM-AATChild Restraint System Installation
on Rear Seat Center PositionTo install a child restraint system in the
center rear seat, extend the shoulder/lap
belt entirely from its retractor until a "click"
is felt. This will engage the seat belt retrac-
tor automatic locking feature, which allows
the seat belt to retract but not extend. Install
the child restraint system, buckle the seat
belt and allow the seat belt to take up any
slack. Make sure that the lap portion of the
belt is tight around the child restraint sys-
tem and the shoulder portion of the belt is
positioned so that it can not interfere with
the child's head or neck.
B235G02CM
Also, double check to be sure that the
retractor has engaged the Automatic Lock-
ing feature by trying to extend webbing out
of the retractor. If the retractor is in the
Automatic Locking mode, the belt will be
locked.
Page 52 of 355

1FEATURES OF YOUR HYUNDAI40
!
WARNING:
o If the retractor is not in the Automatic
Locking mode, the child restraint can
move when your vehicle turns or stops
suddenly. A child can be seriously
injured or killed if the child restraint is
not properly anchored to the car, in-
cluding setting the retractor to the
Automatic Locking mode.
o Do not install any child restraint sys-
tem in the front passenger seat.
Should an accident occur and cause
the passenger side air bag to deploy,
it could severely injure or kill an infant
or child seated in an infant or child
seat. Therefore, only use a child re-
straint system in the rear seat of your
vehicle.
o Before installing Child Restraint Sys-
tems, refer to safety notices for Cur-
tain Air Bag systems beginning on
page 1-58 this manual. Whenever in-
stalling child restraints, use only ap-
proved devices and refer to the "Child
Restraint System" section to ensure
correct installation and occupant pro-
tection is maximized. Also, double check to be sure that the
retractor has engaged the Automatic Lock-
ing feature by trying to extend webbing out
of the retractor. If the retractor is in the
Automatic Locking mode, the belt will be
locked. After installation of the child re-
straint system, try to move it in all directions
to be sure the child restraint system is se-
curely installed. If you need to tighten the
belt, pull more webbing toward the retrac-
tor. When you unbuckle the seat belt and
allow it to retract, the retractor will automati-
cally revert back to its normal seated pas-
senger Emergency Locking usage condi-
tion.
NOTE:o Before installing the child restraint
system in any seating position, read
the instructions supplied by the child
restraint system manufacturer.
o If the seat belt does not operate as
described, have the system checked
immediately by your authorized
Hyundai dealer.
B230G01CM-AATChild Restraint System Installation
on Outboard Rear SeatsTo install a child restraint system in the
outboard rear seats, extend the shoulder/
lap belt entirely from its retractor until a
"click" is felt. This will engage the seat belt
retractor automatic locking feature, which
allows the seat belt to retract but not ex-
tend. Install the child restraint system,
buckle the seat belt and allow the seat belt
to take up any slack. Make sure that the lap
portion of the belt is tight around the child
restraint system and the shoulder portion
of the belt is positioned so that it can not
interfere with the child's head or neck.
B230G01NF-B
Page 75 of 355

1
FEATURES OF YOUR HYUNDAI
63
1. Low Windshield Washer Fluid Level Warning Light
2. Malfunction Indicator Light (MIL)
3. TPMS (Tire Pressure Monitoring System) Malfunction
Indicator
4. Low Tire Pressure Position Telltale
5. Low Tire Pressure Telltale
6. AWD System Warning Light (If installed)
7. AWD Lock Indicator Light (If installed)
8. Odometer / Tripmeter / Trip Computer (If installed)
9. Fuel Gauge
10. Low Fuel Warning Light
11. Seat Belt Warning Light (Driver's Side)
12. Parking Brake/Low Brake Fluid Level Warning Light
13. Charging System Warning Light
14. Coolant Temperature Gauge15. Low Oil Pressure Warning Light
16. Supplemental Restraint (Air bag) System
Service Reminder Indicator (SRI)
17. Tail Gate Open Warning Light
18. Door Ajar Warning Light
19. Automatic Transaxle Position Indicator Light (If installed)
20. High Beam Indicator Light
21. Cruise SET Indicator Light
22. Cruise Indicator Light
23. ABS Service Reminder Indicator
24. Turn Signal Indicator Light
25. Speedometer
26. Electronic Stability Control (ESC) Indicator Light
27. Immobilizer Warning Indicator Light (If Installed)
28. Tachometer
Page 76 of 355

1FEATURES OF YOUR HYUNDAI64
WARNING AND INDICATOR LIGHTSB260S01NF-GAT
Low Windshield Washer
Fluid Level Warning Light
The low windshield washer fluid warning
light comes on when the washer fluid res-
ervoir is approaching empty. When it
comes on, add washer fluid at your earliest
opportunity.B260N02A-AAT
Malfunction Indicator Light
This light illuminates when there is a mal-
function of an exhaust gas related compo-
nent, and the system is not functioning
properly so that the exhaust gas regulation
values are not satisfied. This light will also
illuminate when the ignition key is turned to
the "ON" position, and then it will go out in
a few seconds after the engine is started. If
it illuminates while driving, or does not illumi-
nate when the ignition key is turned to the
"ON" position, take your car to your nearest
authorized Hyundai dealer and have the
system checked.
!
B265W01JM-AAT
TPMS (Tire pressure
monitoring system)
malfunction indicator
TPMS malfunction indicator illuminates
for 3 seconds after the ignition key is turned
to the "ON" position. If the warning light
does not illuminates, or remains when you
turned the ignition key to the "ON" position,
the Tire Pressure Monitoring System is not
working porperly. If this occurs, have your
vehicle checked by an authorized Hyundai
dealer as soon as possible.
The warning light also comes on and stays
on when there is a malfunction with the Tire
Pressure Monitoring System.
If this happens, the system may not monitor
the tire pressure. Have the system checked
by an authorized Hyundai dealer as soon
as possible.
WARNING:
o The TPMS cannot alert you to severe
and sudden tire damage caused by
external factors.
o If you feel any vehicle instability, im-
mediately take your foot off the accel-
erator and slowly move to a safe po-
sition off the road.
Page 77 of 355

1
FEATURES OF YOUR HYUNDAI
65
!
WARNING:
Significantly low tire pressure makes
the vehicle unstable and can contribute
to loss of vehicle control and increased
braking distances.
Continued driving on low pressure tires
may cause the tires to overheat and fail. Avoid hard braking and overcorrecting at
the steering wheel. Inflate the tires to the
proper pressure as indicated on the
vehicle’s tire information placard.
If you have a flat tire, the Low tire Pressure
and Position Telltales will illuminate.
Replace the flat tire with the spare tire(see
page 3-12)
Each wheel is equipped with a tire pres-
sure sensor mounted inside the tire be-
hind the valve stems. You must use TPMS
specific wheels. IT is recommended that
you always have tires serviced by your
Hyundai dealer or qualified technician.
After you replace the flat tire, the Low Tire
Pressure and Position Telltales remain
illuminated. This is normal; the system is
not monitoring the spare tire pressure.
Check the spare tire pressure to make sure
it is correct.
B260W01CM-AAT
Low tire pressure telltale
Low tire pressure
position telltale
The low tire pressure and position telltales
illuminate for 3 seconds after the ignition
key is turned to the "ON" position.
If the warning lights do not illuminate, or
remain illuminate after the 3-second lamp
check when you turned the ignition key to
the "ON" position, the Tire Pressure Moni-
toring System is not working properly. If
this occurs, have your vehicle checked by
an authorized Hyundai dealer as soon as
possible.
This warning lights will also illuminate if
one or more of your tires is significantly
under-inflated. The low tire pressure posi-
tion telltale light will indicate which tire is
significantly under-inflated by illuminating
the corresponding position light.
You should stop and check your tires as
soon as possible. If the warning lights
illuminate while driving, reduce vehicle
speed immediately and stop the vehicle.
B260T01O-GAT
AWD (All Wheel Drive)
System Warning Light
(If installed)
When the key is turned to the "ON" position,
the AWD(All Wheel Drive) system warning
light will illuminate and then go off in a few
seconds.
CAUTION:
If the AWD system warning light ( )
blinks while driving, this indicates that
there is a malfunction in the AWD sys-
tem. If this occurs, have your vehicle
checked by an authorized Hyundai dealer
as soon as possible.
!
CAUTION:
Never use a puncture-repair agent in a
flat tire. If used, the tire pressure sensor
will be damaged and will require replace-
ment. Have the flat tire repaired by a
Hyundai dealer or qualified technician
as soon as possible.
!
Page 160 of 355

1FEATURES OF YOUR HYUNDAI
148
B445B02CM-AATCONTROLLING HOW YOUR
AUDIO SYSTEM SOUNDSOperating your Audio system
Your audio system comprises a factory-
installed amplifier, an AM/FM digital tuner
(radio) and a CD player (single disc or 6-
disc changer). Use the CD player to play
discs encoded in the CD Audio, MP3, and
WMA formats. This audio system also
comes with an external Satellite Digital
Audio Receiver (SDAR) in providing the
XM service.
If your audio system is the D465S or D466S
model and it is connected to a factory-
installed Rear Seat Entertainment (RSE)
system*, you can control some playback
functions of the RSE system using the
audio system’s front panel controls (for
example, CD player controls).Your audio system has 5 different types of
controls. These controls are used either
independently or in combination with your
audio system’s radio, CD player, SDAR or
optional RSE system*.
NOTE:Your audio system’s factory-installed
amplifier is pre-configured for optimum
performance. You will not be able to
make any adjustments. If there is a prob-
lem with the audio system’s amplifier,
please consult a professional audio en-
gineer or the dealer where you purchased
your vehicle.1. General Controls:
These controls are used to operate the
entire audio system. (e.g. Power ON-OFF
control knob)
Use these controls independently or in
combination to control how the audio sys-
tem sounds. (e.g. Volume control, Bass
and Treble controls)
The sound settings you make are appli-
cable to all audio reproduction sources
(radio, CD, SDAR or auxiliary RSE* de-
vices).
2. AM/FM tuner controls:
Use these controls to operate, navigate
the menu options and change settings
when you are using the AM/FM digital
tuner.
The figure below is an example of the LCD
screen display in tuner mode.