2007 Hyundai Santa Fe wheel
[x] Cancel search: wheelPage 187 of 355
1175175175175175175
FEATURES OF YOUR HYUNDAI
USING EXTERNAL CONTROLSThe Dimmer controlThe Dimmer control setting determines
the brightness of the entire vehicle’s dis-
plays.
Turn the scroll wheel up or down to in-
crease or decrease the brightness of the
vehicle’s instrument panels, backlit dis-
plays and the audio system’s LCD screen
and backlit controls.
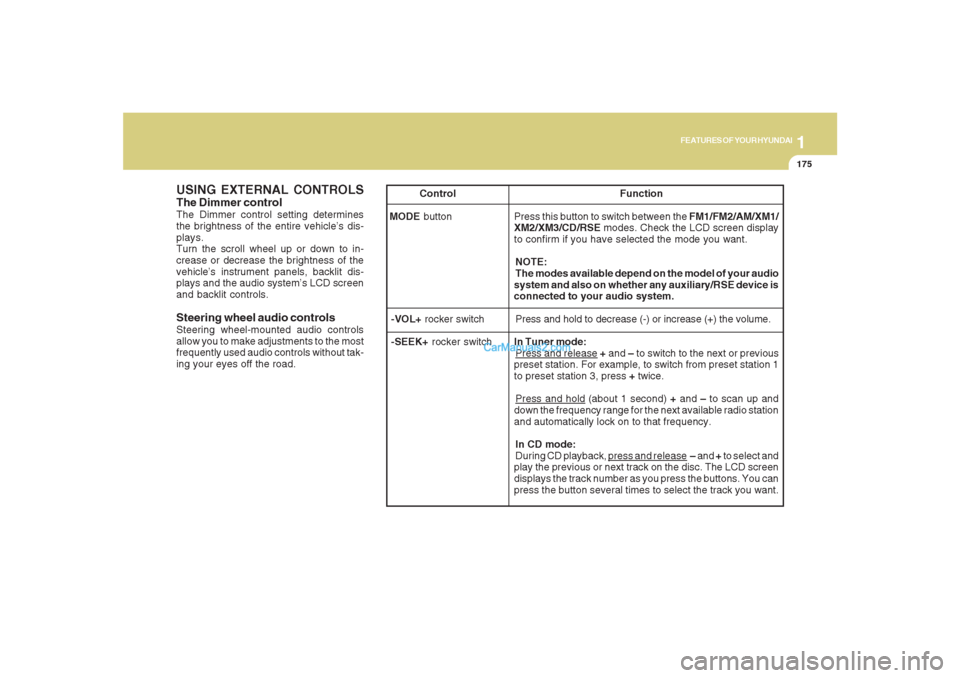
Steering wheel audio controlsSteering wheel-mounted audio controls
allow you to make adjustments to the most
frequently used audio controls without tak-
ing your eyes off the road. Control Function
MODE button Press this button to switch between the FM1/FM2/AM/XM1/
XM2/XM3/CD/RSE modes. Check the LCD screen display
to confirm if you have selected the mode you want.
NOTE:
The modes available depend on the model of your audio
system and also on whether any auxiliary/RSE device is
connected to your audio system.
-VOL+ rocker switchPress and hold to decrease (-) or increase (+) the volume.
-SEEK+ rocker switchIn Tuner mode:
Press and release + and – to switch to the next or previous
preset station. For example, to switch from preset station 1
to preset station 3, press + twice.Press and hold (about 1 second) + and – to scan up and
down the frequency range for the next available radio station
and automatically lock on to that frequency.
In CD mode:
During CD playback,
press and release – and + to select and
play the previous or next track on the disc. The LCD screen
displays the track number as you press the buttons. You can
press the button several times to select the track you want.
Page 193 of 355
1
FEATURES OF YOUR HYUNDAI
181
FEATURES OF YOUR HYUNDAI
181181181181
Adjusting the LCD Display
Press the DISP button on the RSE control
panel to adjust the LCD display. To adjust
the brightness, select Brightness, then,
press the < REW (dimmer) or FWD >
(brighter) buttons. The next time the RSE
is turned on, the LCD display will return to
the brightness level it was adjusted to
when last used. Brightness can be ad-
justed regardless of whether the RSE is
playing an audio or video source.
While the RSE is playing a video signal,
press DISP and then press the
∧ ∧∧ ∧
∧ NEXT or
∨ ∨∨ ∨
∨ PREV buttons to cycle through other
LCD display adjustments including
SCREEN SIZE, CONTRAST, CHROMA
and HUE. With any of these settings dis-
played, press the < REW or FF > buttons to
adjust the settings.
To close the LCD display, pull the bottom
edge towards you and push it up until it
clicks and locks into the stow-away posi-
tion.
Cleaning the LCD Display
If the LCD display becomes dusty or dirty,
clean it by wiping gently with a soft, dry,
clean cloth. Do not use chemical cleanser
to clean the screen.Loading a Disc
To load a disc in the player, insert it part
way into the loading slot. The player will
automatically grip the disc and pull it the
rest of the way in.
Disc Protection
The player has an Auto-Reload Disc Pro-
tection feature to protect discs from acci-
dental damage. If a disc is not removed
within 12 seconds after being ejected, it
will be pulled back into the player. The disc
will not begin playing.
Audio via Vehicle Speakers
To hear the audio from the RSE through
the vehicle's speakers, the RSE must be
selected by the radio CD/AUX button in the
front of the vehicle. Regardless of whether
RSE audio is selected for the vehicle
speakers or not, when the RSE audio is
playing it can be heard in the headphones.Volume Control
You can adjust the volume of the audio
heard in the vehicle speakers from the
RSE control panel or the remote controller.
From the RSE control panel, rotate the
POWER/VOLUME knob. From the remote
controller, press "VOL +" to increase the
volume and "VOL -" to decrease the vol-
ume.
Adjusting the volume in this way will not
affect the wireless headphone volume. To
adjust the headphones, turn the VOL con-
trol wheel on the headphones.
Page 194 of 355
1FEATURES OF YOUR HYUNDAI
182
Headphones
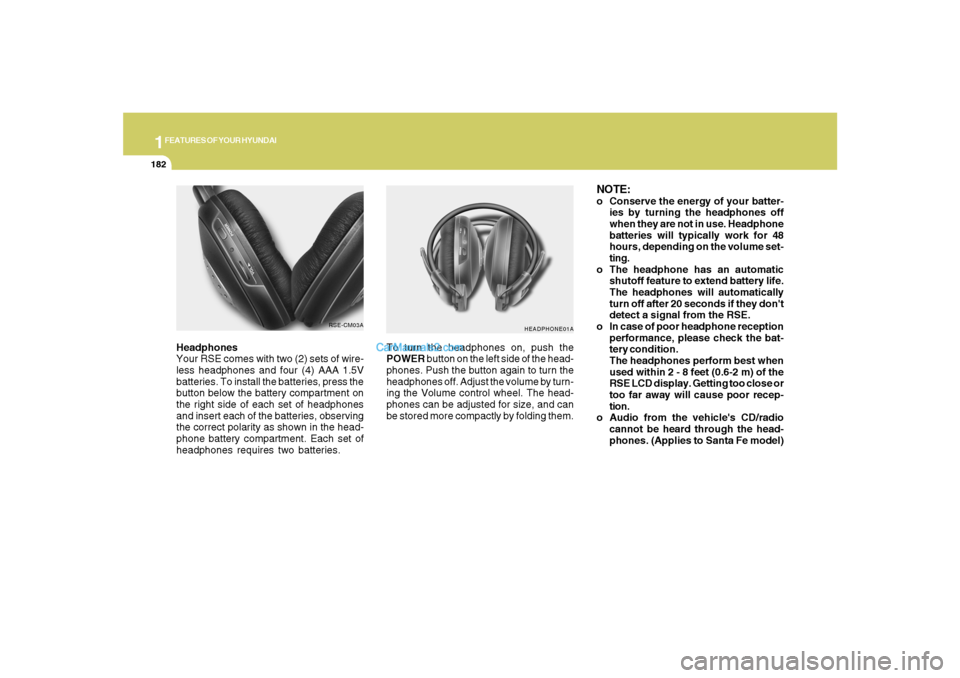
Your RSE comes with two (2) sets of wire-
less headphones and four (4) AAA 1.5V
batteries. To install the batteries, press the
button below the battery compartment on
the right side of each set of headphones
and insert each of the batteries, observing
the correct polarity as shown in the head-
phone battery compartment. Each set of
headphones requires two batteries.
HEADPHONE01A
To turn the headphones on, push the
POWER button on the left side of the head-
phones. Push the button again to turn the
headphones off. Adjust the volume by turn-
ing the Volume control wheel. The head-
phones can be adjusted for size, and can
be stored more compactly by folding them.
NOTE:o Conserve the energy of your batter-
ies by turning the headphones off
when they are not in use. Headphone
batteries will typically work for 48
hours, depending on the volume set-
ting.
o The headphone has an automatic
shutoff feature to extend battery life.
The headphones will automatically
turn off after 20 seconds if they don't
detect a signal from the RSE.
o In case of poor headphone reception
performance, please check the bat-
tery condition.
The headphones perform best when
used within 2 - 8 feet (0.6-2 m) of the
RSE LCD display. Getting too close or
too far away will cause poor recep-
tion.
o Audio from the vehicle's CD/radio
cannot be heard through the head-
phones. (Applies to Santa Fe model)
RSE-CM03A
Page 202 of 355
1FEATURES OF YOUR HYUNDAI
190
NOTE:Some DVDs do not permit chapter navi-
gation.
Instead of using the
∨ ∨∨ ∨
∨ PREV/
∧ ∧∧ ∧
∧ NEXT
buttons, you can also enter the chapter
number using the numbers on the remote
controller. While a DVD/VCD is playing,
press the number button(s) that correspond
to the desired chapter and press ENTER.
4. Stop a Disc
The disc will automatically stop when any
other source (e.g. the vehicle radio or an
external game) is selected. When you
switch back to the DVD, it will begin playing
at the point where it stopped.
While the player is running, press the RSE
control panel POWER/VOLUME knob, or
the ON/OFF button on the remote control-
ler, to stop a disc and turn off the RSE
system and the DVD player. When the
RSE is turned on again, the disc will begin
playing at the point where it stopped.5. Eject a Disc
To eject a disc press the button. A disc
can be ejected even when the unit or the
vehicle is turned off.
NOTE:The player has an Auto-Reload Disc
Protection feature to protect discs from
accidental damage. If a disc is not re-
moved within 12 seconds after being
ejected, it will be pulled back into the
player.
CD PLAYER OPERATIONThe RSE will play audio CDs in both stan-
dard (12 cm) and mini-disc (8 cm) format.NOTE:While the player will accept DVD ROM or
CD ROM disc, the RSE cannot play disc
in this format will eject the disc.
1. Volume Control
You can adjust the volume of the audio
heard in the vehicle speakers from the
RSE control panel or the remote controller.
From the RSE control panel, rotate the
POWER/VOLUME knob. From the remote
controller, press "VOL +" to increase and
"VOL -" to decrease the volume.
Adjusting the volume in this way will not
adjust the wireless headphone volume.
To adjust the headphones, roll the VOL
control wheel.B470E01CM-AAT
Page 210 of 355
1FEATURES OF YOUR HYUNDAI
198
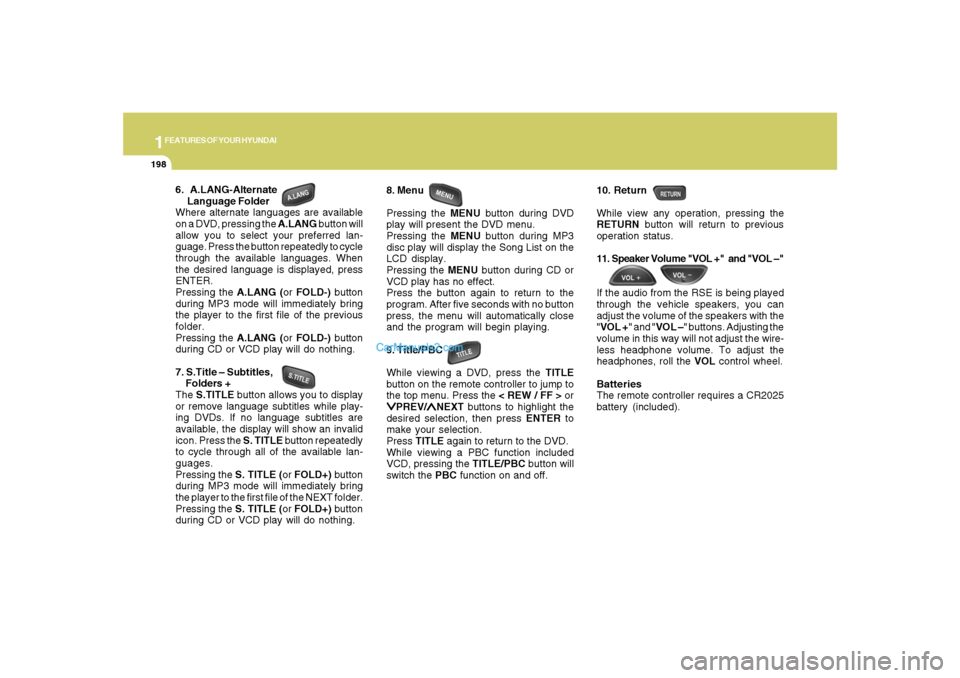
6. A.LANG-Alternate
Language Folder
Where alternate languages are available
on a DVD, pressing the A.LANG button will
allow you to select your preferred lan-
guage. Press the button repeatedly to cycle
through the available languages. When
the desired language is displayed, press
ENTER.
Pressing the A.LANG (or FOLD-) button
during MP3 mode will immediately bring
the player to the first file of the previous
folder.
Pressing the A.LANG (or FOLD-) button
during CD or VCD play will do nothing.
7. S.Title – Subtitles,
Folders +
The S.TITLE button allows you to display
or remove language subtitles while play-
ing DVDs. If no language subtitles are
available, the display will show an invalid
icon. Press the S. TITLE button repeatedly
to cycle through all of the available lan-
guages.
Pressing the S. TITLE (or FOLD+) button
during MP3 mode will immediately bring
the player to the first file of the NEXT folder.
Pressing the S. TITLE (or FOLD+) button
during CD or VCD play will do nothing.8. Menu
Pressing the MENU button during DVD
play will present the DVD menu.
Pressing the MENU button during MP3
disc play will display the Song List on the
LCD display.
Pressing the MENU button during CD or
VCD play has no effect.
Press the button again to return to the
program. After five seconds with no button
press, the menu will automatically close
and the program will begin playing.
9. Title/PBC
While viewing a DVD, press the TITLE
button on the remote controller to jump to
the top menu. Press the < REW / FF > or
∨ ∨∨ ∨
∨PREV/
∧ ∧∧ ∧
∧NEXT buttons to highlight the
desired selection, then press ENTER to
make your selection.
Press TITLE again to return to the DVD.
While viewing a PBC function included
VCD, pressing the TITLE/PBC button will
switch the PBC function on and off.10. Return
While view any operation, pressing the
RETURN button will return to previous
operation status.
11. Speaker Volume "VOL +" and "VOL –"
If the audio from the RSE is being played
through the vehicle speakers, you can
adjust the volume of the speakers with the
"VOL +" and "VOL –" buttons. Adjusting the
volume in this way will not adjust the wire-
less headphone volume. To adjust the
headphones, roll the VOL control wheel.
Batteries
The remote controller requires a CR2025
battery (included).
Page 214 of 355
2
DRIVING YOUR HYUNDAI
3
!
!
WARNING:
o The 2WD Santa Fe is not designed for
off-road use. The AWD Santa Fe is
designed primarily for use on paved
roads. However, occasional use in
off-highway conditions such as es-
tablished unpaved roads and non-
challenging off-road trails is allowed.
The AWD Santa Fe is not designed for
blazing new trails, challenging off-road
conditions, or unpaved hill climbing.
Exceeding the conditions that were
intended for the vehicle's primary
design may result in injury or death.
o Utility vehicles have a significantly
higher rollover rate than other types
of vehicles.
o In a rollover crash, an unbelted per-
son is significantly more likely to die
than a person wearing a seat belt.o Sport utility vehicle have higher
ground clearance and a narrower
track to make them capable of per-
forming in a wide variety of off-road
applications. Specific design charac-
teristics give them a higher center of
gravitiy than ordinary cars. An ad-
vantage of the higher ground clear-
ance is a better view of the road allow-
ing you to anticipate problems. They
are not designed for cornering at the
same speeds as conventional 2-wheel
drive vehicles any more than low-
slung sports cars are designed to
perform satisfactorily under off-road
conditions. If at all possible, avoid
sharp turns or abrupt maneuvers. As
with other vehicles of this type, failure
to operate this vehicle correctly may
result in loss of control or vehicle
rollover.
o In a collision, an unbelted person is
significantly more likely to be seri-
ously injured or killed than a person
wearing a seatbelt.
WARNING:
RISK OF ROLLOVER
!
PROPOSITION 65 WARNING:
Engine exhaust and a wide variety of
automobile components and parts, in-
cluding components found in the interior
furnishings in a vehicle, contain or emit
chemicals known to the State of Califor-
nia to cause cancer and birth defects
and reproductive harm. In addition, cer-
tain fluids contained in vehicles and
certain products of component wear
contain or emit chemicals known to the
State of California to cause cancer and
birth defects or other reproductive harm.
C015A01CM-AAT
Page 215 of 355
2
DRIVING YOUR HYUNDAI
4
!
BEFORE STARTING THE
ENGINEC020A03A-AATBefore you start the engine, you should
always:
1. Look around the vehicle to be sure
there are no flat tires, puddles of oil,
water or other indications of possible
trouble.
2. After entering the car, check to be sure
the parking brake is engaged.
3. Check that all windows, and lights are
clean.
4. Check that the interior and exterior mir-
rors are clean and in position.
5. Check your seat, seatback and head-
rest to be sure they are in their proper
positions.
6. Lock all the doors.
7. Fasten your seat belt and be sure that all
other occupants have fastened theirs.
8. Turn off all lights and accessories that
are not needed.
9. When you turn the ignition switch to
"ON", check that all appropriate warn-
ing lights are operating and that you
have sufficient fuel.
10. Check the operation of warning lights
and all bulbs when key is in the "ON"
position.
!
WARNING:
Your vehicle is equipped with tires de-
signed to provide for safe ride and han-
dling capability.
Do not use a size and type of tire and
wheel that is different from the one that
is originally installed on your vehicle. It
can affect the safety and performance
of your vehicle, which could lead to han-
dling failure or rollover and serious in-
jury.
When replacing the tires, be sure to equip
all four tires with the tire and wheel of the
same size, type, tread, brand and load-
carrying capacity.
WARNING:
o All passengers must be properly
belted whenever the vehicle is mov-
ing. Refer to pages: 1-27 through 1-
33 for more information on their proper
use.
o Always check the surrounding areas
near your vehicle for people, espe-
cially children, before putting a car
into 'drive.'
o Always wear appropriate shoes when
operating your vehicle. Unsuitable
shoes (high heels, ski boots, etc.) may
interfere with your ability to use the
brake and accelerator pedal, and the
clutch (if installed).
Page 216 of 355
2
DRIVING YOUR HYUNDAI
5
TO START THE ENGINEC030A02E-AATCombination Ignition Switcho If your Hyundai is equipped with a manual
transaxle, place the shift lever in neutral
and depress the clutch pedal fully.
o If your Hyundai has an automatic
transaxle, place the shift lever in "P"
(park).
o To start the engine, insert the ignition
key and turn it to the "START" position.
Release it as soon as the engine starts.
Do not hold the key in the "START"
position for more that 15 seconds.
NOTE:o The engine will not start if the clutch
pedal is not depressed fully (Manual
Transaxle) or the shift lever is not in
"P" or "N" Position (Automatic
Transaxle).
o The ignition key cannot be turned from
"ACC" position to "LOCK" position
unless the shift lever is in the "P"
(Park) position or the negative bat-
tery terminal is disconnected from
the battery. To remove the key, al-
ways confirm that the shift lever is
securely positioned in "P" (Park) (For
Automatic Transaxle).
o For additional information about start-
ing, see page 2-6.
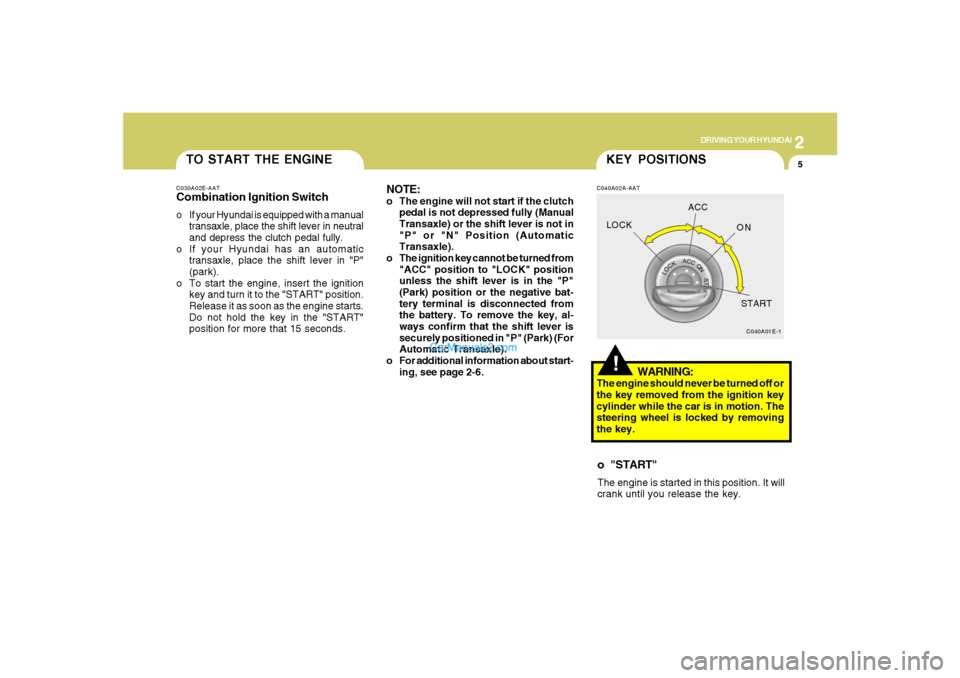
!KEY POSITIONSC040A02A-AAT
WARNING:
The engine should never be turned off or
the key removed from the ignition key
cylinder while the car is in motion. The
steering wheel is locked by removing
the key.o "START"The engine is started in this position. It will
crank until you release the key.
C040A01E-1
LOCKACC
ON
START