2007 Hyundai Santa Fe load capacity
[x] Cancel search: load capacityPage 215 of 355
2
DRIVING YOUR HYUNDAI
4
!
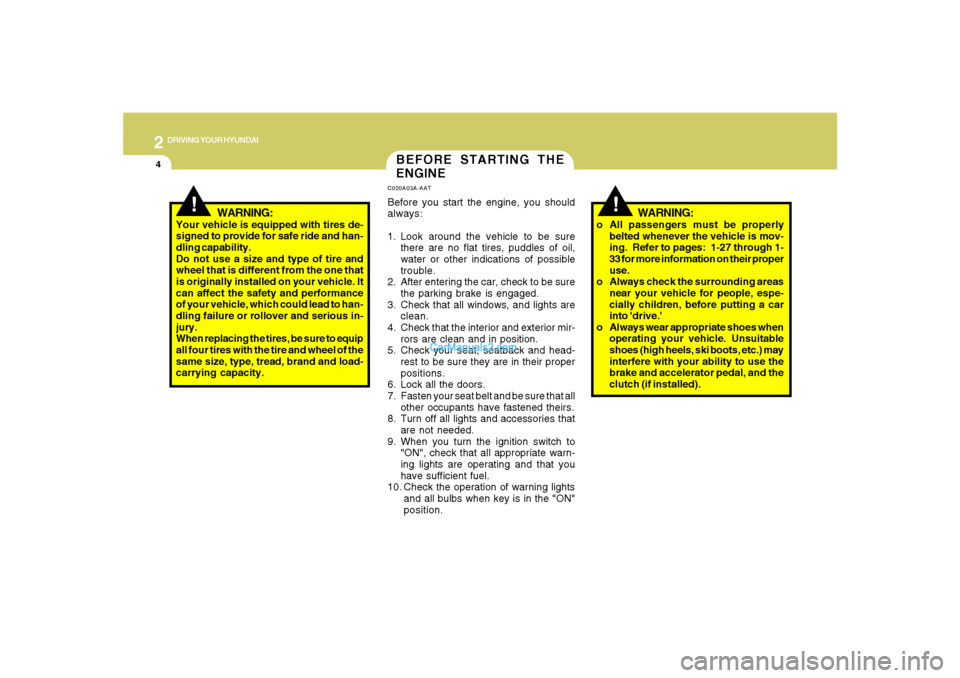
BEFORE STARTING THE
ENGINEC020A03A-AATBefore you start the engine, you should
always:
1. Look around the vehicle to be sure
there are no flat tires, puddles of oil,
water or other indications of possible
trouble.
2. After entering the car, check to be sure
the parking brake is engaged.
3. Check that all windows, and lights are
clean.
4. Check that the interior and exterior mir-
rors are clean and in position.
5. Check your seat, seatback and head-
rest to be sure they are in their proper
positions.
6. Lock all the doors.
7. Fasten your seat belt and be sure that all
other occupants have fastened theirs.
8. Turn off all lights and accessories that
are not needed.
9. When you turn the ignition switch to
"ON", check that all appropriate warn-
ing lights are operating and that you
have sufficient fuel.
10. Check the operation of warning lights
and all bulbs when key is in the "ON"
position.
!
WARNING:
Your vehicle is equipped with tires de-
signed to provide for safe ride and han-
dling capability.
Do not use a size and type of tire and
wheel that is different from the one that
is originally installed on your vehicle. It
can affect the safety and performance
of your vehicle, which could lead to han-
dling failure or rollover and serious in-
jury.
When replacing the tires, be sure to equip
all four tires with the tire and wheel of the
same size, type, tread, brand and load-
carrying capacity.
WARNING:
o All passengers must be properly
belted whenever the vehicle is mov-
ing. Refer to pages: 1-27 through 1-
33 for more information on their proper
use.
o Always check the surrounding areas
near your vehicle for people, espe-
cially children, before putting a car
into 'drive.'
o Always wear appropriate shoes when
operating your vehicle. Unsuitable
shoes (high heels, ski boots, etc.) may
interfere with your ability to use the
brake and accelerator pedal, and the
clutch (if installed).
Page 229 of 355
2
DRIVING YOUR HYUNDAI
18
Driving AWD Safely(1)As always, be sure to wear the seat belt.
(2)Do not drive in challenging off-road
conditions or areas that exceed the
vehicle's basic design intent or the
driver's experience level.
(3)Drive at lower speeds in strong cross-
winds. Because of your vehicle's higher
center of gravity, its stability will be
affected in crosswinds. Slower speeds
ensure better vehicle control.
(4)Check the brake condition after driving
in wet or muddy conditions. Press the
brake several times as you move slowly
until you feel normal braking forces
return.
(5)Do not drive the vehicle through water.
(i.e. streams, rivers, lakes, etc.)
(6)When driving on a snow-covered road
or a slippery, muddy surface, make sure
that you keep a sufficient distance be-
tween your vehicle and the one ahead
of you.(7)Since the driving torque is always ap-
plied to all 4 wheels, the performance of
the full-time AWD vehicle is affected by
the condition of the tires. Be sure to
equip your vehicle with four tires of the
same size and type.
o When replacement of any of the tires
or wheels is necessary, replace all
of them with tires or wheels of the
same size type.
o Rotate the tires and check the tire
pressure at regular intervals.
!
WARNING:
Your vehicle is equipped with tires de-
signed to provide for safe ride and han-
dling capability.
Do not use a size and type of tire and
wheel that is different from the one that
is originally installed on your vehicle. It
can affect the safety and performance
of your vehicle, which could lead to han-
dling failure or rollover and serious in-
jury.
When replacing the tires, be sure to equip
all four tires with the tire and wheel of the
same size, type, tread, brand and load-
carrying capacity.
Page 244 of 355
2
DRIVING YOUR HYUNDAI
33
The tire label located on the driver's
side of the center pillar outer panel
gives the original tire size, cold tire
pressures recommended for your ve-
hicle, the number of people that can be
in your vehicle and vehicle capacity
weight.
Vehicle capacity weight:o 5 passenger vehicle : 930 lbs (420 kg)
o 7 passenger vehicle : 1120 lbs (506 kg)Vehicle capacity weight is the maxi-
mum combined weight of occupants
and cargo. If your vehicle is equipped
with a trailer, the combined weight in-
cludes the tongue load.Seating capacity:
o 5 passenger vehicle
Total: 5 persons
(Front seat: 2 persons,
Rear seat: 3 persons)
o 7 passenger vehicle
Total: 7 persons
(Front seat: 2 persons,
Rear seat: 3 persons
Third row seat: 2 persons)
Seating capacity is the maximum num-
ber of occupants including a driver,
your vehicle may carry.
However the seating capacity may be
reduced based upon the weight of all of
the occupants, and the weight of the
cargo being carried or towed. Do not
overload the vehicle as there is a limit
to the total weight, or load limit including
occupants and cargo, the vehicle can
carry.Towing capacity:
Towing capacity is the maximum trailer
weight including its cargo weight, your
vehicle can tow. See the section "Trailer
or Vehicle Towing" for specifications
about the trailer weight.
Cargo capacity:
The cargo capacity of your vehicle will
increase or decrease depending on the
weight and the number of occupants
and the tongue load, if your vehicle is
equipped with a trailer.
Steps for Determining Correct Load
Limit
(1)Locate the statement "The combined
weight of occupants and cargo should
never exceed XXX pounds'' on your
vehicle's placard.
(2)Determine the combined weight of
the driver and passengers that will be
riding in your vehicle.
Page 245 of 355
2
DRIVING YOUR HYUNDAI
34
C190F02JM
Example 2
Total
1400 lbs
(635 kg)
750 lbs
(340 kg)
650 lbs
(295 kg) Item
A
B
CDescription
Vehicle Capacity Weight
Subtract Occupant Weight
150 lbs (68 kg) x 5
Available Cargo and
Luggage Weight
ABC
C190F01JMTotal
1400 lbs
(635 kg)
300 lbs
(136 kg)
1100 lbs
(498 kg)
Example 1Item
A
B
CDescription
Vehicle Capacity Weight
Subtract Occupant Weight
150 lbs (68 kg) × 2
Available Cargo and
Luggage weight
ABC
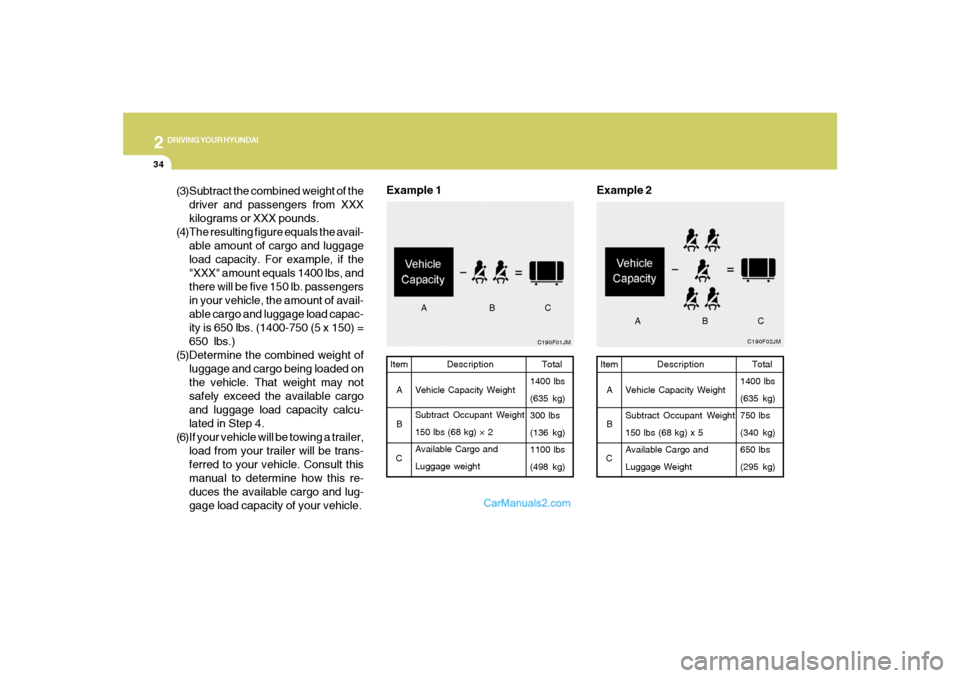
(3)Subtract the combined weight of the
driver and passengers from XXX
kilograms or XXX pounds.
(4)The resulting figure equals the avail-
able amount of cargo and luggage
load capacity. For example, if the
"XXX" amount equals 1400 lbs, and
there will be five 150 lb. passengers
in your vehicle, the amount of avail-
able cargo and luggage load capac-
ity is 650 lbs. (1400-750 (5 x 150) =
650 lbs.)
(5)Determine the combined weight of
luggage and cargo being loaded on
the vehicle. That weight may not
safely exceed the available cargo
and luggage load capacity calcu-
lated in Step 4.
(6)If your vehicle will be towing a trailer,
load from your trailer will be trans-
ferred to your vehicle. Consult this
manual to determine how this re-
duces the available cargo and lug-
gage load capacity of your vehicle.
Page 246 of 355
2
DRIVING YOUR HYUNDAI
35
C190F03JMTotal
1400 lbs
(635 kg)
860 lbs
(390 kg)
540 lbs
(245 kg) Item
A
B
CDescription
Vehicle Capacity Weight
Subtract Occupant Weight
172 lbs (78 kg) x 5
Available Cargo Weight
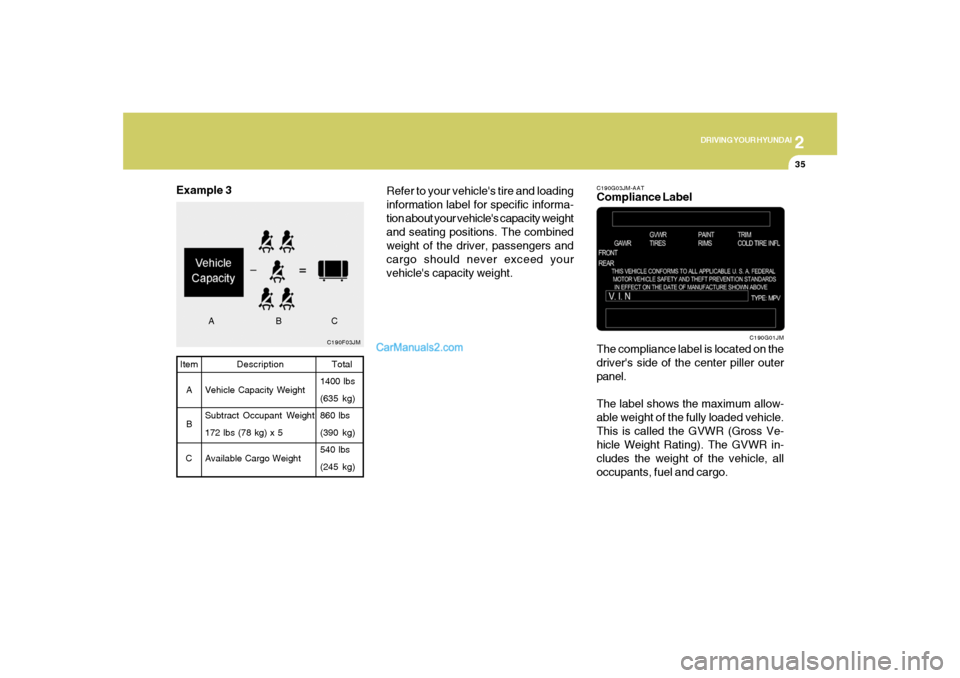
Example 3
ABC
Refer to your vehicle's tire and loading
information label for specific informa-
tion about your vehicle's capacity weight
and seating positions. The combined
weight of the driver, passengers and
cargo should never exceed your
vehicle's capacity weight.
C190G03JM-AATCompliance Label
The compliance label is located on the
driver's side of the center piller outer
panel.
The label shows the maximum allow-
able weight of the fully loaded vehicle.
This is called the GVWR (Gross Ve-
hicle Weight Rating). The GVWR in-
cludes the weight of the vehicle, all
occupants, fuel and cargo.
C190G01JM
Page 247 of 355
2
DRIVING YOUR HYUNDAI
36
!
WARNING:
o Overloading your vehicle can
cause heat buildup in your
vehicle's tires and possible tire
failure that could lead to a crash.
o Overloading your vehicle can
cause increased stopping dis-
tances that could lead to a crash.
o A crash resulting from poor han-
dling vehicle damage, tire failure,
or increased stopping distances
could result in serious injury or
death.
!
WARNING:
o Do not load your vehicle any
heavier than the GVWR, either the
maximum front or rear GAWR and
vehicle capacity weight. If you do,
parts, including tires on your ve-
hicle can break, and it can change
the way your vehicle handles and
braking ability. This could cause
you to lose control and crash.
Also, overloading can shorten the
life of your vehicle.
!
This label also tells you the maximum
weights that can be supported by the
front and rear axles, called Gross Axle
Weight Rating (GAWR). To find out the
actual loads on your front and rear
axles, you need to go to a weigh station
and weigh your vehicle. Your dealer can
help you with this. Be sure to spread out
your load equally on both sides of the
centerline.
WARNING:
o Never exceed the GVWR for your
vehicle, the GAWR for either the
front or rear axle and vehicle ca-
pacity weight. Exceeding these rat-
ings can cause an accident or
vehicle damage. You can calcu-
late the weight of your load by
weighing the items (or people)
before putting them in the vehicle.
Be careful not to overload your
vehicle.
Page 260 of 355
312
WHAT TO DO IN AN EMERGENCY
IF YOU HAVE A FLAT TIRED050A02A-AATIf a tire goes flat while you are driving:
1. Take your foot off the accelerator
pedal and let the car slow down while
driving straight ahead. Do not apply
the brakes immediately or attempt to
pull off the road as this may cause a
loss of control. When the vehicle has
slowed to such a speed that it is safe
to do so, brake carefully and pull off
the road. Drive off the road as far as
possible and park on firm, level
ground. If you are on a divided high-
way, do not park in the median area
between the two traffic lanes.
2. When the car is stopped, turn on your
emergency hazard flashers, set the
parking brake and put the transaxle
in "P" (automatic) or reverse (manual
transaxle).
3. Have all passengers get out of the
vehicle. Be sure they all get out on
the side of the vehicle that is away
from traffic.
4. Change the tire following the instruc-
tions provided on the following pages.
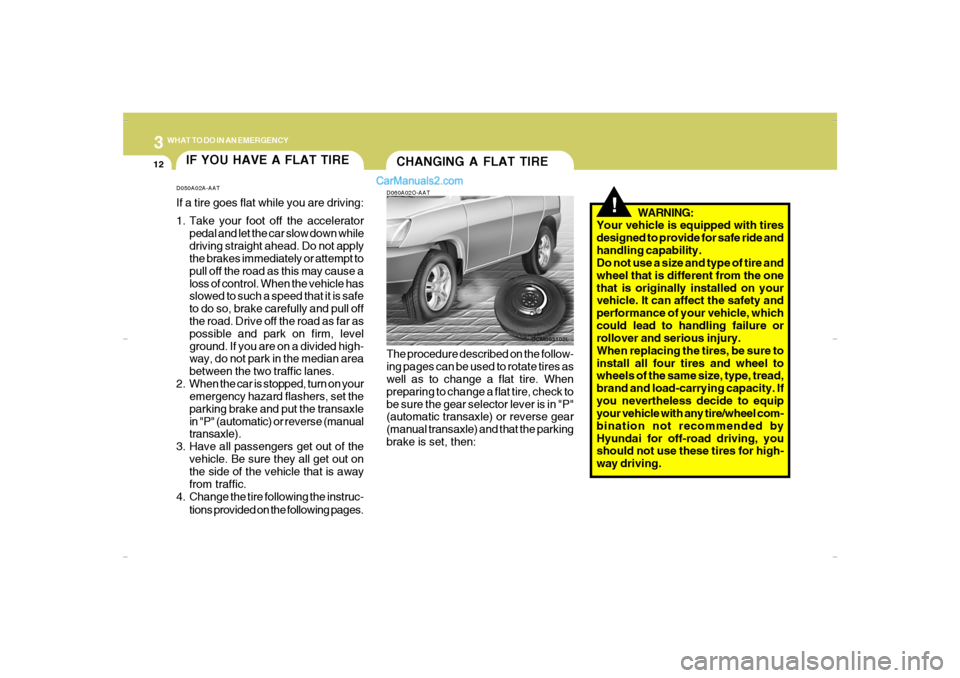
CHANGING A FLAT TIRED060A02O-AAT
OCM053102L
!
The procedure described on the follow-
ing pages can be used to rotate tires as
well as to change a flat tire. When
preparing to change a flat tire, check to
be sure the gear selector lever is in "P"
(automatic transaxle) or reverse gear
(manual transaxle) and that the parking
brake is set, then:WARNING:
Your vehicle is equipped with tires
designed to provide for safe ride and
handling capability.
Do not use a size and type of tire and
wheel that is different from the one
that is originally installed on your
vehicle. It can affect the safety and
performance of your vehicle, which
could lead to handling failure or
rollover and serious injury.
When replacing the tires, be sure to
install all four tires and wheel to
wheels of the same size, type, tread,
brand and load-carrying capacity. If
you nevertheless decide to equip
your vehicle with any tire/wheel com-
bination not recommended by
Hyundai for off-road driving, you
should not use these tires for high-
way driving.
Cmhma-3.p653/20/2006, 5:02 PM 12
Page 333 of 355
8
CONSUMER INFORMATION, REPORTING SAFETY DEFECTS & BINDING ARBITRATION OF WARRANTY CLAIMS8
Intended Outboard Sidewall: The side
of an asymmetrical tire, that must al-
ways face outward when mounted on a
vehicle.
Kilopascal (kPa): The metric unit for
air pressure.
Load Index: An assigned number rang-
ing from 1 to 279 that corresponds to
the load carrying capacity of a tire.
Maximum Inflation Pressure: The
maximum air pressure to which a cold
tire may be inflated. The maximum air
pressure is molded onto the sidewall.
Maximum Load Rating: The load rat-
ing for a tire at the maximum permis-
sible inflation pressure for that tire.
Maximum Loaded Vehicle Weight:
The sum of curb weight; accessory
weight; vehicle capacity weight; and
production options weight.
Normal Occupant Weight: The num-
ber of occupants a vehicle is designed
to seat multiplied by 150 pounds (68
kg). Cold Tire Pressure: The amount of air
pressure in a tire, measured in pounds
per square inch (psi) or kilopascals
(kPa) before a tire has built up heat from
driving.
Curb Weight: This means the weight of
a motor vehicle with standard and op-
tional equipment including the maxi-
mum capacity of fuel, oil and coolant,
but without passengers and cargo.
DOT Markings: A code molded into the
sidewall of a tire signifying that the tire
is in compliance with the U.S. Depart-
ment of Transportation motor vehicle
safety standards. The DOT code in-
cludes the Tire Identification Number
(TIN), an alphanumeric designator which
can also identify the tire manufacturer,
production plant, brand and date of
production.
GVWR: Gross Vehicle Weight Rating
GAWR FRT: Gross Axle Weight Rating
for the front Axle.
GAWR RR: Gross Axle Weight Rating
for the rear axle.
I030D01JM-AATTire Terminology And Definitions
Air Pressure: The amount of air inside
the tire pressing outward on the tire. Air
pressure is expressed in pounds per
square inch (psi) or kilopascal (kPa).
Accessory Weight: This means the
combined weight of optional accesso-
ries. Some examples of optional ac-
cessories are, automatic transmission,
power seats, and air conditioning.
Aspect Ratio: The relationship of a
tire's height to its width.
Belt: A rubber coated layer of cords that
is located between the plies and the
tread. Cords may be made from steel or
other reinforcing materials.
Bead: The tire bead contains steel
wires wrapped by steel cords that hold
the tire onto the rim.
Bias Ply Tire: A pneumatic tire in which
the plies are laid at alternate angles
less than 90 degrees to the centerline of
the tread.