2007 Hyundai Santa Fe key battery
[x] Cancel search: key batteryPage 23 of 355

1
FEATURES OF YOUR HYUNDAI
11
HMR
THEFT-ALARM SYSTEMB075B01CM-AATArmed StagePark the car and stop the engine. Arm the
system as described below.B070A01A-AAT(If installed)This system is designed to provide protec-
tion from unauthorized entry into the car.
This system is operated in three stages :
the first is the "Armed" stage, the second is
the "Alarm" stage and the third is the "Dis-
armed" stage. If triggered, the system pro-
vides an audible alarm with blinking of the
turn signal lights.
NOTE:The transmitter will not work if any of
following occur:
- The ignition key is in ignition switch.
- You exceed the operating distance
limit (10 m).
- The battery in the transmitter is weak.
- Other vehicles or objects may be
blocking the signal.
- The weather is extremely cold.
- The transmitter is close to a radio
transmitter such as a radio station or
an airport which can interfere with
normal operation of the transmitter.
When the transmitter does not work
correctly, open and close the door with
the ignition key. If you have a problem
with the transmitter, contact an autho-
rized Hyundai Dealer.NOTE:Keep the transmitter away from water or
any liquid. If the keyless entry system is
inoperative due to exposure to water or
liquids, it will not be covered by your
manufacturer vehicle warranty.1) Remove the ignition key from the igni-
tion switch.
2) Make sure that the hood and tail gate
are closed and latched.
3) Lock the doors using the transmitter of
the keyless entry system or key or cen-
tral door lock switch.
After completion of the steps above, the
turn signal lights will blink once and the
system will be armed after 30 seconds.
The system can also be armed by locking
the doors with the key; however, the turn
signal lights are not operated.
If any door, tailgate or engine hood is
opened within 30 seconds after entering
the armed stage, the system is disarmed to
prevent unnecessary alarm.
NOTE:If any door, tailgate or engine hood re-
mains open, the system will not be armed.
If all doors, tailgate and engine hood are
closed, after pressing the "Lock" button
on the transmitter, the turn signal lights
blink once indicating the system is
armed.
Page 63 of 355
1
FEATURES OF YOUR HYUNDAI
51
CAUTION:
When installing a container of liquid air
freshener inside the vehicle, do not place
it near the instrument cluster nor on the
instrument panel surface. If there is any
leakage from the air freshener onto these
areas (instrument cluster, instrument
panel or air ventilator), it may damage
these parts. If the liquid from the air
freshener does leak onto these areas,
wash them with water immediately.
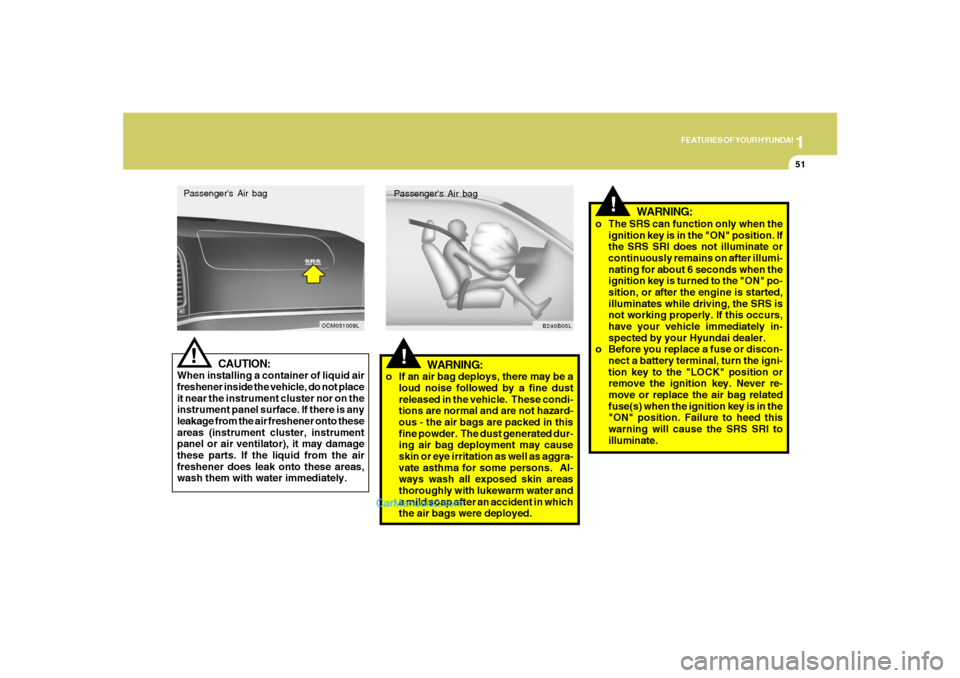
!Passenger's Air bag
OCM051009L
!
WARNING:
o If an air bag deploys, there may be a
loud noise followed by a fine dust
released in the vehicle. These condi-
tions are normal and are not hazard-
ous - the air bags are packed in this
fine powder. The dust generated dur-
ing air bag deployment may cause
skin or eye irritation as well as aggra-
vate asthma for some persons. Al-
ways wash all exposed skin areas
thoroughly with lukewarm water and
a mild soap after an accident in which
the air bags were deployed.Passenger's Air bag
B240B05L
!
o The SRS can function only when the
ignition key is in the "ON" position. If
the SRS SRI does not illuminate or
continuously remains on after illumi-
nating for about 6 seconds when the
ignition key is turned to the "ON" po-
sition, or after the engine is started,
illuminates while driving, the SRS is
not working properly. If this occurs,
have your vehicle immediately in-
spected by your Hyundai dealer.
o Before you replace a fuse or discon-
nect a battery terminal, turn the igni-
tion key to the "LOCK" position or
remove the ignition key. Never re-
move or replace the air bag related
fuse(s) when the ignition key is in the
"ON" position. Failure to heed this
warning will cause the SRS SRI to
illuminate.
WARNING:
Page 89 of 355
1
FEATURES OF YOUR HYUNDAI
77
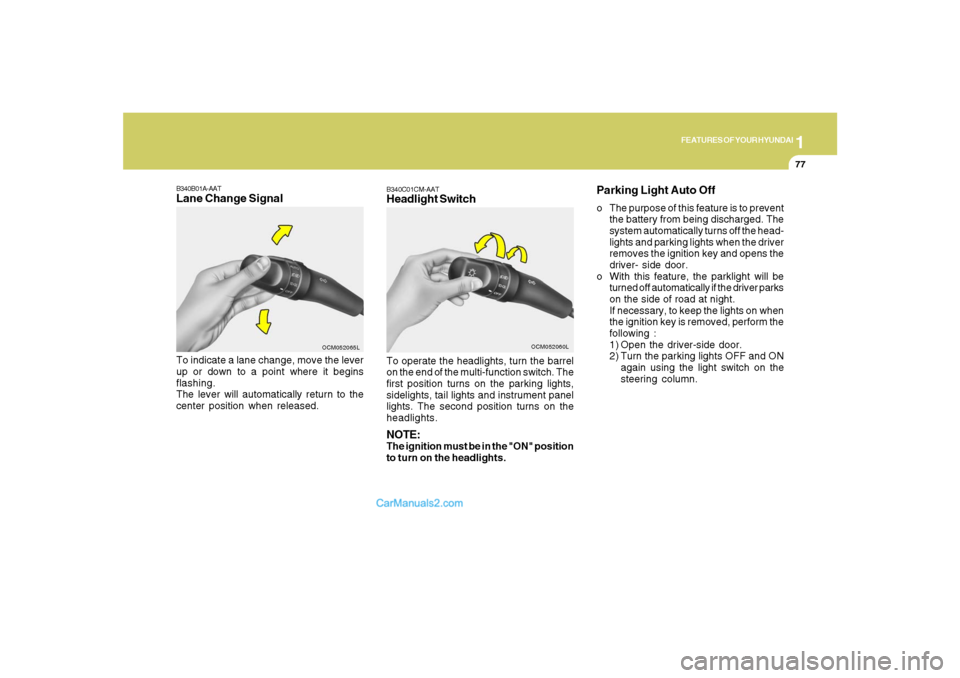
B340C01CM-AATHeadlight SwitchTo operate the headlights, turn the barrel
on the end of the multi-function switch. The
first position turns on the parking lights,
sidelights, tail lights and instrument panel
lights. The second position turns on the
headlights.NOTE:The ignition must be in the "ON" position
to turn on the headlights.
OCM052060L
B340B01A-AATLane Change SignalTo indicate a lane change, move the lever
up or down to a point where it begins
flashing.
The lever will automatically return to the
center position when released.
OCM052065L
Parking Light Auto Offo The purpose of this feature is to prevent
the battery from being discharged. The
system automatically turns off the head-
lights and parking lights when the driver
removes the ignition key and opens the
driver- side door.
o With this feature, the parklight will be
turned off automatically if the driver parks
on the side of road at night.
If necessary, to keep the lights on when
the ignition key is removed, perform the
following :
1) Open the driver-side door.
2) Turn the parking lights OFF and ON
again using the light switch on the
steering column.
Page 99 of 355
1
FEATURES OF YOUR HYUNDAI
87
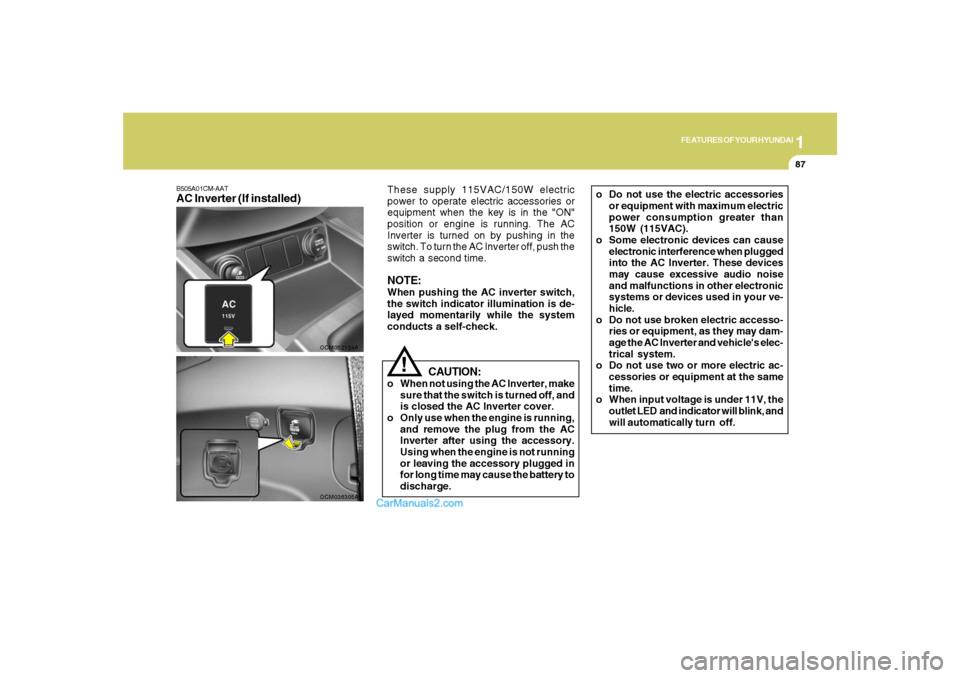
B505A01CM-AATAC Inverter (If installed)
OCM052124A
CAUTION:
o When not using the AC Inverter, make
sure that the switch is turned off, and
is closed the AC Inverter cover.
o Only use when the engine is running,
and remove the plug from the AC
Inverter after using the accessory.
Using when the engine is not running
or leaving the accessory plugged in
for long time may cause the battery to
discharge.
!
These supply 115VAC/150W electric
power to operate electric accessories or
equipment when the key is in the "ON"
position or engine is running. The AC
Inverter is turned on by pushing in the
switch. To turn the AC Inverter off, push the
switch a second time.NOTE:When pushing the AC inverter switch,
the switch indicator illumination is de-
layed momentarily while the system
conducts a self-check.
OCM036305A
o Do not use the electric accessories
or equipment with maximum electric
power consumption greater than
150W (115VAC).
o Some electronic devices can cause
electronic interference when plugged
into the AC Inverter. These devices
may cause excessive audio noise
and malfunctions in other electronic
systems or devices used in your ve-
hicle.
o Do not use broken electric accesso-
ries or equipment, as they may dam-
age the AC Inverter and vehicle's elec-
trical system.
o Do not use two or more electric ac-
cessories or equipment at the same
time.
o When input voltage is under 11V, the
outlet LED and indicator will blink, and
will automatically turn off.
Page 104 of 355

1FEATURES OF YOUR HYUNDAI92
!
CAUTION:
If the sunroof is not reset, it may not
operate properly.
B460E01TG-GATResetting the sunroofWhenever the vehicle battery is discon-
nected or discharged, or you use the emer-
gency handle to operate the sunroof, you
have to reset your sunroof system as fol-
lows:3. Insert the hexagonal head wrench pro-
vided with the vehicle into the socket.
This wrench can be found in the vehicle's
glove box.
4. Turn the wrench clockwise to open or
counterclockwise to close the sunroof.
OCM052022N
1. Turn the ignition key to the "ON" posi-
tion.
2. Press the TILT UP button for more than
1 second to tilt up the sunroof com-
pletely when the sunroof is fully closed.
Then, release the button.
3. Press and hold the TILT UP button once
again until the sunroof has returned to
the original position of TILT UP after it is
raised a little higher than the maximum
TILT UP position. Then, release the
button.
4. Press and hold the TILT UP button within
5 seconds until the sunroof is operated
as follows;
TILT DOWN → SLIDE OPEN → SLIDE
CLOSE
Then, release the button.
B460D01CM-AATManual Operation of SunroofIf the sunroof does not electrically operate:
1. Open the sunglass holder.
2. Remove the two mounting screws of the
front overhead console with a (+) driver.
OCM055031N
Page 216 of 355
2
DRIVING YOUR HYUNDAI
5
TO START THE ENGINEC030A02E-AATCombination Ignition Switcho If your Hyundai is equipped with a manual
transaxle, place the shift lever in neutral
and depress the clutch pedal fully.
o If your Hyundai has an automatic
transaxle, place the shift lever in "P"
(park).
o To start the engine, insert the ignition
key and turn it to the "START" position.
Release it as soon as the engine starts.
Do not hold the key in the "START"
position for more that 15 seconds.
NOTE:o The engine will not start if the clutch
pedal is not depressed fully (Manual
Transaxle) or the shift lever is not in
"P" or "N" Position (Automatic
Transaxle).
o The ignition key cannot be turned from
"ACC" position to "LOCK" position
unless the shift lever is in the "P"
(Park) position or the negative bat-
tery terminal is disconnected from
the battery. To remove the key, al-
ways confirm that the shift lever is
securely positioned in "P" (Park) (For
Automatic Transaxle).
o For additional information about start-
ing, see page 2-6.
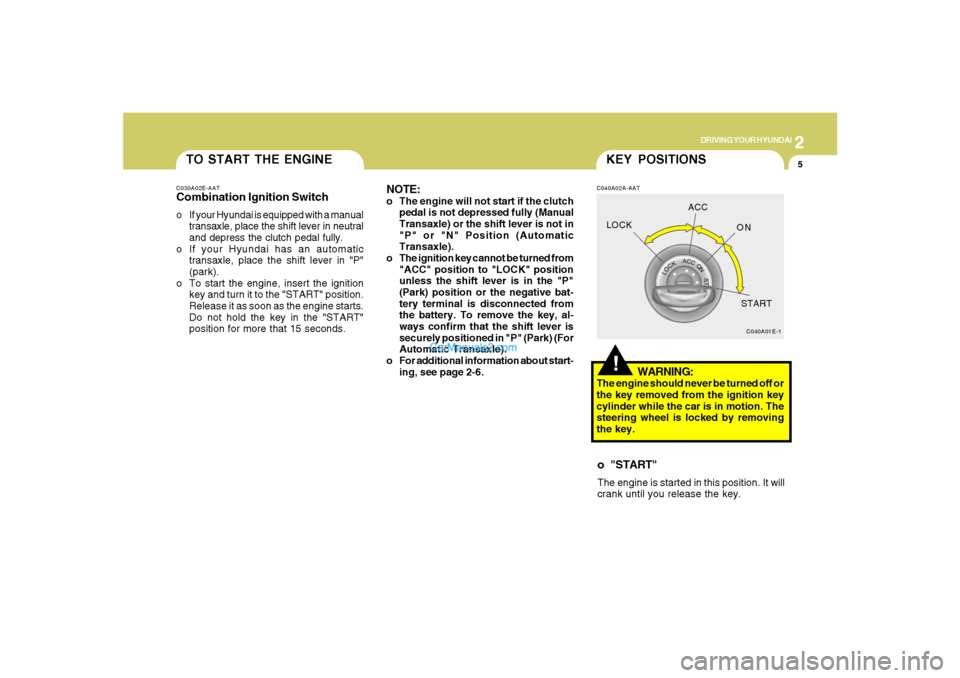
!KEY POSITIONSC040A02A-AAT
WARNING:
The engine should never be turned off or
the key removed from the ignition key
cylinder while the car is in motion. The
steering wheel is locked by removing
the key.o "START"The engine is started in this position. It will
crank until you release the key.
C040A01E-1
LOCKACC
ON
START
Page 217 of 355
2
DRIVING YOUR HYUNDAI
6
C070C01E-1
LOCKACC
ON
START
C050A01E-1
STARTING!
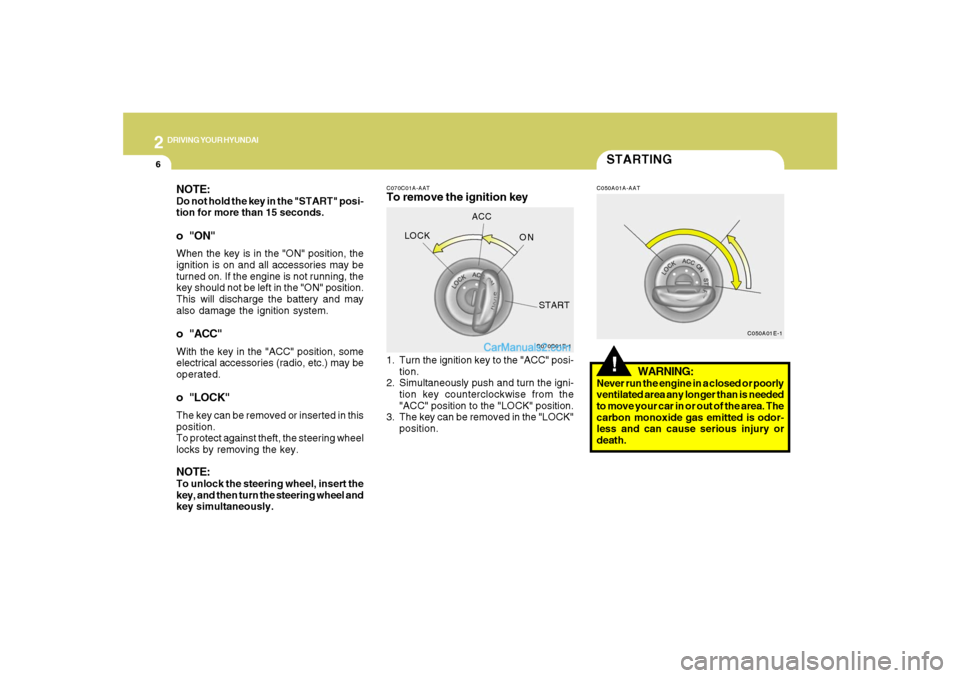
C070C01A-AATTo remove the ignition key
C050A01A-AAT
1. Turn the ignition key to the "ACC" posi-
tion.
2. Simultaneously push and turn the igni-
tion key counterclockwise from the
"ACC" position to the "LOCK" position.
3. The key can be removed in the "LOCK"
position.
WARNING:
Never run the engine in a closed or poorly
ventilated area any longer than is needed
to move your car in or out of the area. The
carbon monoxide gas emitted is odor-
less and can cause serious injury or
death.
NOTE:Do not hold the key in the "START" posi-
tion for more than 15 seconds.o "ON"When the key is in the "ON" position, the
ignition is on and all accessories may be
turned on. If the engine is not running, the
key should not be left in the "ON" position.
This will discharge the battery and may
also damage the ignition system.o "ACC"With the key in the "ACC" position, some
electrical accessories (radio, etc.) may be
operated.o "LOCK"The key can be removed or inserted in this
position.
To protect against theft, the steering wheel
locks by removing the key.NOTE:To unlock the steering wheel, insert the
key, and then turn the steering wheel and
key simultaneously.
Page 236 of 355
2
DRIVING YOUR HYUNDAI
25
C160D01A-AATCheck Battery and CablesWinter puts additional burdens on the
battery system. Visually inspect the battery
and cables as described in Section 6. The
level of charge in your battery can be
checked by your Hyundai dealer or a ser-
vice station.
C160F01A-AATCheck Spark Plugs and Ignition
SystemInspect your spark plugs as described in
Section 6 and replace them if necessary.
Also check all ignition wiring and compo-
nents to be sure they are not cracked, worn
or damaged in any way.C160E01A-AATChange to "Winter Weight" Oil if
NecessaryIn some climates it is recommended that a
lower viscosity "winter weight" oil be used
during cold weather. See Section 9 for
recommendations. If you aren't sure what
weight oil you should use, consult your
Hyundai dealer.
C160G01A-GATTo Keep Locks from FreezingTo keep the locks from freezing, squirt an
approved de-icer fluid or glycerine into the
key opening. If a lock is covered with ice,
squirt it with an approved de-icing fluid to
remove the ice. If the lock is frozen inter-
nally, you may be able to thaw it out by
using a heated key. Handle the heated key
with care to avoid injury.NOTE:The proper temperature for using the
immobilizer key is from -40°F (-40°C) to
176°F (80°C). If you heat the immobilizer
key over 80°C to open the frozen lock, it
may cause damage to the transponder
in its head.
C160C01A-AATUse High Quality Ethylene Glycol
CoolantYour Hyundai is delivered with high qual-
ity ethylene glycol coolant in the cooling
system. It is the only type of coolant that
should be used because it helps prevent
corrosion in the cooling system, lubricates
the water pump and prevents freezing. Be
sure to replace or replenish your coolant in
accordance with the maintenance sched-
ule in Section 5. Before winter, have your
coolant tested to assure that its freezing
point is sufficient for the temperatures an-
ticipated during the winter.