Page 85 of 355
1
FEATURES OF YOUR HYUNDAI
73
2. Tripmeter
OCM051018L
OCM052204R
OCM052055
Pushing in the TRIP switch when the igni-
tion switch is turned "ON" will display two
tripmeters in kilometers or miles.To shift from TRIP A to TRIP B, press the
TRIP switch.
TRIP A:First distance you have traveled
from your origination point to a
first destination.
TRIP B:Second distance from the first
destination to the final destina-
tion.When the RESET switch is pressed for 1
second, the tripmeter will reset to 0.
Page 86 of 355
1FEATURES OF YOUR HYUNDAI74
Push in the RESET switch more than 1
second to initialize the displayed informa-
tion.
OCM051018L
Reset Switch
TRIPMETER
DISTANCE TO EMPTY
AVERAGE FUEL CONSUMPTION
OUTSIDE TEMPERATURE
(If installed)
Pushing in the TRIP switch for when the
ignition switch is in "ON" position changes
the display as follows;
OCM052055
Trip Switch
TRIP COMPUTERB400B01CM-AAT(If Installed)Trip computer is a microcomputer-con-
trolled driver information system that dis-
plays information related to driving on the
LCD.
OCM051017A
Page 87 of 355

1
FEATURES OF YOUR HYUNDAI
75
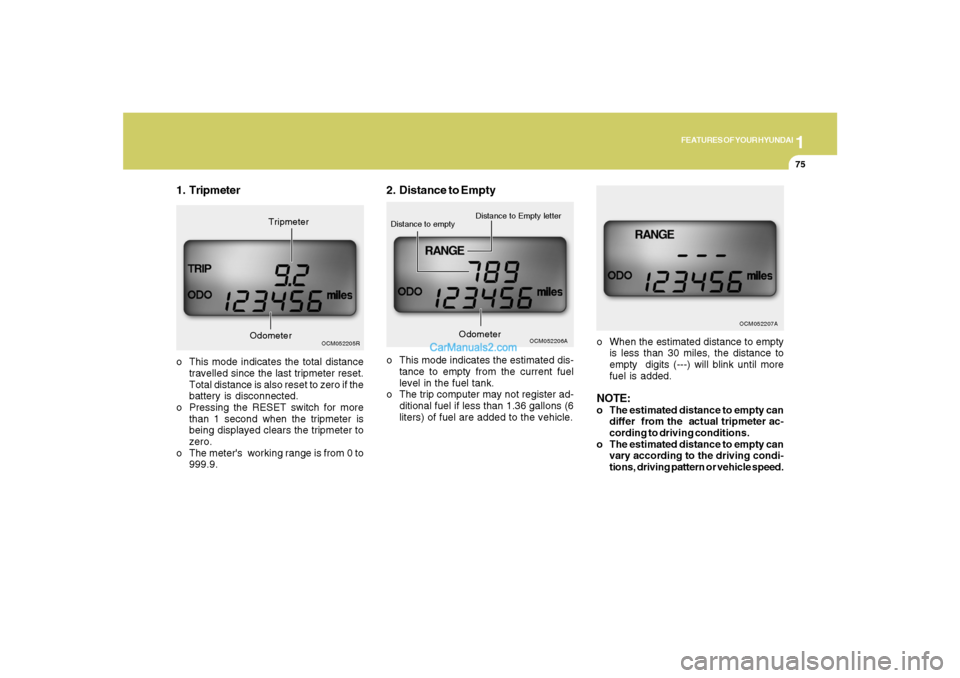
o When the estimated distance to empty
is less than 30 miles, the distance to
empty digits (---) will blink until more
fuel is added.NOTE:o The estimated distance to empty can
differ from the actual tripmeter ac-
cording to driving conditions.
o The estimated distance to empty can
vary according to the driving condi-
tions, driving pattern or vehicle speed.
2. Distance to Emptyo This mode indicates the estimated dis-
tance to empty from the current fuel
level in the fuel tank.
o The trip computer may not register ad-
ditional fuel if less than 1.36 gallons (6
liters) of fuel are added to the vehicle.
OCM052206A
Distance to Empty letter
Distance to empty
OCM052207A
Odometer
1. Tripmetero This mode indicates the total distance
travelled since the last tripmeter reset.
Total distance is also reset to zero if the
battery is disconnected.
o Pressing the RESET switch for more
than 1 second when the tripmeter is
being displayed clears the tripmeter to
zero.
o The meter's working range is from 0 to
999.9.
OCM052205R
OdometerTripmeter
Page 88 of 355

1FEATURES OF YOUR HYUNDAI76
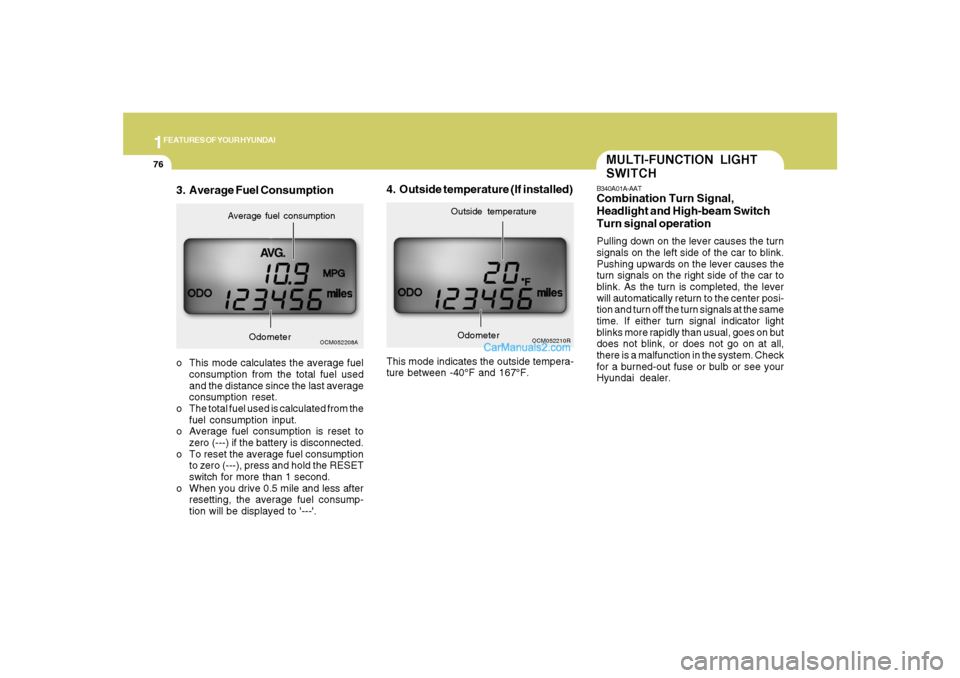
o This mode calculates the average fuel
consumption from the total fuel used
and the distance since the last average
consumption reset.
o The total fuel used is calculated from the
fuel consumption input.
o Average fuel consumption is reset to
zero (---) if the battery is disconnected.
o To reset the average fuel consumption
to zero (---), press and hold the RESET
switch for more than 1 second.
o When you drive 0.5 mile and less after
resetting, the average fuel consump-
tion will be displayed to '---'.
4. Outside temperature (If installed)This mode indicates the outside tempera-
ture between -40°F and 167°F.
OCM052210R
Outside temperature
Odometer
3. Average Fuel Consumption
OCM052208A
Average fuel consumption
Odometer
MULTI-FUNCTION LIGHT
SWITCHB340A01A-AATCombination Turn Signal,
Headlight and High-beam Switch
Turn signal operationPulling down on the lever causes the turn
signals on the left side of the car to blink.
Pushing upwards on the lever causes the
turn signals on the right side of the car to
blink. As the turn is completed, the lever
will automatically return to the center posi-
tion and turn off the turn signals at the same
time. If either turn signal indicator light
blinks more rapidly than usual, goes on but
does not blink, or does not go on at all,
there is a malfunction in the system. Check
for a burned-out fuse or bulb or see your
Hyundai dealer.
Page 96 of 355

1FEATURES OF YOUR HYUNDAI84
INSTRUMENT PANEL LIGHT
CONTROL (RHEOSTAT)B410A01A-AATThe instrument panel lights can be made
brighter or dimmer by turning the instru-
ment panel light control knob.
OCM052056
DIGITAL CLOCKB400A01NF-GATThere are three control buttons for the
digital clock. Their functions are:
H- Push "H" to advance the hour indi-
cated.
M- Push "M" to advance the minute indi-
cated.
R- Push "R" to reset minutes to ":00" to
facilitate resetting the clock to the
correct time. When this is done:
Pressing "R" between 11 : 01 and 11
: 29 changes the readout to 11 : 00.
Pressing "R" between 11 : 30 and 11
: 59 changes the readout to 12 : 00.
Push the "R" button for 5 seconds to
display a 12 or 24-hour clock.
OCM052116A
CAUTION:
Do not clean the inner side of the rear
window glass with an abrasive type of
glass cleaner or use a scraper to re-
move foreign deposits from the inner
surface of the glass as this may cause
damage to the defroster elements.
!
NOTE:Use the rear window defroster only when
the engine is running.
Page 111 of 355

1
FEATURES OF YOUR HYUNDAI
99
!
WARNING:
Do not adjust or fold the outside rearview
mirrors while the vehicle is moving. This
could result in loss of control, and an
accident causing death, serious injury
or property damage.
CAUTION:
If the mirror is jammed with ice, do not
adjust the mirror by force. Use an ap-
proved spray de-icer (not radiator anti-
freeze) to release the frozen mecha-
nism or move the vehicle to a warm
place and allow the ice to melt.
!
DAY/NIGHT INSIDE REAR-
VIEW MIRRORB520A01A-AATManual TypeYour Hyundai is equipped with a day/night
inside rearview mirror. The "night" position
is selected by flipping the tab at the bottom
of the mirror toward you. In the "night"
position, the glare of headlights of cars
behind you is reduced.
B520A01CM
B520C01CM-AATAutomatic Dimming Rearview
Mirror with Compass (If installed)1. Status Indicator LED
2. Feature Control Button
3. Rear Light Sensor
4. Display Window
Automatic dimming rearview mirrors auto-
matically controls the glare from head-
lights behind you when the function is
turned on by pressing and holding the
Feature Control Button for more than 3 but
less than 6 seconds. This feature can be
turned off by pressing and holding the
button for the same amount of time once
more.
B520C08JM
Page 112 of 355

1FEATURES OF YOUR HYUNDAI
100
- The compass headings are inaccurate
in long distance driving.
If the vehicle’s compass headings become
inaccurate, the compass should be cali-
brated as follows:
1. Ensure the vehicle is not located near
large steel structures or under electric
power lines.
2. Turn on the compass by pressing the
button.
3. Press and hold the
button for more
than 6 but less than 9 seconds. The
current zone number will appear in the
display. Release then press the
but-
ton until your zone number appears in
the display.
4. Check the mirror angle by pressing and
holding the
button for more than
12seconds. Release then press the
button to “L”(for steering wheel on the
Left side of the vehicle). (if installed)
5. Press and hold the
button between 9
and 12 seconds. Release the
button
when a “C” appears in the display.
6. Drive the vehicle in 2 complete circles
at less than 5mph(8km/h) or until the
compass heading appears.
CAUTION:
Be sure the area is free of traffic, pedes-
trians, and obstructions.
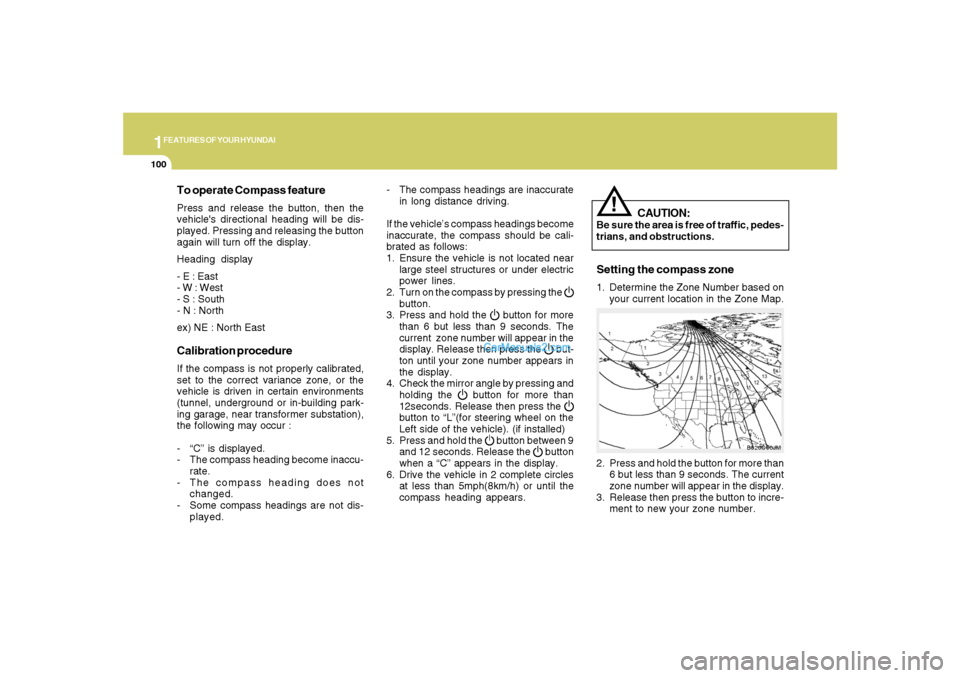
2. Press and hold the button for more than
6 but less than 9 seconds. The current
zone number will appear in the display.
3. Release then press the button to incre-
ment to new your zone number.
B520C06JM
To operate Compass featurePress and release the button, then the
vehicle's directional heading will be dis-
played. Pressing and releasing the button
again will turn off the display.
Heading display
- E : East
- W : West
- S : South
- N : North
ex) NE : North EastCalibration procedureIf the compass is not properly calibrated,
set to the correct variance zone, or the
vehicle is driven in certain environments
(tunnel, underground or in-building park-
ing garage, near transformer substation),
the following may occur :
- “C” is displayed.
- The compass heading become inaccu-
rate.
- The compass heading does not
changed.
- Some compass headings are not dis-
played.
!
Setting the compass zone1. Determine the Zone Number based on
your current location in the Zone Map.
Page 114 of 355
1FEATURES OF YOUR HYUNDAI
102
HOMELINK MIRRORB520C01CM-AATAutomatic-Dimming Mirror
with Z-Nav™ Electronic Compass
Display and HomeLink
®
(If Installed)Your vehicle comes with a Gentex Auto-
matic-Dimming Mirror with a Z-Nav™ Elec-
tronic Compass Display and an Integrated
HomeLink
® Wireless Control System. Dur-
ing nighttime driving, this feature will auto-
matically detect and reduce rearview mir-
ror glare while the compass indicates the
direction the vehicle is pointed. The
HomeLink® Universal Transceiver allows
you to activate your garage door(s), elec-
tric gate, home lighting, etc.
1. Channel 1 Button
2. Channel 2 Button
3. Status Indicator LED
4. Channel 3 Button5. Rear Light Sensor
6. Dimming On/Off Button
7. Compass Control Button
8. Display
B520C01CM