2007 Hyundai Accent clock
[x] Cancel search: clockPage 9 of 282

1. Hood Release Lever ............................................ 1-90
2. Front/Rear Fog Light Switch (If Installed) ............ 1-77
3. Headlight Leveling Switch (If Installed) ................ 1-76
4. Instrument Cluster.............................................. 1-66
5. Multi-Function Light Switch................................. 1-72
6. Horn and Driver's Front Airbag (If Installed) 1-98, 1-44
7. Windshield W iper/Washer Switch ........................1-74
8. Hazard Warning Light Switch.............................. 1-76
9. Digital Clock ........................................................ 1-78
10. Rear Window De froster Switch ............................ 1-77
11. Audio System (If Installed) ................................ 1-118
12. Passenger's Front Airbag (If Installed) ................1-44
13. Glov e Box ........................................................... 1-86
CAUTION:
When installing a container of liquid air freshener inside the vehicle, do not place it near the instrument cluster nor on the instrument panel pad surface. If there is any leakage from the air freshener onto these areas (Instrument cluster, instrument panel pad or air ventilator), itmay damage these parts. If the liquid from air freshener does leak onto these areas, wash them with water immediately.
! 14. Heating/Air Conditioning Control Panel
(If Installed) ....................................................... 1-100
15. Multi Box ............................................................ 1-86
16. Cigarette Lighter .................................................. 1-78
17. Seat Warmer Switch (If Installed) ........................ 1-18
18. Electronic Stability Program (ESP) Switch
(If Installed) ......................................................... 2-14
19. Power Outlet ....................................................... 1-79
20. Ashtray ............................................................... 1-80
21. Shift Lever ........................................................... 2-9
22. Parking Brake Lever ........................................... 1-89
23. Front Drink Holder ............................................... 1-80
24. Trunk Lid Release Lever .....................................1-94
25. Fuel Filler Lid Release Lever ...............................1-92
Page 11 of 282

CAUTION:
When installing a container of liquid air freshener inside the vehicle, do not place it near the instrument cluster nor on the instrument panel pad surface. If there is any leakage from the air freshener onto these areas (Instrument cluster, instrument panel pad or air ventilator), it may damage these parts. If the liquid from air freshener does leak onto these areas, wash themwith water immediately.!
1. Hood
Release Lever ............................................ 1-90
2. Front/Rear Fog Light Switch (If Installed) ............ 1-77
3. Headlight Leveling Switch (If Installed) ................ 1-76
4. Instrument Cluster.............................................. 1-66
5. Multi-Function Light Switch................................. 1-72
6. Horn and Driver's Front Airbag (If Installed) . 1-98,1-44
7. Windshield W iper/Washer Switch ........................1-74
8. Hazard Warning Light Switch.............................. 1-76
9. Digital Clock ........................................................ 1-78
10. Rear Window De froster Switch ............................ 1-77
11. Audio System (If Installed) ................................ 1-118
12. Passenger's Front Airbag (If Installed) ................1-44
13. Glov e Box ........................................................... 1-8614. Heating/Air Conditioning Control Panel
(If Installed) ....................................................... 1-100
15. Multi Box ............................................................ 1-86
16. Cigarette Lighter .................................................. 1-78
17. Seat Warmer Switch (If Installed) ........................ 1-18
18. Electronic Stability Program (ESP) Switch (If Installed) ......................................................... 2-14
19. Power Outlet ....................................................... 1-79
20. Ashtray ............................................................... 1-80
21. Shift Lever ........................................................... 2-9
22. Parking Brake Lever ........................................... 1-89
23. Front Drink Holder ............................................... 1-80
24. Trunk Lid Release Lever .....................................1-94
25. Fuel Filler Lid Release Lever ...............................1-92
Page 24 of 282

1FEATURES OF YOUR HYUNDAI
12
!
WINDOW GLASS
B050A01A-AAT
To raise or lower the window, turn the window regulator handle clockwise or counterclockwise. WARNING:
When opening or closing the win- dows, make sure your passenger'sarms, hands and body are safely out of the way.
3FDA2015
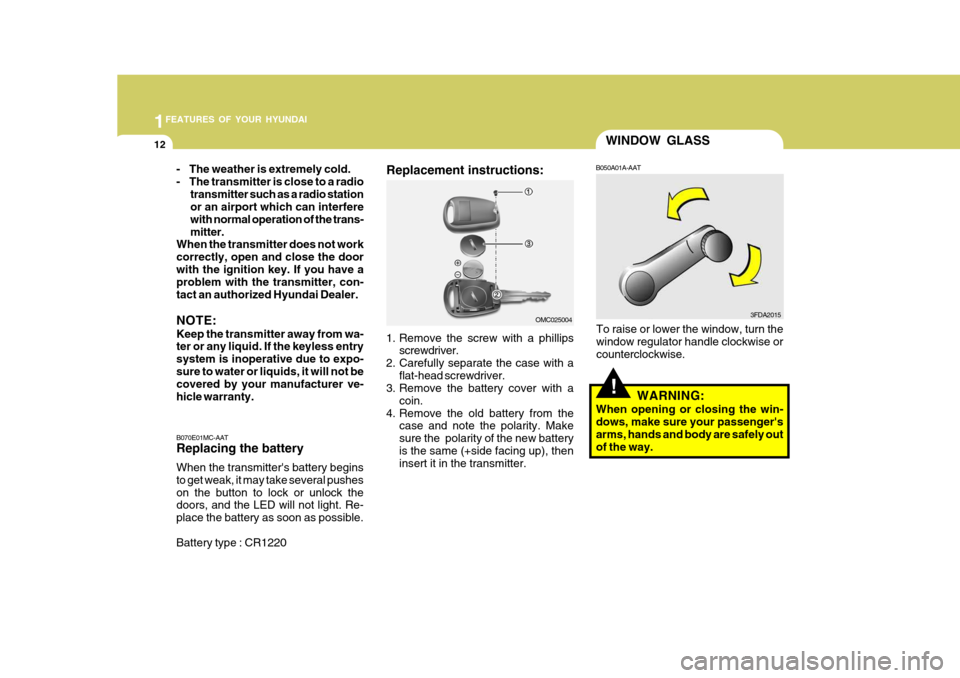
B070E01MC-AAT Replacing the battery When the transmitter's battery begins to get weak, it may take several pusheson the button to lock or unlock the doors, and the LED will not light. Re- place the battery as soon as possible. Battery type : CR1220 1. Remove the screw with a phillips
screwdriver.
2. Carefully separate the case with a flat-head screwdriver.
3. Remove the battery cover with a
coin.
4. Remove the old battery from the case and note the polarity. Make sure the polarity of the new batteryis the same (+side facing up), then insert it in the transmitter. OMC025004
- The weather is extremely cold.
- The transmitter is close to a radio
transmitter such as a radio station or an airport which can interfere with normal operation of the trans-mitter.
When the transmitter does not workcorrectly, open and close the doorwith the ignition key. If you have a problem with the transmitter, con- tact an authorized Hyundai Dealer. NOTE: Keep the transmitter away from wa- ter or any liquid. If the keyless entry system is inoperative due to expo-sure to water or liquids, it will not be covered by your manufacturer ve- hicle warranty. Replacement instructions:
Page 62 of 282

1FEATURES OF YOUR HYUNDAI
50
!
The airbags deploy only in certain side impact conditions severe enough to cause significant injuryto the vehicle occupants.
o For best protection from the side
impact airbag system and to avoidbeing injured by the deploying side impact airbag, both front seat occupants should sit in an up-right position with the seat belt properly fastened. The driver's hands should be placed on thesteering wheel at the 9:00 and 3:00 o'clock positions. The passenger's arms and hands should be placedon their laps.
o Do not use any accessory seat
covers.
o Use of seat covers could reduce or prevent the effectiveness of thesystem.
o Do not install any accessories on the side or near the side impactairbag.
o Do not use excessive force on the side of the seat.
o Do not place any objects over the
airbag or between the airbag and yourself.
WARNING:
o The side impact airbag is supple- mental to the driver's and the passenger's seat belt systems andis not a substitute for them. There- fore your seat belts must be worn at all times while the vehicle is inmotion.
B990B01MC
Side airbag sensor
Important Safety Notes on the Side Impact Airbag system Following is a number of safety points concerning this system which shouldalways be observed to ensure risk of injury is reduced in an accident.
o Do not place any objects (an um- brella, bag, etc.) between the front door and the front seat. Such ob- jects may become dangerous pro- jectiles and cause injury if thesupplemental side impact airbag inflates.
o To prevent unexpected deploy-
ment of the side impact air bagthat may result in personal injury, avoid impact to the side impactairbag sensor when the ignition key is on.
Page 90 of 282

1FEATURES OF YOUR HYUNDAI
78DIGITAL CLOCK
B400A01A-AAT There are three control buttons for the digital clock. Their functions are: HOUR - Push "H" to advance the hour
indicated. MIN - Push "M" to advance the minute
indicated.RESET - Push "R" to reset minutes to
":00" to facilitate resetting the clock to the correct time. When this is done: Pressing "R" between 10 : 30 and 11 : 29 changes the readout to 11 : 00. Pressing "R" between 11 : 30 and 12 :29 changes the readout to 12 : 00.CIGARETTE LIGHTER
B420A02A-AAT
For the cigarette lighter to work, the key must be in the "ACC" position or the "ON" position. To use the cigarette lighter, push it allthe way into its socket. When the ele- ment has heated, the lighter will pop out to the "ready" position.Do not hold the cigarette lighter pressed in. This can damage the heating ele- ment and create a fire hazard.If it is necessary to replace the ciga- rette lighter, use only a genuine Hyundai replacement or its approved equivalent. HHR2098A
OMC025098
B360A01Y-GAT Rear Fog Light Switch (If Installed)
To turn on the rear fog lights, push the switch. They will light when the head- light switch is in the second position and the key is in the "ON" position.
B360A01MC
B360A01MC-R
Right-hand Drive Type
Left-hand Drive Type
Page 95 of 282

1
FEATURES OF YOUR HYUNDAI
83
B460D01NF-GAT Manual Operation of Sunroof If the sunroof does not electrically oper- ate:
1. Open the spectacle case.
2. Remove the two mounting screws of
the front overhead console with a (+)driver. OMC025022
3. Insert the hexagonal head wrench
provided with the vehicle into the socket. This wrench can be found in the vehicle's trunk or glove box.
4. Turn the wrench clockwise to open or counterclockwise to close thesunroof. OMC025023B460E01TG-GAT Resetting the sunroof Whenever the vehicle battery is discon- nected or discharged, or you use theemergency handle to operate the sunroof, you have to reset your sunroof system as follows:
1. Turn the ignition key to the "ON"
position.
2. Press the TILT UP button for more than 1 second to tilt up the sunroof completely when the sunroof is fullyclosed. Then, release the button.
3. Press and hold the TILT UP button
once again until the sunroof hasreturned to the original position of TILT UP after it is raised a little higher than the maximum TILT UPposition. Then, release the button.
4. Press and hold the TILT UP button
within 5 seconds until the sunroof isoperated as follows; TILT DOWN � SLIDE OPEN �
SLIDE CLOSEThen, release the button.
Page 106 of 282

1FEATURES OF YOUR HYUNDAI
94
B540D01MC-GAT Remote Trunk Lid Release (4 Door) (If Installed)
OMC025011
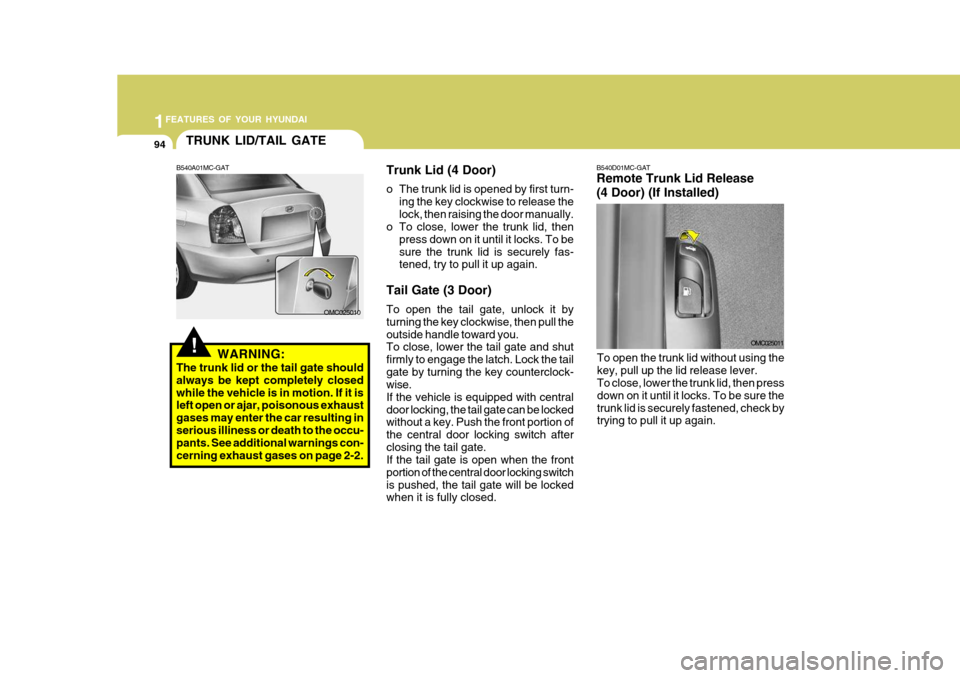
To open the trunk lid without using the key, pull up the lid release lever. To close, lower the trunk lid, then press down on it until it locks. To be sure thetrunk lid is securely fastened, check by trying to pull it up again.
!
TRUNK LID/TAIL GATE
B540A01MC-GAT
WARNING:
The trunk lid or the tail gate should always be kept completely closedwhile the vehicle is in motion. If it is left open or ajar, poisonous exhaust gases may enter the car resulting inserious illiness or death to the occu- pants. See additional warnings con- cerning exhaust gases on page 2-2. Trunk Lid (4 Door)
o The trunk lid is opened by first turn-
ing the key clockwise to release the lock, then raising the door manually.
o To close, lower the trunk lid, then
press down on it until it locks. To besure the trunk lid is securely fas- tened, try to pull it up again.
Tail Gate (3 Door) To open the tail gate, unlock it by turning the key clockwise, then pull theoutside handle toward you. To close, lower the tail gate and shut firmly to engage the latch. Lock the tailgate by turning the key counterclock- wise. If the vehicle is equipped with centraldoor locking, the tail gate can be locked without a key. Push the front portion of the central door locking switch afterclosing the tail gate. If the tail gate is open when the front portion of the central door locking switchis pushed, the tail gate will be locked when it is fully closed.
OMC025010
Page 122 of 282

1FEATURES OF YOUR HYUNDAI
110
B970C01NF-GAT Automatic Operation The FATC (Full Automatic Tempera- ture Control) system automatically con- trols heating and cooling by doing as follows:
1. Push the "AUTO" switch. The indi-
cator light will illuminate confirming that the Face, Floor and/or Bi-Level modes as well as the blower speed and air conditioner will be controlledautomatically. 2. Turn the "TEMP" knob to set the
desired temperature.The temperature will increase to the maximum 32°C(90°F) by turning the knob clockwise.The temperature will decrease to the minimum 17°C(62°F) by turning the knob counterclockwise.
NOTE: If the battery has been discharged or disconnected, the temperature modewill reset to Centigrade degrees. This is a normal condition and you can change the temperature modefrom Centigrade to Fahrenheit as follows; Press the "OFF" and "AUTO " switch simultaneously for 3 seconds.The display shows that the unit of temperature is adjusted to Centigrade or Fahrenheit (°C
��
��
� °F or °F
��
��
� °C).
B970C01MC B970C02MC
1JBA4067
Photo Sensor
NOTE: Never place anything over the sen- sor which is located on the instru- ment panel to ensure better control of the heating and cooling system.