Page 185 of 304
Your vehicle has several convenient
storage areas:Glove box
Console compartment
Door pockets
Trunk, including the rear seats
when f olded down
However, carrying too much cargo,
or improperly storing it, can af f ect
your vehicle’s handling, stability,
stopping distance, and tires, and
make it unsaf e. Bef ore carrying any
type of cargo, be sure to read the
f ollowing pages. Center pocket
Carrying Cargo
184
GLOVE BOX
CENTER POCKET
TRUNK DOOR POCKETS
CONSOLE COMPARTMENT
�����—�����—�����y�
����
������
�y���
�(�#�����
���y���
�����y
Page 186 of 304

�µ�·
Steps f or Determining Correct Load
Limit:
Locate the statement, ‘‘the
combined weight of occupants and
cargo should never exceed 850
lbs’’ on your vehicle’s placard.
[The placard is on the driver’s
doorjamb.]
Determine the combined weight
of the driver and passengers that
will be riding in your vehicle.
The resulting f igure equals the
available amount of cargo and
luggage load capacity.
For example, if the maximum load
is 850 lbs and there will be f ive 150
lb. passengers in your vehicle, the
amount of available cargo and
luggage load capacity is 100 lbs. (850 750 (5 150) = 100 lbs.)
The maximum load f or your vehicle
is 850 lbs (385 kg) f or U.S.A, 395 kg
f or Canada. This f igure includes the
total weight of all occupants, cargo,
and accessories, and the tongue load
if you are towing a trailer.
Subtract the combined weight of
the driver and passengers f rom
850 lbs.Determine the combined weight
of luggage and cargo being loaded
on the vehicle. That weight may
not saf ely exceed the available
cargo and luggage load capacity
calculated in step 4.
If your vehicle will be towing a
trailer, load f rom your trailer will
be transf erred to your vehicle.
Consult this manual to determine
how this reduces the available
cargo and luggage load capacity of
yourvehicle(seepage ).
In addition, the total weight of the
vehicle, all passengers, accessories,
and cargo must not exceed the Gross
Vehicle Weight Rating (GVWR) or
the Gross Axle Weight Rating
(GAWR). Both are on a label on the
driver’s doorjamb.
4. 5.
3.
1. 2.
6.
204
Load Limits
Carrying Cargo
Bef ore Driving
185
Overloading or improper
loading can affect handling and
stability and cause a crash in
which you can be hurt or killed.
Follow all load limits and other
loading guidelines in thismanual.
�����—�����—�����y�
����
��������y���
�(�#�����
���y���
�����y
Page 187 of 304

Store or secure all items that could
be thrown around and hurt
someone during a crash.Distribute cargo evenly on the
f loor of the trunk, placing the
heaviest items on the bottom and
as far forward as possible.
If you carry large items that
prevent you f rom closing the trunk
lid, exhaust gas can enter the
passenger area. To avoid the
possibility of
, f ollow the instructions
on page .
If youfolddownthebackseat,tie
down items that could be thrown
about the vehicle during a crash or
sudden stop.
Do not put any items on top of the
trunk panel. They can block your
view and be thrown around the
vehicle during a crash.
Be sure items placed on the f loor
behind the f ront seats cannot roll
under the seats and interf ere with
the driver’s ability to operate the
pedals, the proper operation of the
seats, or proper operation of the
sensors under the seats.
Keep the glove box closed while
driving. If it is open, a passenger
could injure their knees during a
crash or sudden stop. 51
Carrying Items in the Passenger
Compartment
Carrying Cargo in the Trunk
carbon monoxide
poisoning
Carrying Cargo
186
�����—�����—�����y�
����
��������y���
�(�#�����
���y���
���
�y
Page 188 of 304

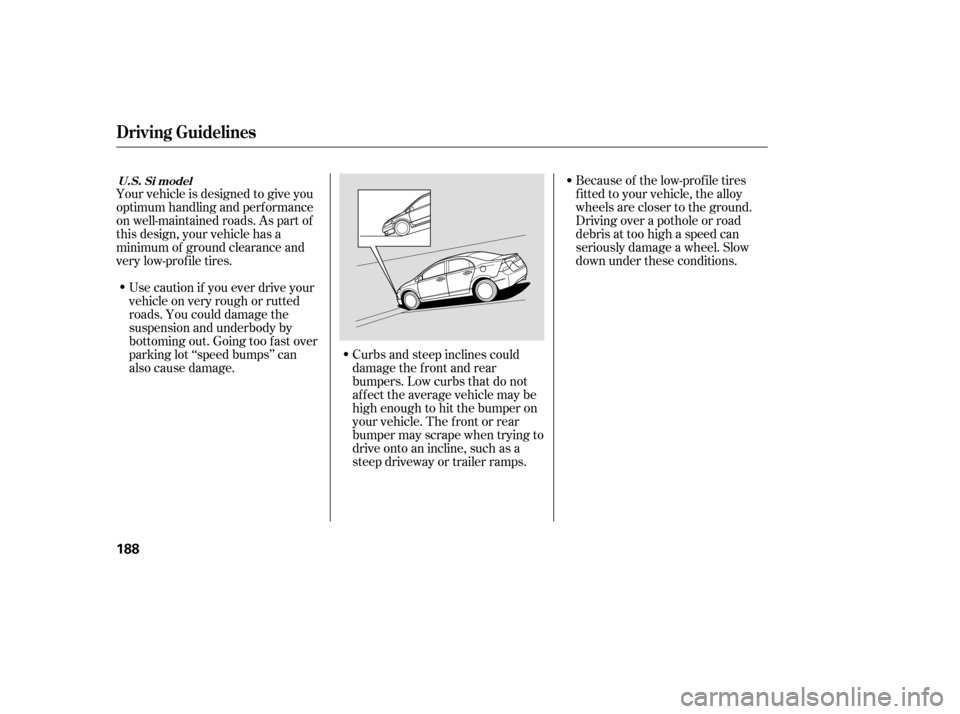
Because of the low-prof ile tires
f itted to your vehicle, the alloy
wheels are closer to the ground.
Driving over a pothole or road
debris at too high a speed can
seriously damage a wheel. Slow
down under these conditions.
Curbs and steep inclines could
damage the f ront and rear
bumpers. Low curbs that do not
affect the average vehicle may be
high enough to hit the bumper on
your vehicle. The f ront or rear
bumper may scrape when trying to
drive onto an incline, such as a
steep driveway or trailer ramps.
Use caution if you ever drive your
vehicleonveryroughorrutted
roads. You could damage the
suspension and underbody by
bottoming out. Going too f ast over
parking lot ‘‘speed bumps’’ can
also cause damage.
Your vehicle is designed to give you
optimum handling and perf ormance
on well-maintained roads. As part of
this design, your vehicle has a
minimum of ground clearance and
very low-prof ile tires.
Driving Guidelines
U.S. Si model
188
�����—�����—�����y�
����
��������y���
�(�#�����
���y���
�����y
Page 189 of 304
Make sure all windows, mirrors,
and outside lights are clean and
unobstructed. Remove f rost, snow,
or ice.
Check that the hood and trunk are
f ully closed.Check that any items you may be
carrying are stored properly or
f astened down securely.
Check the seat adjustment (see
page ).
Check the adjustment of the
inside and outside mirrors (see
page ).
Check the steering wheel
adjustment (see page ).
Make sure the doors are securely
closed and locked.Fasten your seat belt. Check that
your passengers have f astened
their seat belts (see page ).
Youshoulddothefollowingchecks
and adjustments every day bef ore
you drive your vehicle.
When you start the engine, check
the gauges and indicators in the
instrument panel (see page ).
Visually check the tires. If a tire
looks low, use a gauge to check its
pressure (see page ).
1. 2. 3. 4.
9.
8.
7.
6.
5.
10.
245 91
99 75 14
57
Preparing to Drive
Driving
189
�����—�����—�����y�
����
����
���y���
�(�#�����
���y���
�����y
Page 190 of 304

Apply the parking brake.
In cold weather, turn of f all
electrical accessories to reduce
the drain on the battery.If the engine does not start within
15 seconds, or starts but stalls
right away, repeat step 4 with the
accelerator pedal pressed halfway
down. If the engine starts, release
pressure on the accelerator pedal
so the engine does not race.If the engine fails to start, press
the accelerator pedal all the way
down, and hold it there while
starting to clear flooding. If the
engine still does not start, return
to step 5.
Press the clutch pedal down all the
way. The START (III) position
does not f unction unless the clutch
pedal is pressed.
Without touching the accelerator
pedal, turn the ignition key to the
START (III) position. Do not hold
the key in the START (III)
position f or more than 15 seconds
at a time. If the engine does not
start right away, pause for at least
10 seconds bef ore trying again.
Make sure the shif t lever is in
Park. Press on the brake pedal.
1. 2. 3. 4. 6.
5.
Manual transmission: Automatic transmission: 77
Starting the Engine
190
T he immobilizer system protects your
vehicle f rom thef t. If an improperly-
coded key (or other device) is used, the
engine’s f uel system is disabled. For
more inf ormation, see page .
The engine is harder to start in cold
weather. Also, the thinner air f ound at
altitudes above 8,000 f eet (2,400
meters) adds to this problem.
�����—�����—�����y�
����
��������y���
�(�#�����
���y���
�����y
Page 191 of 304

CONT INUED
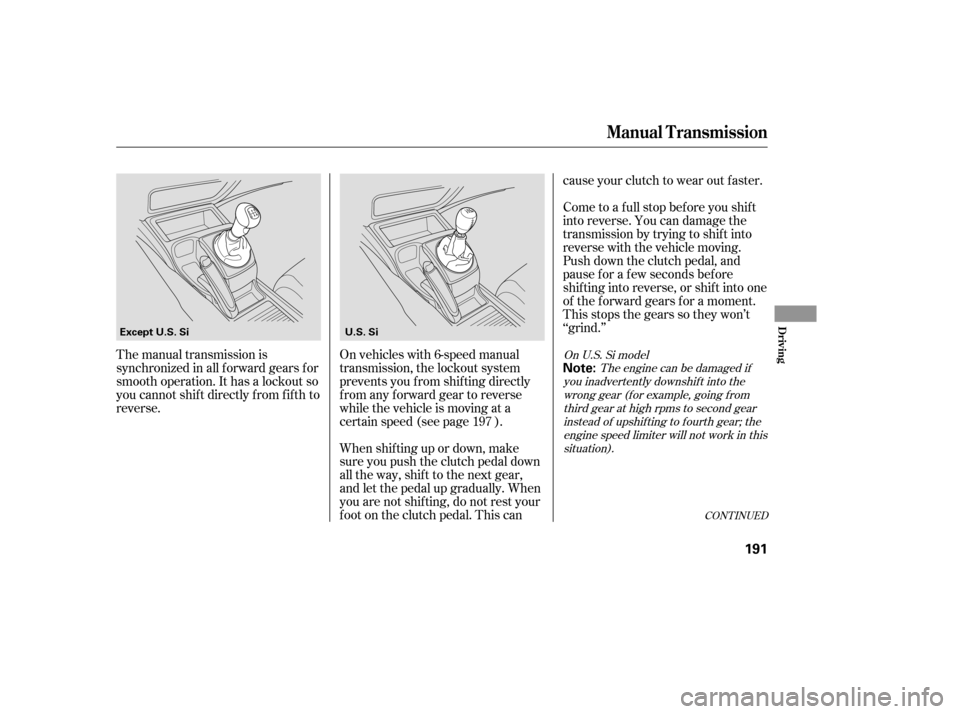
The manual transmission is
synchronized in all f orward gears f or
smooth operation. It has a lockout so
you cannot shift directly from fifth to
reverse.On vehicles with 6-speed manual
transmission, the lockout system
prevents you f rom shif ting directly
from any forward gear to reverse
while the vehicle is moving at a
certain speed (see page ).
When shif ting up or down, make
sure you push the clutch pedal down
all the way, shif t to the next gear,
and let the pedal up gradually. When
you are not shif ting, do not rest your
f oot on the clutch pedal. This cancause your clutch to wear out f aster.
Come to a full stop before you shift
into reverse. You can damage the
transmission by trying to shift into
reverse with the vehicle moving.
Push down the clutch pedal, and
pause f or a f ew seconds bef ore
shif ting into reverse, or shif t into one
of the f orward gears f or a moment.
This stops the gears so they won’t
‘‘grind.’’
197
The engine can be damaged if
you inadvertently downshif t into the wrong gear (f or example, going f rom
third gear at high rpms to second gearinstead of upshif ting to f ourth gear; the
engine speed limiter will not work in thissituation).
On U.S. Si model
Manual T ransmission
Driving
191
Note:
Except U.S. Si U.S. Si
�����—�����—�����y�
����
��������y���
�(�#�����
���y���
�����y
Page 192 of 304

Shif t up
1st to 2nd
2nd to 3rd 3rd to 4th4th to 5th
5th to 6th
When slowing down, you can get
extra braking f rom the engine by
shifting to a lower gear. This extra
braking can help you maintain a safe
speed and prevent your brakes f rom
overheating while going down a
steep hill. Bef ore downshif ting,
make sure the engine speed will not
go into the tachometer’s red zone in
the lower gear.
Your vehicle is equipped with an
aluminum shif t lever. If you leave the
vehicle parked outside f or a long time on a hot day, be caref ul bef ore
moving the shift lever. Because of
the heat, the shift lever may be
extremely hot. If the outside
temperature is low, the shif t lever
f eels cold.
Drive in the highest gear that lets
the engine run and accelerate
smoothly. This will give you good
f uel economy and ef f ective
emissions control. The f ollowing
shif t points are recommended:
Shif t up
1st to 2nd
2nd to 3rd 3rd to 4th4th to 5th Normal acceleration
15 mph (24 km/h)
27 mph (43 km/h)
39 mph (63 km/h)
53 mph (85 km/h) Normal acceleration
17 mph (27 km/h)
29 mph (47 km/h)
37 mph (60 km/h)
43 mph (69 km/h)
49 mph (79 km/h)
With 5-speed manual transmission With 6-speed manual transmission
On U.S. Si model
Recommended Shif t Points
Manual T ransmission
192
Rapid slowing or speeding-up
can cause loss of control on
slippery surfaces. If you crash,
you can be injured.
Use extra care when driving on
slippery surfaces.
�����—�����—�����y�
����
������
�y���
�(�#�����
���y���
�����y