Page 207 of 268
This f ilter removes the dust and
pollenthatisbroughtinfromthe
outside through the heating and
cooling system/climate control
system.
Have your dealer replace the filter
when this service is indicated by a
maintenance message on the
inf ormation display. It should be
replaced every 15,000 miles (24,000
km) if you drive primarily in urban
areas that have high concentrations
of soot in the air, or if the f low f rom
the heating and cooling system
becomeslessthanusual.Check the condition of the wiper
blades at least every 6 months.
Replace them if you f ind signs of
cracking in the rubber, and areas
that are getting hard or if they leave
streaks and unwiped areas when
used.
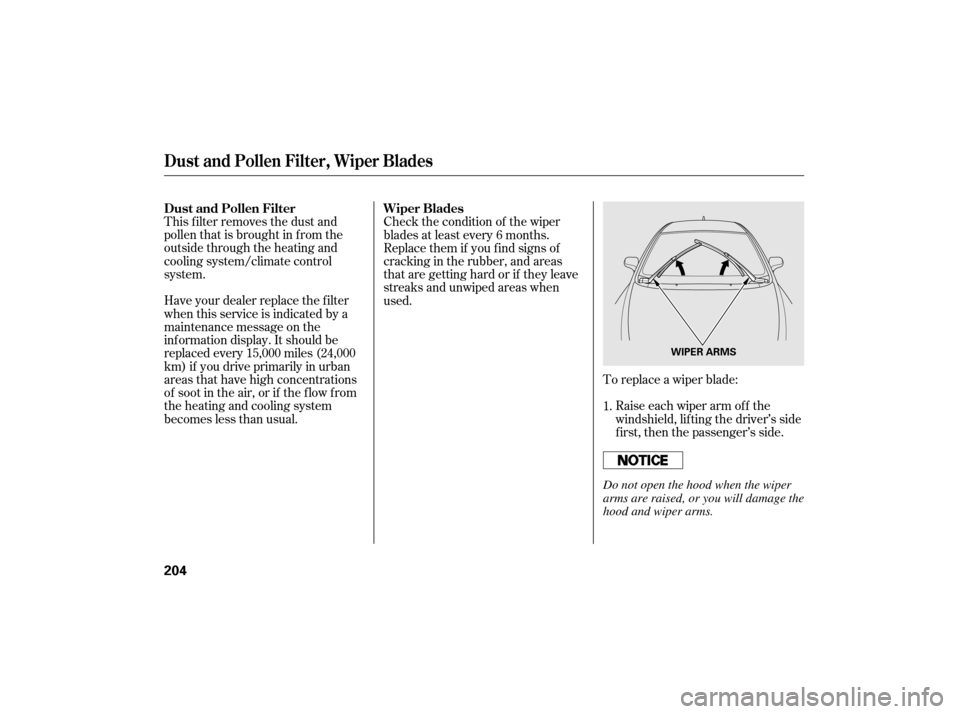
To replace a wiper blade:Raise each wiper arm off the
windshield, lif ting the driver’s side
first, then the passenger’s side.
1.
Dust and Pollen Filter, Wiper Blades
Dust and Pollen Filter
Wiper Blades
204
WIPER ARMS
Do not open the hood when the wiper
arms are raised, or you will damage the
hood and wiper arms.
Page 215 of 268
�µ
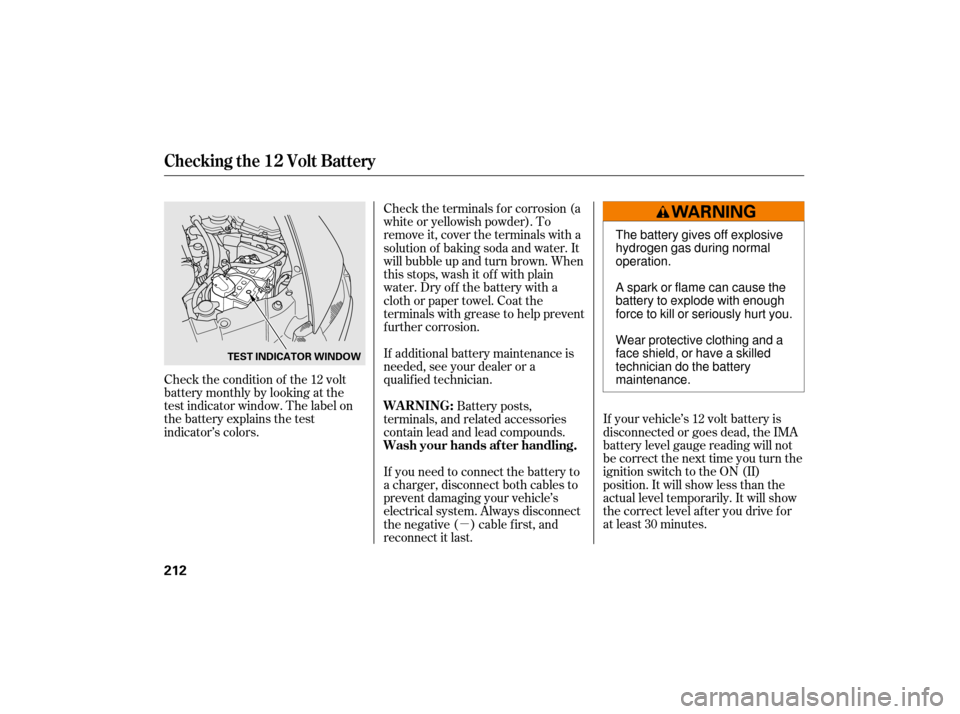
Check the condition of the 12 volt
battery monthly by looking at the
test indicator window. The label on
the battery explains the test
indicator’s colors.
If your vehicle’s 12 volt battery is
disconnected or goes dead, the IMA
battery level gauge reading will not
be correct the next time you turn the
ignition switch to the ON (II)
position. It will show less than the
actual level temporarily. It will show
the correct level af ter you drive f or
at least 30 minutes.
Check the terminals f or corrosion (a
white or yellowish powder). To
remove it, cover the terminals with a
solution of baking soda and water. It
will bubble up and turn brown. When
this stops, wash it of f with plain
water. Dry off the battery with a
cloth or paper towel. Coat the
terminals with grease to help prevent
f urther corrosion.
If additional battery maintenance is
needed, see your dealer or a
qualif ied technician.
Battery posts,
terminals, and related accessories
contain lead and lead compounds.
If you need to connect the battery to
a charger, disconnect both cables to
prevent damaging your vehicle’s
electrical system. Always disconnect
the negative ( ) cable first, and
reconnect it last.
Checking the 12 Volt Battery
WARNING:
Wash your hands af ter handling.
212
TEST INDICATOR WINDOW
The battery gives off explosive
hydrogen gas during normal
operation.
A spark or flame can cause the
battery to explode with enough
force to kill or seriously hurt you.
Wear protective clothing and a
face shield, or have a skilled
technician do the battery
maintenance.
Page 216 of 268
Fill the f uel tank.
Change the engine oil and f ilter.Block the rear wheels.
Wash and dry the exterior
completely.
Cleantheinterior.Makesurethe
carpeting, floor mats, etc., are
completely dry.
If you need to park your vehicle f or
an extended period (more than 1
month), there are several things you
should do to prepare it f or storage.
Proper preparation helps prevent
deterioration and makes it easier to
get your vehicle back on the road. If
possible, store your vehicle indoors. Leave one window open slightly (if
the vehicle is being stored
indoors).Cover the vehicle with a
‘‘breathable’’ cover, one made
f rom a porous material such as
cotton. Non-porous materials, such
as plastic sheeting, trap moisture,
which can damage the paint.
To minimize sticking, apply a
silicone spray lubricant to all door
and trunk seals. Also, apply a
vehiclebodywaxtothepainted
surfaces that mate with the door
and trunk seals. Support the f ront wiper blade
arms with a f olded towel or rag so
they do not touch the windshield. Disconnect the 12 volt battery. Reconnect the 12 volt battery and
drive your vehicle every month f or
about 30 minutes. This will keep
the IMA battery charged and in
good condition.
Leave the parking brake off. Put
the transmission in Park. If the vehicle is to be stored f or a
longer period, it should be
supported on jackstands so the
tires are of f the ground.
If possible, periodically run the
engine until it reaches f ull
operating temperature (the
cooling f ans cycle on and of f
twice). Pref erably, do this once a
month.
Vehicle Storage
Maint enance
213
If this vehicle is unused f or over one
month, the service lif e of the 158V
Nickel-Metal Hydride battery will be
reduced and the battery may be
permanently damaged.
Page 226 of 268
�´�´
Although this seems like a simple
procedure, you should take several
precautions.
To jump start your vehicle:
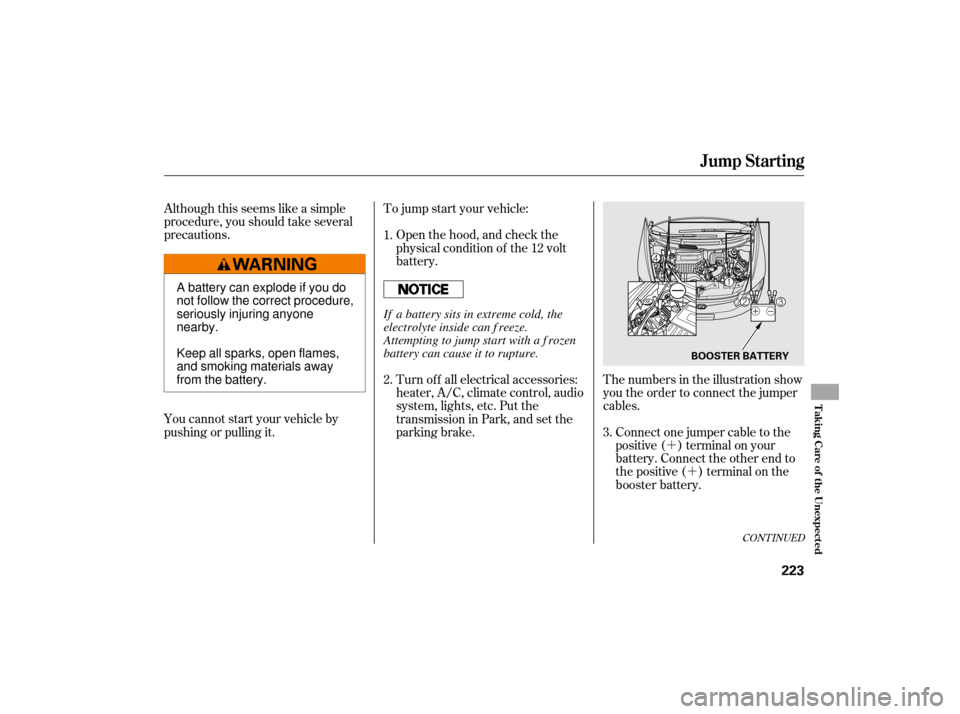
The numbers in the illustration show
you the order to connect the jumper
cables.Connect one jumper cable to the
positive ( ) terminal on your
battery. Connect the other end to
the positive ( ) terminal on the
booster battery.
You cannot start your vehicle by
pushing or pulling it. Open the hood, and check the
physical condition of the 12 volt
battery.
Turn of f all electrical accessories:
heater, A/C, climate control, audio
system, lights, etc. Put the
transmission in Park, and set the
parking brake.
1.
2.
3.
CONT INUED
Jump Starting
T aking Care of t he Unexpect ed
223
BOOSTER BATTERY
A battery can explode if you do
not follow the correct procedure,
seriously injuring anyone
nearby.
Keep all sparks, open flames,
and smoking materials away
from the battery.If a battery sits in extreme cold, the
electrolyte inside can f reeze.
Attempting to jump start with a f rozen
battery can cause it to rupture.
Page 227 of 268
�µStart the vehicle. If the starter
motor still operates slowly, check
that the jumper cables have good
metal-to-metal contact.
Keep the ends of the jumper cables
away from each other and any metal
on the vehicle until everything is
disconnected. Otherwise, you may
cause an electrical short.
If the booster battery is in another
vehicle, have an assistant start
that vehicle and run it at a fast idle. Once your vehicle is running,
disconnect the negative cable f rom
your vehicle, then f rom the
booster battery. Disconnect the
positive cable f rom your vehicle,
then from the booster battery.
If your vehicle’s 12 volt battery is
disconnected or goes dead, the IMA
battery level gauge reading will not
be correct the next time you turn the
ignition switch to the ON (II)
position. It will show less than the
actual level temporarily. It will show
the correct level af ter you drive f or
at least 30 minutes.
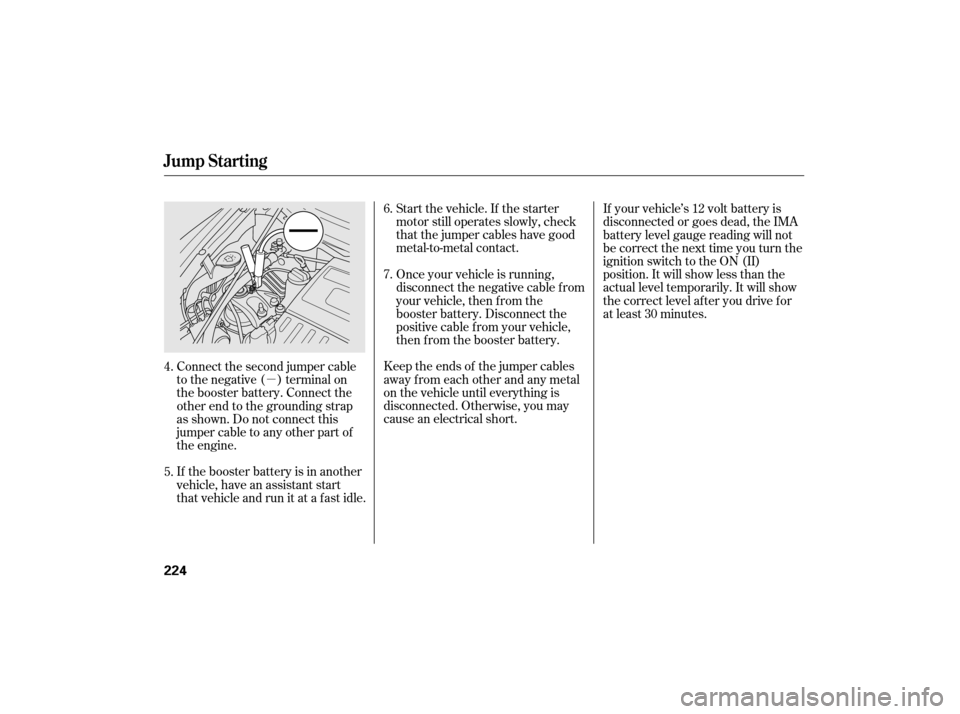
Connect the second jumper cable
to the negative ( ) terminal on
the booster battery. Connect the
other end to the grounding strap
as shown. Do not connect this
jumper cable to any other part of
the engine. 7. 6.
4.
5.
Jump Starting
224
Page 231 of 268
�µ
�µ
If theAutoIdleStopisactiveforan
extended period, the charging
system indicator may come on. If it
happens, start the engine.
The charging system indicator may
also come on if the Integrated Motor
Assist (IMA) battery charge drops
below a desired level and the engine
starts to recharge the battery.
This indicator may blink af ter you
start the vehicle in the morning
when the temperature is below 20
°F ( 30°C). It will stop blinking
when the IMA battery warms up.
If the charging system
indicator comes on brightly
when the engine is running,
the 12 volt battery is not being
charged.
Immediately turn of f all electrical
accessories. Try not to use other
electrically operated controls such as
the power windows. Keep the engine
running; starting the engine will
discharge the battery rapidly.
Go to a service station or garage
where you can get technical
assistance.
Charging System Indicator
228
Page 234 of 268
The vehicle’s f uses are contained in
threefuseboxes.The primary and secondary under-
hood f use boxes are in the engine
compartment on the driver’s side.
The interior f use box is underneath
the steering column.
Fuses
T aking Care of t he Unexpect ed
231
TAB
UNDER-HOOD (PRIMARY)
UNDER-HOOD (SECONDARY)
INTERIOR
FUSE LABEL
Page 235 of 268
Turn the ignition switch to the
LOCK (0) position. Make sure the
headlights and all oth er
accessories are off.
Remove the cover from the fuse
box.
If
something electrical in your
vehicle stops working, the first thing
youshouldcheckforisablownfuse.
Determine f rom the chart on pages and , or the diagram on the
fuse box lid, which fuse or fuses
control that device. Check those
f uses f irst, but check all the f uses
bef ore deciding that a blown f use is
the cause. Replace any blown f uses,
and check if the device works.
Check each of the large f uses in
the primary under-hood f use box
by looking through the top at the
wire inside. Remove the screws
with a Phillips-head screwdriver.
1.
2. 3.
235
236
Checking and Replacing Fuses
Fuses
232
BLOWN
FUSE BLOWN