Page 100 of 268
Open any door.
Unlock the doors with the key or
remote transmitter.
Remove the key from the ignition.The f ront ceiling light has two
spotlights. Push the spotlight lenses
to turn them on and off.
The ceiling light has a three-position
switch; ON, Door Activated, and
OFF. In the Door Activated (center)
position, the light comes on when
you: If you do not open either door af ter
you unlock the driver’s door or
remove the key from the ignition
switch, the light f ades out in about
30 seconds.
If you leave either door open without
the key is in the ignition switch, the
ceiling light will go of f af ter 3
minutes. After all doors are closed tightly, the
light dims slightly, then f ades out in
about 30 seconds.
Ceiling L ight Spotlights
Interior Lights
Inst rument s and Cont rols
97
DOOR ACTIVATED
ON
OFF
Page 108 of 268
Press the OFF button. However, a
lack of airf low can cause the
windowstofogup.Youshouldkeep
the fan on at all times so stale air and
moisture do not build up in the
interior and cause f ogging.To regulate the interior temperature
and humidity, the climate control
system has two sensors. A sunlight
sensor is located in the top of the
dashboard and a temperature/
humidity sensor is next to the
steering column. Do not cover the
sensors or, spill liquid or spray
chemical cleaners on the sensors.
To Turn Everything Off Sunlight, Temperature, and
Humidity Sensors
Climat e Cont rol
Features
105
TEMPERATURE/HUMIDITY SENSOR
SUNLIGHT SENSOR
Page 114 of 268

�µ�µ
�µ
These two
modes adjust the strength of the
sound coming from each speaker.
BALANCE adjusts the side-to-side
strength, while FADER adjusts the
front-to-back strength. You
can use the instrument panel
brightness control buttons to adjust
the illumination of the audio system
(see page ). The audio system
illuminates when the parking lights
are on, even if the radio is of f .
The SVC
mode controls the volume based on
vehicle speed. The f aster you go, the
louder the audio volume becomes.
As you slow down, the audio volume
decreases.
The SVC has f our modes; SVC OFF,
SVC LOW, SVC MID, and SVC
HIGH. The def ault setting is MID.
Turn the SOUND (TUNE) knob to
adjust the setting to your liking.
If you f eel the sound is too loud,
choose low. If you f eel the sound is
too quiet, choose high.
Use the TREBLE/
BASS modes to adjust the tone to
your liking.
74
Playing the Radio
Balance/FaderA udio System L ighting
Speed-sensitive volume
compensation (SVC)
Treble/Bass
Features
111
Page 127 of 268

�µ�´�µ �µ �µ
To adjust the sound, push the
AUDIO button, then enter the sound
grid by touching the SOUND icon on
the display.
You can use the instrument panel
brightness control buttons to adjust
the illumination of the audio system
(see page ). The audio system
illuminates when the parking lights
are on, even if the radio is of f .
To adjust the treble
and bass, touch or on each side
of the treble or bass adjustment bar,
or move the joystick. The adjustment
bar shows you the current setting. These modes adjust
the strength of the sound coming
f rom each speaker. Lef t/Right
balance adjusts the side-to-side
strength, while Front/Rear f ader
adjusts the front-to-back strength.
To adjust the left/right balance,
touch the ‘‘L’’ or ‘‘R’’ icon, or move
the joystick. To adjust the f ront/rear
f ader, touch the ‘‘FR’’ or ‘‘RR’’ icon,
or move the joystick. The SVC
mode controls the volume based on
vehicle speed. The f aster you go, the
louder the audio volume becomes.
As you slow down, the audio volume
decreases.
The def ault setting is Mid. If you f eel
the sound is too loud, choose low. If
you f eel the sound is too quiet,
choose Hi.
To see the audio display when you
are f inished adjusting the sound,
wait 5 seconds.
74
A djust ing t he Sound
Playing the Radio (Vehicles with Navigation System)
A udio System L ighting
Treble/Bass L ef t/Right Balance and Front/
Rear FaderSpeed-sensitive volume
compensation (SVC)
124
SOUND ICON
Page 130 of 268

�µ
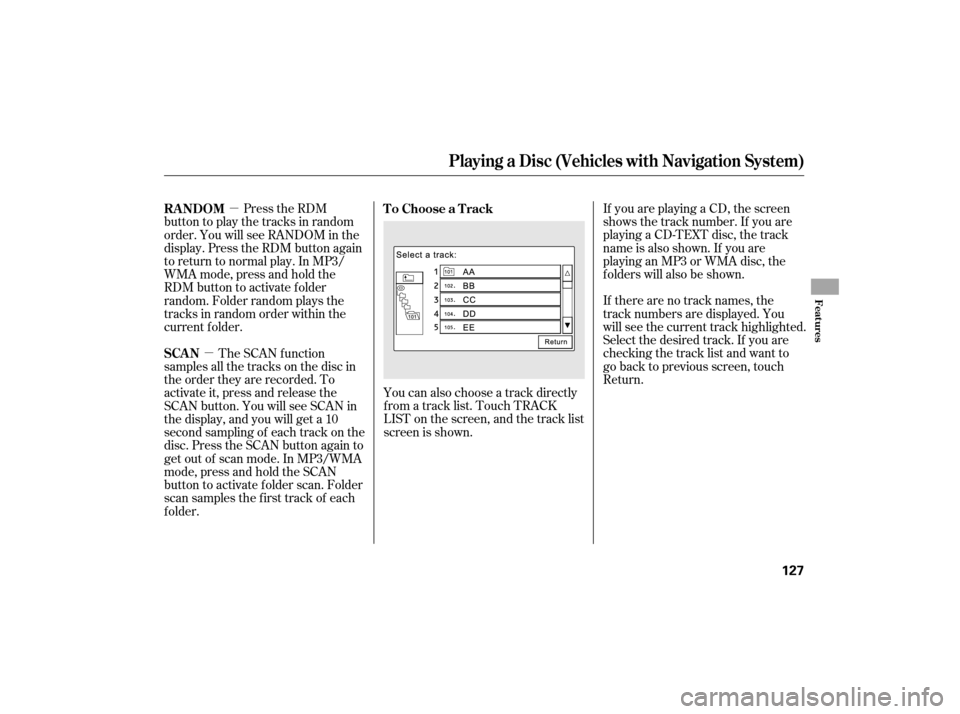
�µ You can also choose a track directly
f rom a track list. Touch TRACK
LIST on the screen, and the track list
screen is shown. If you are playing a CD, the screen
shows the track number. If you are
playing a CD-TEXT disc, the track
name is also shown. If you are
playinganMP3orWMAdisc,the
f olders will also be shown.
If there are no track names, the
track numbers are displayed. You
will see the current track highlighted.
Select the desired track. If you are
checking the track list and want to
go back to previous screen, touch
Return.
Press the RDM
button to play the tracks in random
order. You will see RANDOM in the
display. Press the RDM button again
to return to normal play. In MP3/
WMA mode, press and hold the
RDM button to activate f older
random. Folder random plays the
tracks in random order within the
current f older.
The SCAN f unction
samples all the tracks on the disc in
the order they are recorded. To
activate it, press and release the
SCAN button. You will see SCAN in
the display, and you will get a 10
second sampling of each track on the
disc. Press the SCAN button again to
get out of scan mode. In MP3/WMA
mode,pressandholdtheSCAN
button to activate f older scan. Folder
scan samples the f irst track of each
f older. To Choose a Track
RANDOM
SCAN
Playing a Disc (Vehicles with Navigation System)
Features
127
Page 133 of 268

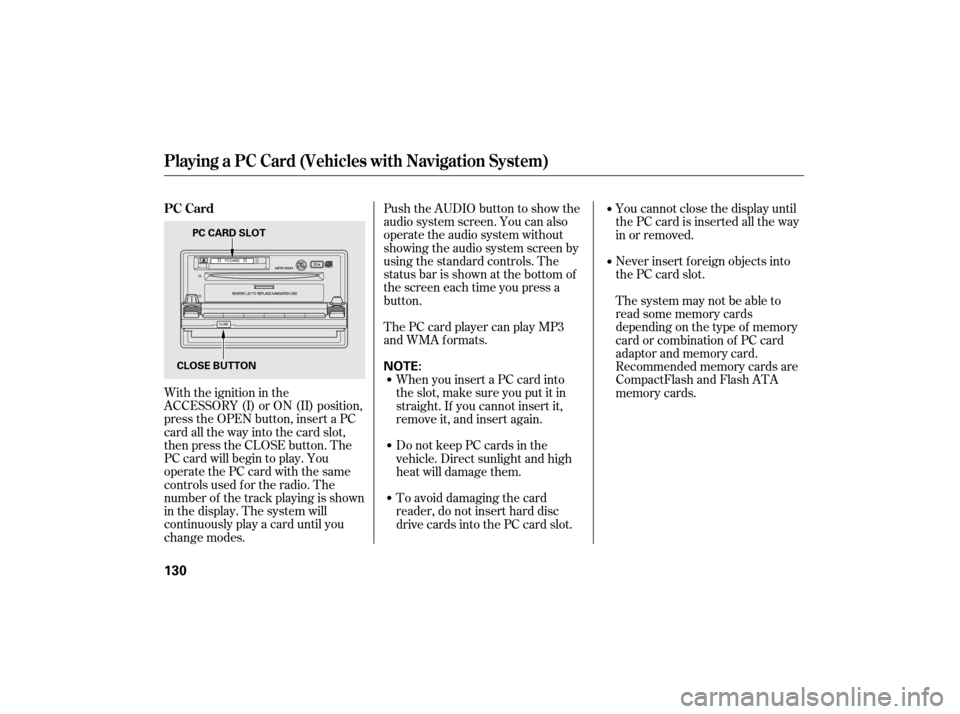
With the ignition in the
ACCESSORY (I) or ON (II) position,
press the OPEN button, insert a PC
card all the way into the card slot,
then press the CLOSE button. The
PC card will begin to play. You
operate the PC card with the same
controls used f or the radio. The
number of the track playing is shown
in the display. The system will
continuously play a card until you
change modes.Push the AUDIO button to show the
audio system screen. You can also
operate the audio system without
showing the audio system screen by
using the standard controls. The
status bar is shown at the bottom of
the screen each time you press a
button.
You cannot close the display until
the PC card is inserted all the way
in or removed.
Never insert f oreign objects into
the PC card slot.
ThePCcardplayercanplayMP3
and WMA formats. When you insert a PC card into
the slot, make sure you put it in
straight. If you cannot insert it,
remove it, and insert again.
Do not keep PC cards in the
vehicle. Direct sunlight and high
heat will damage them.
To avoid damaging the card
reader, do not insert hard disc
drive cards into the PC card slot. Thesystemmaynotbeableto
read some memory cards
depending on the type of memory
card or combination of PC card
adaptor and memory card.
Recommended memory cards are
CompactFlash and Flash ATA
memory cards.
Playing a PC Card (Vehicles with Navigation System)
PC Card
130
NOTE:CLOSE BUTTON
PC CARD SLOT
Page 138 of 268
You can also choose a track directly
f rom a track list. Touch TRACK
LIST on the screen, and the track list
screen will be shown. The display
changes depending on which play
mode you chose. You will see the
current track highlighted. Select the
desired track. If you want to go back
to the previous screen, press Return.If you want to search f or a particular
song, select Song Search on the
track list screen. You can search a
songfromTitlebyKeyword,Artist,
or Album.
If you choose Title by Keyword,
enter the title or any keyword, then
press List. The system will search to
f ind the song or songs.
If youcannotfindcharacters,select
More to show other characters.
CONT INUED
Playing a PC Card (Vehicles with Navigation System)
Search by T it le by K eyword
Features
135
Folder mode is shown
RETURN ICON MORE ICON
SONG SEARCH ICON
TITLE BY KEYWORD ICON
ARTIST ICON ALBUM ICON
LIST ICON
Page 144 of 268

When a disc is not being played,
store it in its case to protect it f rom
dust and other contamination. To
prevent warpage, keep discs out of
direct sunlight and extreme heat.
To clean a disc, use a clean sof t cloth.
Wipe across the disc f rom the center
to the outside edge.
A new disc may be rough on the
inner and outer edges. The small
plastic pieces causing this roughness
can f lake of f and f all on the
recording surf ace of the disc,
causing skipping or other problems.
Remove these pieces by rubbing the
inner and outer edges with the side
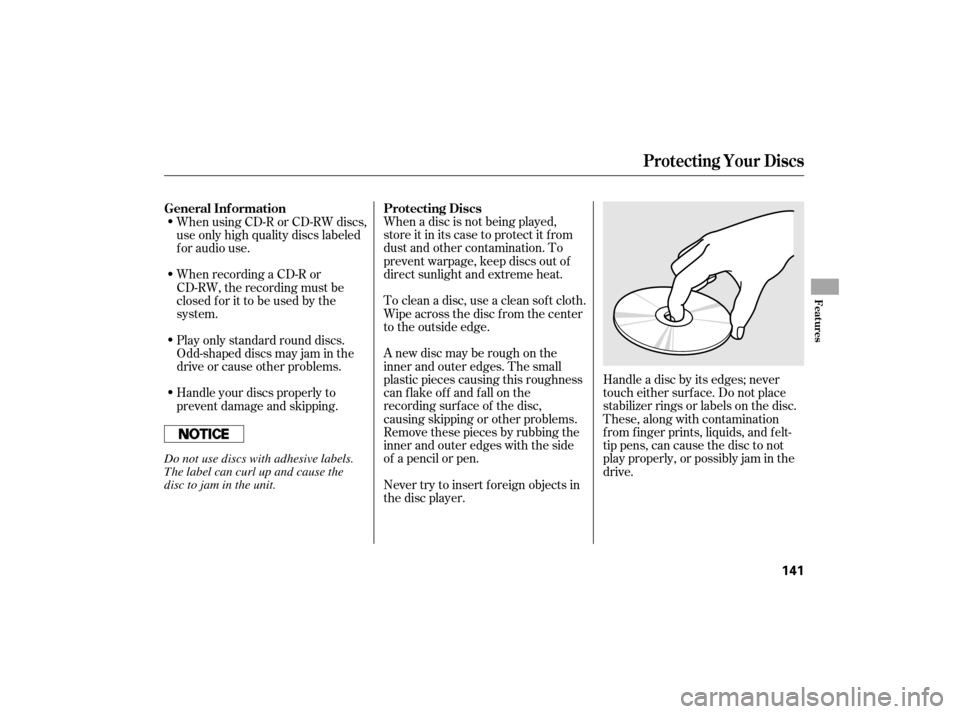
of a pencil or pen.Handle a disc by its edges; never
touch either surf ace. Do not place
stabilizer rings or labels on the disc.
These, along with contamination
f rom f inger prints, liquids, and f elt-
tip pens, can cause the disc to not
play properly, or possibly jam in the
drive.
When recording a CD-R or
CD-RW, the recording must be
closedforittobeusedbythe
system. When using CD-R or CD-RW discs,
use only high quality discs labeled
f or audio use.
Never try to insert f oreign objects in
the disc player.
Handle your discs properly to
prevent damage and skipping. Play only standard round discs.
Odd-shaped discs may jam in the
driveorcauseotherproblems.
General Inf ormation
Protecting Discs
Protecting Your Discs
Features
141
Do not use discs with adhesive labels.
The label can curl up and cause the
disc to jam in the unit.