Page 60 of 311
�Î
�Î
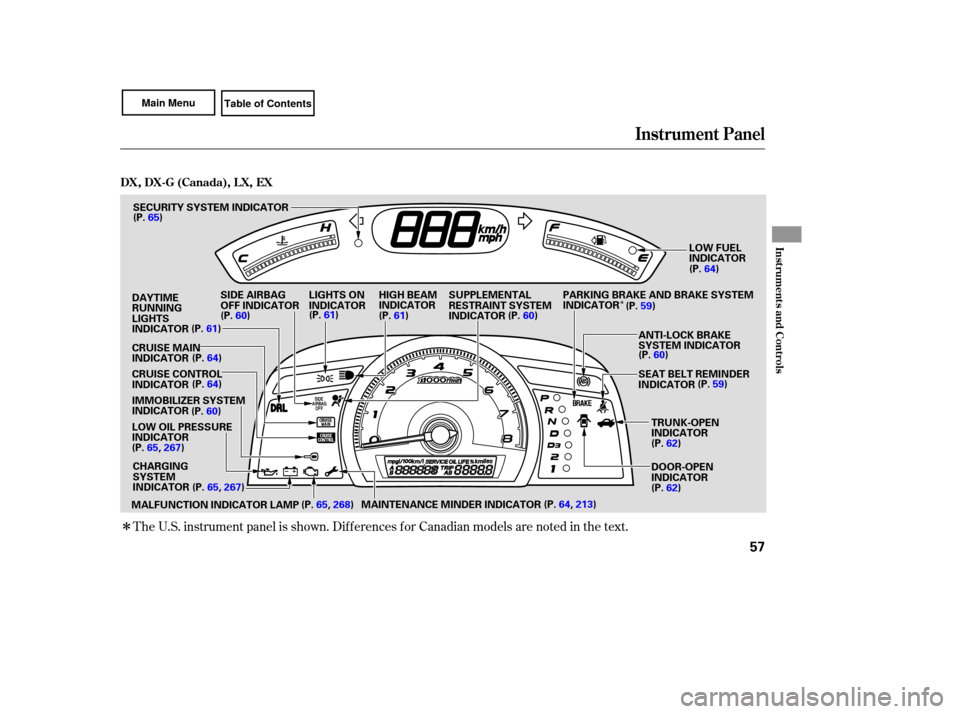
The U.S. instrument panel is shown. Differences for Canadian models are noted in the text.
Instrument Panel
Instrument sand Cont ro ls
DX, DX-G (Canada), LX,EX
57
IMMOBILIZER SYSTEM
INDICATOR
LOW OIL PRESSURE
INDICATOR SEAT
BELT REMINDER
INDICATOR
MAINTENANCE MINDER INDICATOR
SUPPLEMENTAL
RESTRAINT
SYSTEM
INDICATOR
LIGHTS
ON
INDICATOR
CRUISE CONTROL
INDICATOR CRUISE MAIN
INDICATOR SECURITY
SYSTEM INDICATOR
LOW FUEL
INDICATOR
SIDE AIRBAG
OFF INDICATOR
DOOR-OPEN
INDICATOR TRUNK-OPEN
INDICATOR
ANTI-LOCK
BRAKE
SYSTEM INDICATOR
HIGH
BEAM
INDICATOR
(P. 62)
(P. 62)
DAYTIME
RUNNING
LIGHTS
INDICATOR
(P.
65)
(P. 60) (P.
61)
(P. 61) (P. 60) (P.
64)
(P. 60)
(P. 59)
(P.
61)
(P. 64)
(P. 64)
(P. 60)
(P. 65, 267)
(P. 65, 267)
(P. 64, 213)
CHARGING
SYSTEM
INDICATOR
MALFUNCTION INDICATOR LAMP (P.
65, 268) PARKING
BRAKE AND BRAKE SYSTEM
INDICATOR (P. 59)
Page 61 of 311
�Î
�Î�Î
The
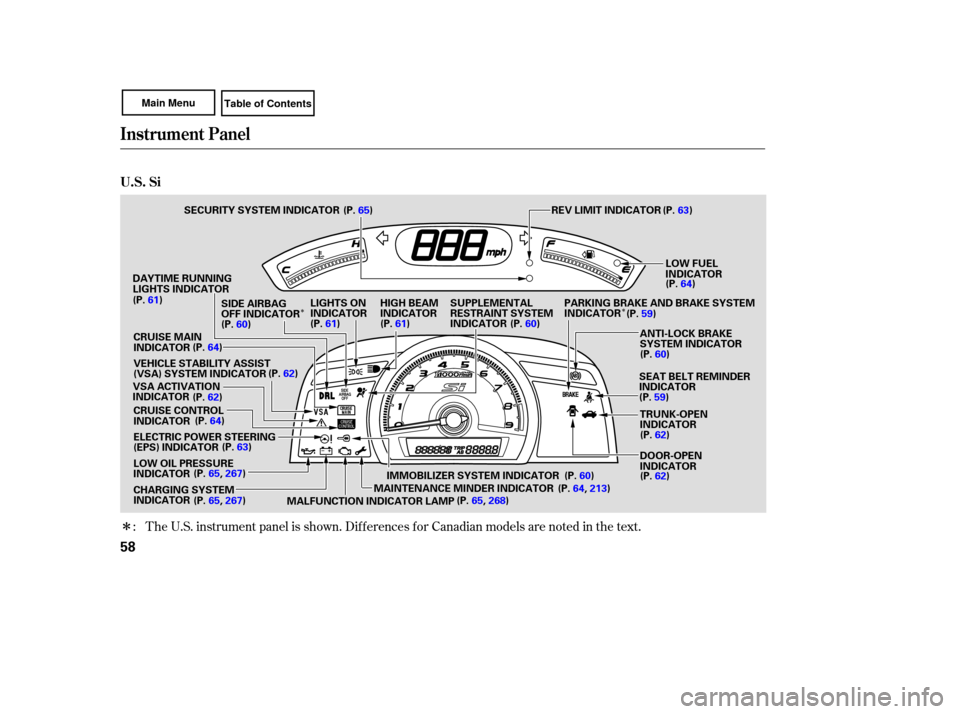
U.S. instrument panel is shown. Differences for Canadian models are noted in the text.
:
Instrument Panel
U.S. Si
58
LOW OIL PRESSURE
INDICATOR SECURITY
SYSTEM INDICATOR
LOW FUEL
INDICATOR
SEAT BELT REMINDER
INDICATOR
IMMOBILIZER SYSTEM INDICATOR
LIGHTS
ON
INDICATOR SUPPLEMENTAL
RESTRAINT
SYSTEM
INDICATOR
SIDE
AIRBAG
OFF INDICATOR
CRUISE CONTROL
INDICATOR
ELECTRIC POWER STEERING
(EPS) INDICATOR
CRUISE
MAIN
INDICATOR HIGH
BEAM
INDICATOR
CHARGING SYSTEM
INDICATOR ANTI-LOCK
BRAKE
SYSTEM INDICATOR
DOOR-OPEN
INDICATOR TRUNK-OPEN
INDICATOR
REV
LIMIT INDICATOR
(P. 61)
(P. 61) PARKING
BRAKE AND BRAKE SYSTEM
INDICATOR
MAINTENANCE MINDER INDICATOR
DAYTIME
RUNNING
LIGHTS INDICATOR
VSA ACTIVATION
INDICATOR VEHICLE
STABILITY ASSIST
(VSA) SYSTEM INDICATOR (P.
65)
(P. 60) (P.
61) (P. 60) (P.
59)
(P. 60)(P.
64)
(P.
63)
(P. 62)
(P. 62)
(P. 64)
(P. 63)
(P. 65, 267)
(P. 65, 267) (P.
60)
(P. 64, 213) (P.
62)
(P.
62)
(P.
59)
(P.
64)
MALFUNCTION INDICATOR LAMP (P.
65, 268)
Page 64 of 311
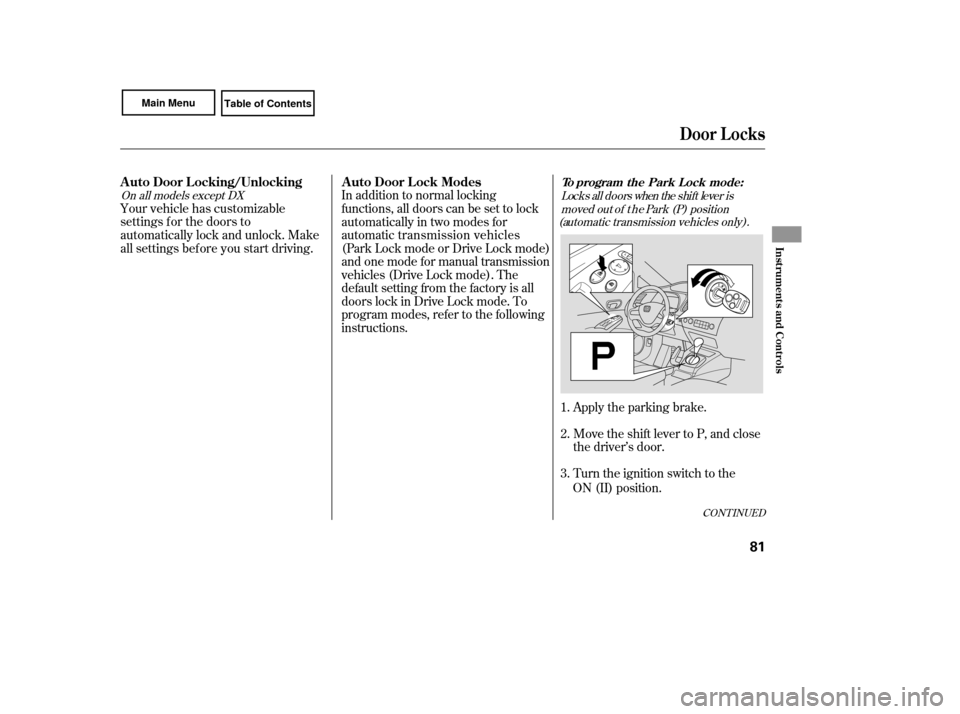
This indicator reminds you that the
exterior lights are on. It comes on
when the light switch is in either the
or position. If you turn the
ignition switch to the ACCESSORY
(I) or LOCK (0) position without
turning off the light switch, this
indicator will stay on. A reminder
chime will also sound when you open
the driver’s door.
When you press the hazard warning
button, both turn signal indicato rs
and all turn signals on the outside of
the vehicle flash. If
this indicator comes on when the
ignition switch is turned to the ON
(II) position and the parking brake is
rele ased, it means there is a problem
in a circuit. Have your vehicle
checked by your dealer.
This indicator comes on with the
high beam headlights. For more
info rmation, see page .
This indicator also comes on with
reduced brightness when the
daytime running lights (DRL) are on
(see page ).
The
left or right turn signal indicator
blinks when you signal a lane change
or turn. If an indicator does not blink
or blinks rapidly, it usually means
one of the turn signal bulbs is
burned out (see page ). Replace
the bulb as soon as possible, since
other drivers cannot see that you are
signaling. 238
72
73
Turn Signal and
Hazard Warning
Indicators
Lights On Indicator
‘‘Daytime Running
Lights’’ Indicator
High Beam Indicator
Instrument Panel Indicators
Inst rument s and Cont rols
61
Page 76 of 311
�´�µ
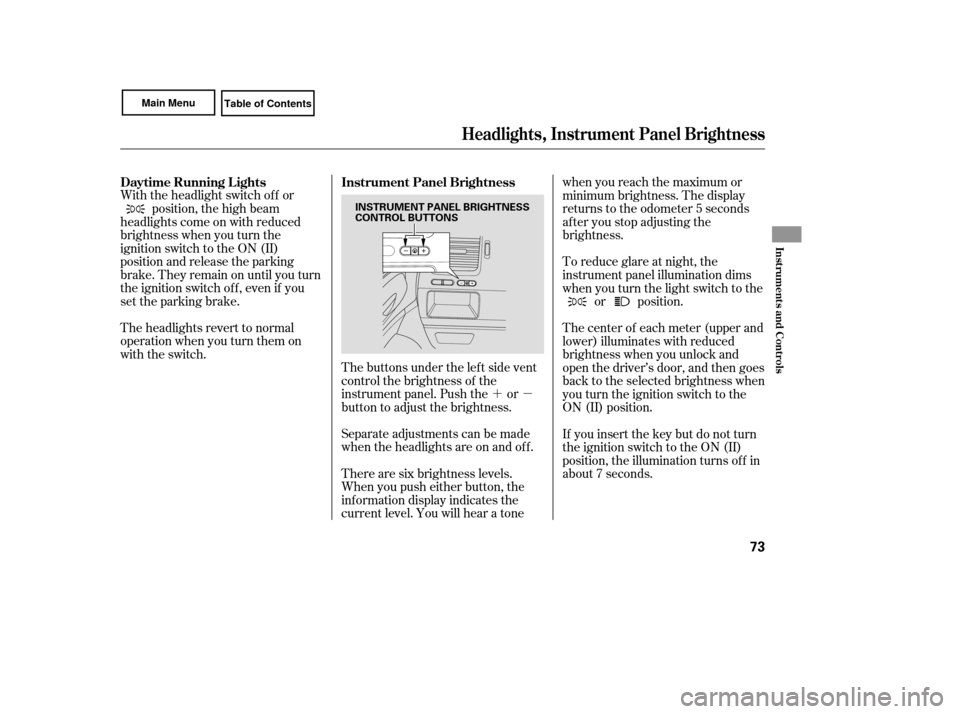
The buttons under the lef t side vent
control the brightness of the
instrument panel. Push the or
button to adjust the brightness.
Separate adjustments can be made
when the headlights are on and of f .
With the headlight switch of f or
position, the high beam
headlights come on with reduced
brightness when you turn the
ignition switch to the ON (II)
position and release the parking
brake. They remain on until you turn
the ignition switch of f , even if you
set the parking brake.
The headlights revert to normal
operation when you turn them on
with the switch.
There are six brightness levels.
When you push either button, the
inf ormation display indicates the
current level. You will hear a tonewhen you reach the maximum or
minimum brightness. The display
returns to the odometer 5 seconds
af ter you stop adjusting the
brightness.
To reduce glare at night, the
instrument panel illumination dims
when you turn the light switch to the
or position.
The center of each meter (upper and
lower) illuminates with reduced
brightness when you unlock and
open the driver’s door, and then goes
back to the selected brightness when
you turn the ignition switch to the
ON (II) position.
If you insert the key but do not turn
the ignition switch to the ON (II)
position, the illumination turns of f in
about 7 seconds.
Daytime Running L ights Instrument Panel Brightness
Headlights, Instrument Panel Brightness
Inst rument s and Cont rols
73
INSTRUMENT PANEL BRIGHTNESS
CONTROL BUTTONS
Page 79 of 311
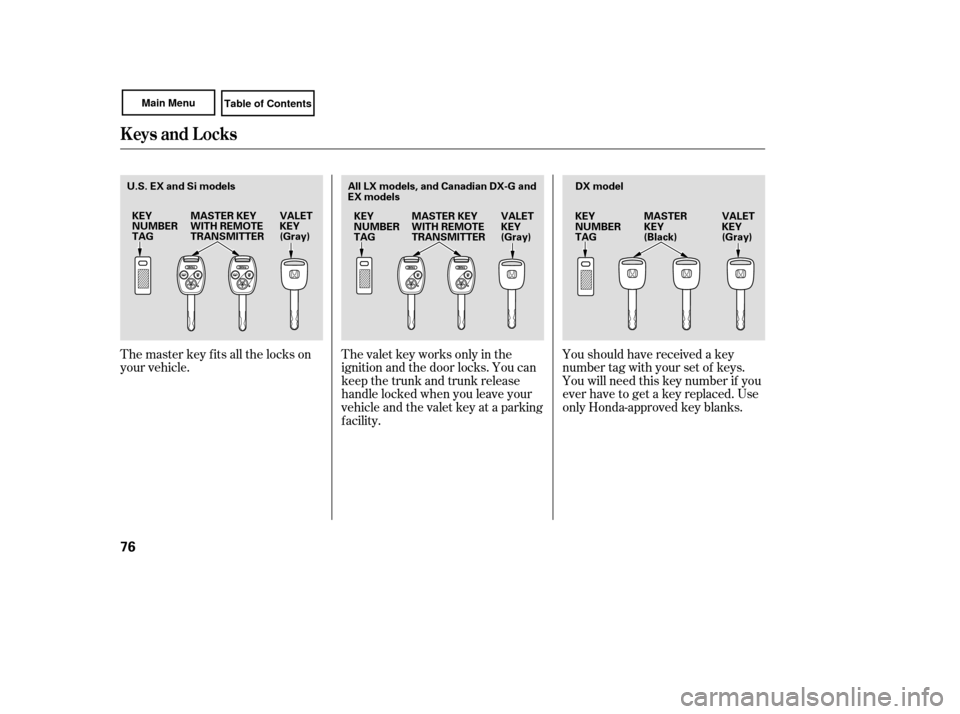
Youshouldhavereceivedakey
number tag with your set of keys.
You will need this key number if you
ever have to get a key replaced. Use
only Honda-approved key blanks.
The valet key works only in the
ignition and the door locks. You can
keep the trunk and trunk release
handle locked when you leave your
vehicle and the valet key at a parking
f acility.
The master key fits all the locks on
your vehicle.
Keys and Locks
76
KEY
NUMBER
TAG
MASTER KEY
WITH REMOTE
TRANSMITTER VALET
KEY
(Gray)KEY
NUMBER
TAGDX model
VALET
KEY
(Gray)
MASTER
KEY
(Black)
All LX models, and Canadian DX-G and
EX models
U.S. EX and Si models
KEY
NUMBER
TAG MASTER KEY
WITH REMOTE
TRANSMITTER VALET
KEY
(Gray)
Page 82 of 311
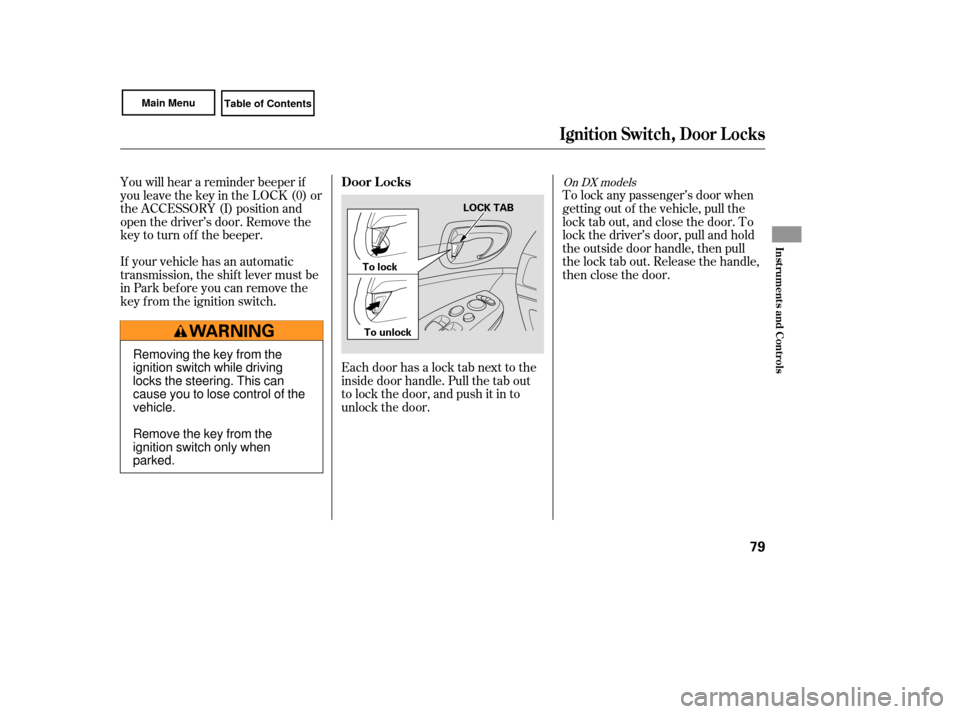
Each door has a lock tab next to the
inside door handle. Pull the tab out
to lock the door, and push it in to
unlock the door.To lock any passenger’s door when
getting out of the vehicle, pull the
lock tab out, and close the door. To
lock the driver’s door, pull and hold
the outside door handle, then pull
the lock tab out. Release the handle,
then close the door.
You will hear a reminder beeper if
you leave the key in the LOCK (0) or
the ACCESSORY (I) position and
open the driver’s door. Remove the
key to turn of f the beeper.
If your vehicle has an automatic
transmission, the shif t lever must be
in Park bef ore you can remove the
key f rom the ignition switch.
On DX models
Ignit ion Swit ch, Door L ocks
Door L ocks
Inst rument s and Cont rols
79
LOCK TAB
To lock
To unlock
Removing the key from the
ignition switch while driving
locks the steering. This can
cause you to lose control of the
vehicle.
Remove the key from the
ignition switch only when
parked.
Page 83 of 311
To lock the passenger’s door when
getting out of the vehicle, pull out
the lock tab and close the door. To
lock the driver’s door, remove the
key f rom the ignition switch and pull
out the lock tab or push the top of
the master switch, then close the
door. The lock tab on the passenger’s door
locks and unlocks only that door.
Pushing in the driver’s door lock tab
only unlocks the driver’s door.
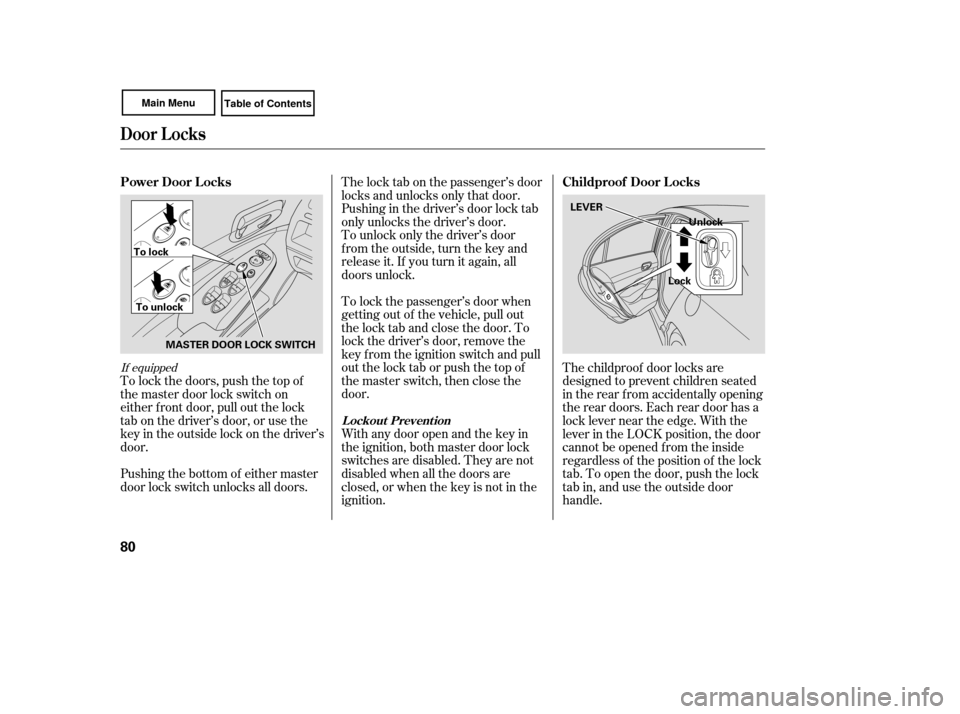
To lock the doors, push the top of
the master door lock switch on
either f ront door, pull out the lock
tabonthedriver’sdoor,orusethe
keyintheoutsidelockonthedriver’s
door. To unlock only the driver’s door
f rom the outside, turn the key and
release it. If you turn it again, all
doors unlock.
With any door open and the key in
the ignition, both master door lock
switches are disabled. They are not
disabled when all the doors are
closed, or when the key is not in the
ignition.
Pushing the bottom of either master
door lock switch unlocks all doors. The childproof door locks are
designed to prevent children seated
in the rear f rom accidentally opening
the rear doors. Each rear door has a
lock lever near the edge. With the
lever in the LOCK position, the door
cannot be opened f rom the inside
regardless of the position of the lock
tab. To open the door, push the lock
tab in, and use the outside door
handle.
If equipped
Door L ocks
L ockout Prevent ion
Power Door L ocks
Childproof Door L ocks
80
MASTER DOOR LOCK SWITCH
To lock
To unlock LEVER
LockUnlock
Page 84 of 311
CONT INUED
On all mo
dels except DX
Your ve h
icle has customizable
settings f or the doors to
automatically lock and unlock. Make
all settings bef ore you start driving. In addition to normal locking
functions, all doors can be set to lock
automatically in two modes for
automatic transmission vehicles
Door L ocks
A uto Door L ocking/Unlocking
A uto Door L ock Modes
Inst rument s and Cont rols
81
(Park Lock mode or Drive Lock mode)
and one mode for manual transmission
vehicles (Drive Lock mode). The
default setting from the factory is all
doors lock in Drive Lock mode. To
program modes, refer to the following
instructions.
Apply the parking brake.
Move the shift lever to P, and close
the driver’s door.
Turn the ignition switch to the
ON (II) position.
1.
2.
3.
(automatic transmission vehicles only).
To program the Park Lock mode:
Locks all doors when the shift lever is moved out of t he Park (P) position